How to fill out a service work order (Service WO)
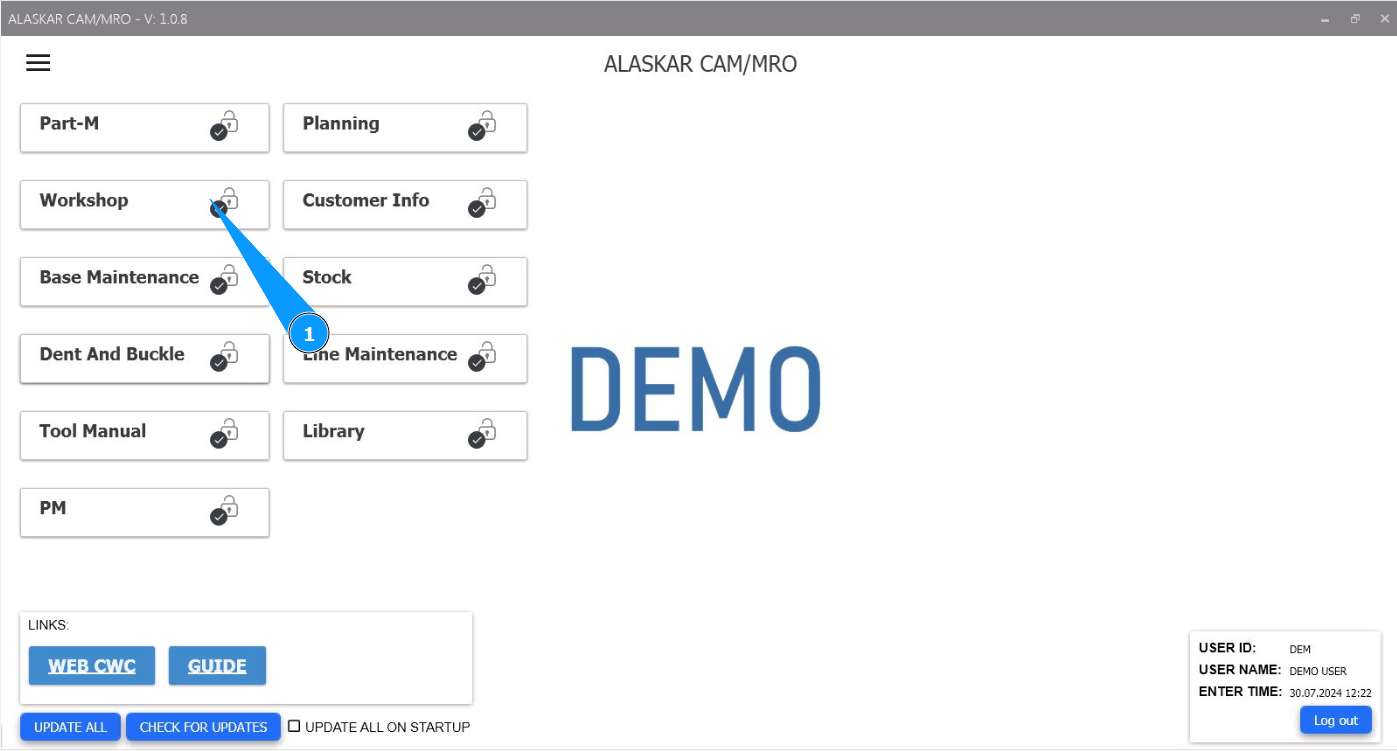
1. In order to fill out the Service work order, go to the module "Workshop".
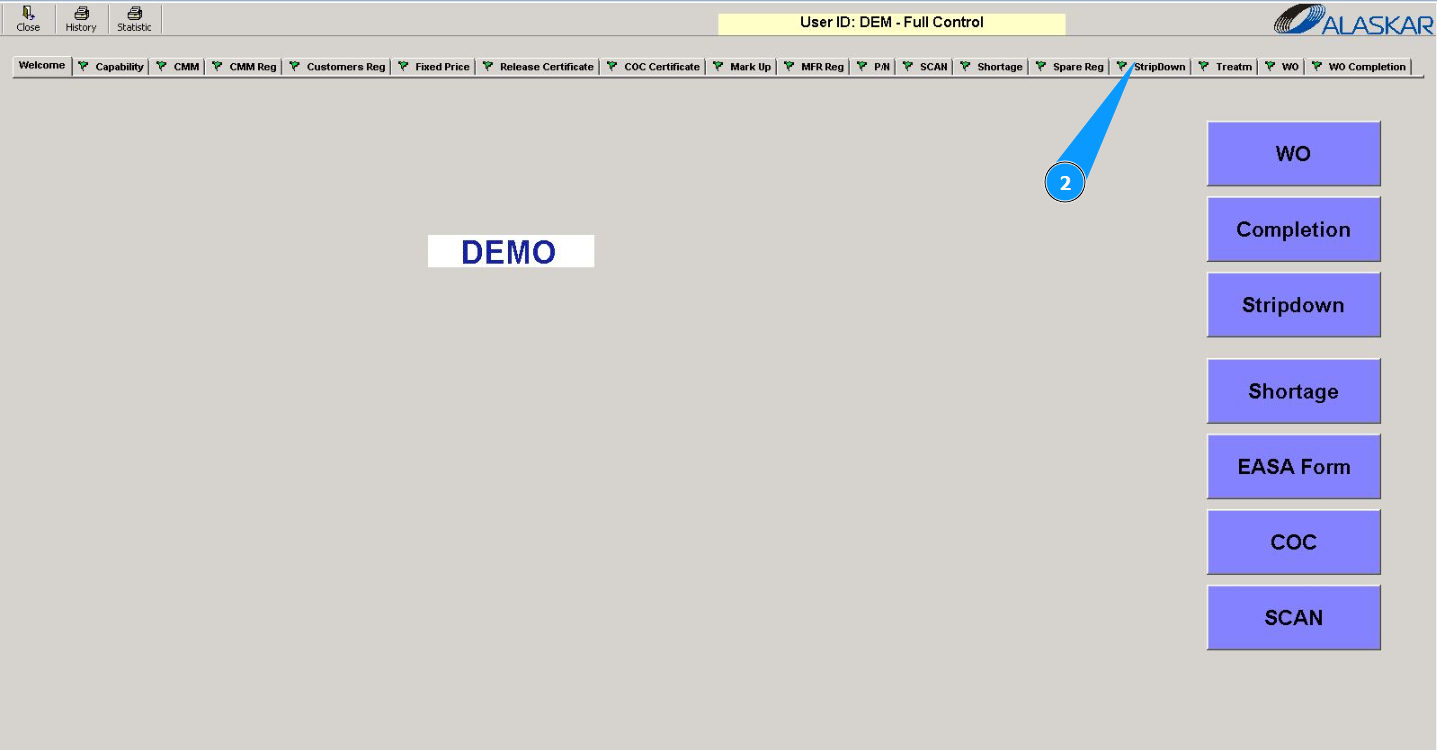
2. Then go to the tab "StripDown".
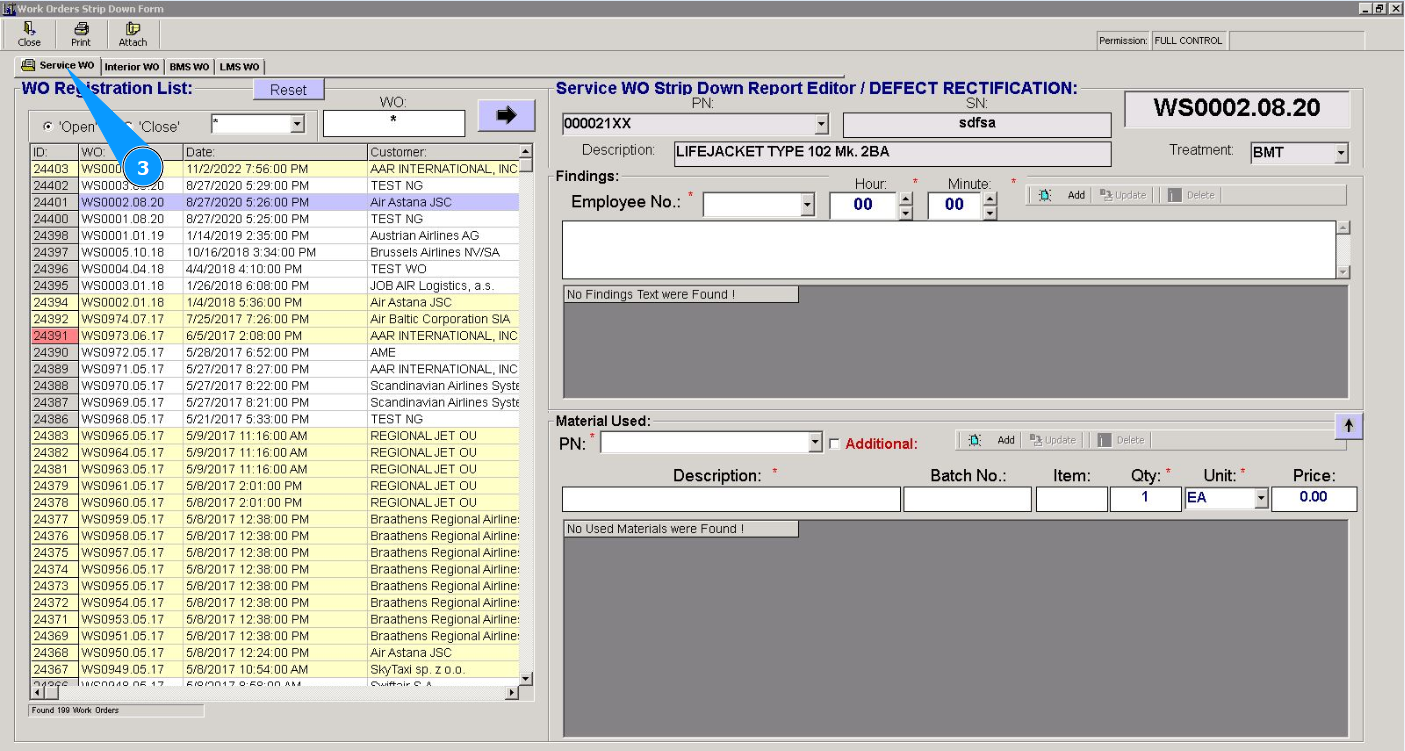
3. Then go to the tab "Service WO".
4. Select the required WO from the list and click on the corresponding line. Note: If necessary, use the search filters. Enter the WO number that needs to be filled in the field "WO". Press the "Enter" button on your keyboard.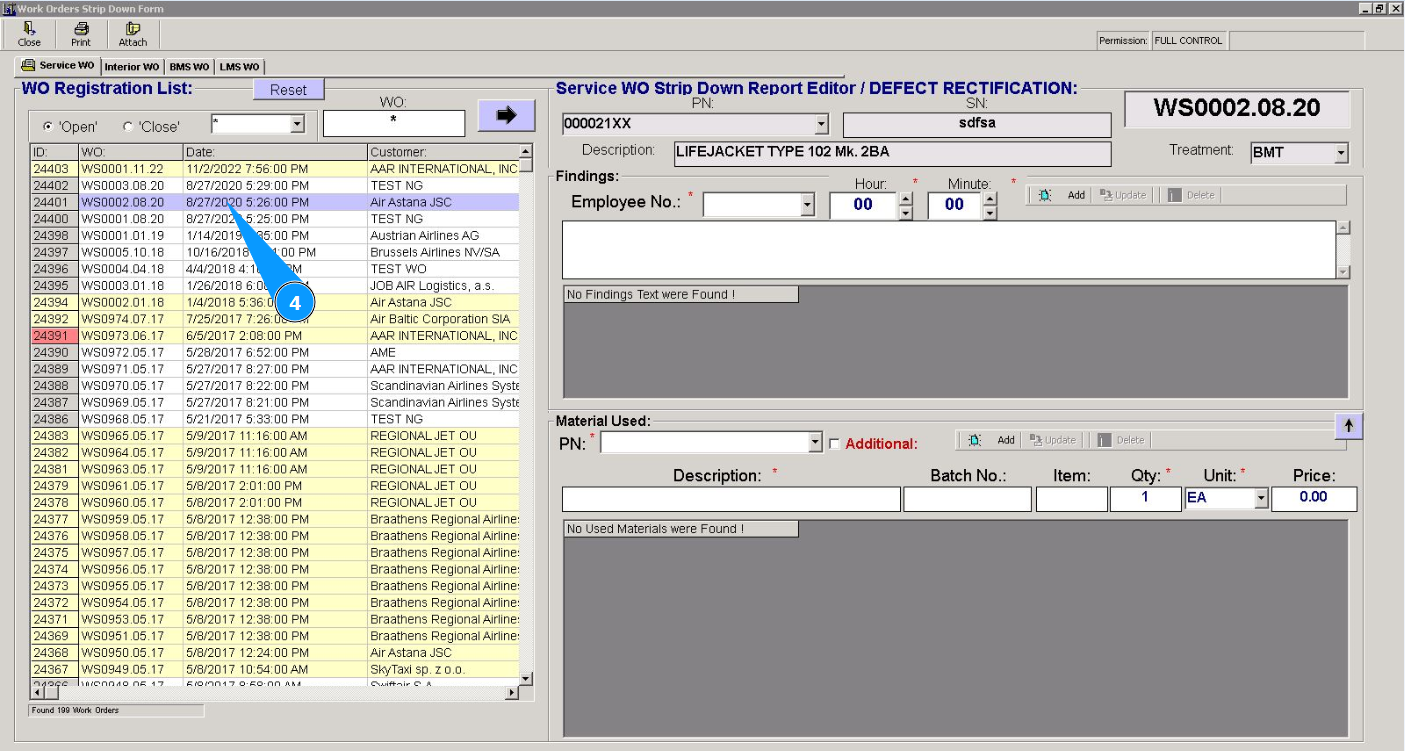
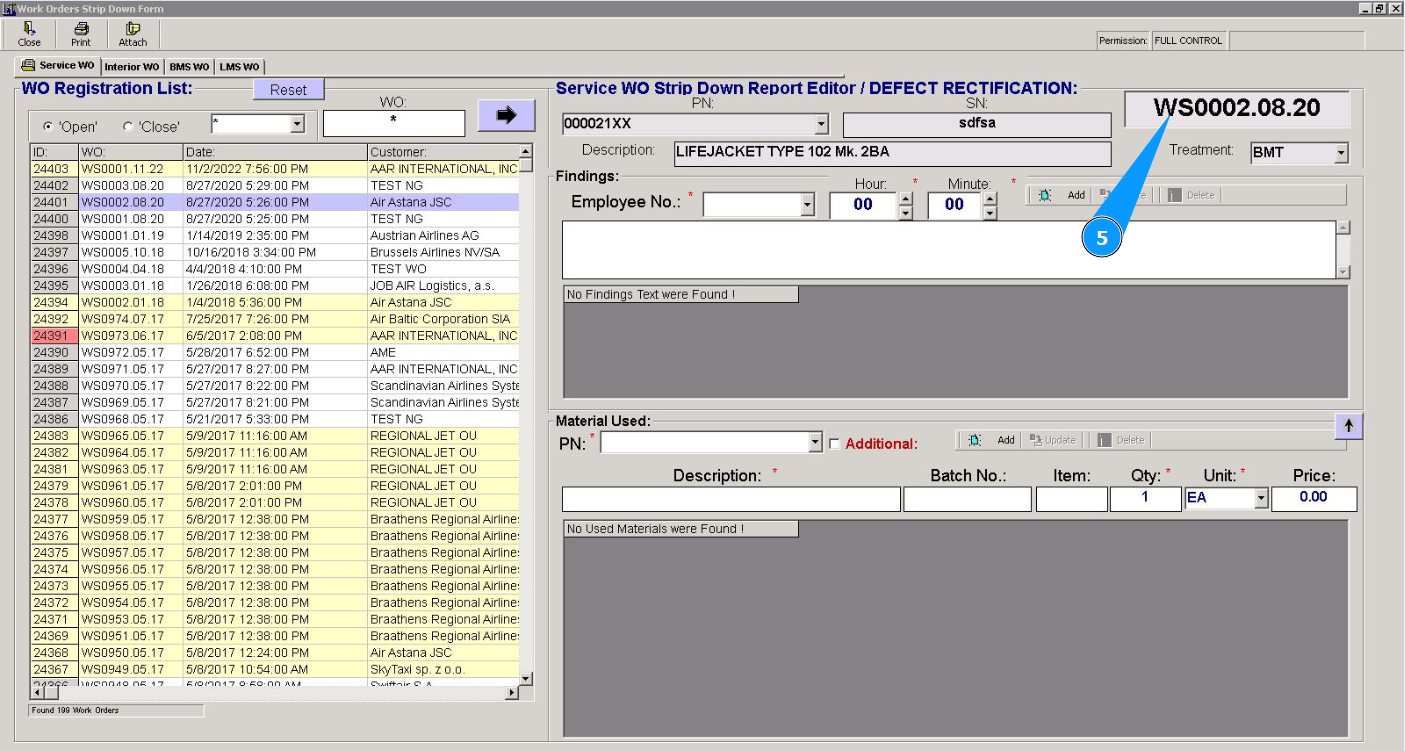
5. Check that the required service work order is displayed in the "Service WO Stripdown Report Editor/Defect Rectification".
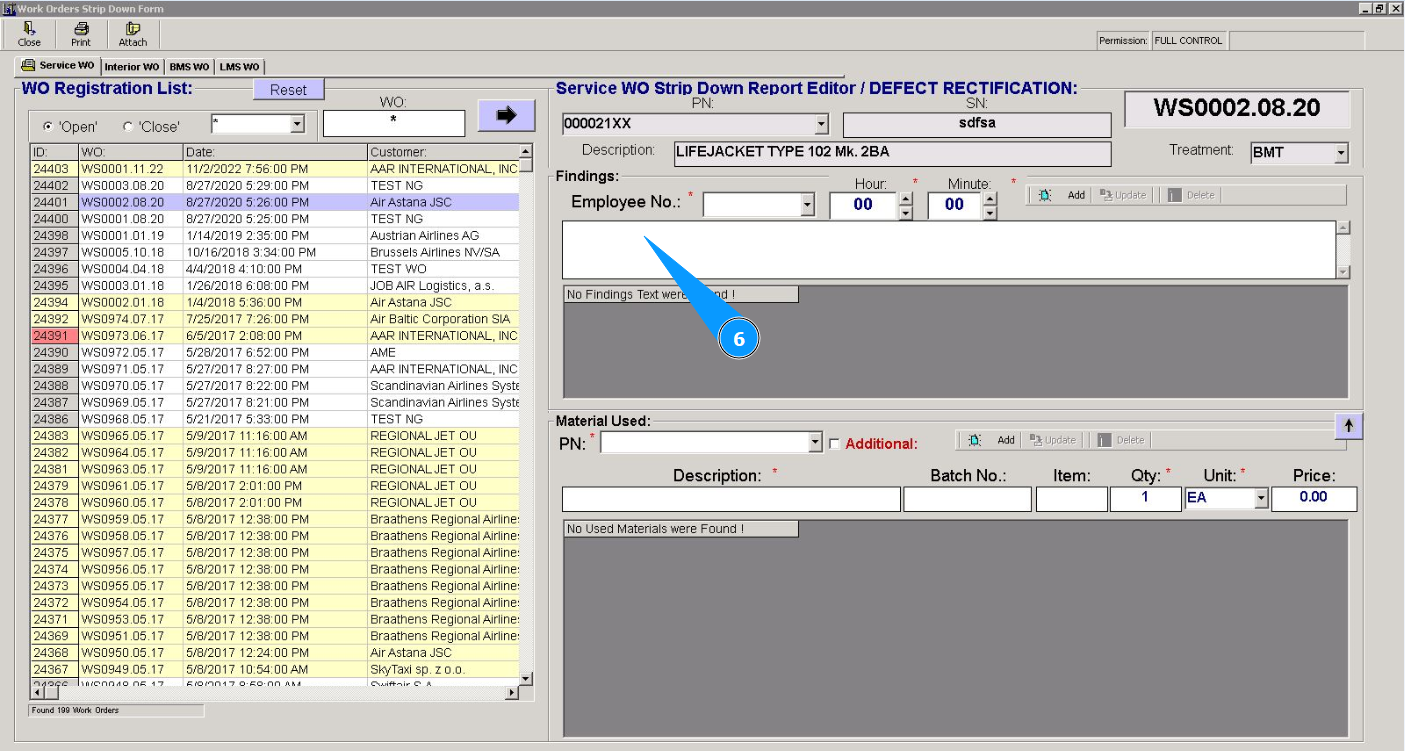
6. Enter the text of the deviation found during work in the field "Findings".
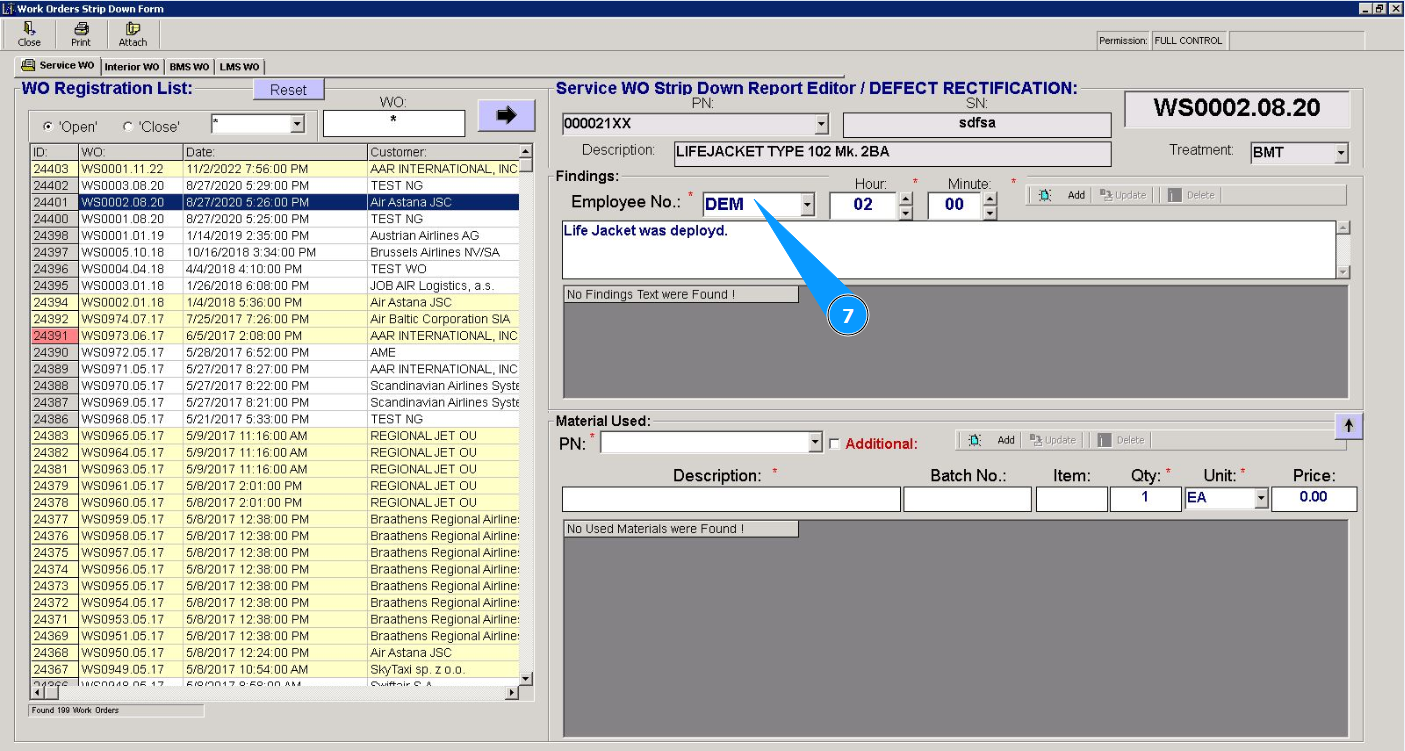
7. Select from the dropdown list the specialist who worked with the defect in the field "Employee №".
8. Enter the man-hours spent in hours in the field "Hour".

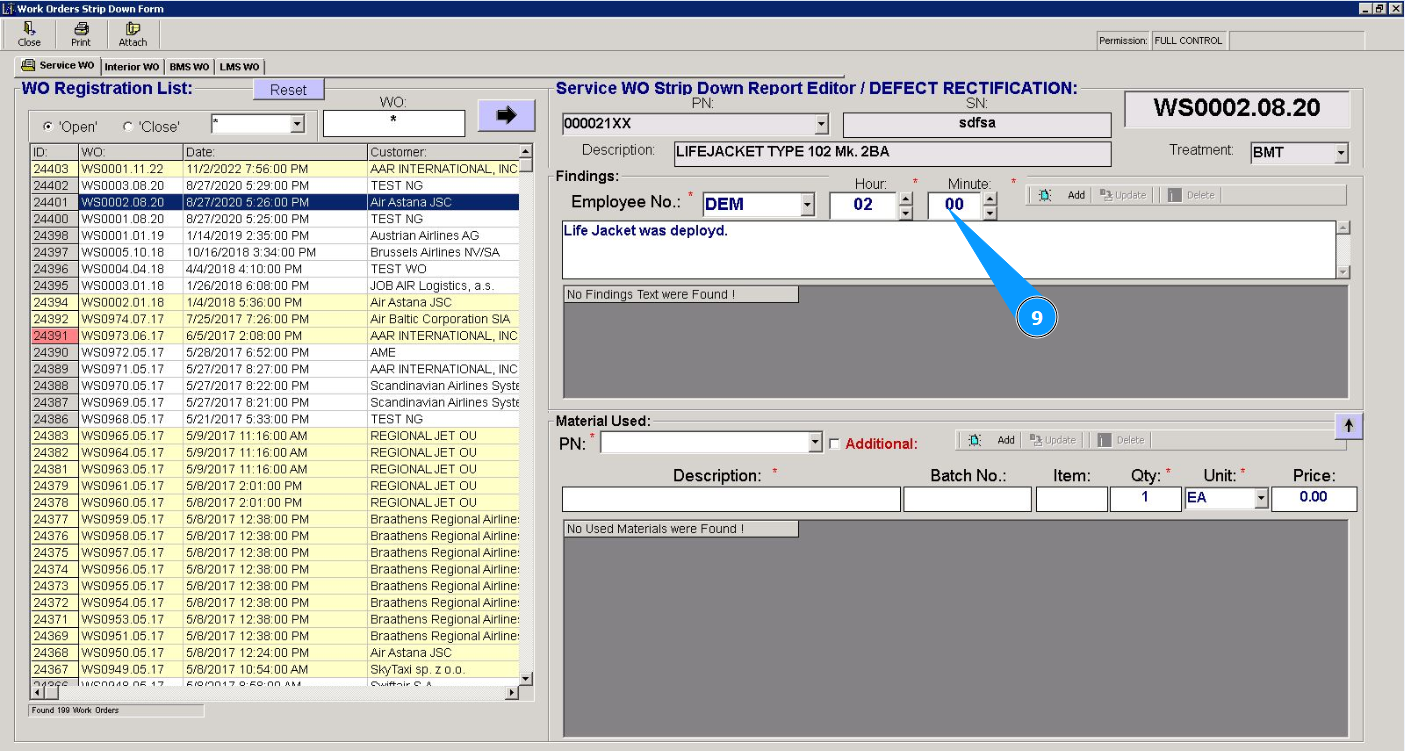
9. Enter the man-hours spent in minutes in the field "Minute".
10. Click on the button "Add" to add finding data to the program.

11. Click on the button "Yes" to confirm adding data to the program.

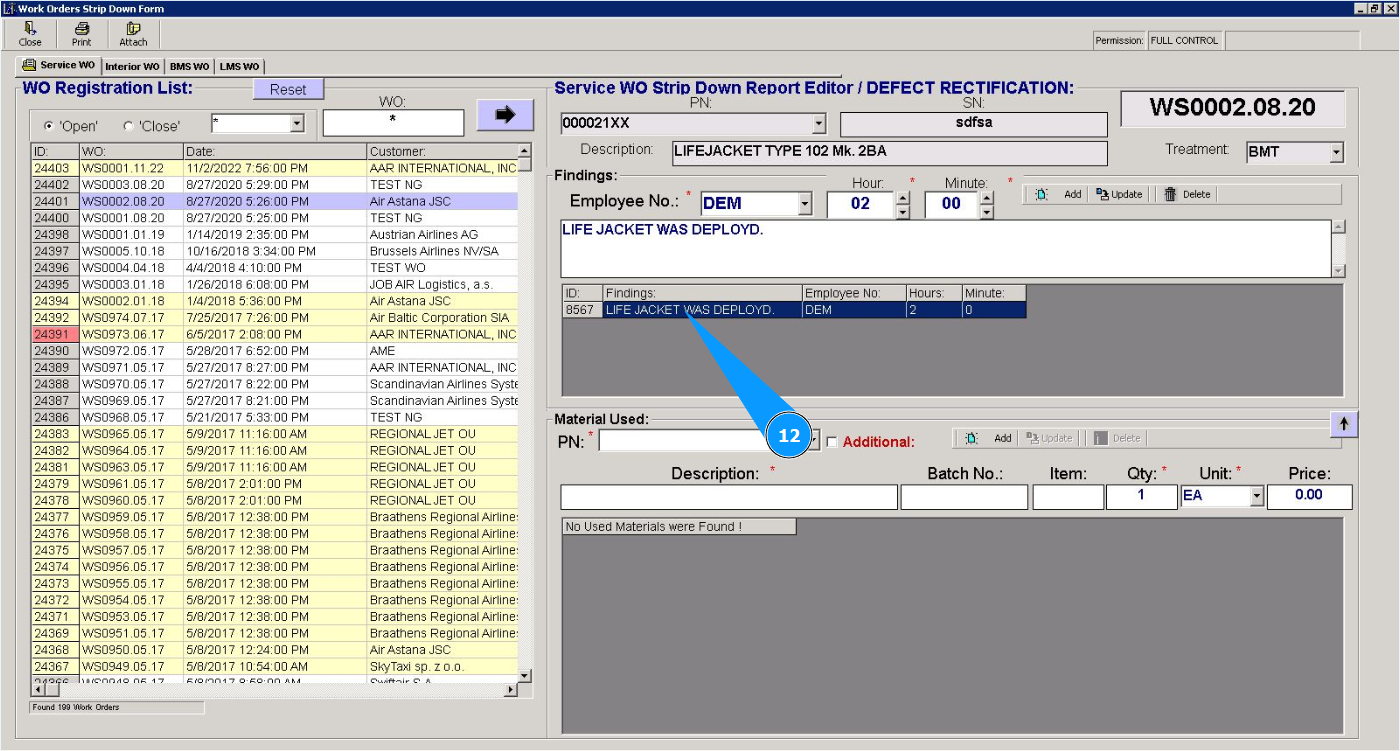
12. Make sure that the finding is displayed in the window "Findings".
Note: If you need to add the findings, repeat steps 6 to 12 of this instruction.
13. From the dropdown list, select the part number of the consumable used in the field "PN". Note: The description of the consumable used will be entered automatically in the field "Description".
14. If the applied used material is additional to this finding, tick the box "Additional".

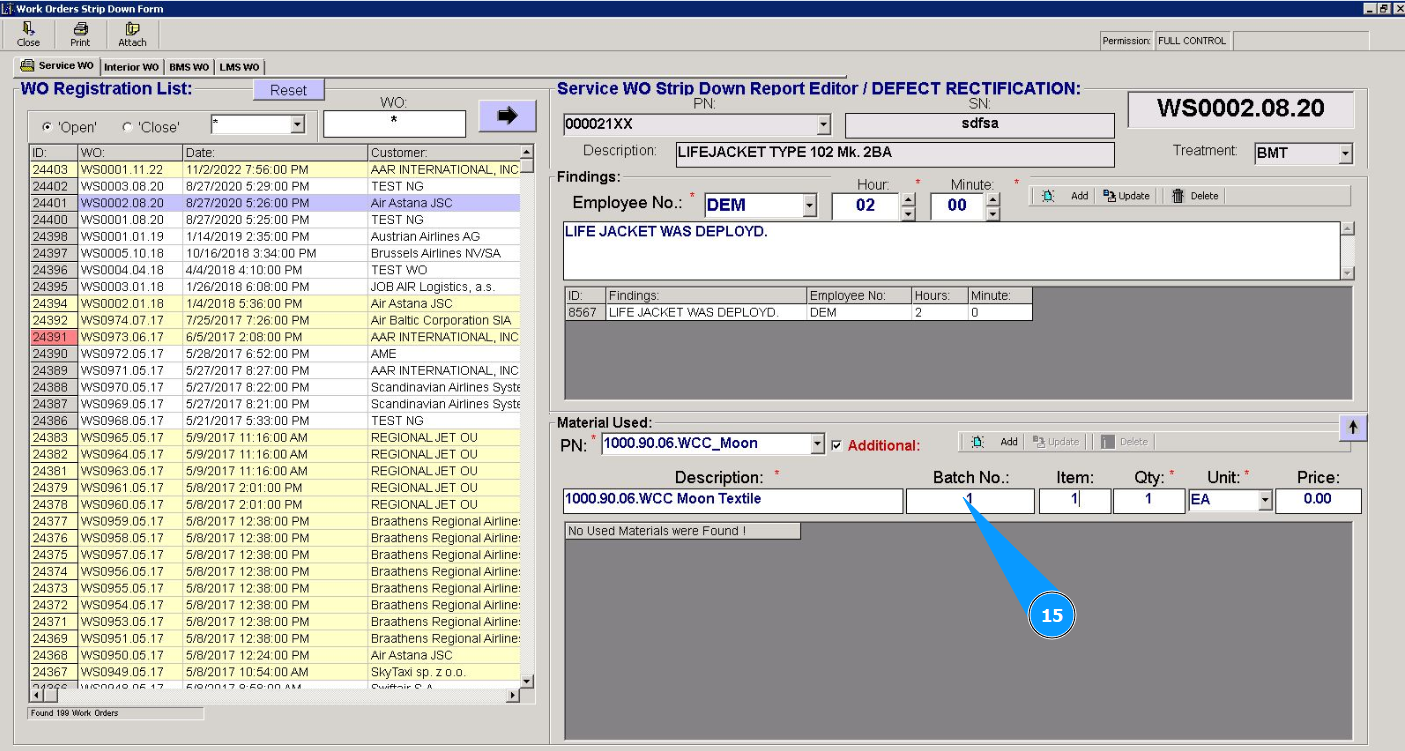
15. If necessary, enter the batch number from the certificate for consumables in the field "Batch No.".
16. If necessary, enter the number of the consumable item in the field "Item".

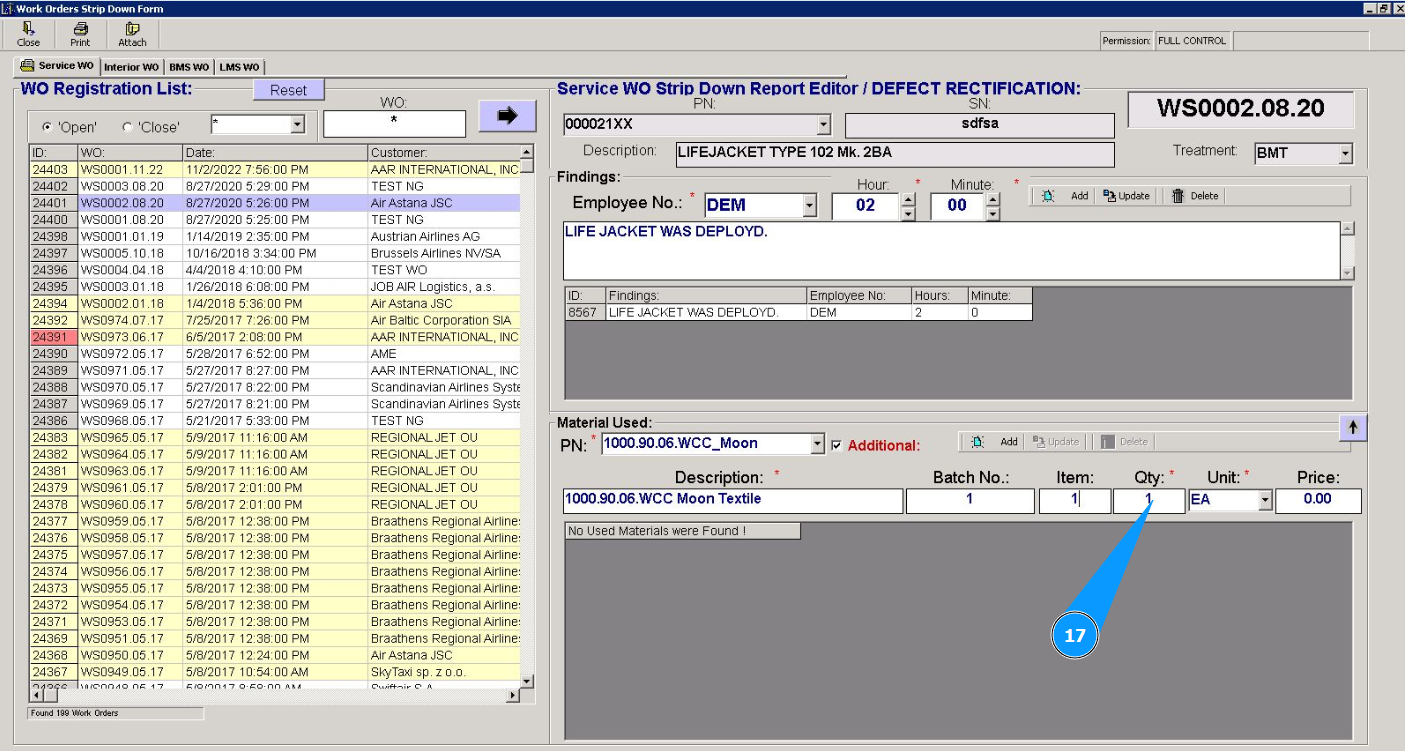
17. Enter the quantity of consumables in the "Qty".
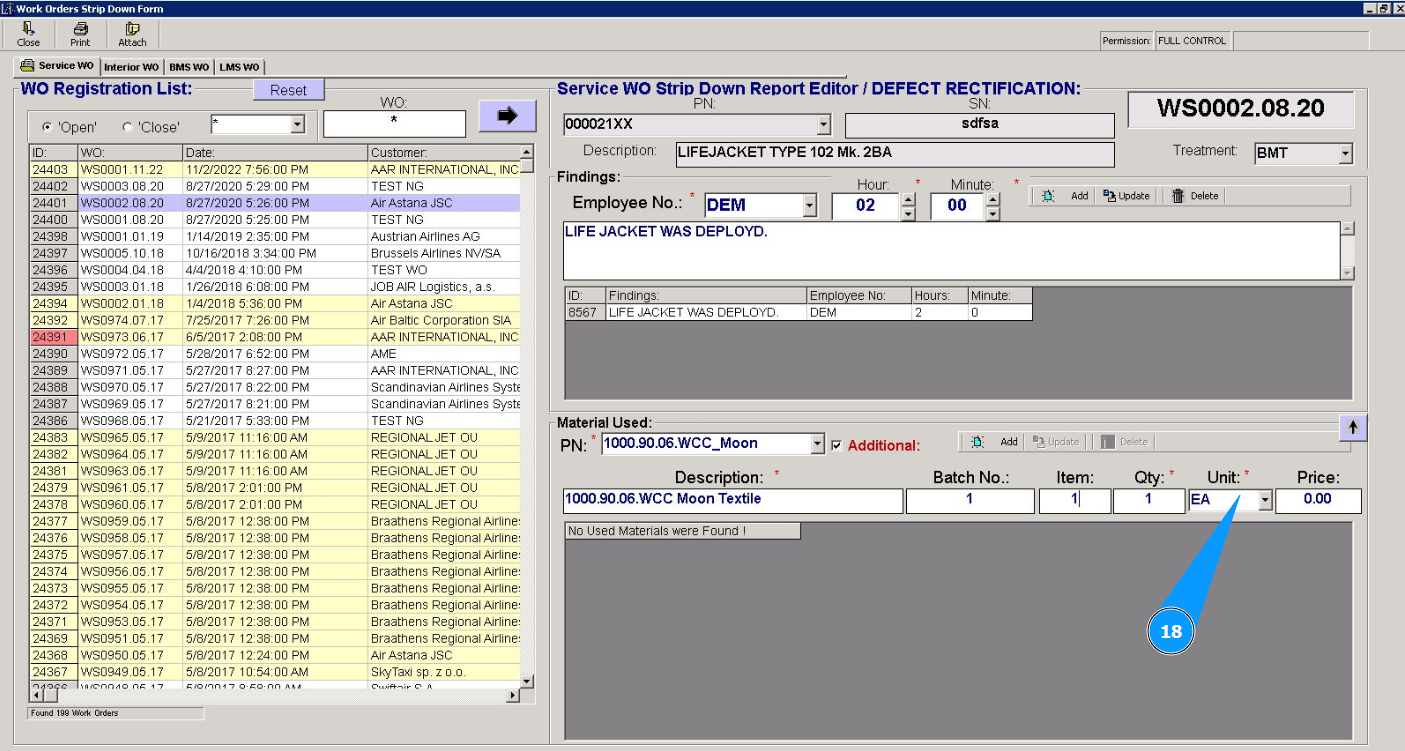
18. Select the consumable unit of measurement from the dropdown list in the field "Unit".
19. If necessary, enter the cost of the consumable in the field "Price".

20. Click on the button "Add" to add consumable data to the program.

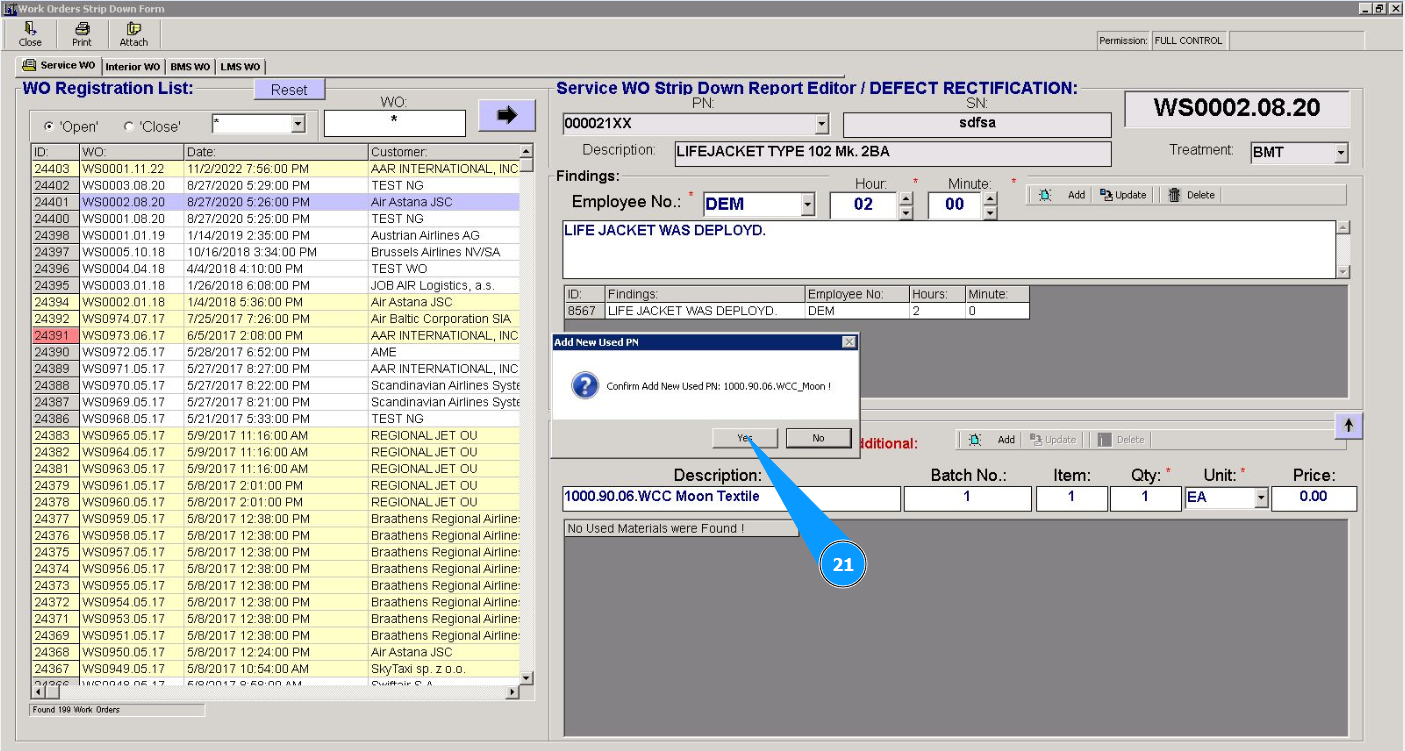
21. Click on the button "Yes" to confirm adding the consumable data to the program.
22. Check that the consumable item you entered is displayed in the window "Findings".

Note: If you need to add used materials, repeat steps 13 through 22 of this instruction.