How to register spare parts
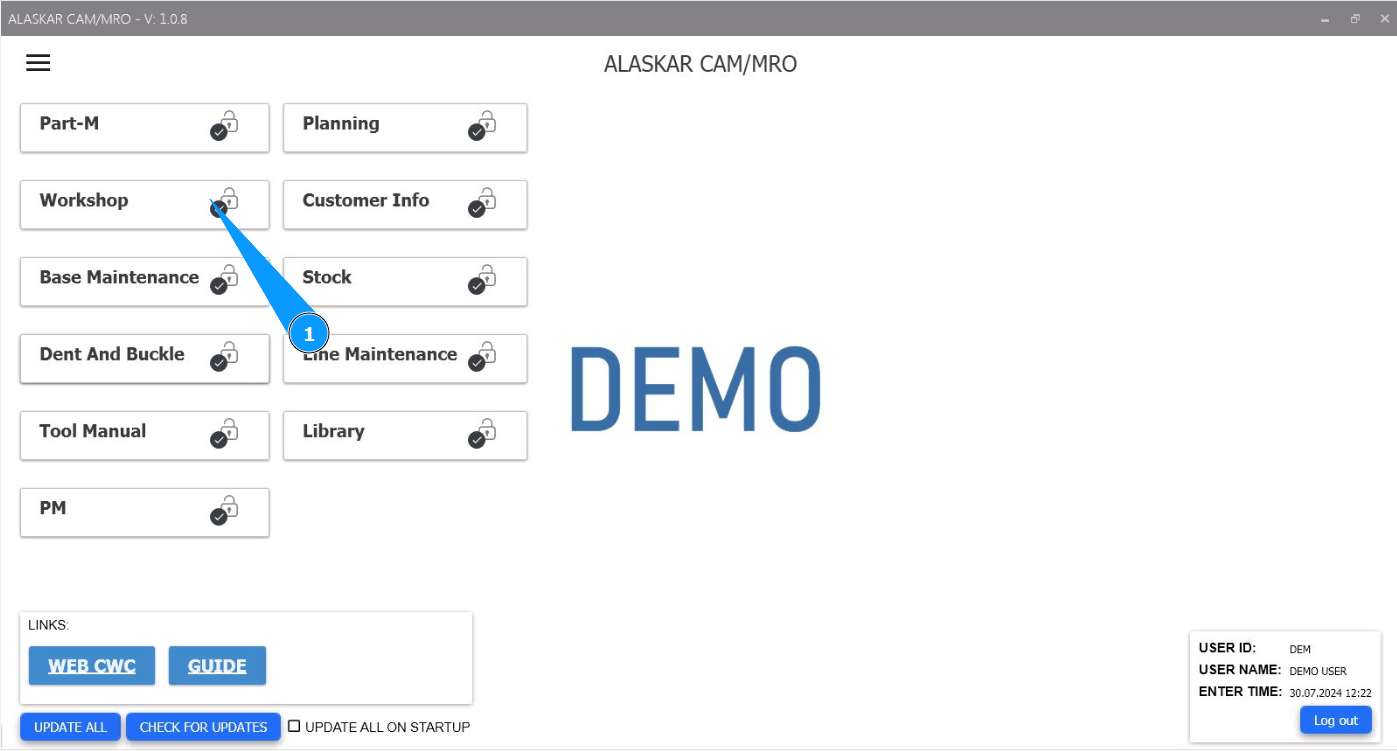
1. In order to register spare parts, go to the module "Workshop".
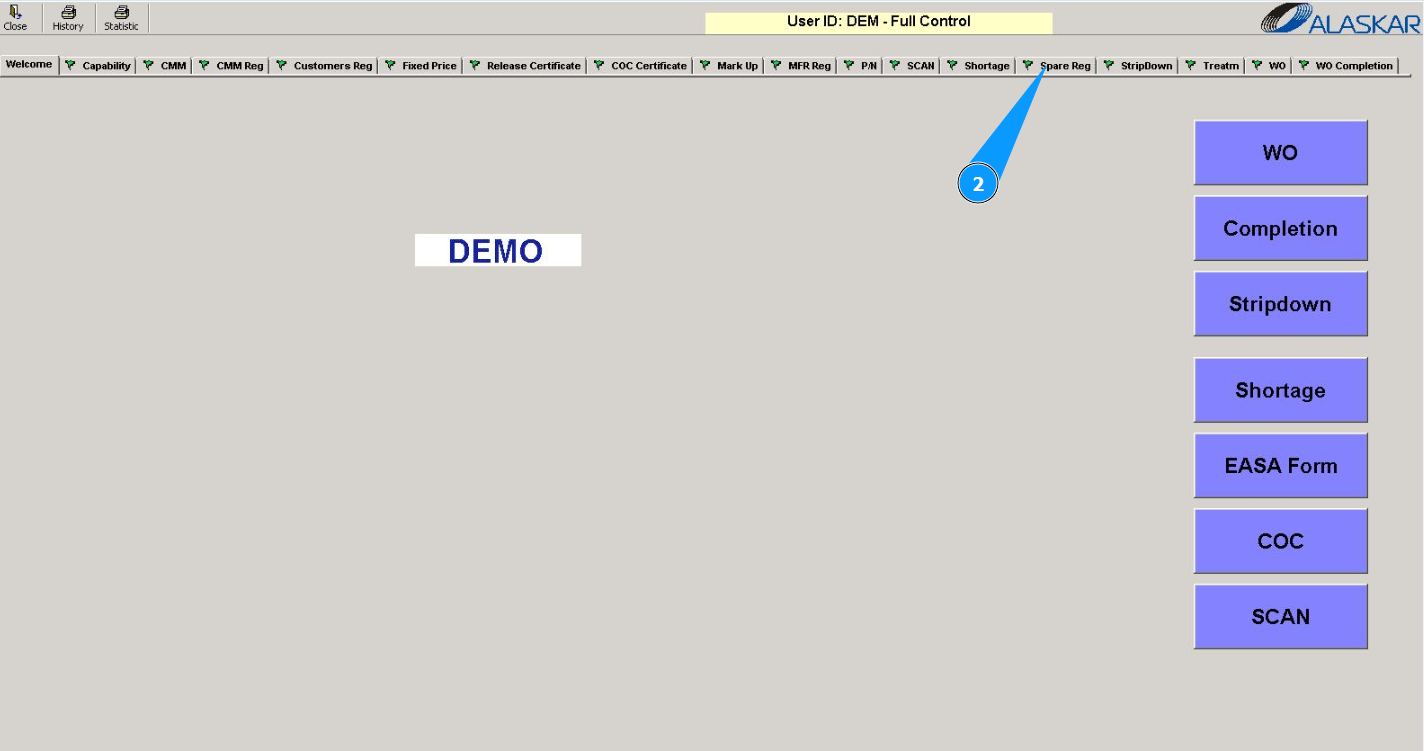
2. Then go to the tab "Spare Reg".
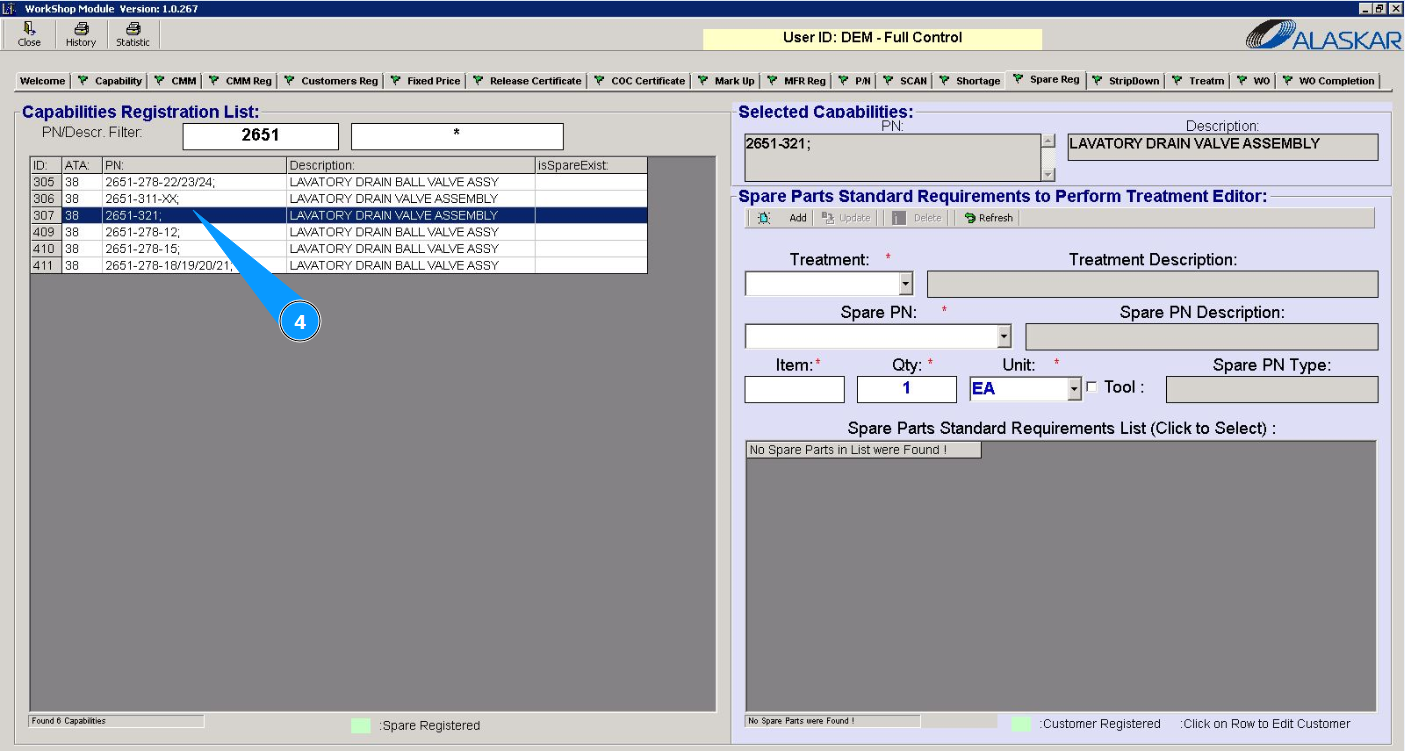
3. Enter the part number for which you want to add spare parts in the field "PN/Descr.Filter". Press the "Enter" button on your keyboard.

4. Select the required part number from the list and click on the corresponding line in the window "Capabilities Registration List".
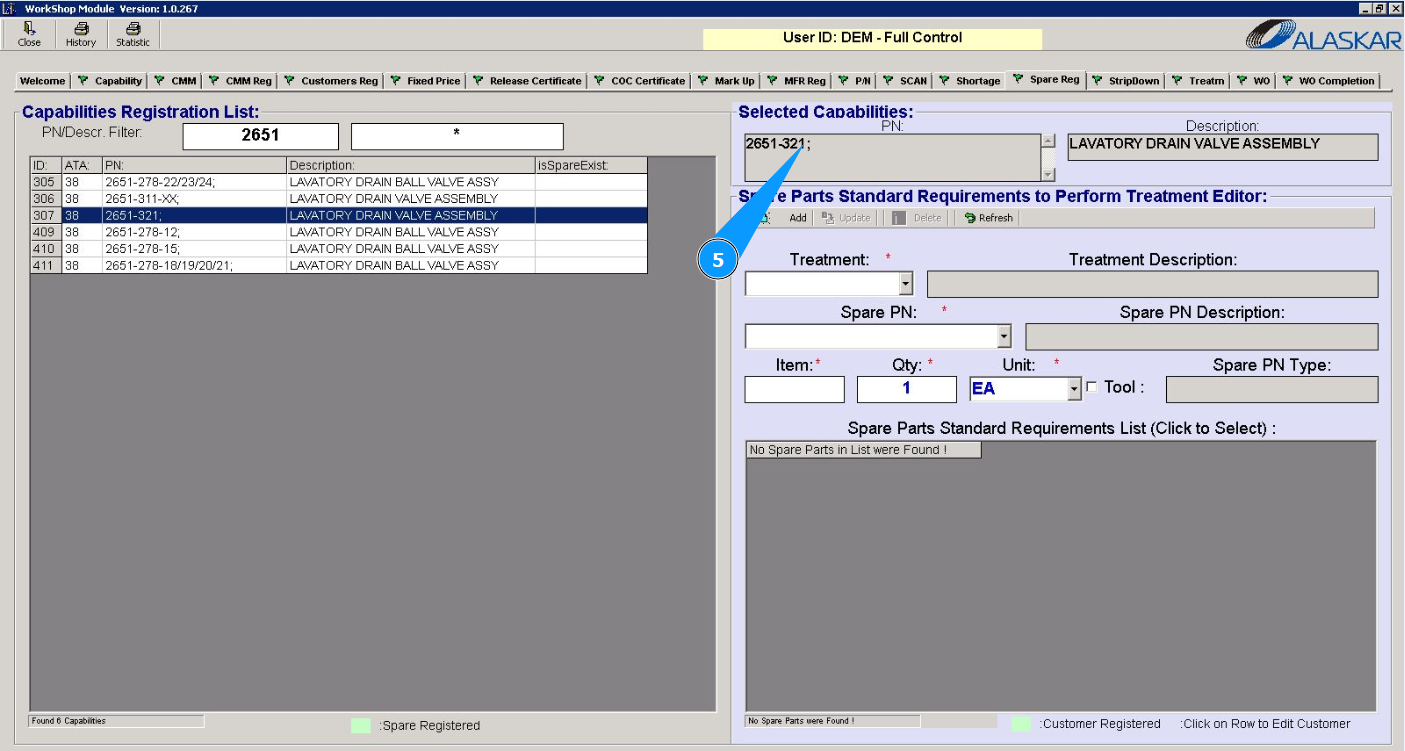
5. Check that the selected part number is displayed in the window "Selected Capabilities".
6. Select the type of work from the dropdown list in the field "Treatment". Note: The description of the type of work will be entered automatically in the field "Treatment Description".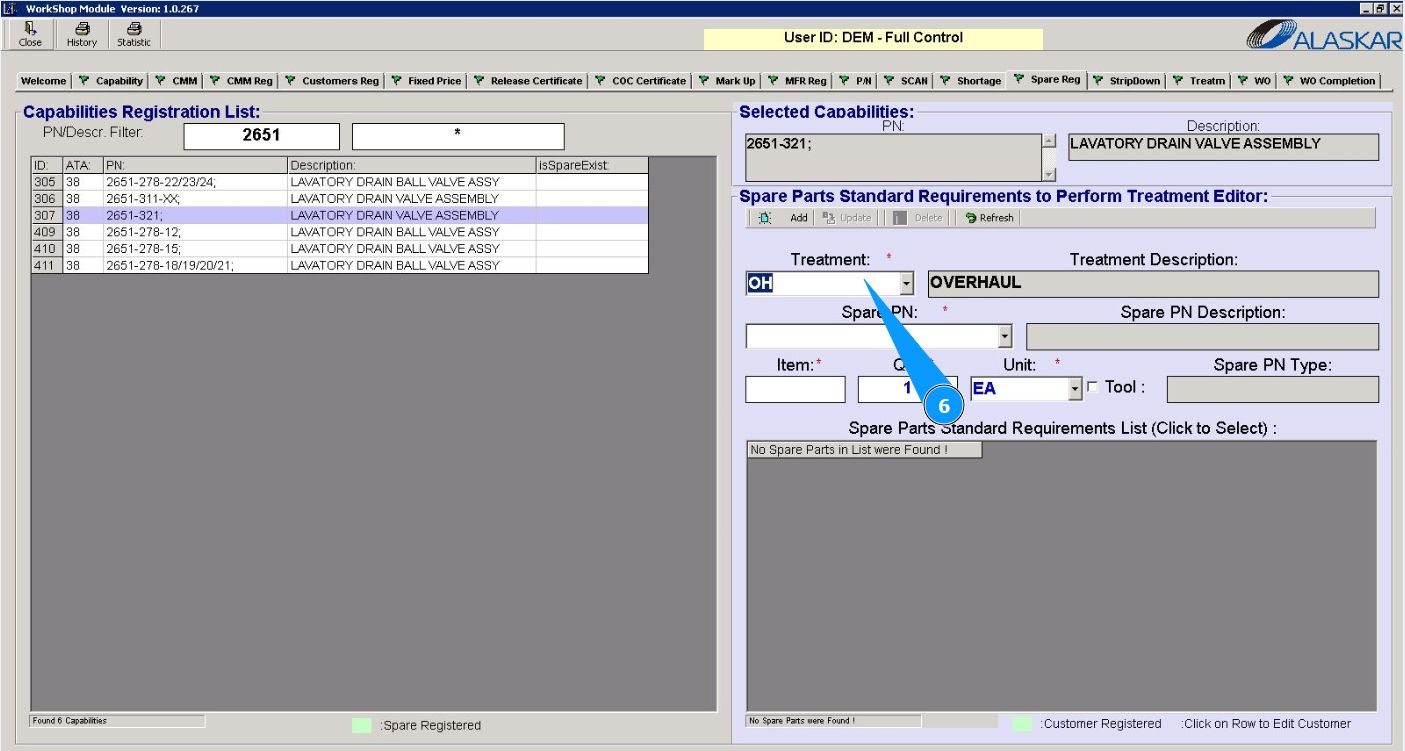
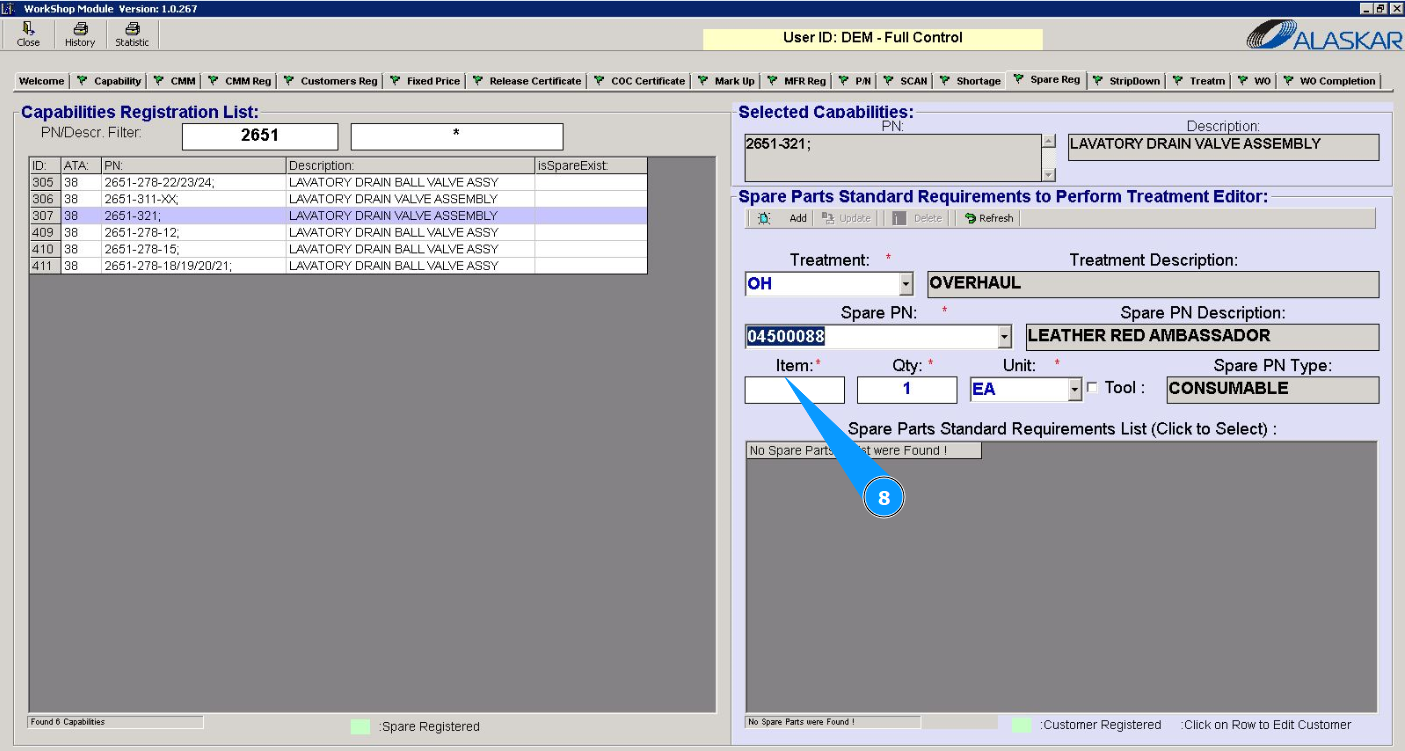
7. From the dropdown list, select the part number of the required spare part in the field "Spare PN". Note: The description of the part number will be entered automatically in the field "Spare PN Description".
8. Enter the number of items for the spare part in the field "Item".
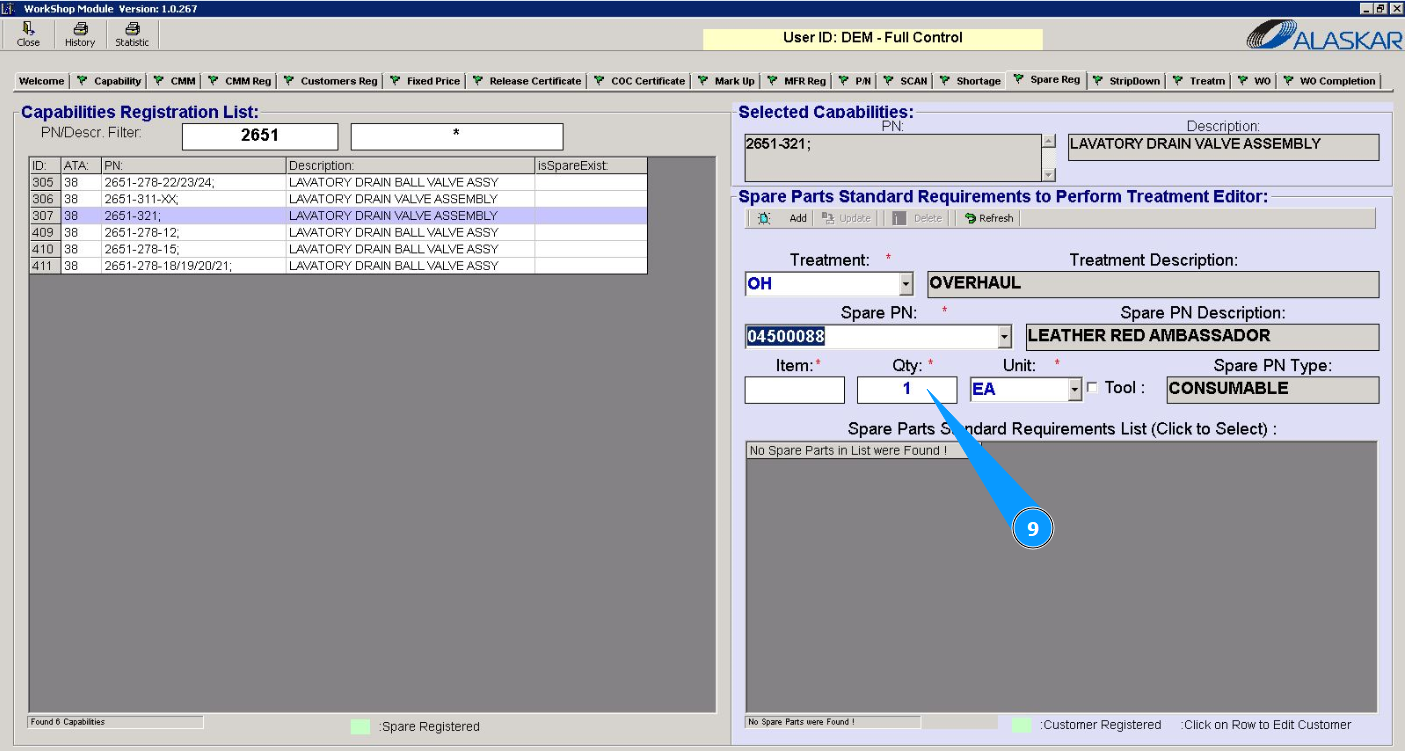
9. Enter the quantity of the required spare parts in the field "Qty".
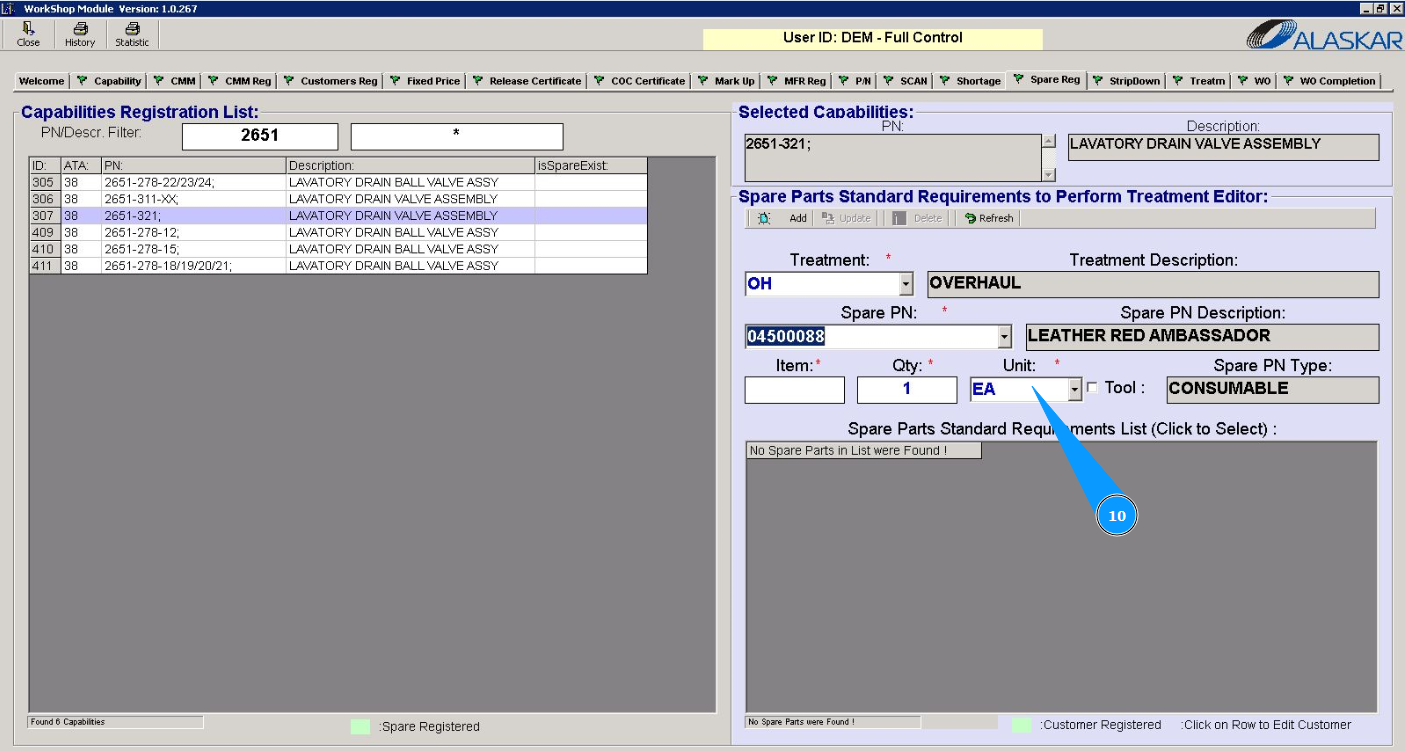
10. Select the spare part unit of measurement from the dropdown list in the field "Unit".
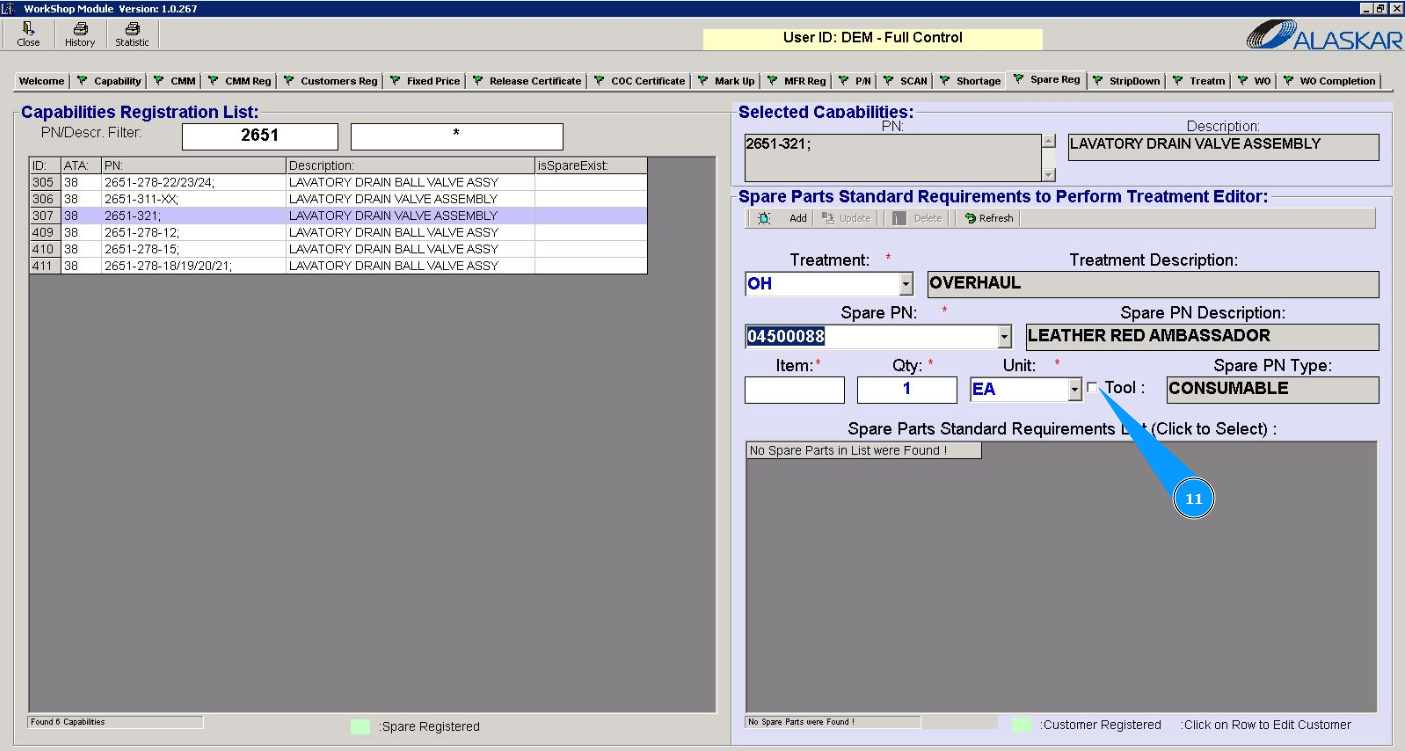
11. If necessary, if the required spare part is a tool tick in the window "Tool".
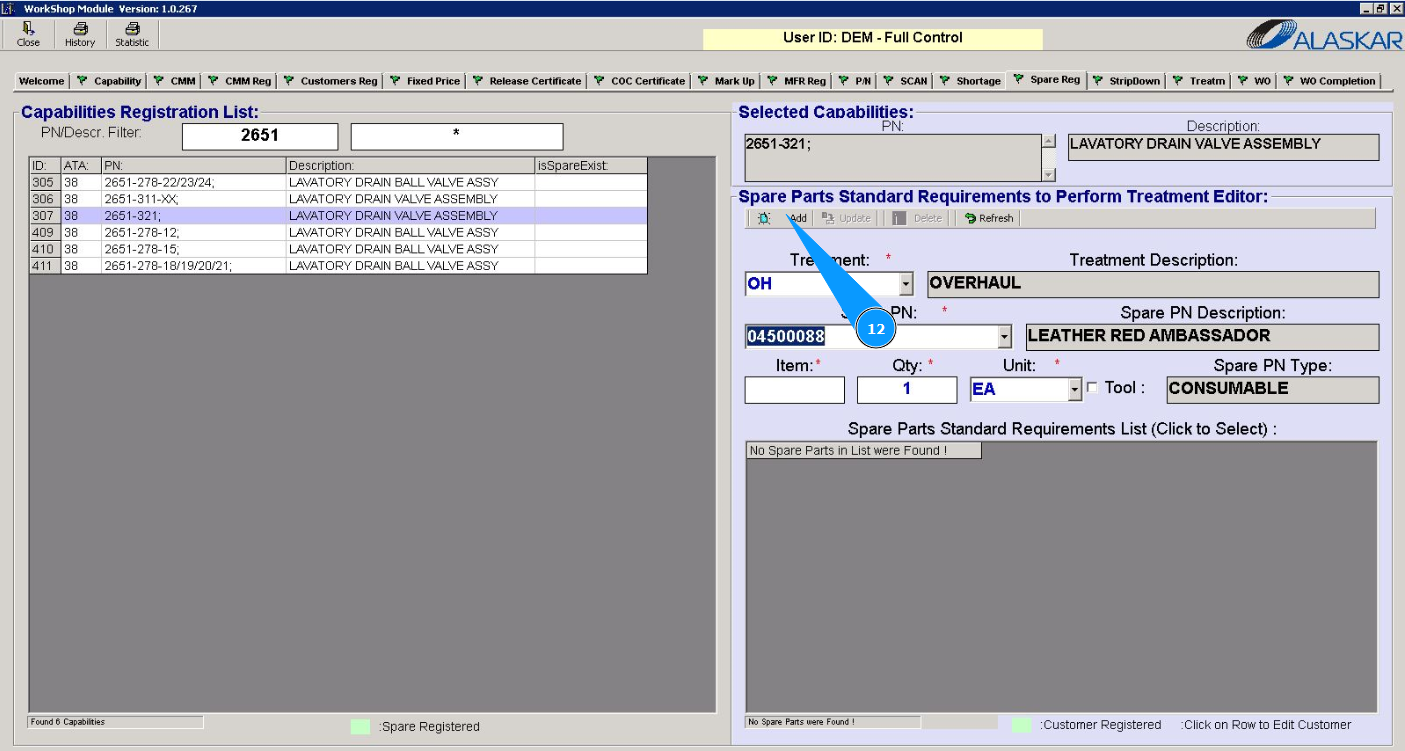
12. Click on the button "Add" to add spare part data to the program.
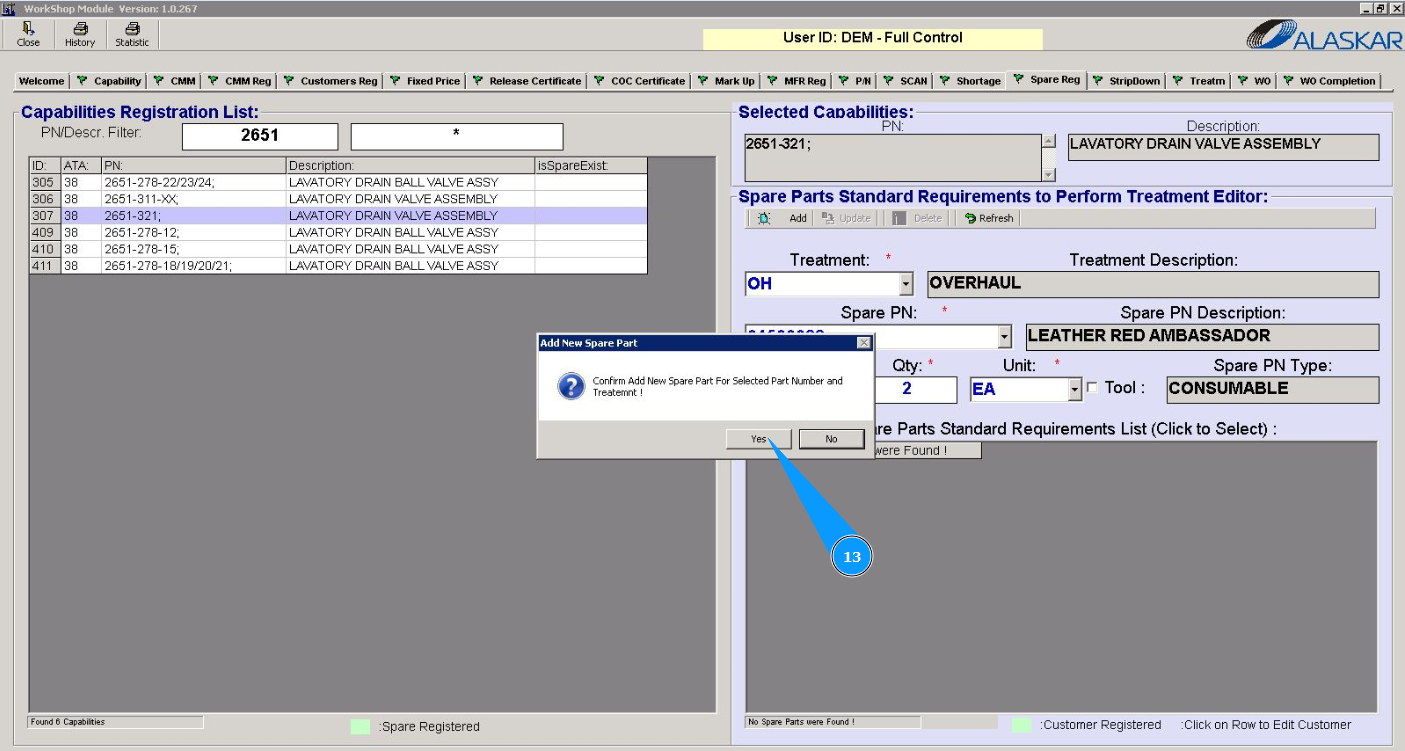
13. Click on the button "Yes" to confirm adding the spare part data to the program.
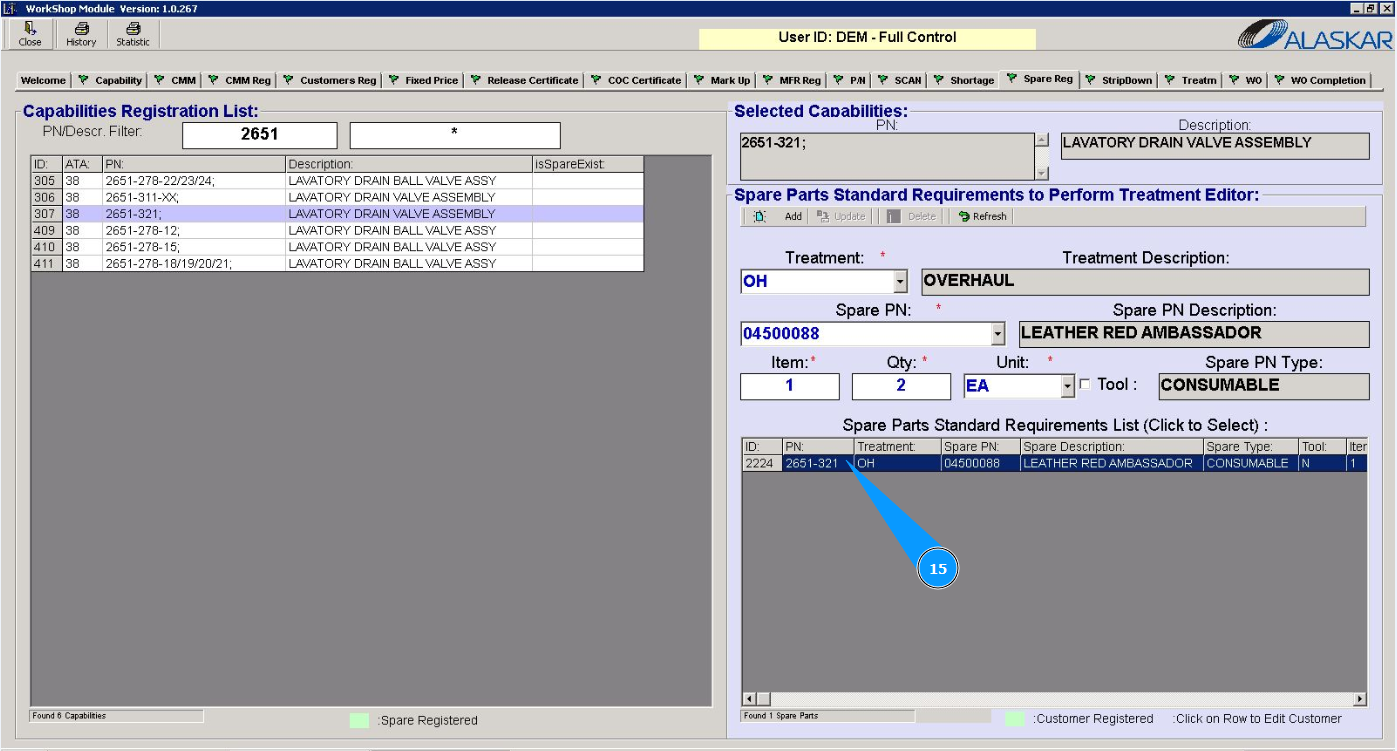
14. Check that the spare part is displayed in the list in the window "Spare Parts Standard Requirements".

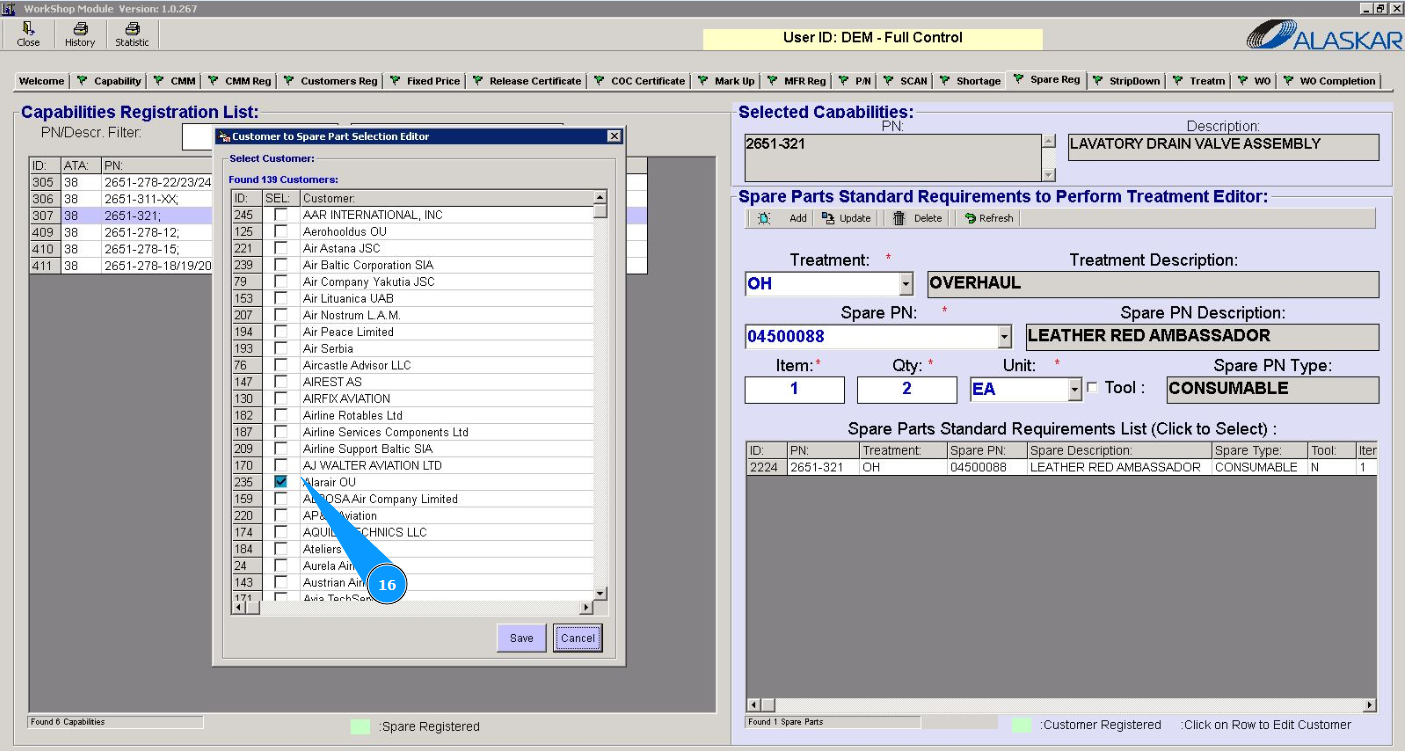
15. Enter a supplier for the spare part and click on the line with the spare part.
16. Select the required supplier from the list and tick in the appropriate window.
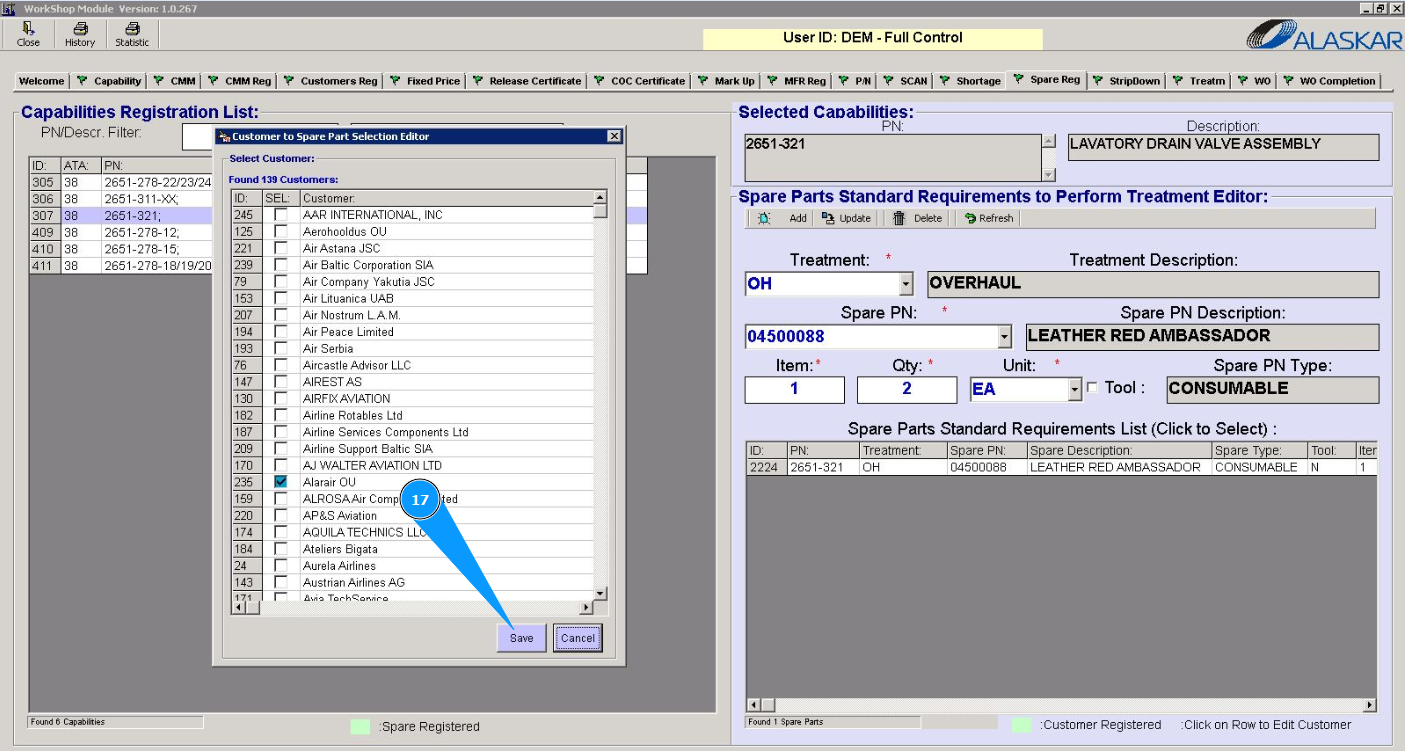
17. Click on the button "Save" to save the supplier to the program.
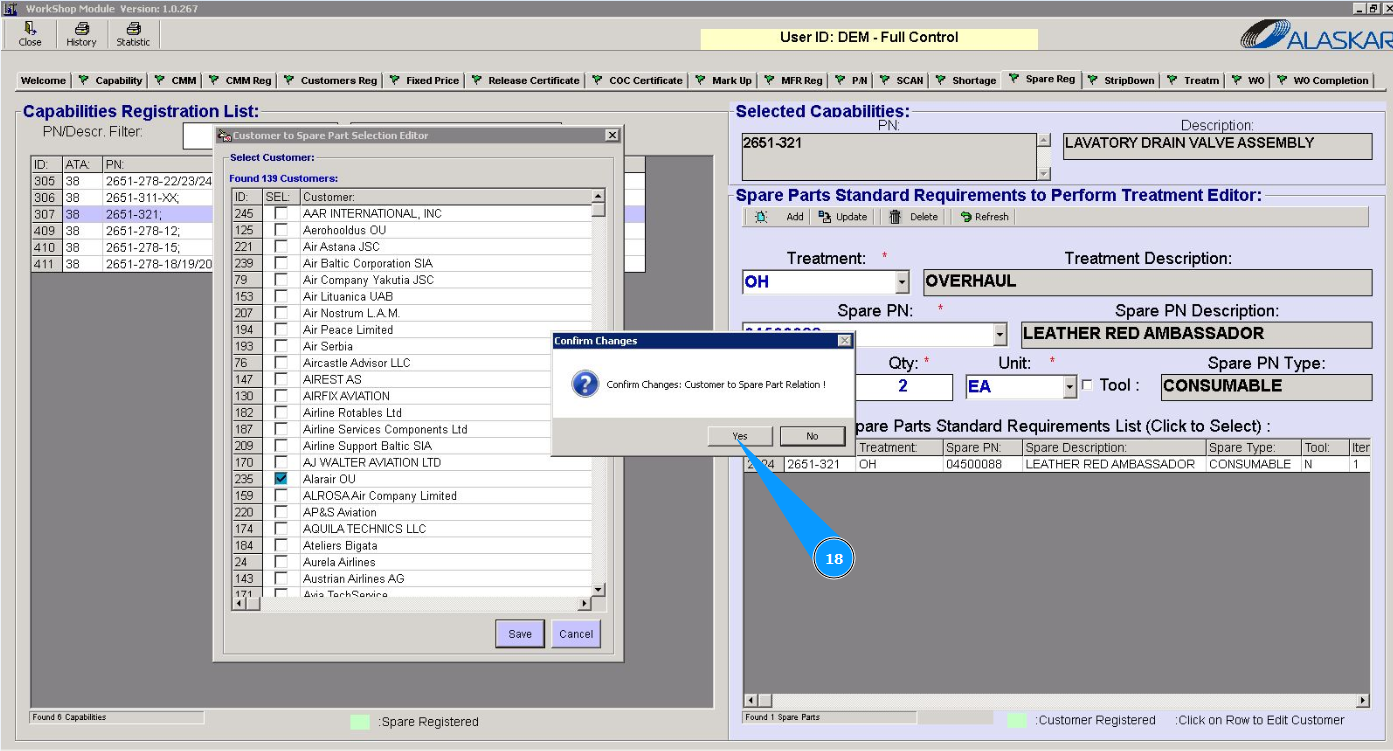
18. Click on the button "Yes" to confirm adding the supplier data to the program.
19. Click on the button "Ok" the data has been successfully entered into the program.

Note: If you need to add additional spare parts or tools, repeat steps 7 through 19 of this instruction.