How to create a Purchase Order
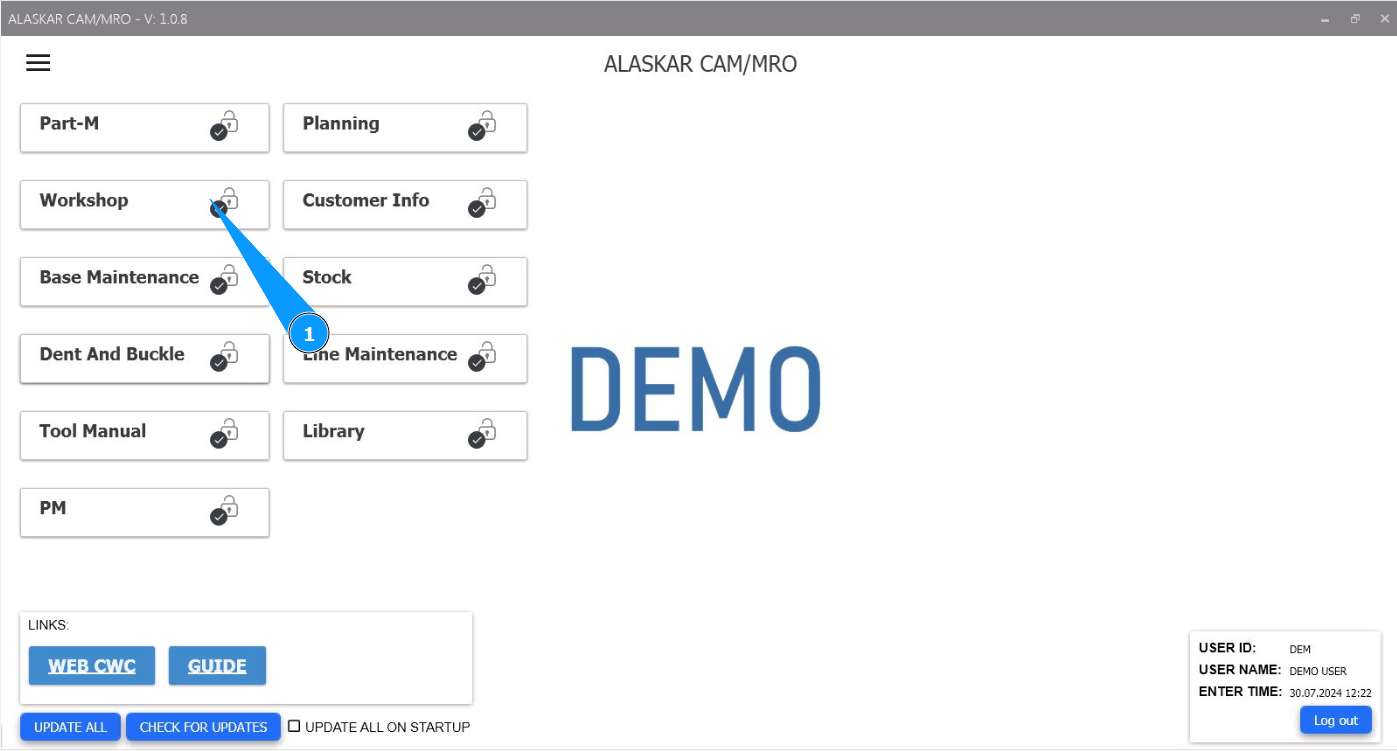
1. In order to create a Purchase Order, go to the module "Workshop".
2. Then go to the tab "WO" or to the submodule "WO".
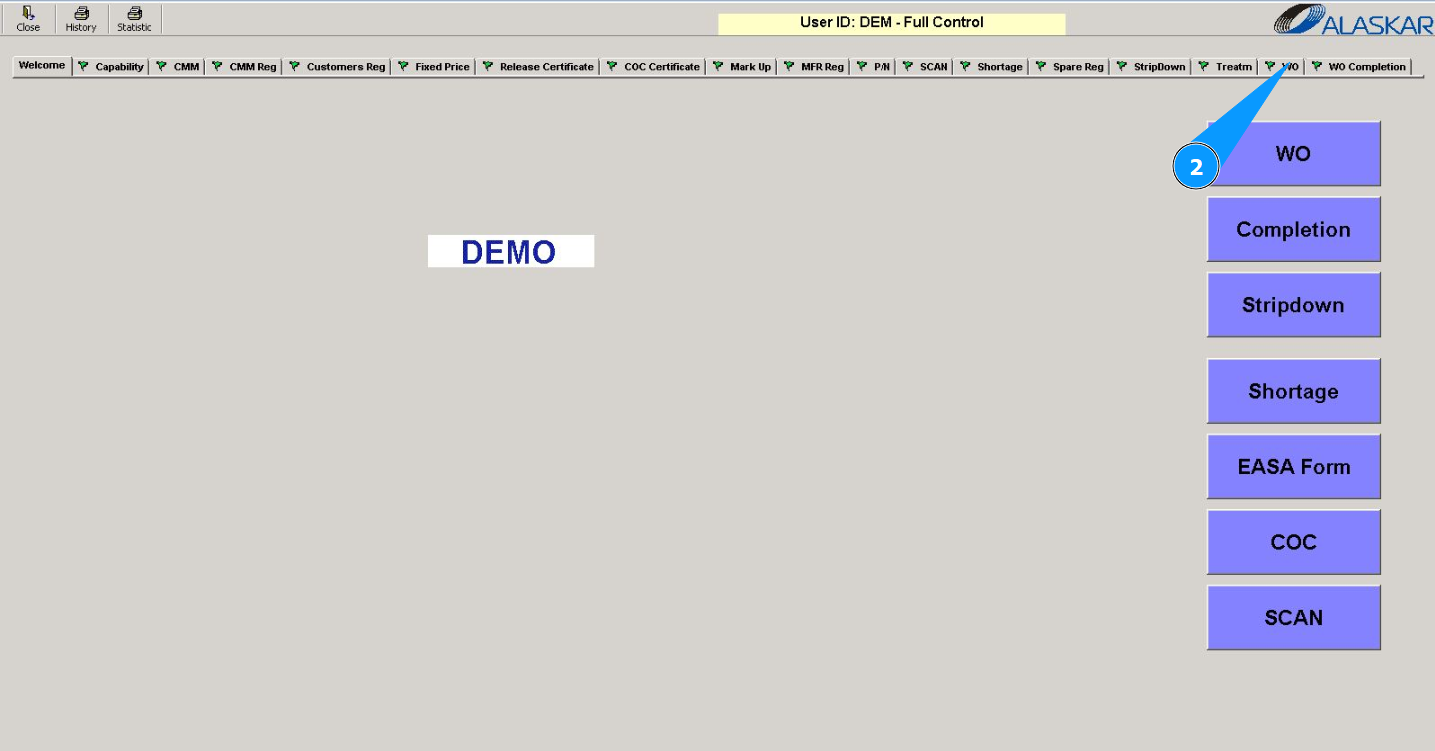
Note: You can create a purchase order for any type of WO: Service, Interior, BMS WO or LMS WO.
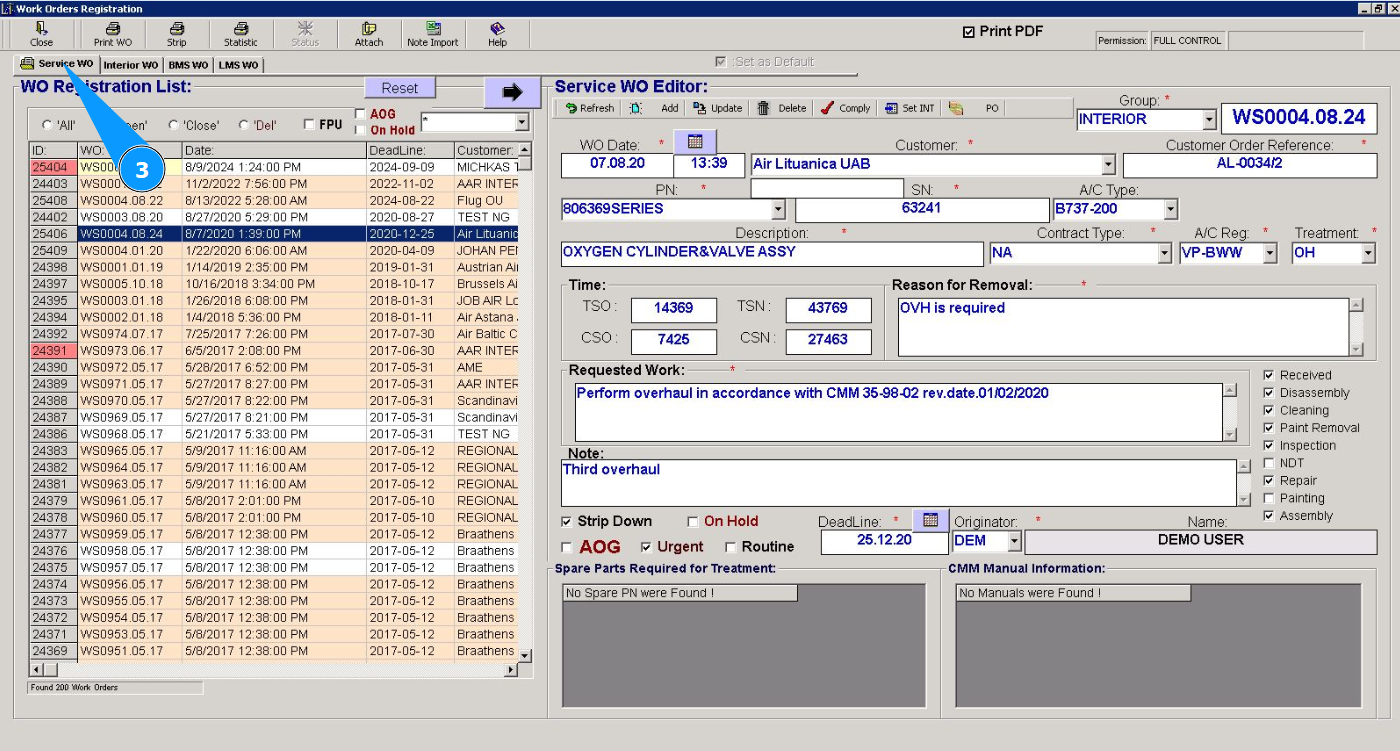
3. Then go to the tab for your WO type. For example: "Service WO".
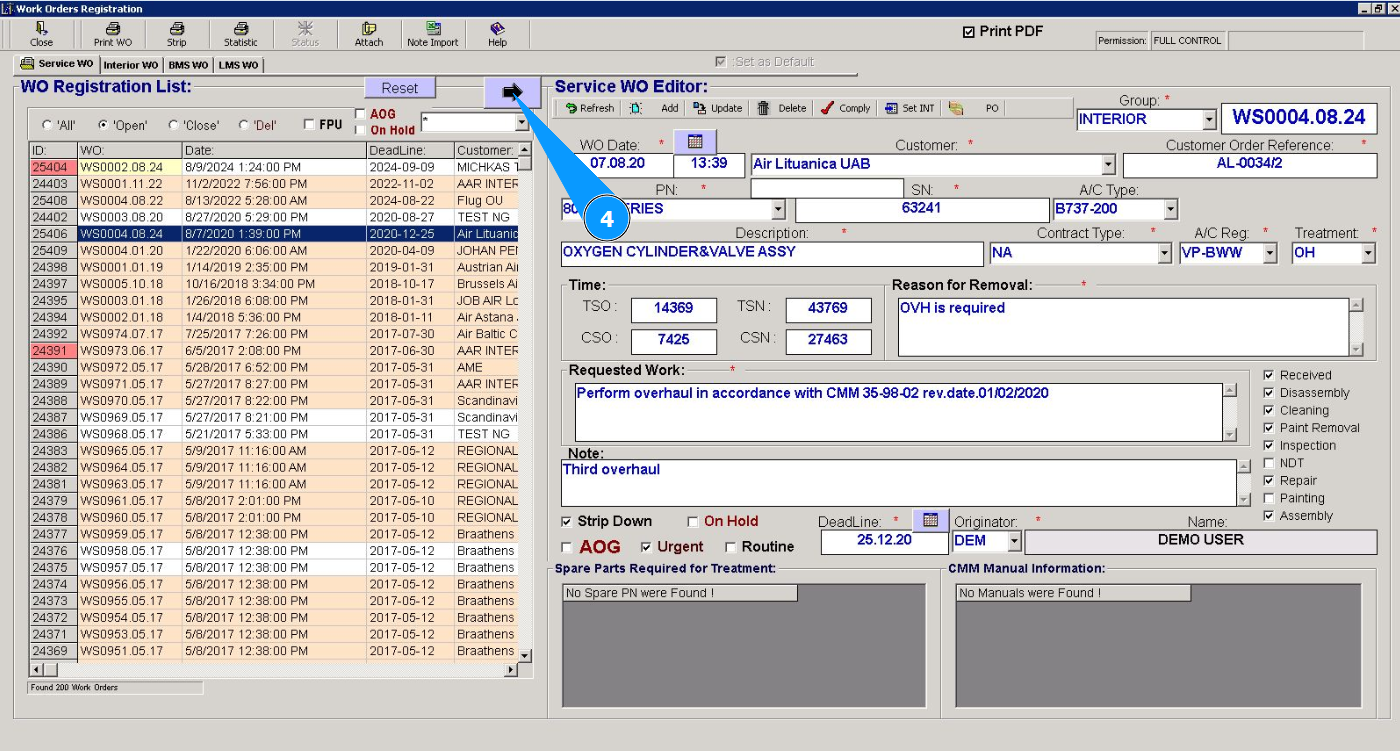
4. Click on the button with an arrow to open the work order editor.
5. Select the required work order from the list in the window "WO Registration List". Click on the corresponding line. Note: Use the available filters if necessary.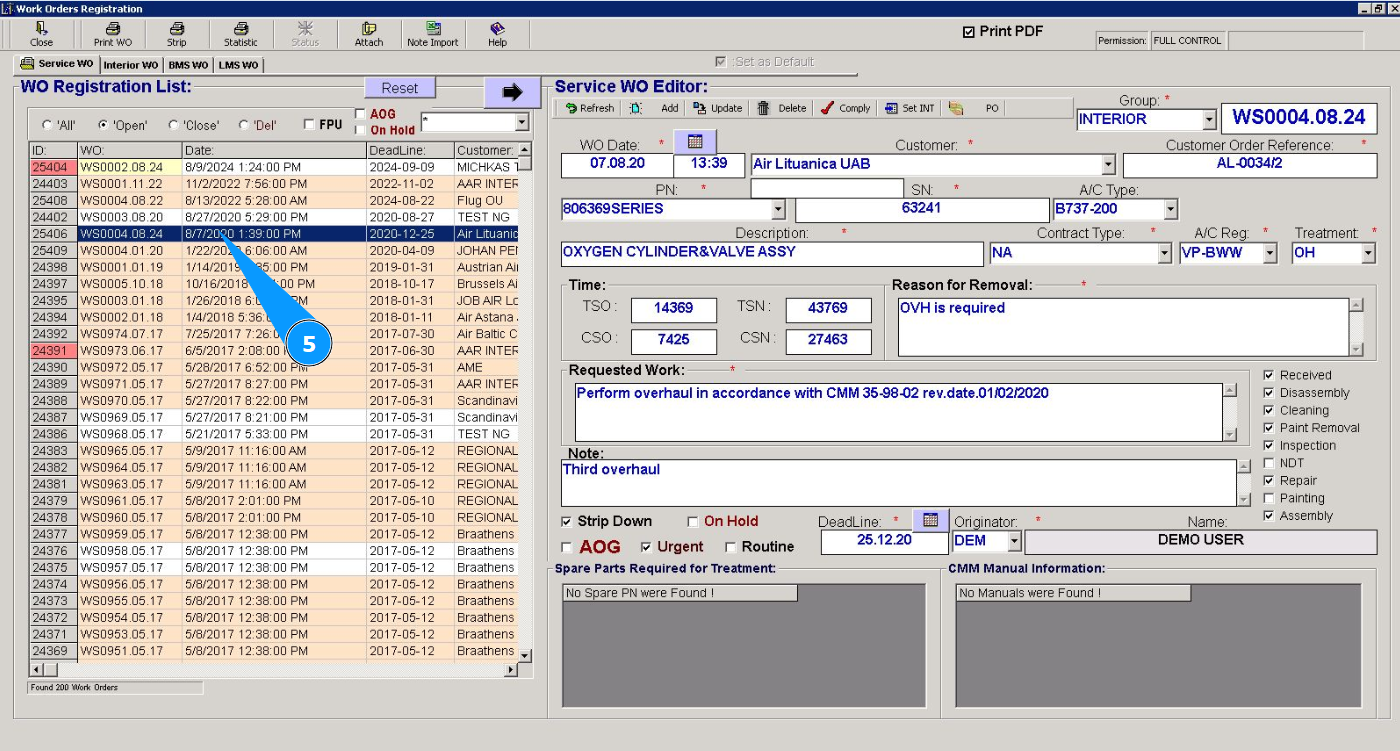
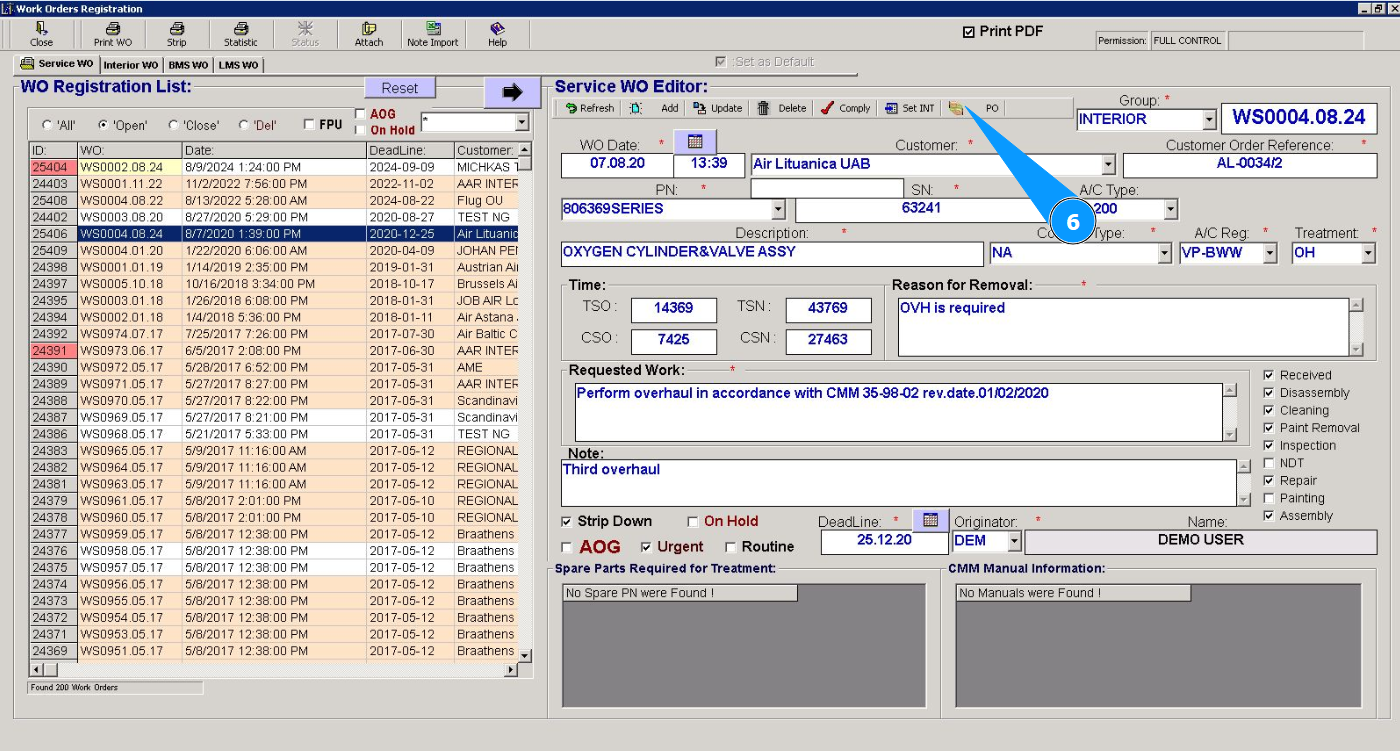
6. Click on the button "PO" to open the purchase order creation editor.
7. Check that the editor opens in the window "Purchase Order Editor".
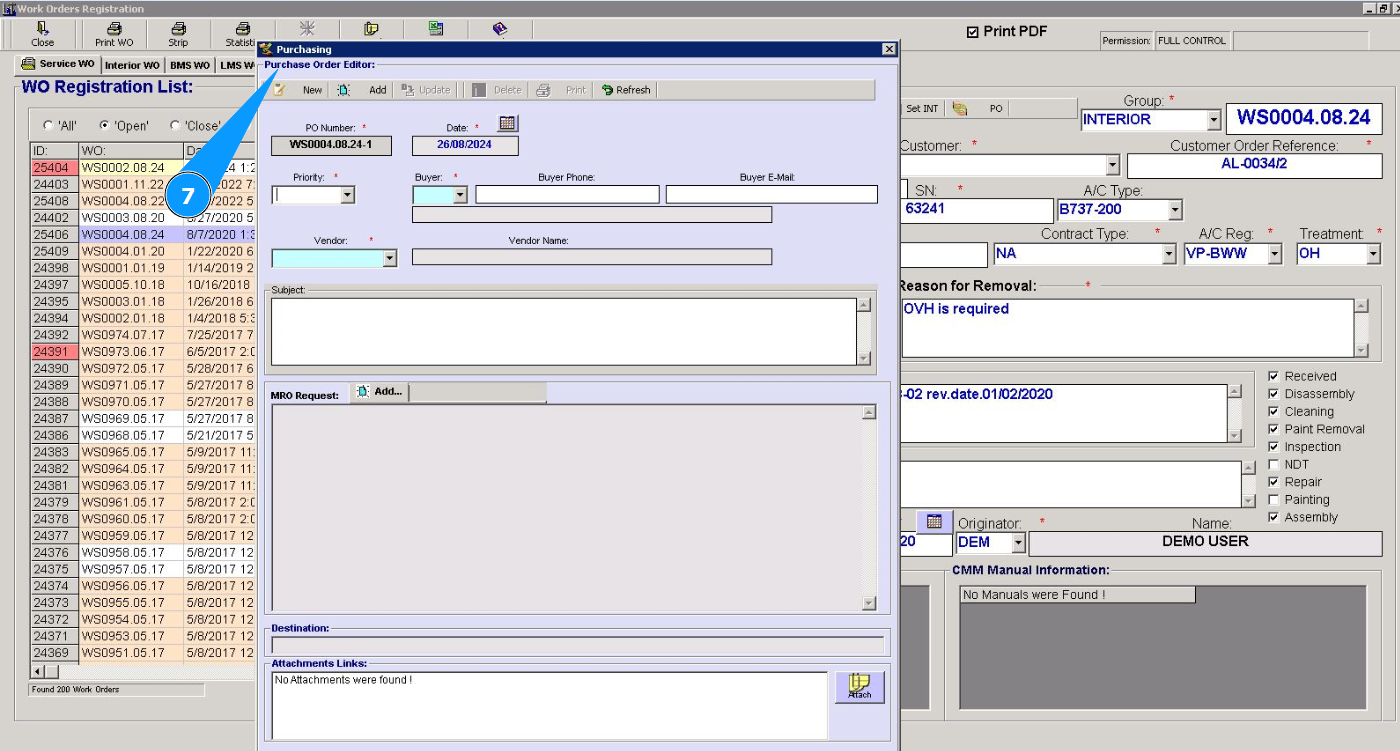
8. If necessary, change the PO creation date in the field "Date". Note: The purchase order number will be entered automatically by the program in the field "PO Number".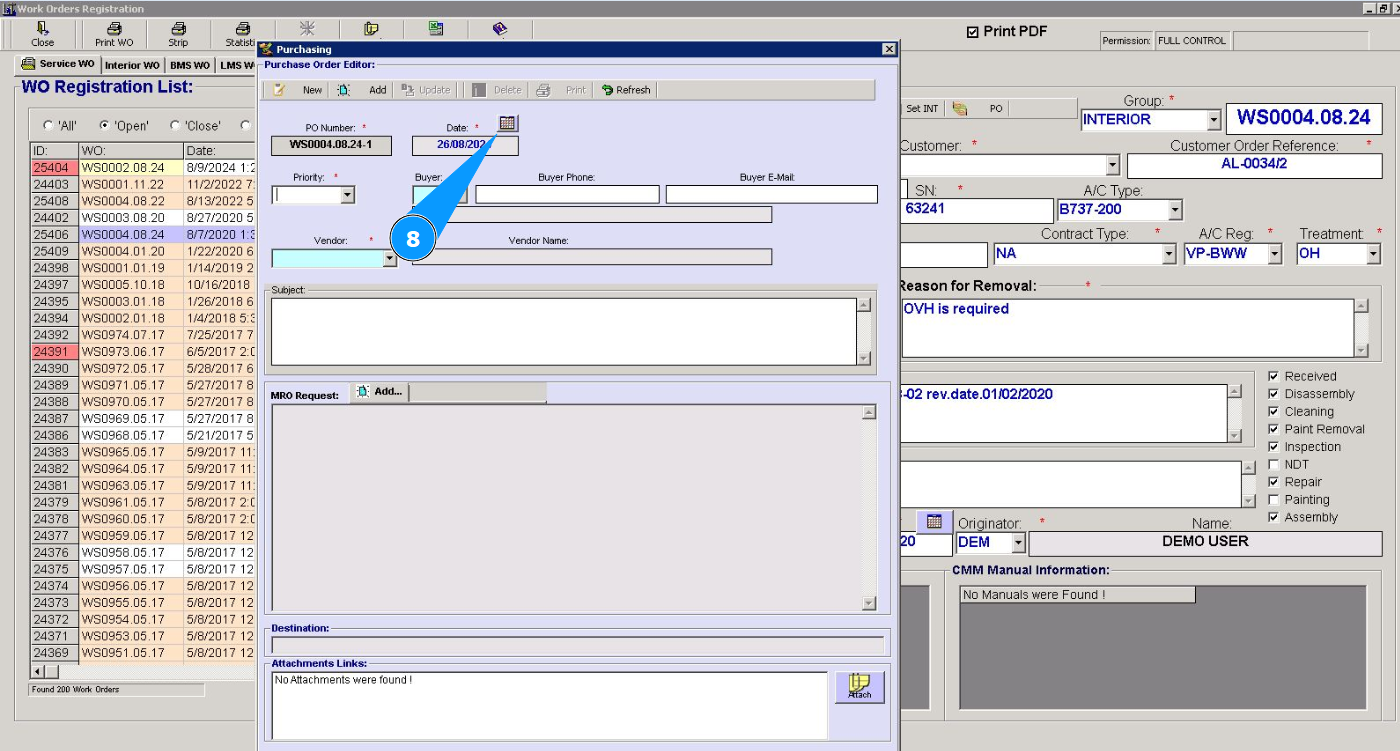
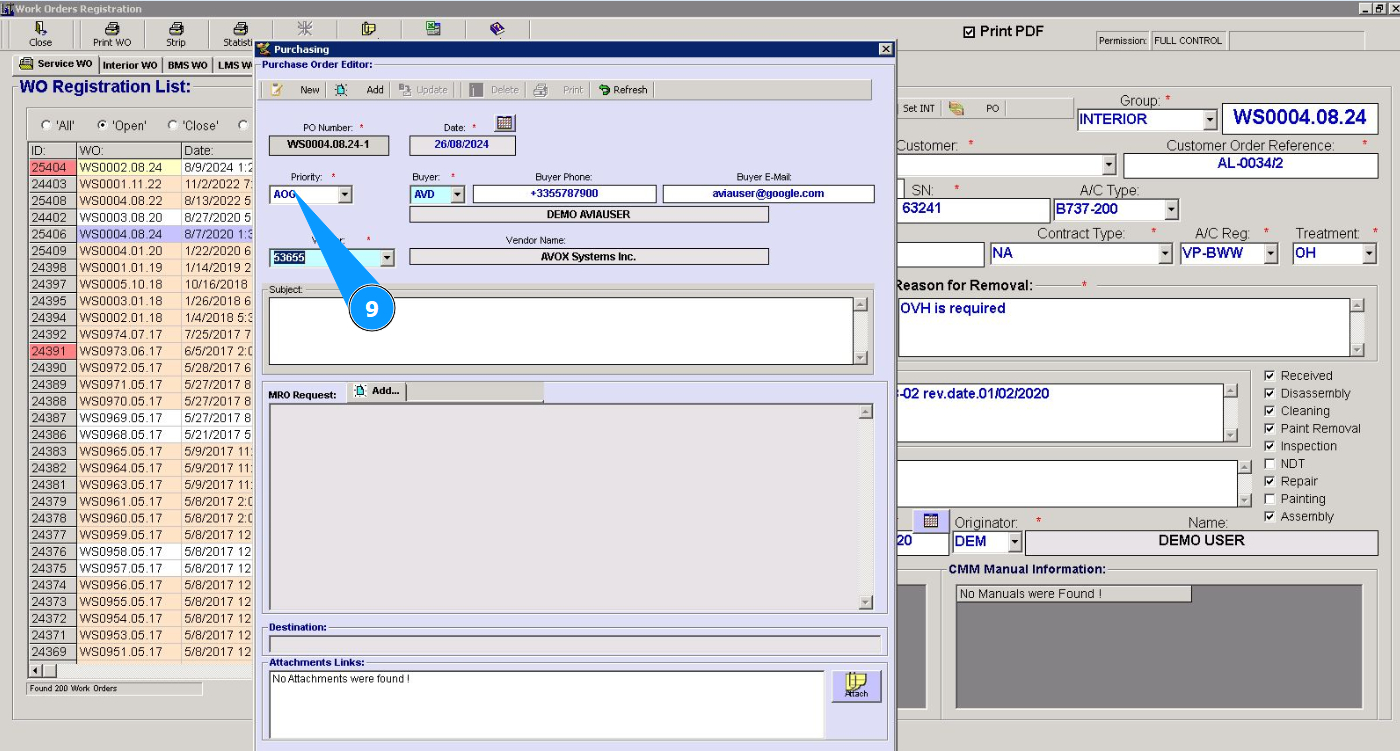
9. Select the priority of PO from the dropdown list in the field "Priority".
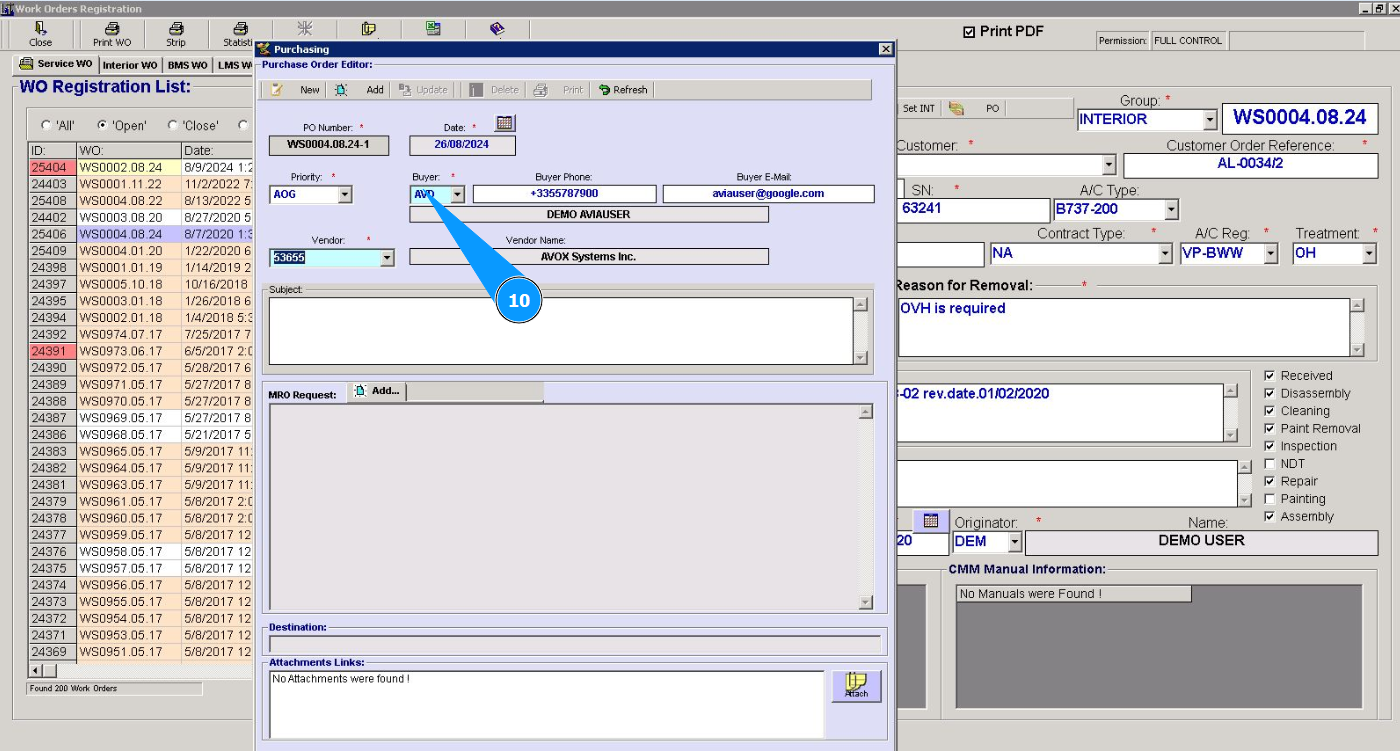
10. Select the buyer of the PO from the dropdown list in the field "Buyer".
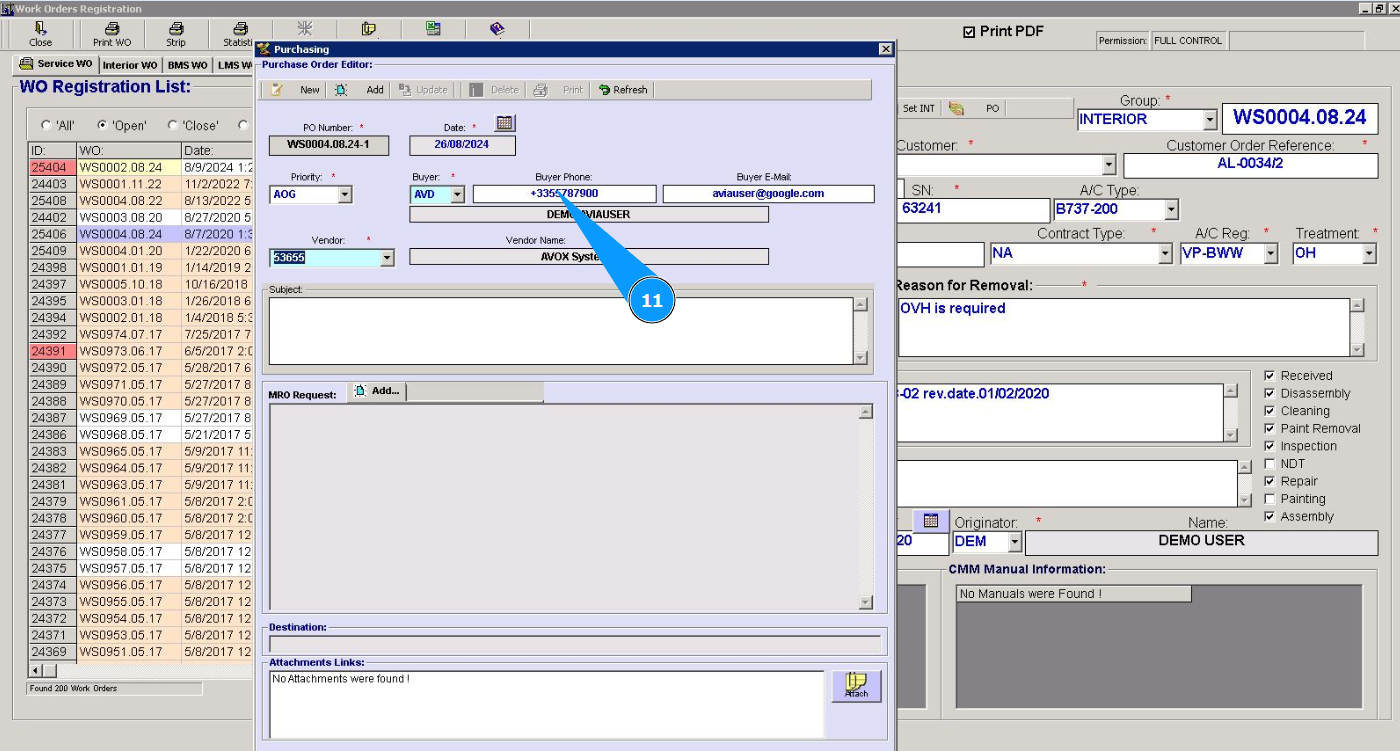
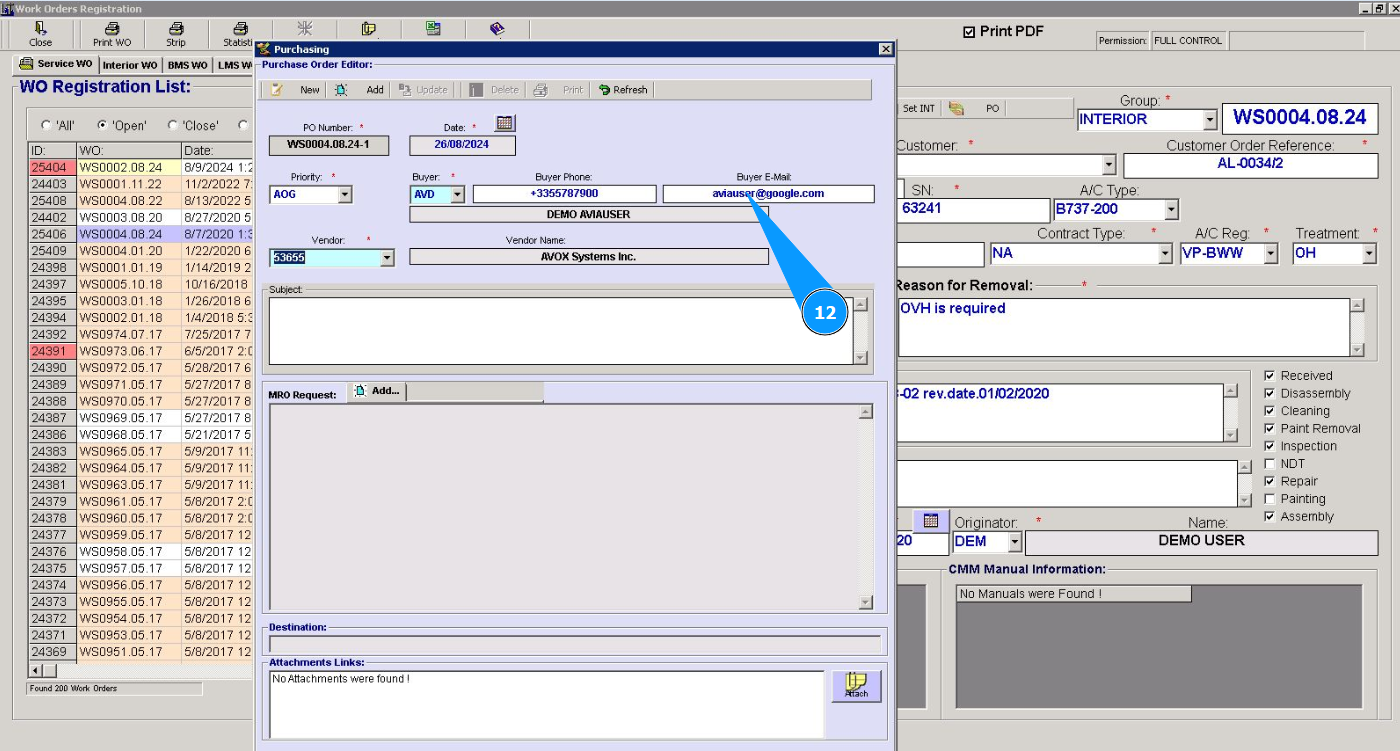
11. If necessary, enter the buyer's phone number in the field "Buyer Phone".
12. If necessary, enter the buyer's email in the field "Buyer E-Mail".
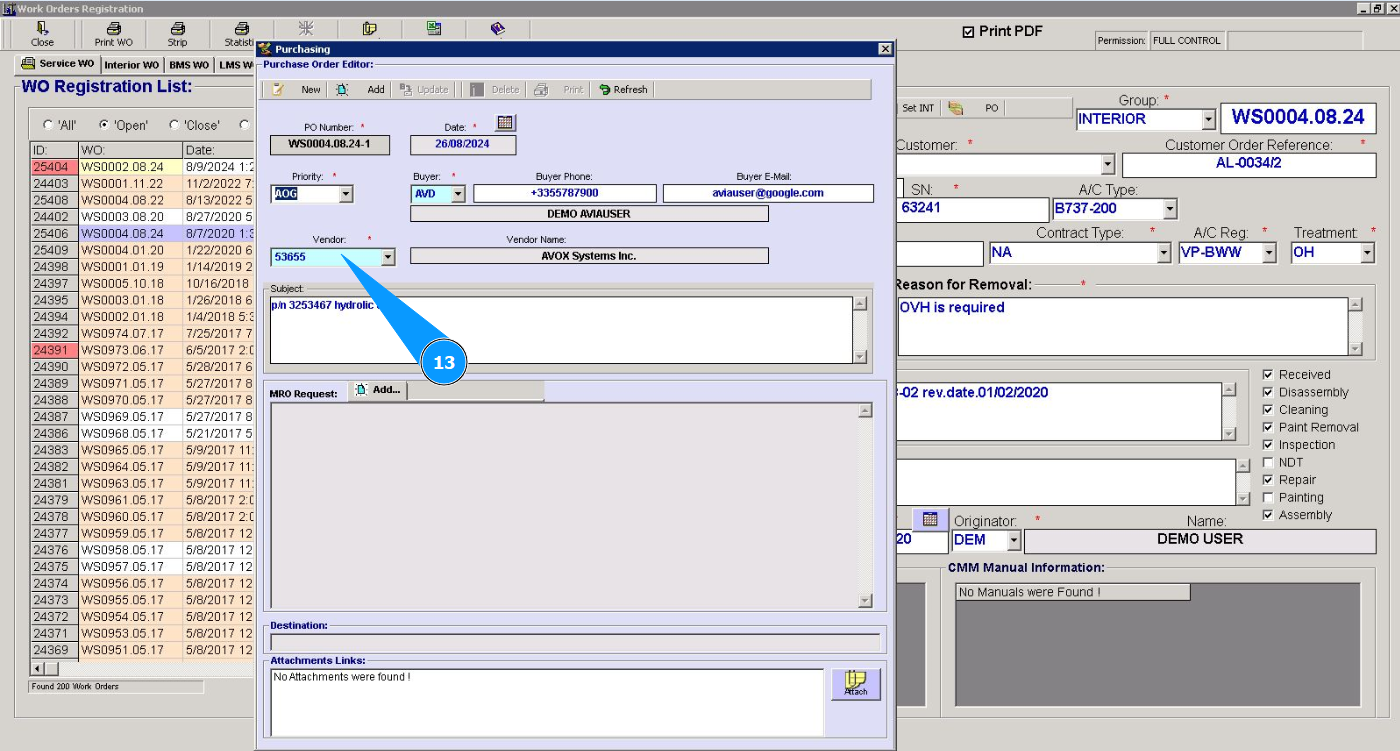
13. Select the vendor of the PO from the dropdown list in the field "Vendor".
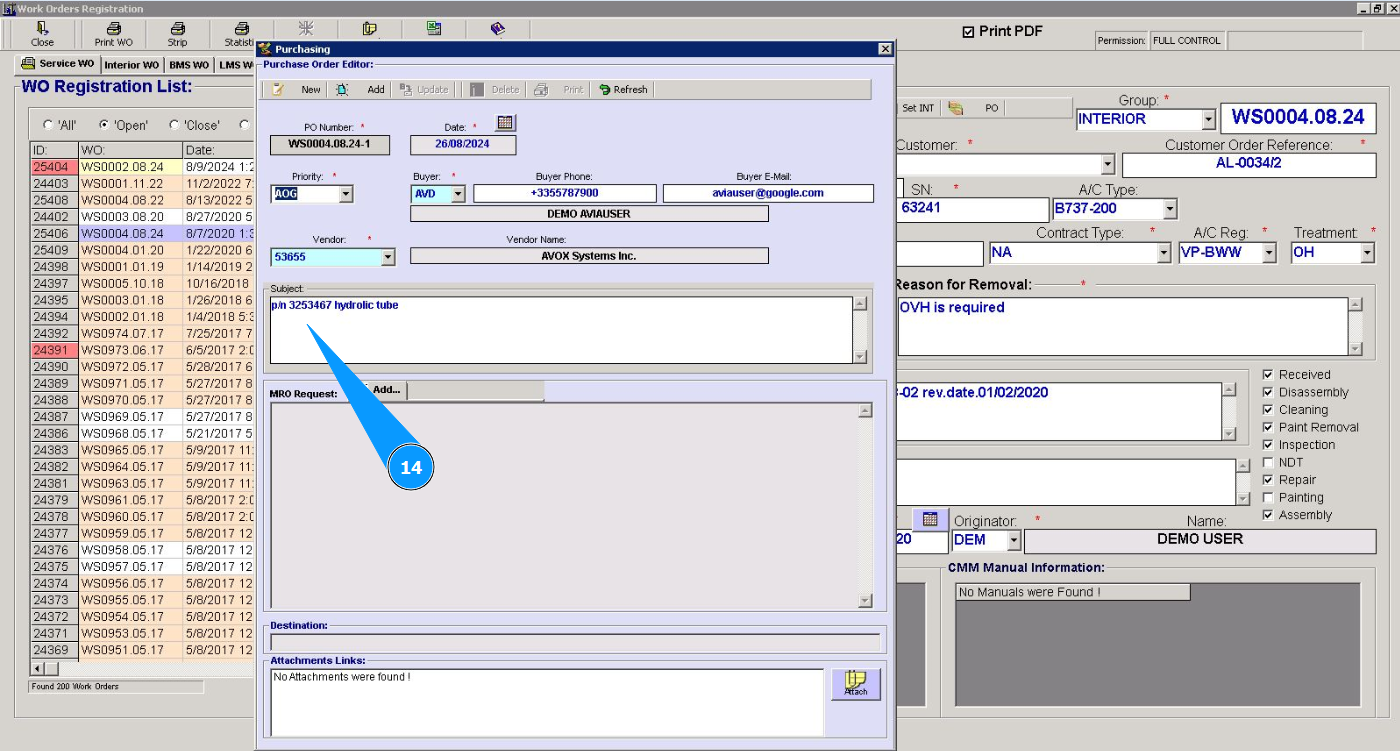
14. Enter the subject of PO in the field "Subject".
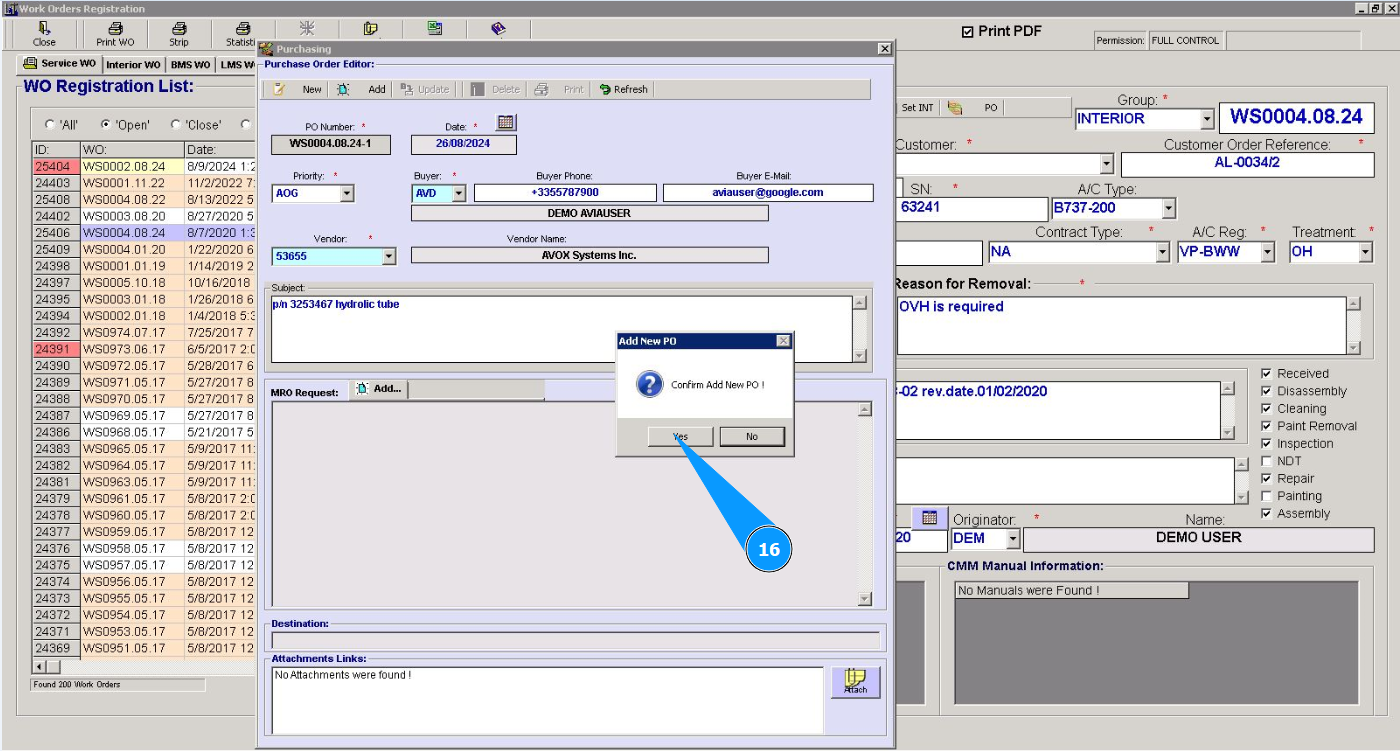
15. Click on the button "Add" to add the PO to the program.

16. Click on the button "Yes" to confirm entering the data into the program.
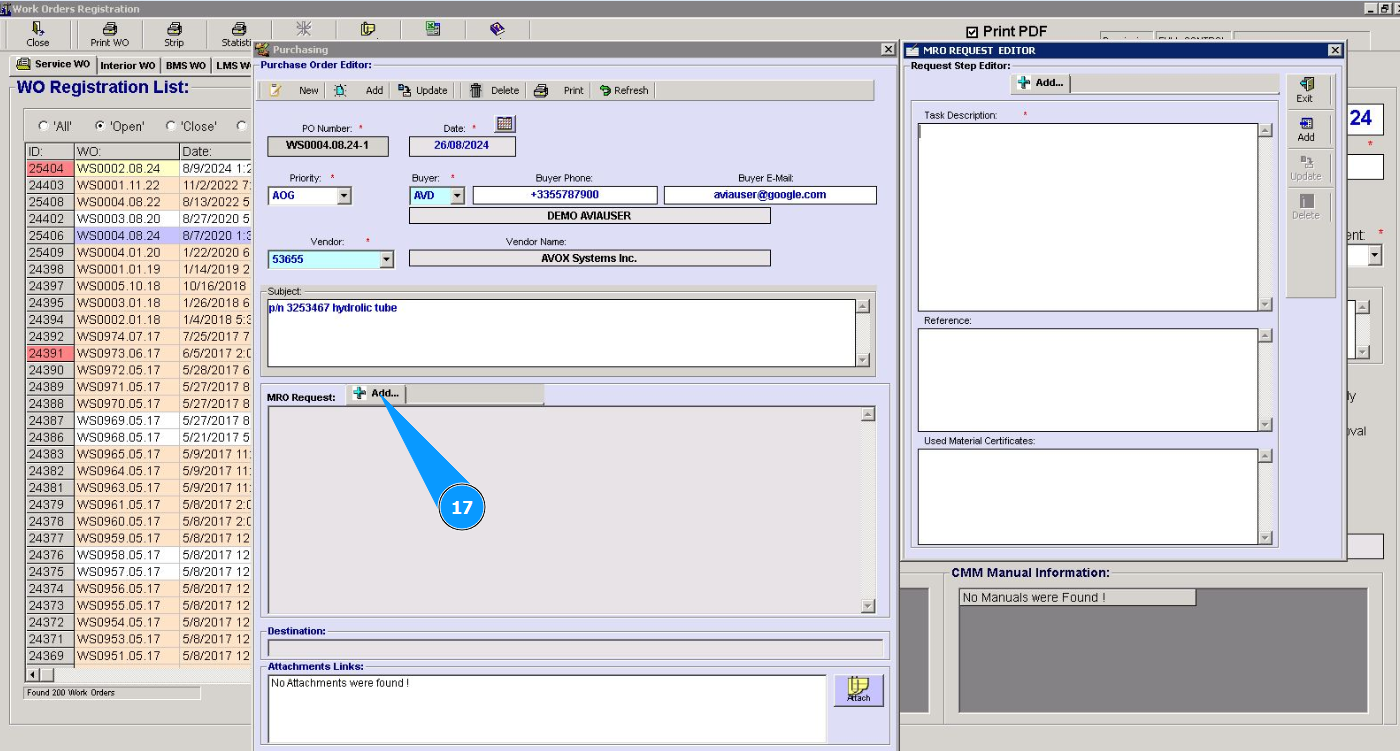
17. Click on the button "Add" to add additional data for the request to the PO.
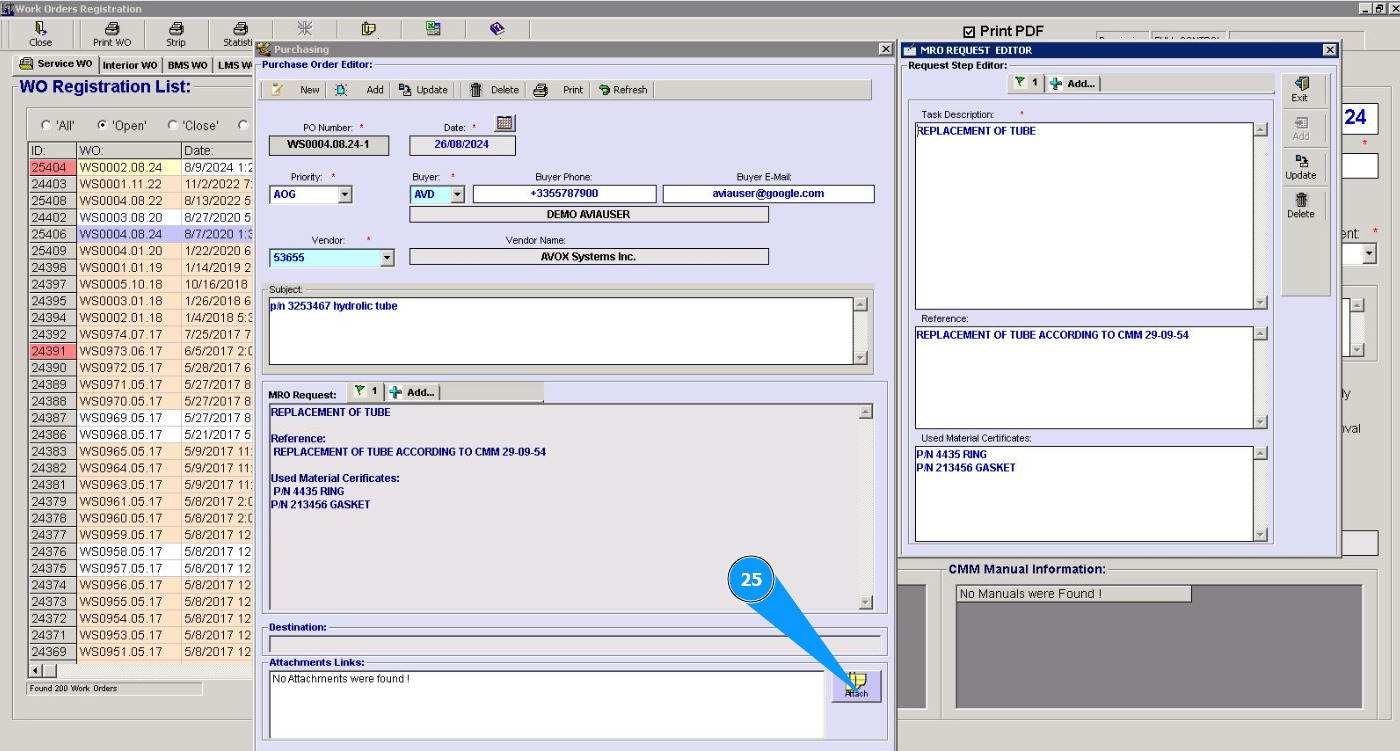
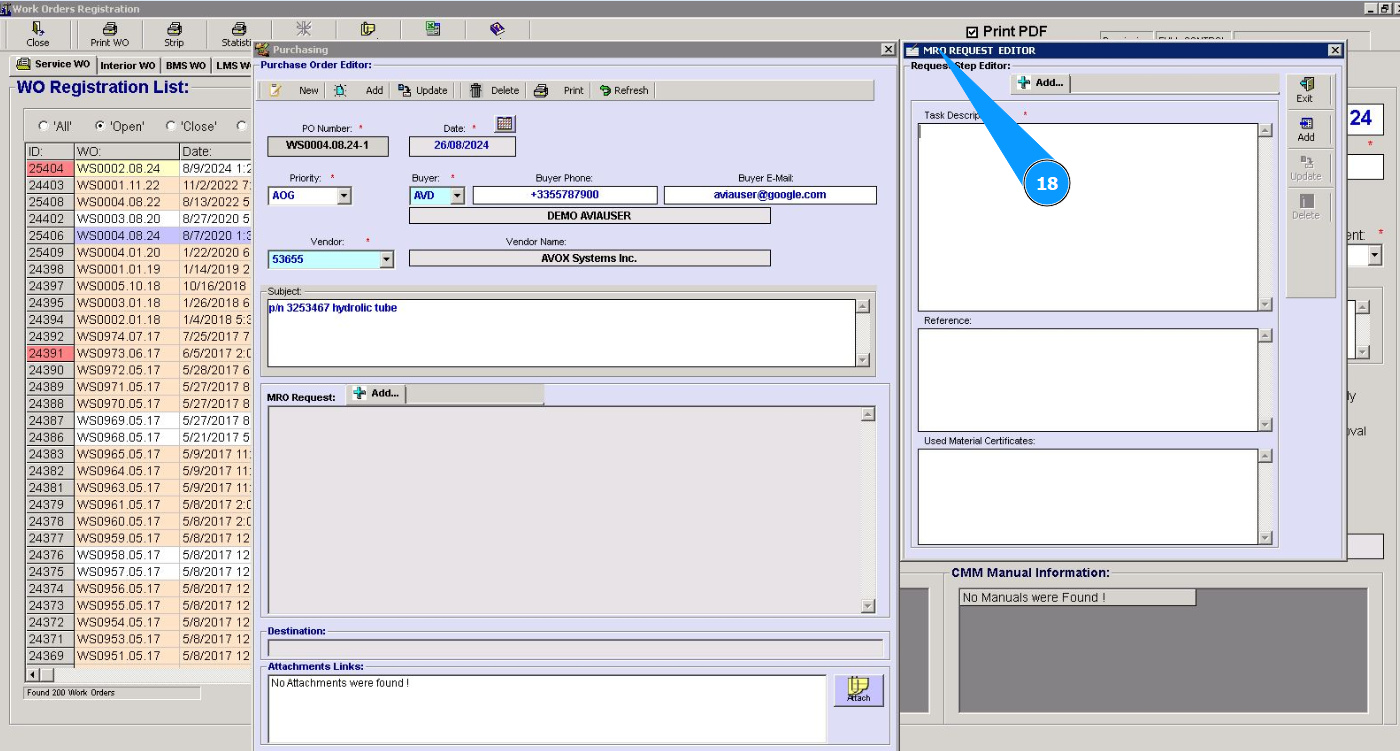
18. Make sure that the editor is opened in the window "MRO Request Editor".
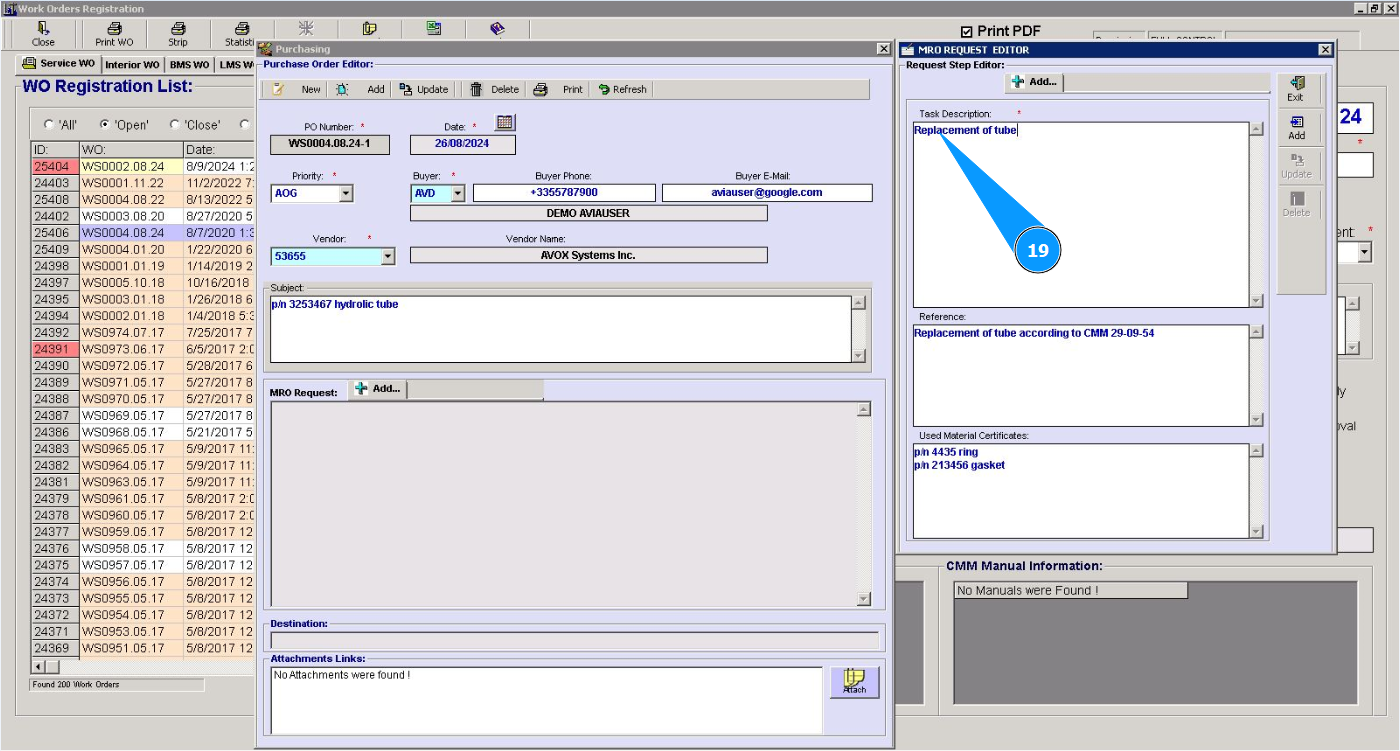
19. If necessary, enter a description of the request in the field "Description".
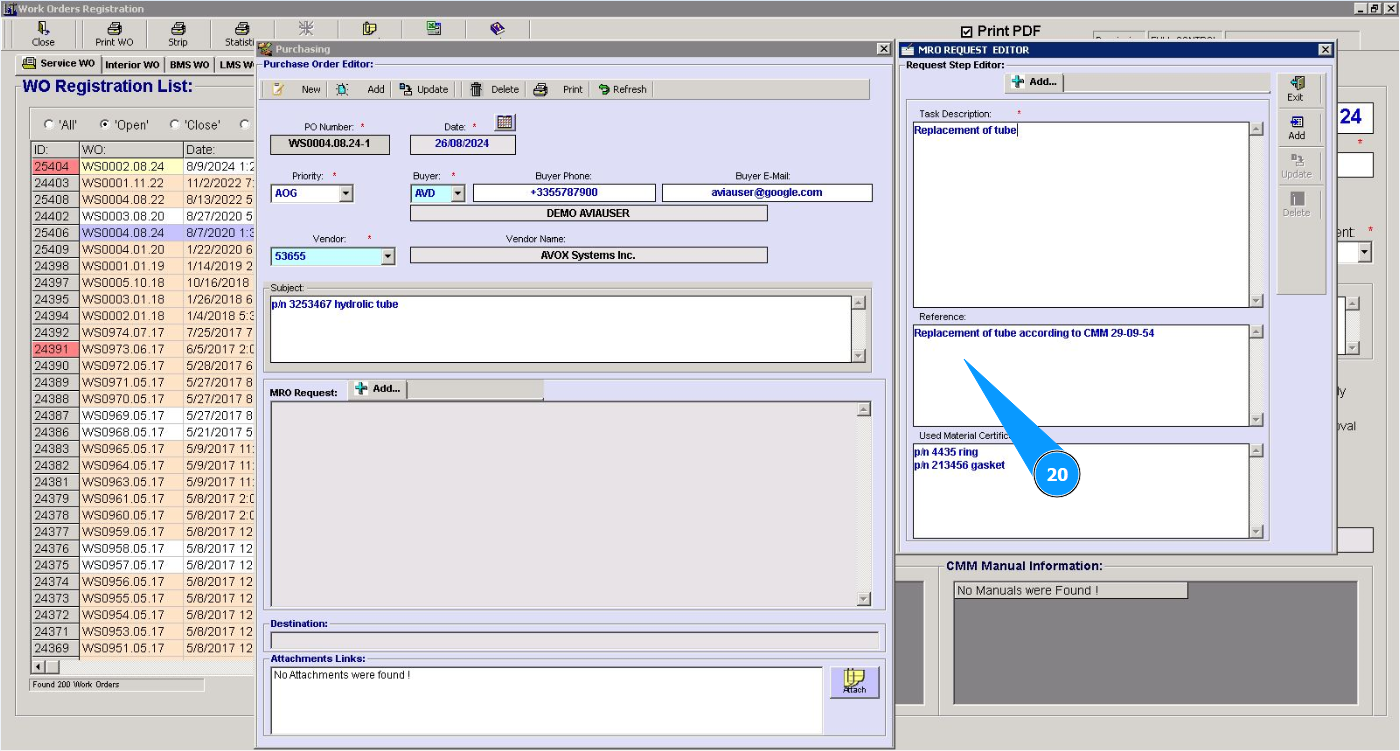
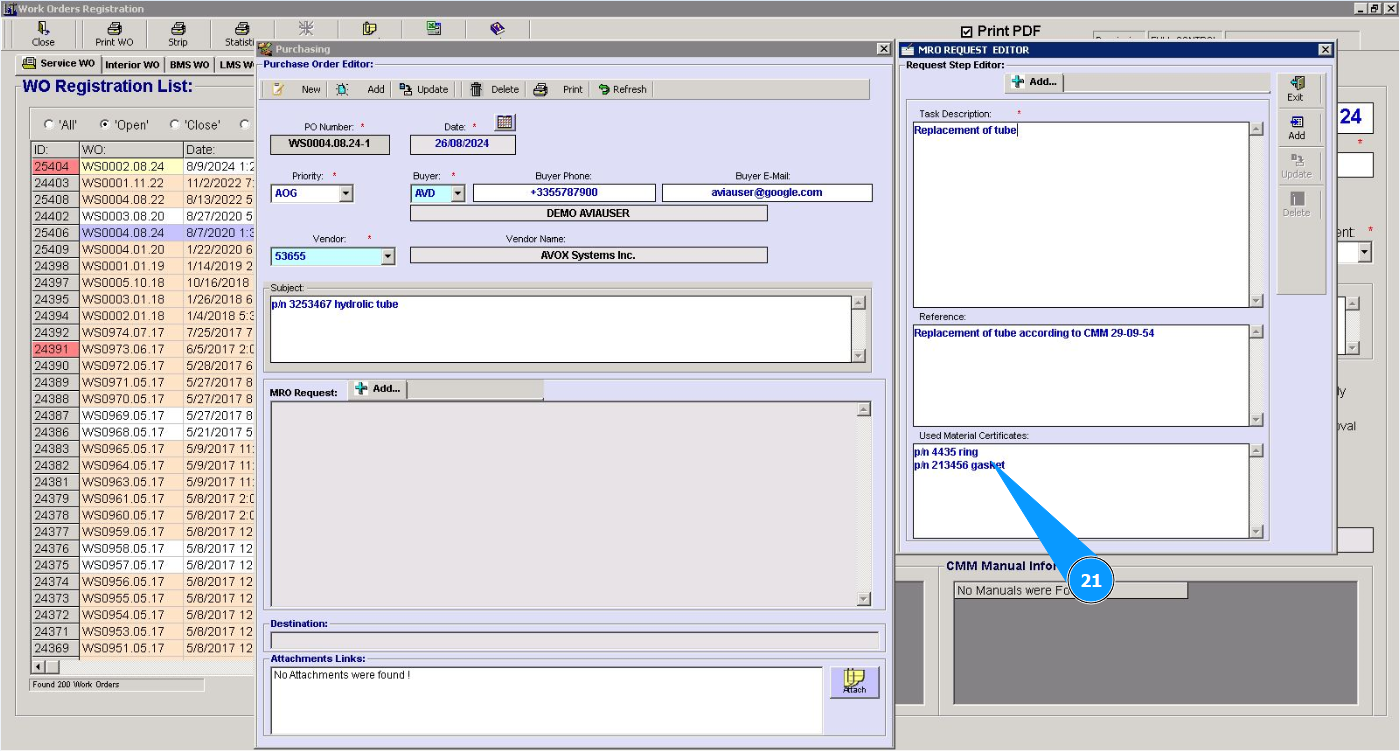
20. If necessary, enter a reference to the request in the field "Reference".
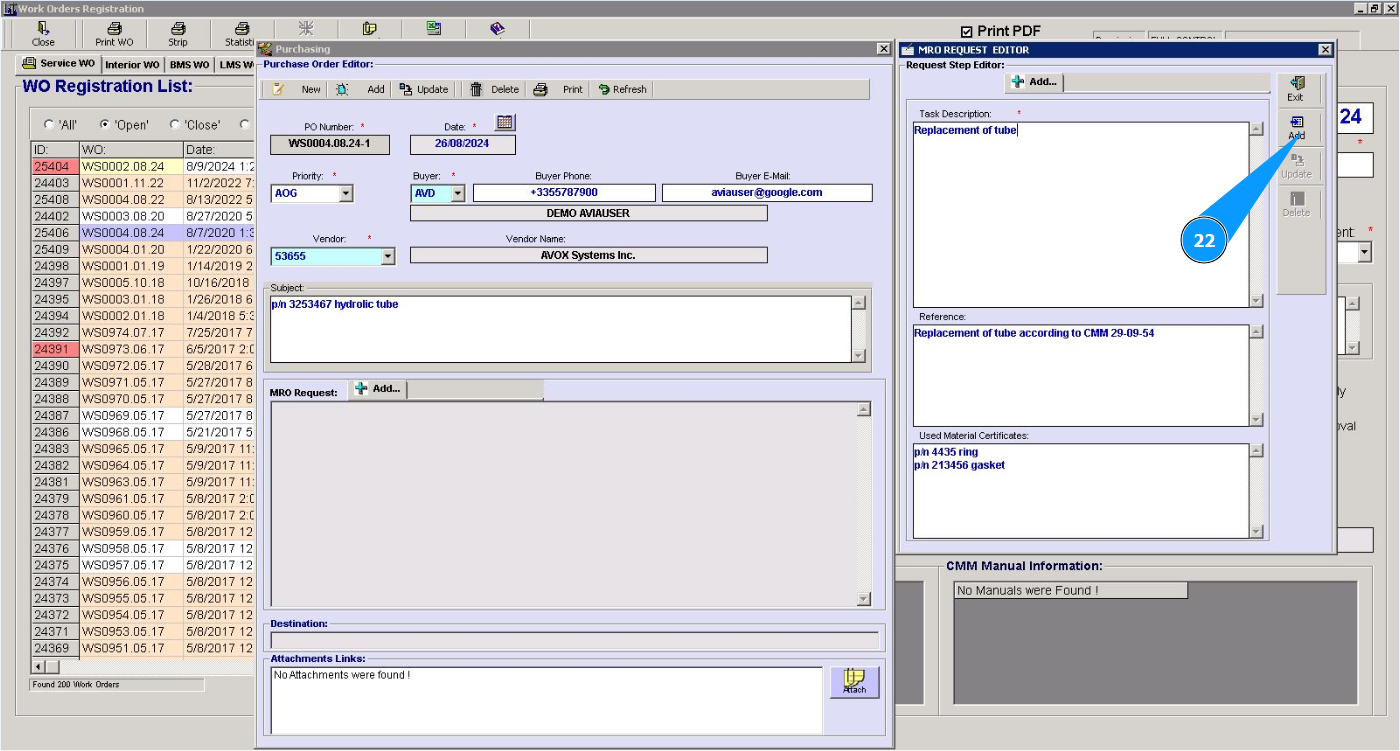
21. Enter the required certificate numbers or other information in the field "Used Material Certificates".
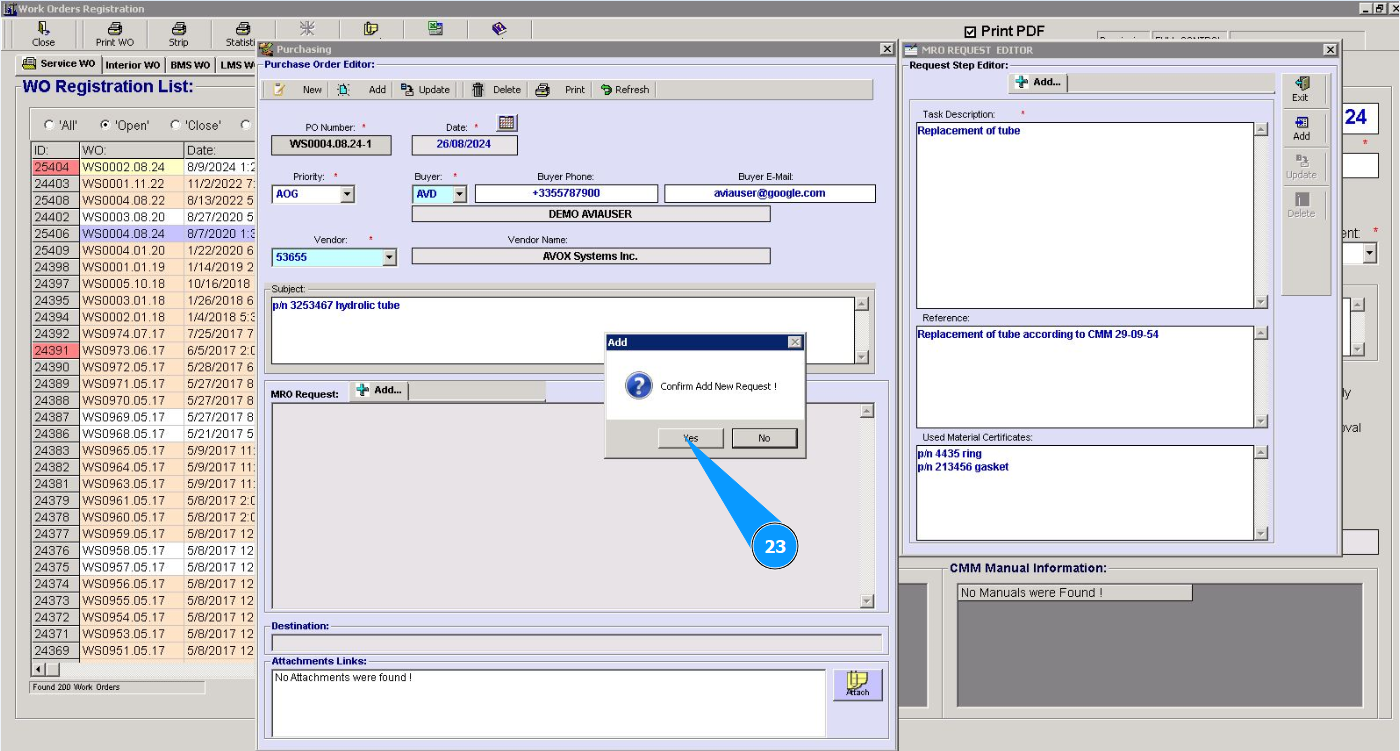
22. Click on the button "Add" to add the data to the PO.
23. Click on the button "Yes" to confirm entering the data into the program.
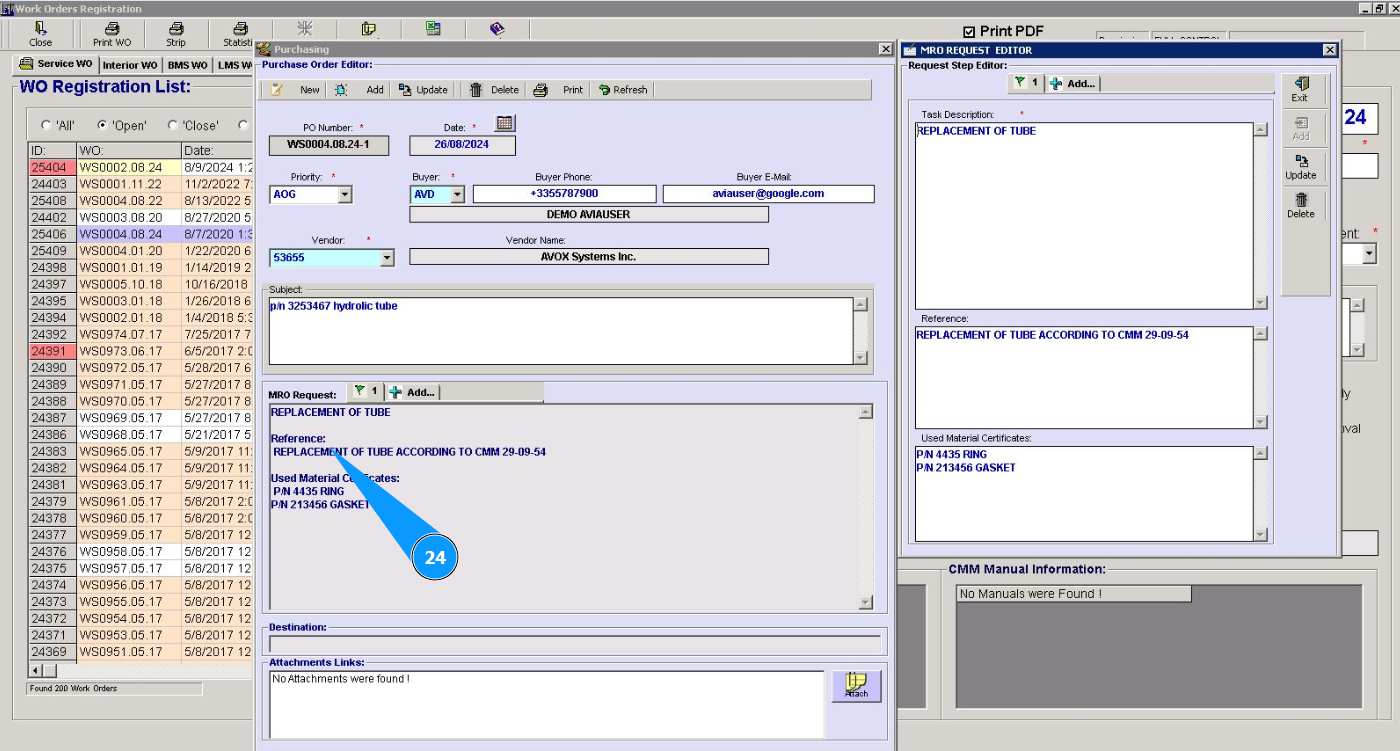
24. Check that the entered data is displayed in the window "MRO Request".
25. If necessary, attach the required documents and click on the button "Attach".