How to add a new part number
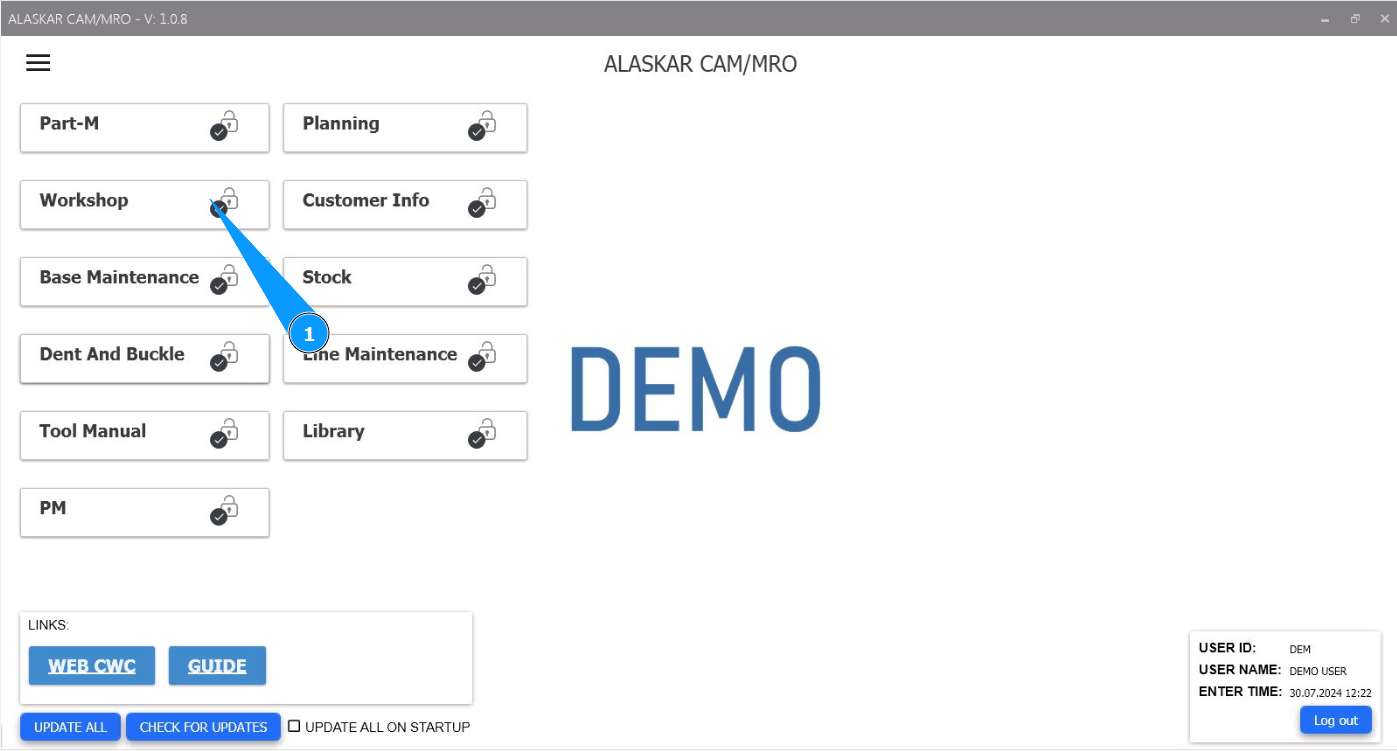
1. In order to add a new part number, go to the module "Workshop".
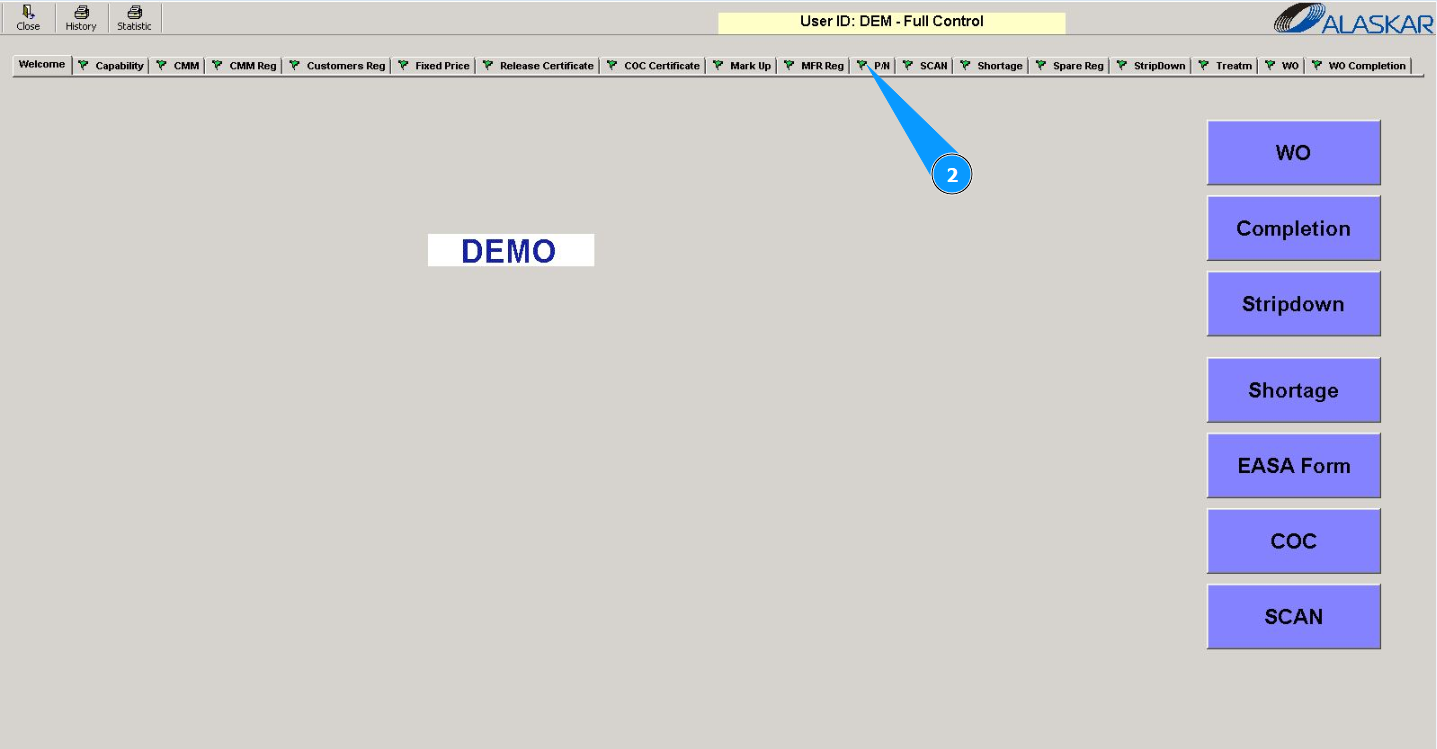
2. Then go to the tab "P/N".
3. Enter the new part number in the field "PN".
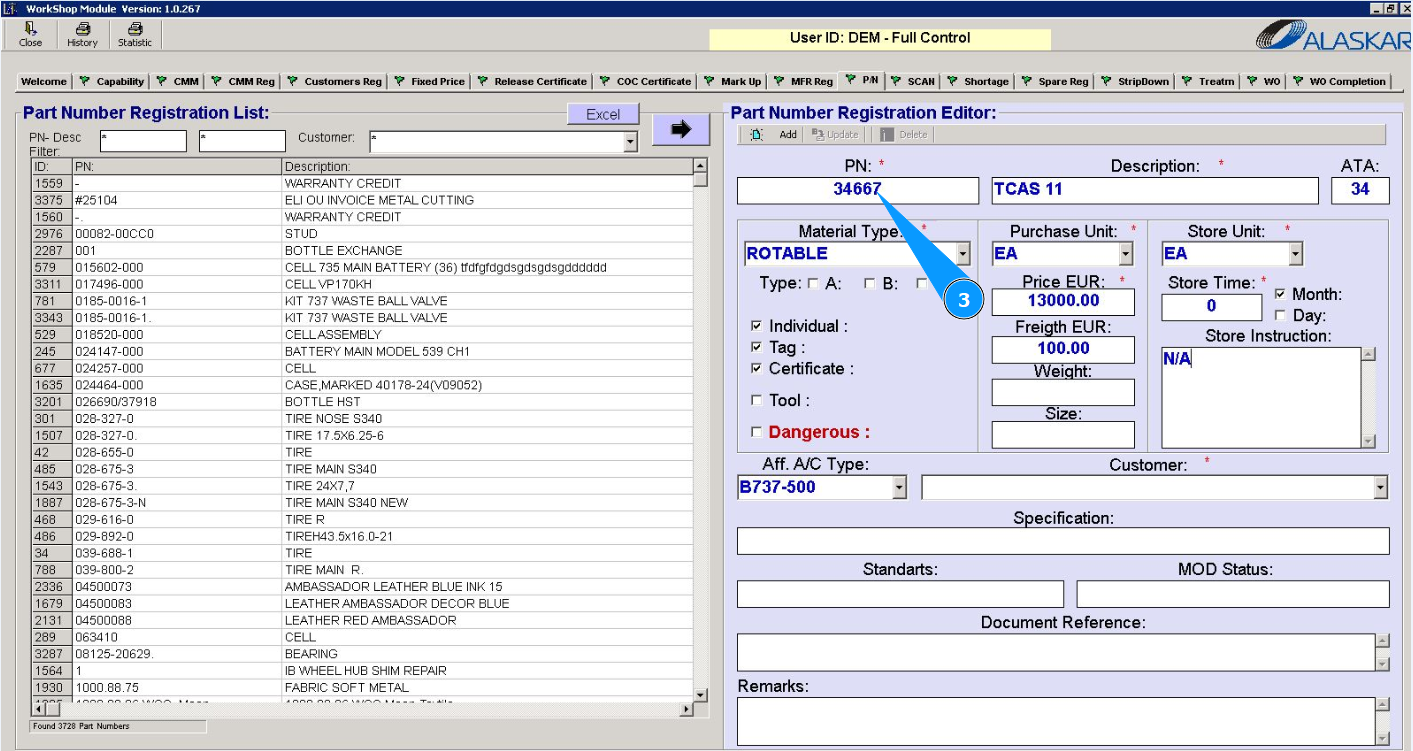
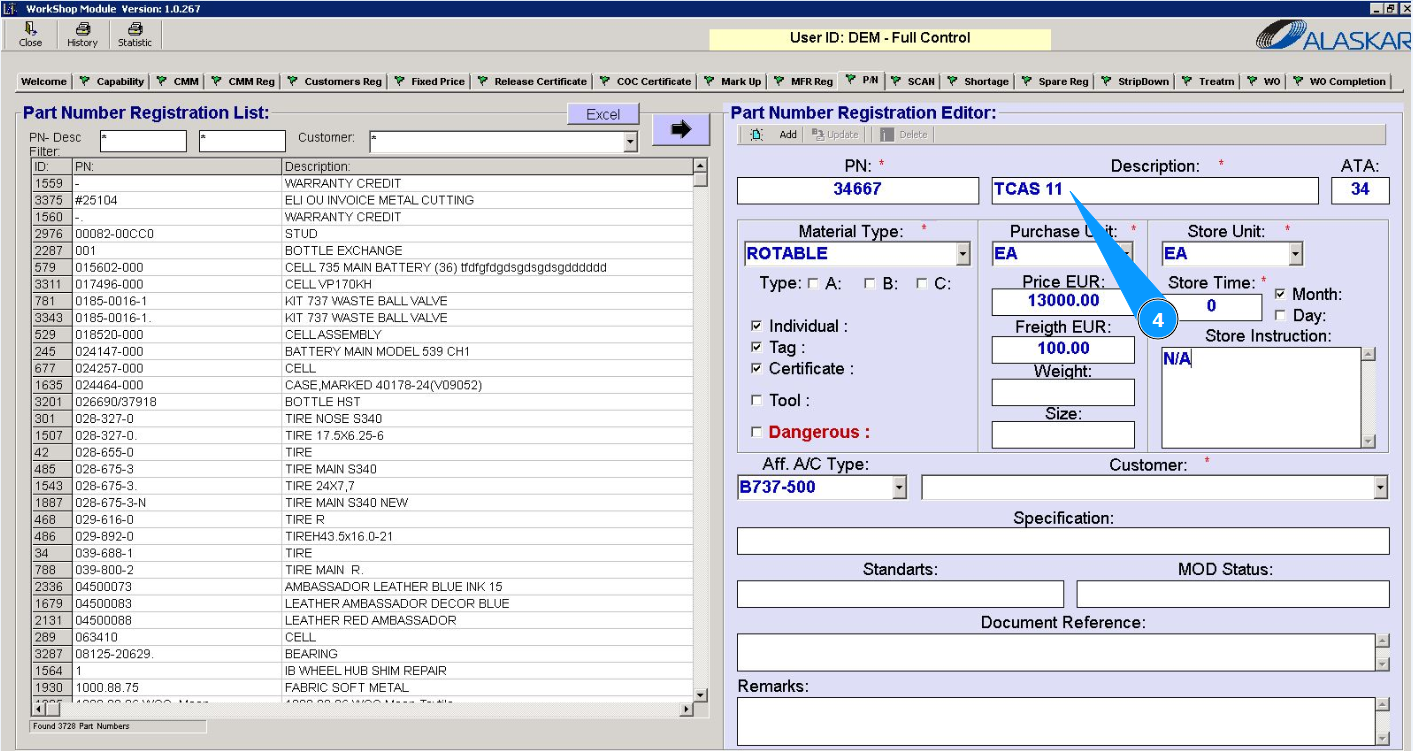
4. Enter the description (name) of the component in the field "Description".
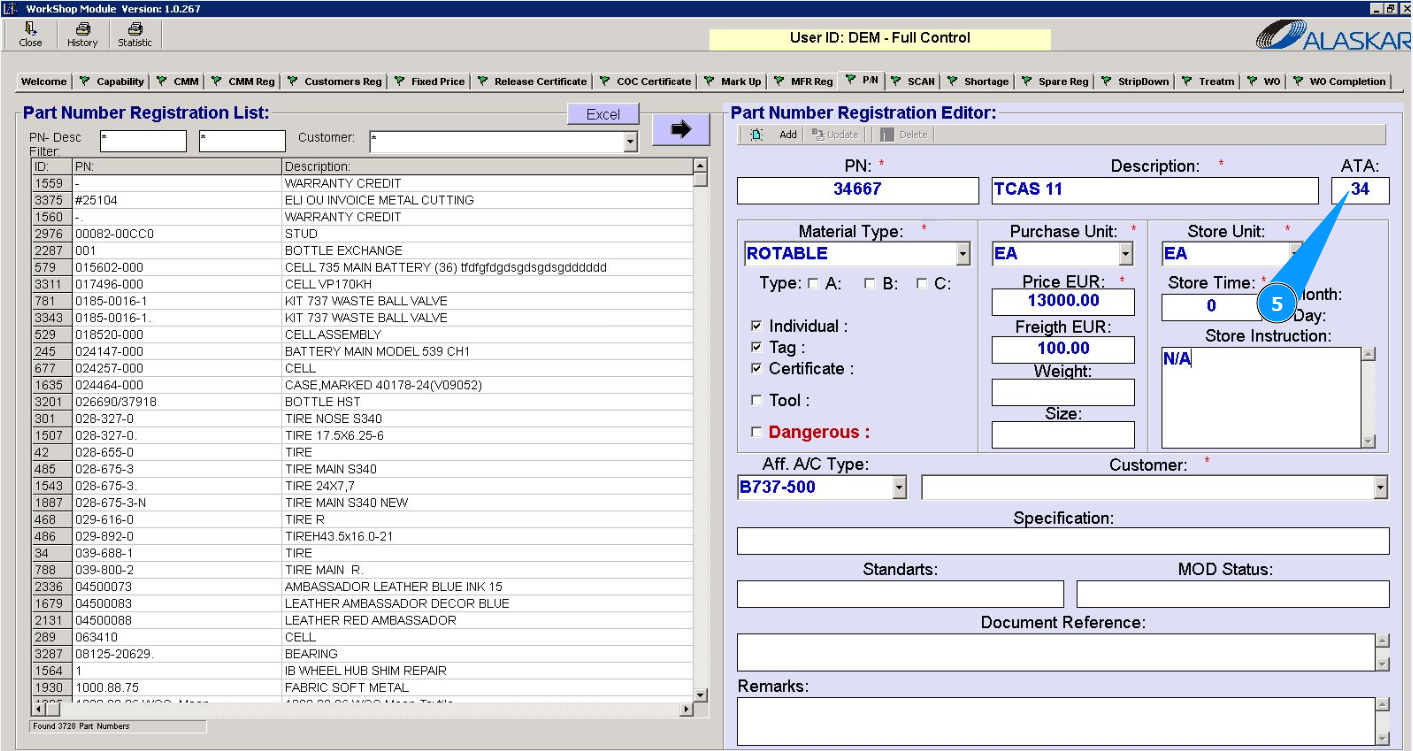
5. If necessary, enter the ATA chapter number in the field "ATA".
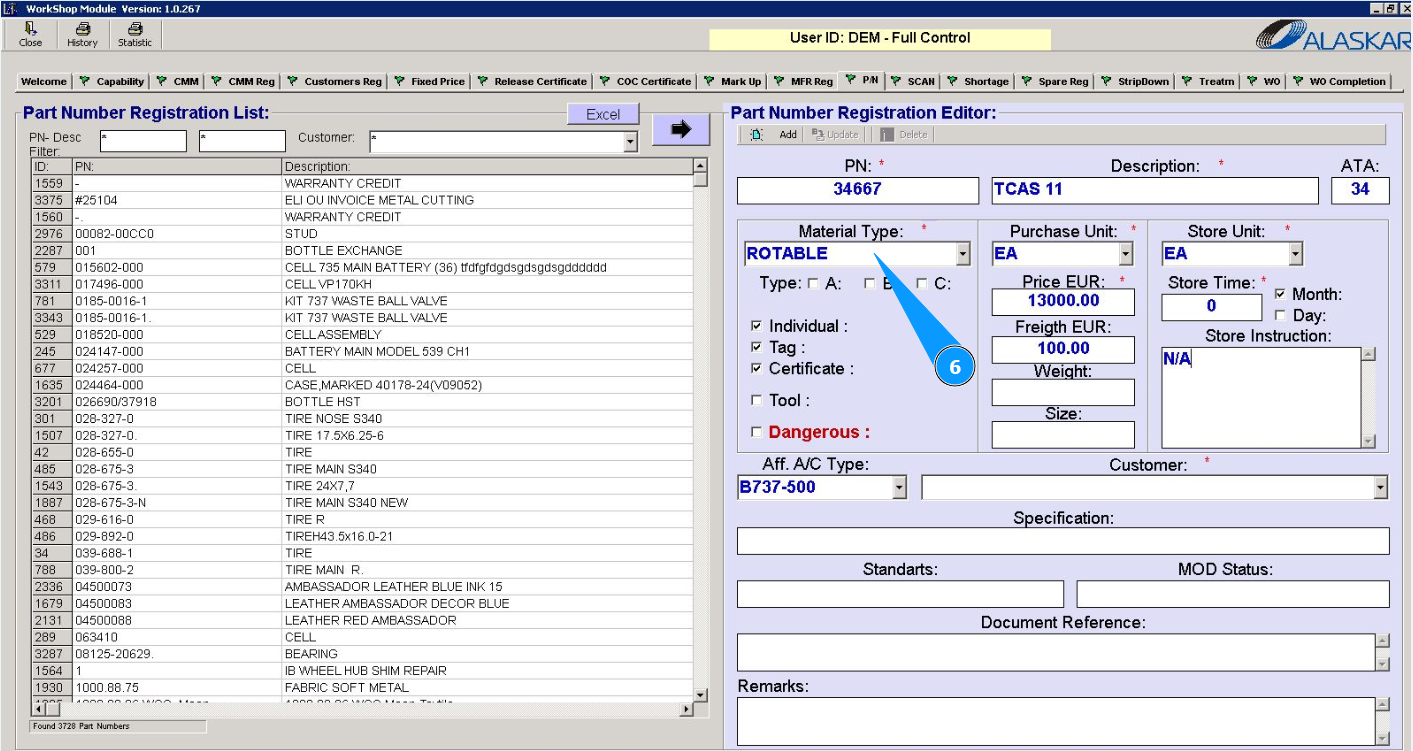
6. For components from the dropdown list, select the material type "Rotable" in the field "Material Type".
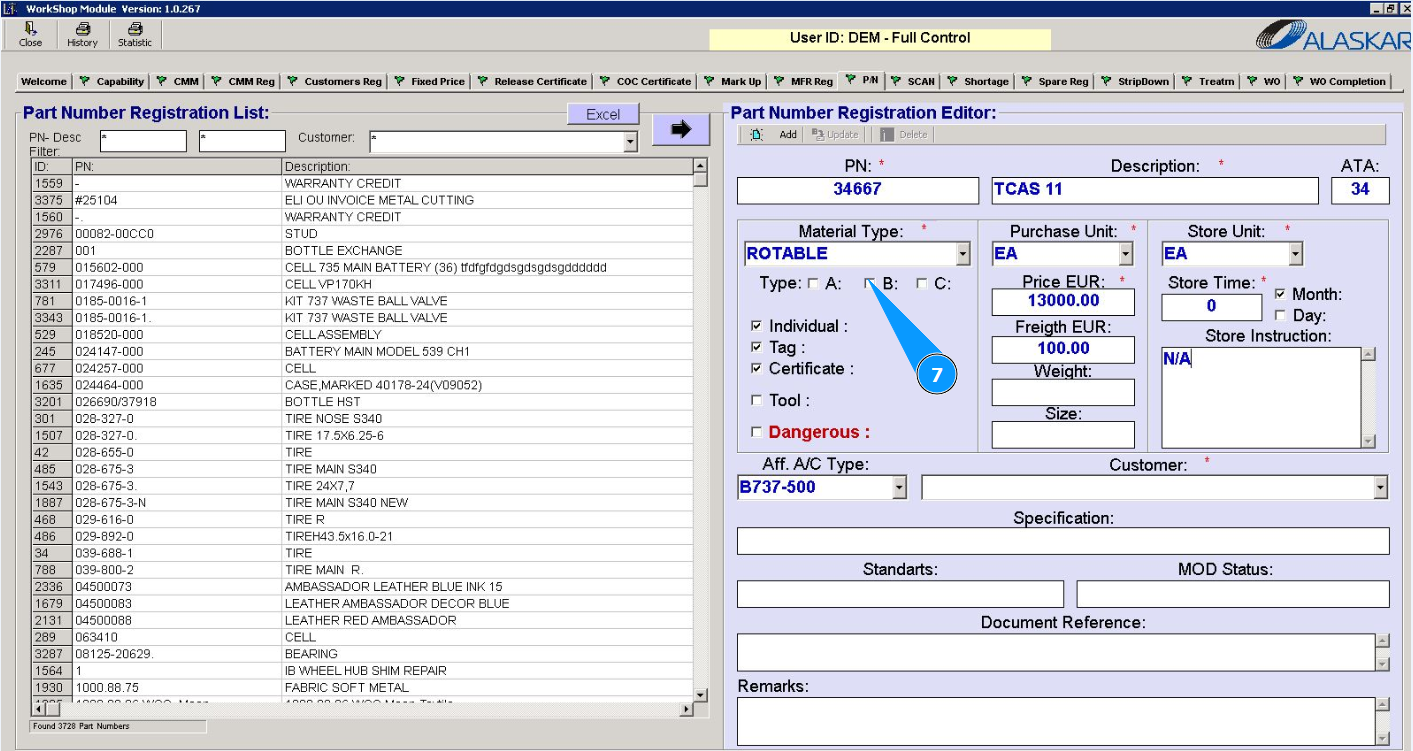
7. Select an additional component type in the field "A", "B", or "C".
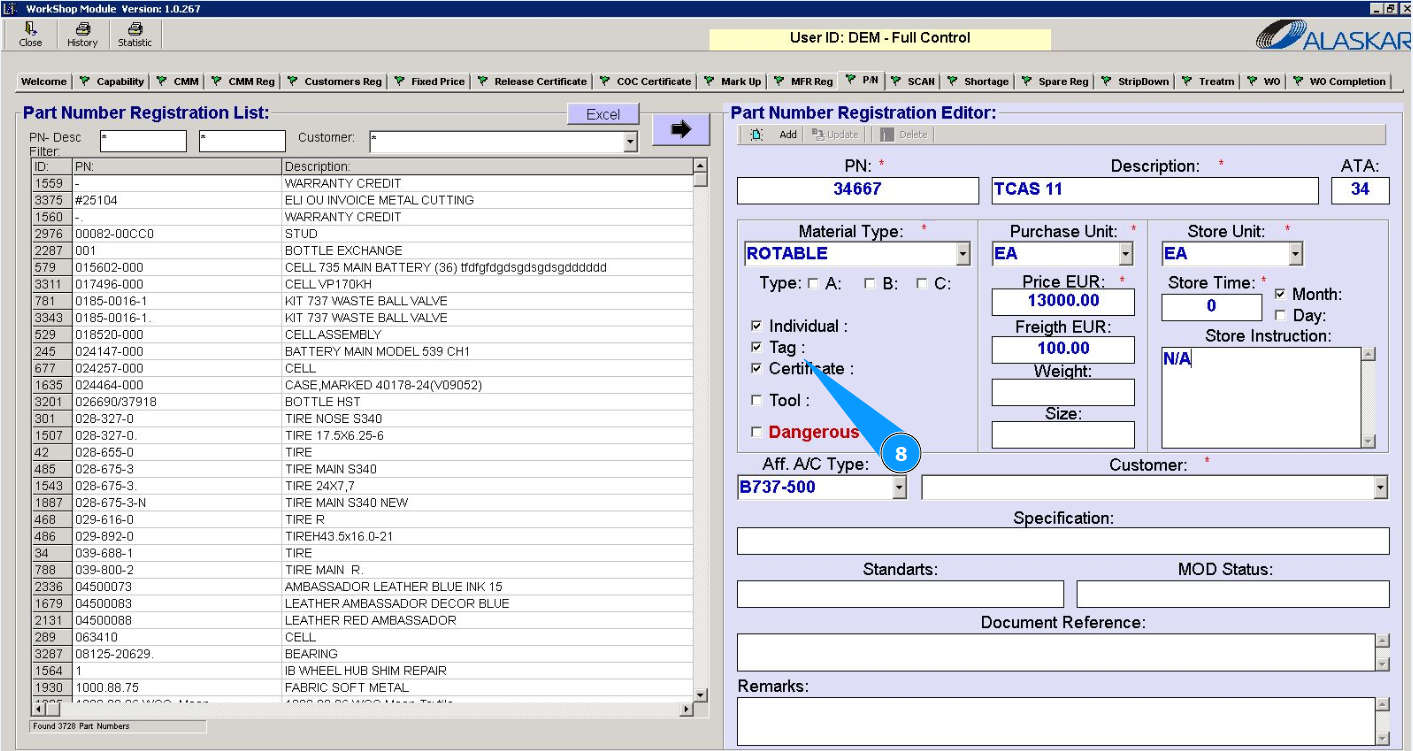
8. Select additional criteria in the appropriate fields.
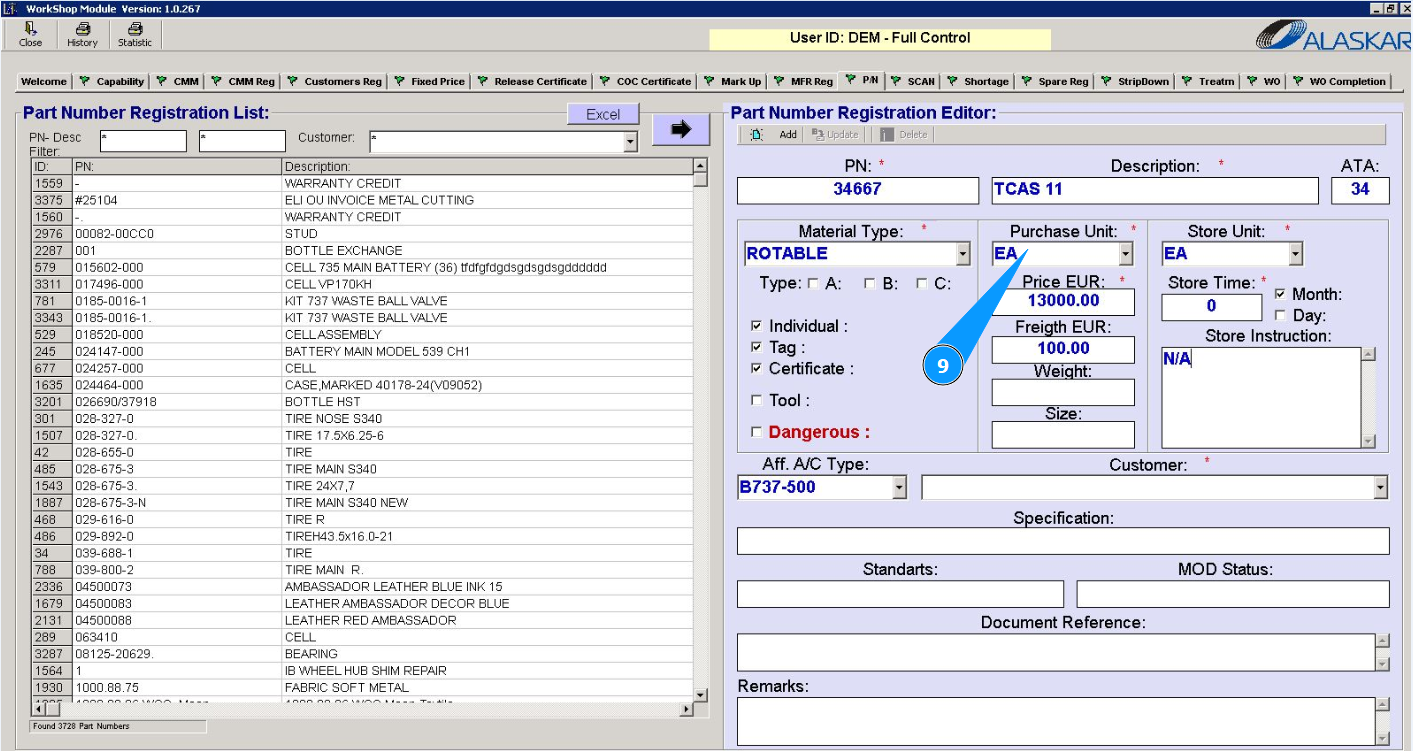
9. Select the unit of measurement for the order (piece, kilograms, E.A., etc.) from the dropdown list in the field "Purchase Unit".
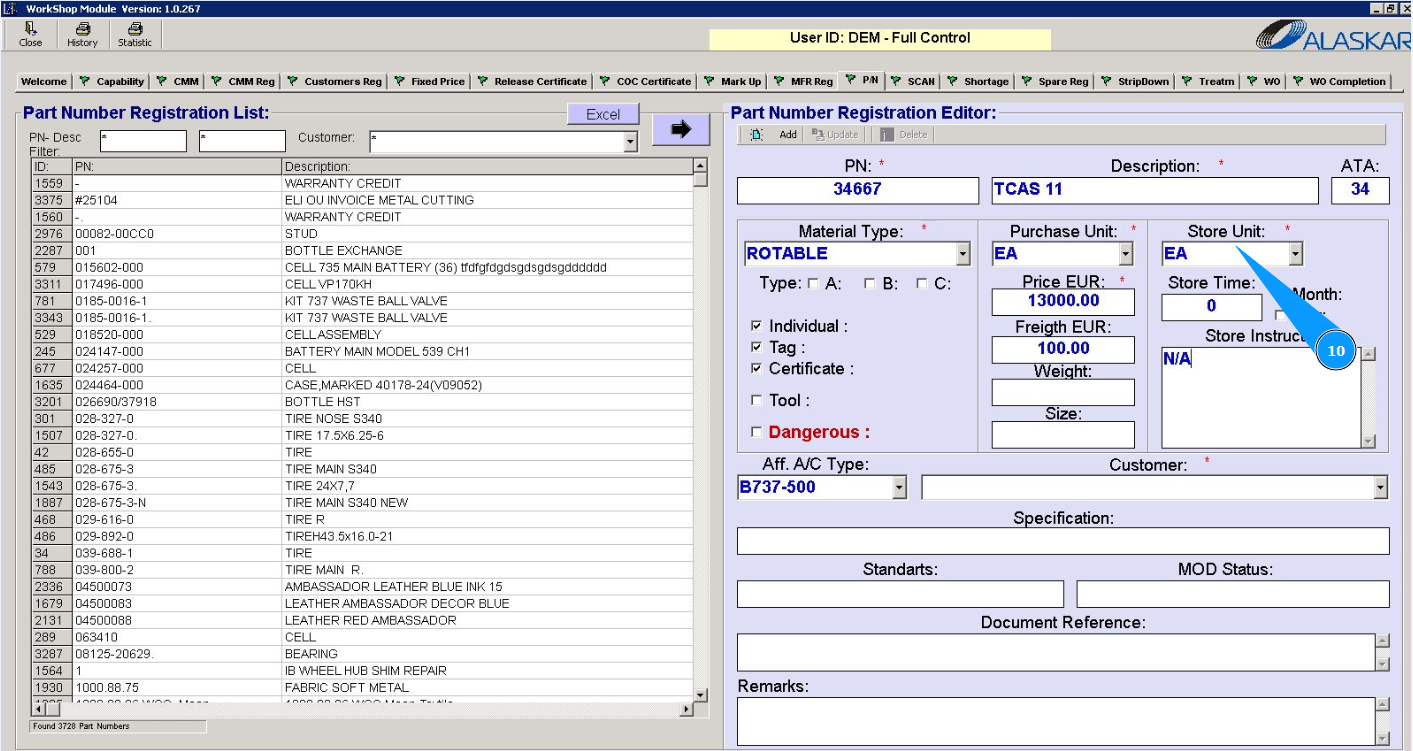
10. Select storage units (piece, kilograms, E.A., etc.) from the dropdown list in the field "Store Unit".
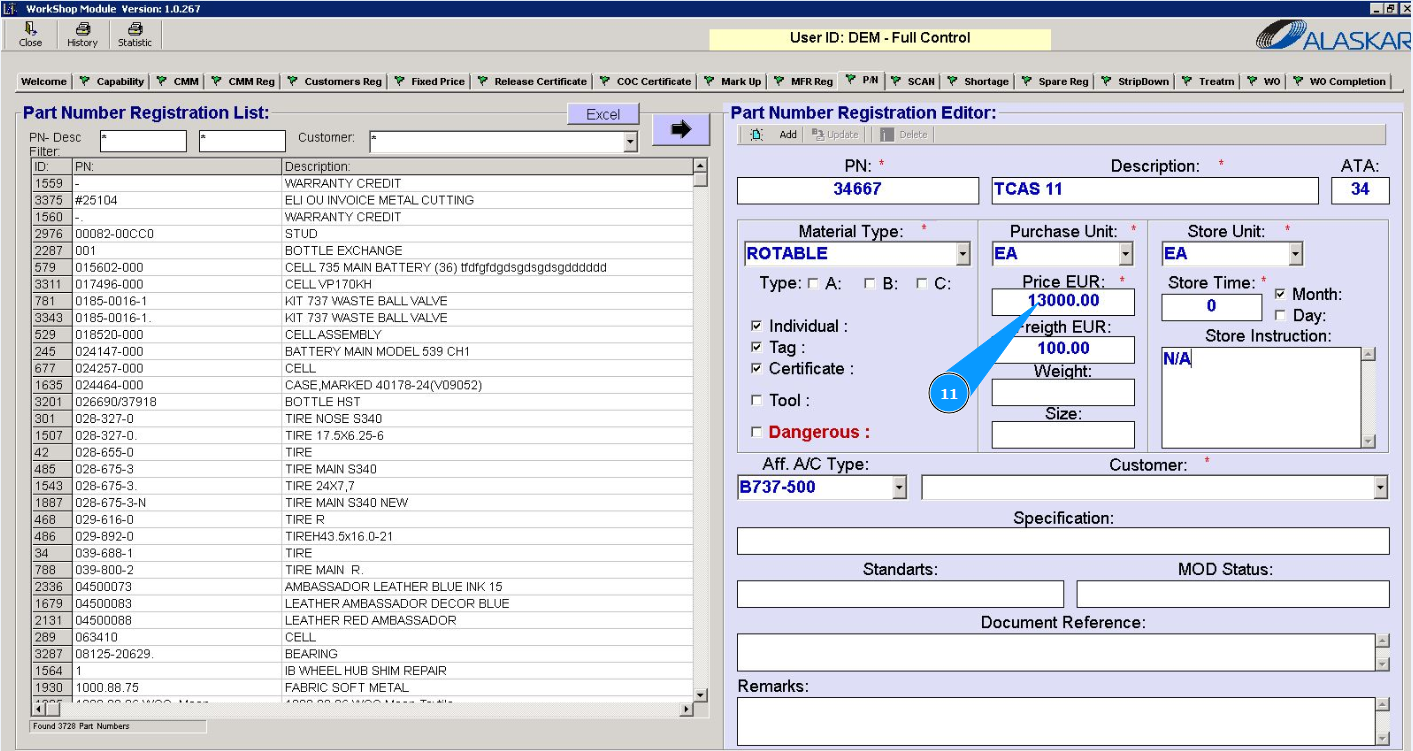
11. Enter the cost of the component in the field "Price EUR".
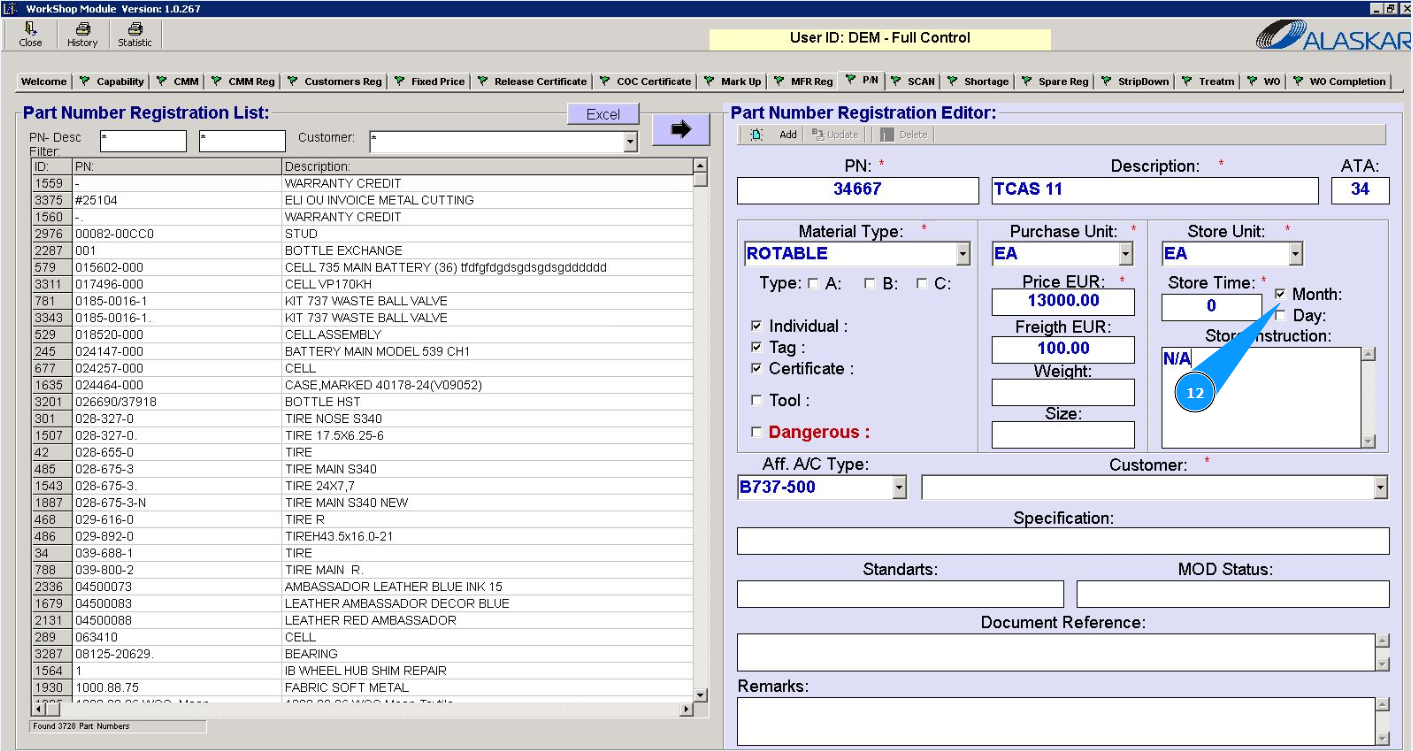
12. Select storage time limit units in the appropriate fields.
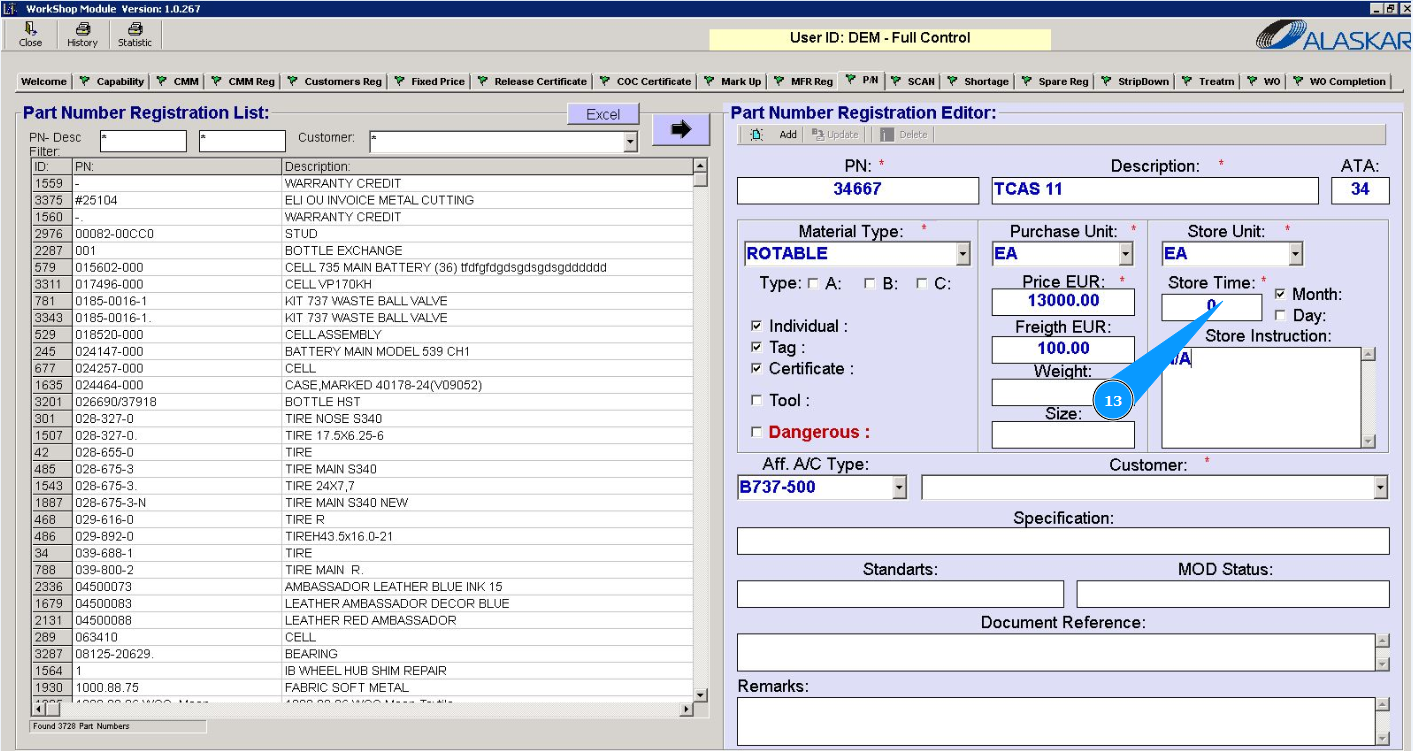
13. Enter restrictions on the storage time of the component in the field "Store Time".
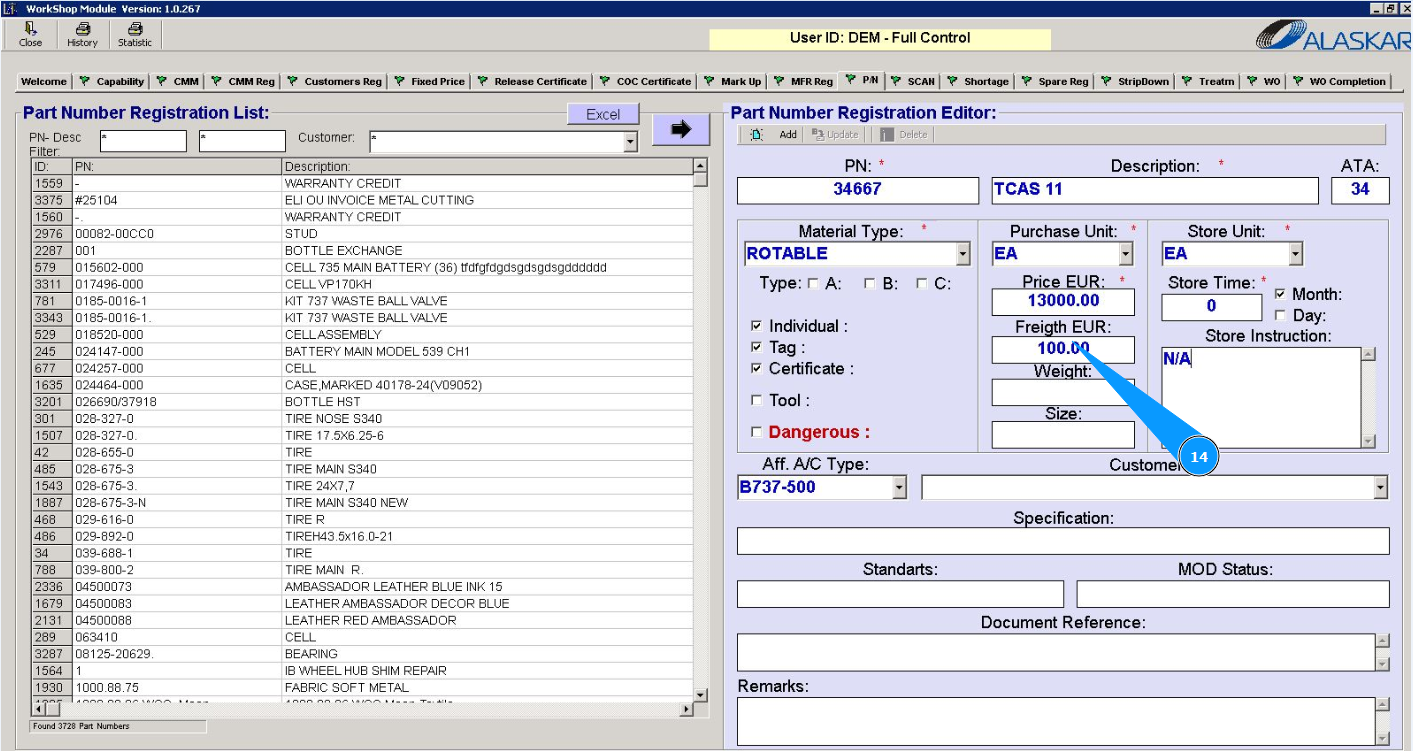
14. If necessary, enter the cost of transportation in the field "Freight EUR".
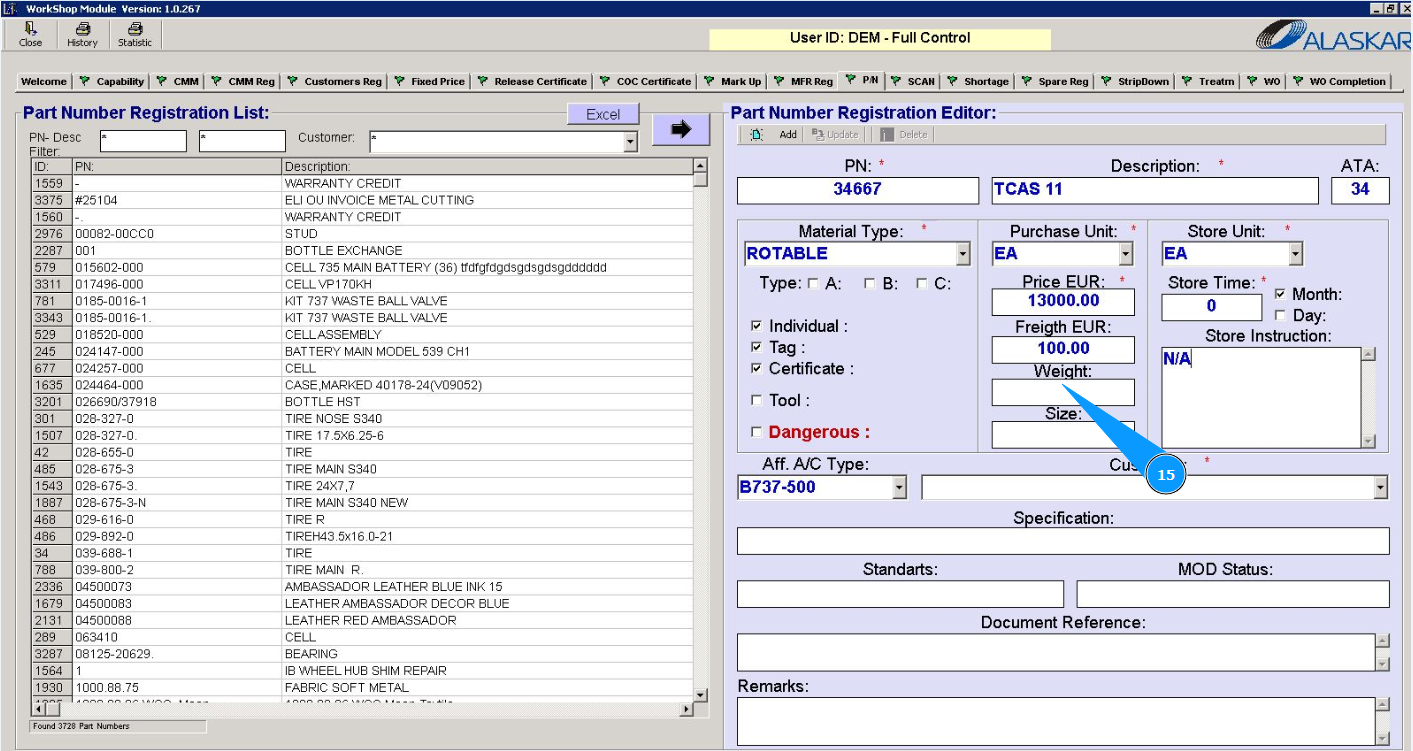
15. If necessary, enter the weight of the component in the field "Weight".
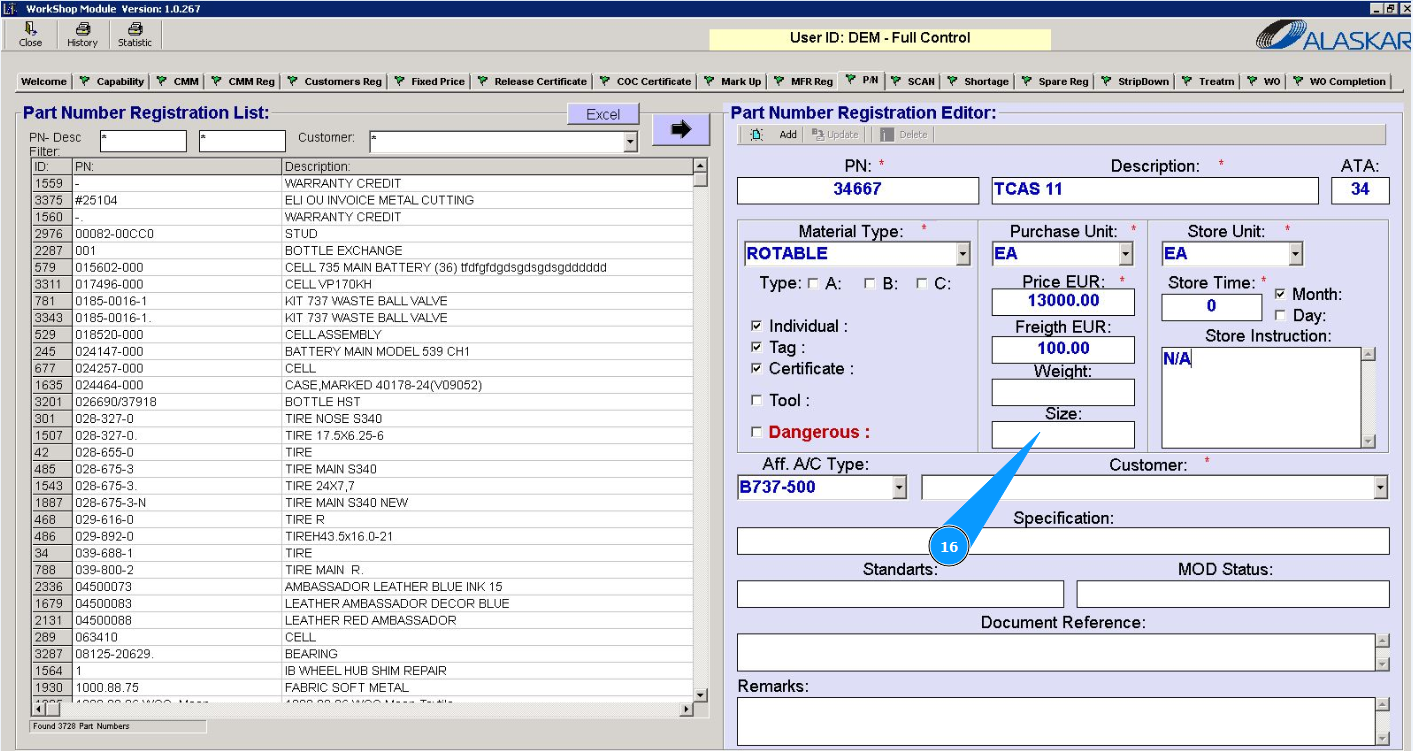
16. If necessary, enter the dimensions of the component in the field "Size".
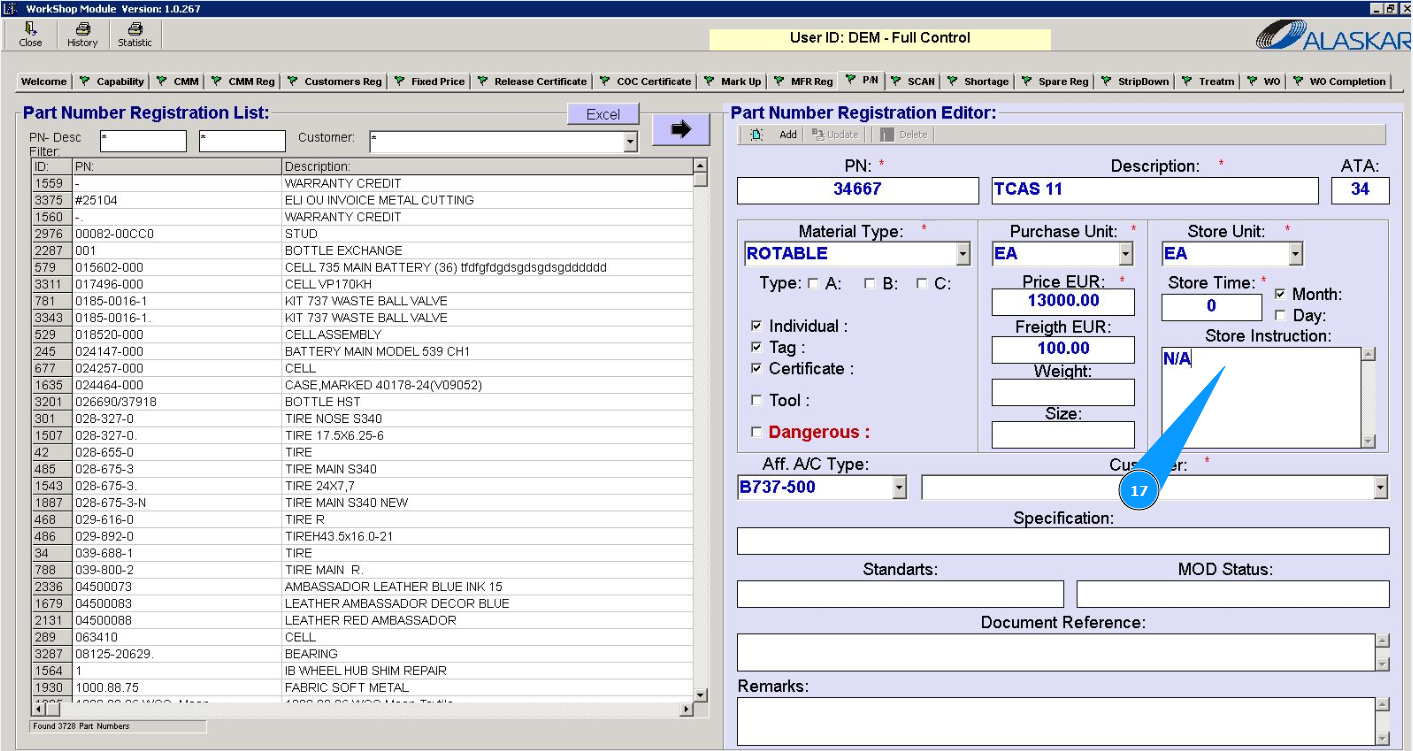
17. If necessary, enter instructions for storing the component in the field "Store Instruction".
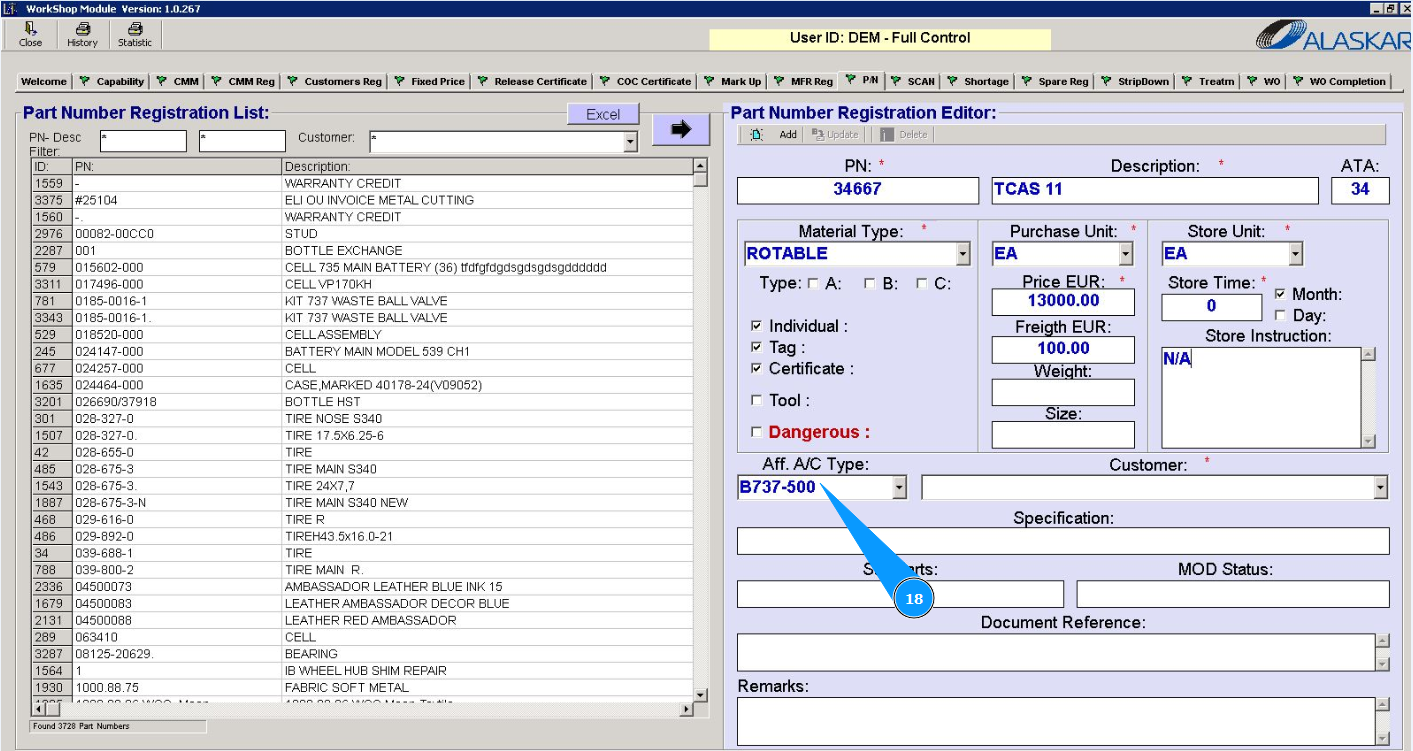
18. Select the aircraft type from the dropdown list in the field "Aff. A/C Type".
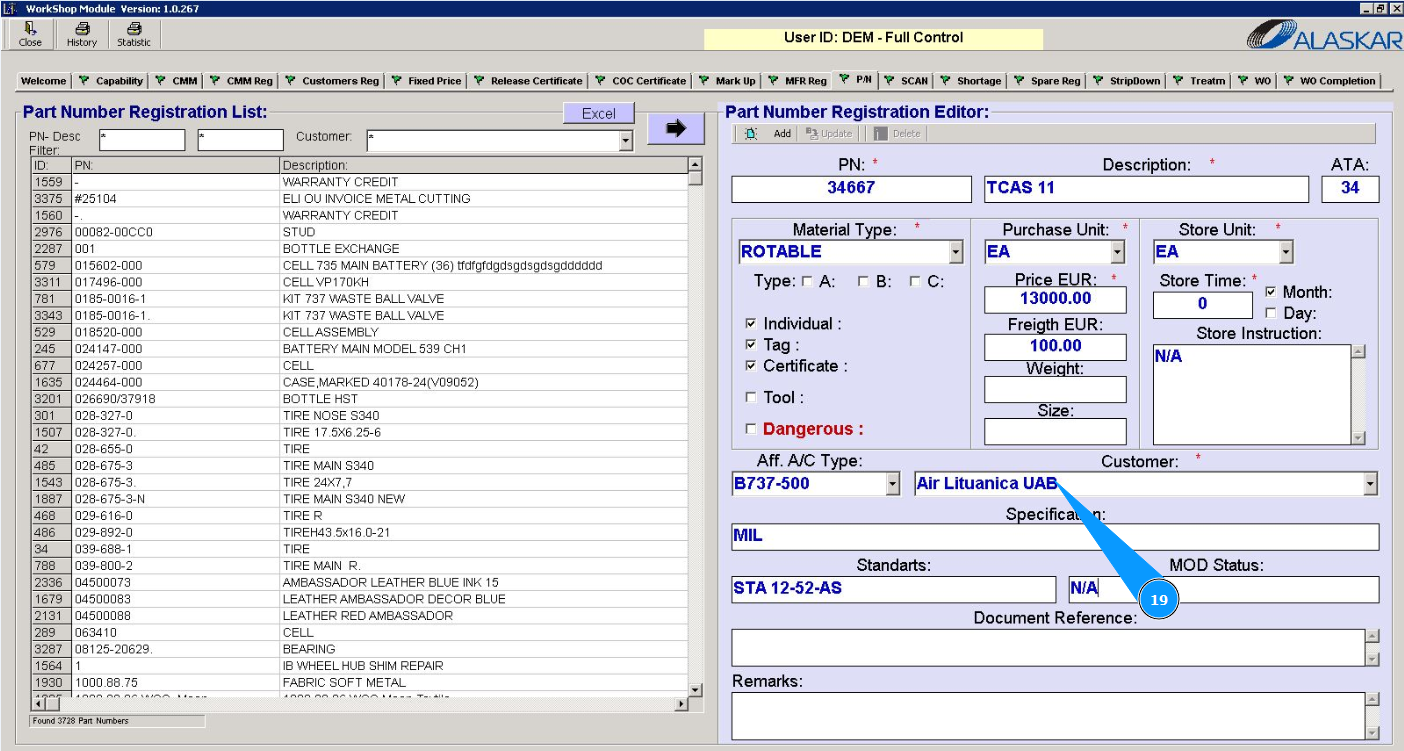
19. Select a customer from the dropdown list in the field "Customer".
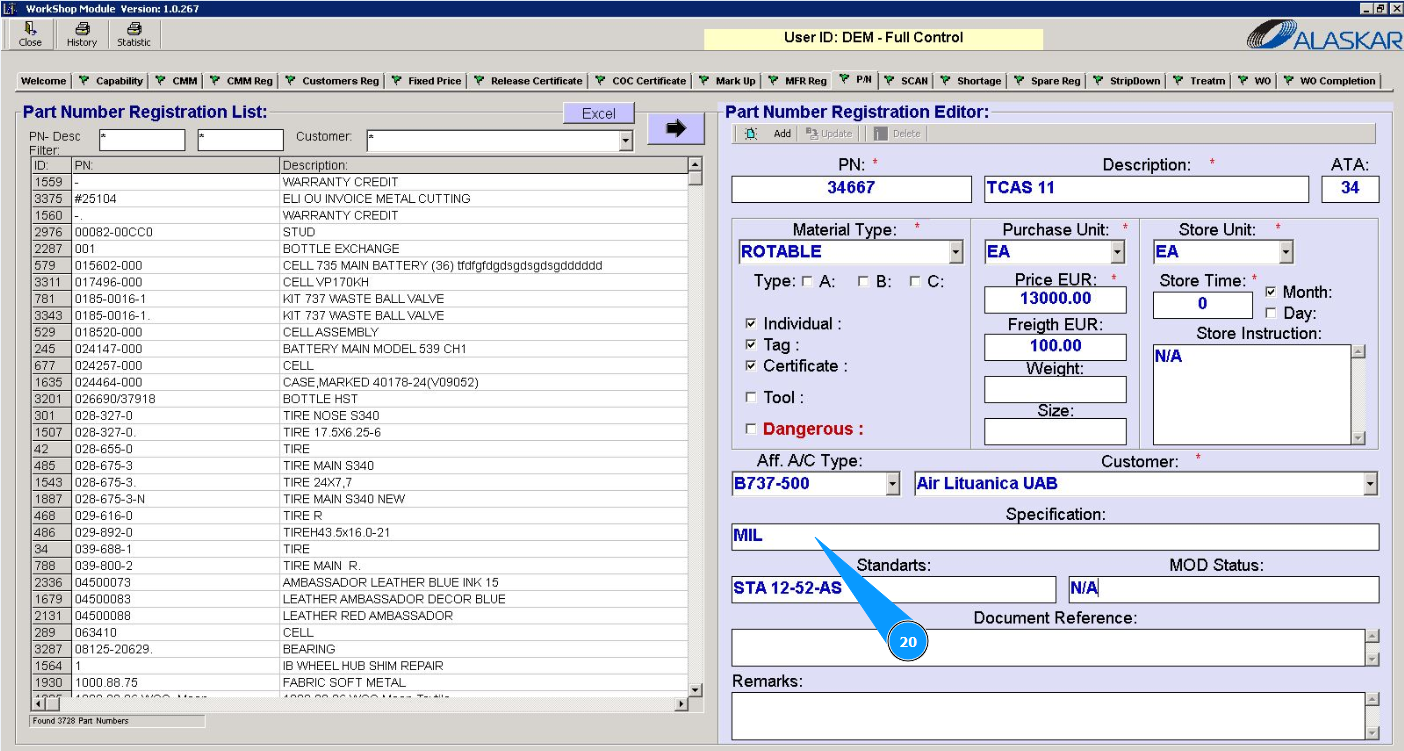
20. If necessary, enter the component specification in the field "Specification".
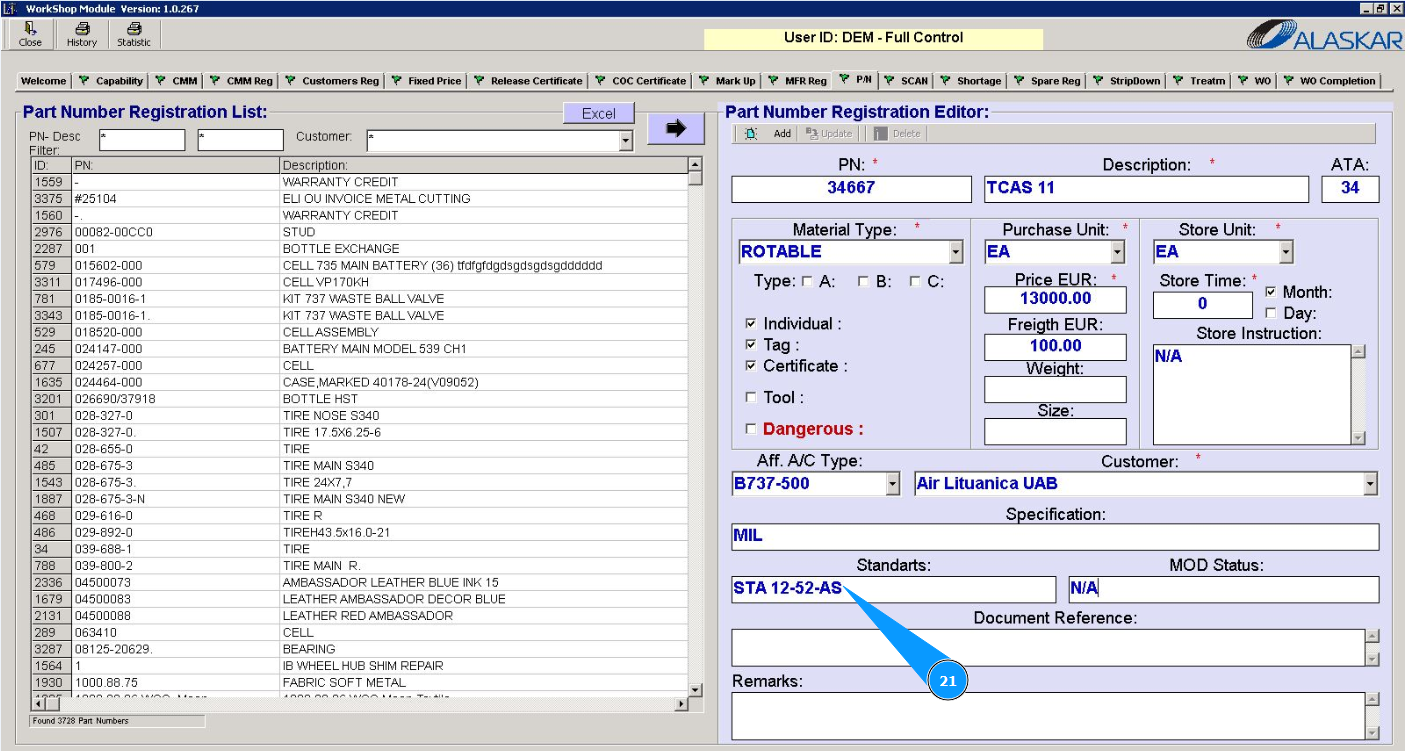
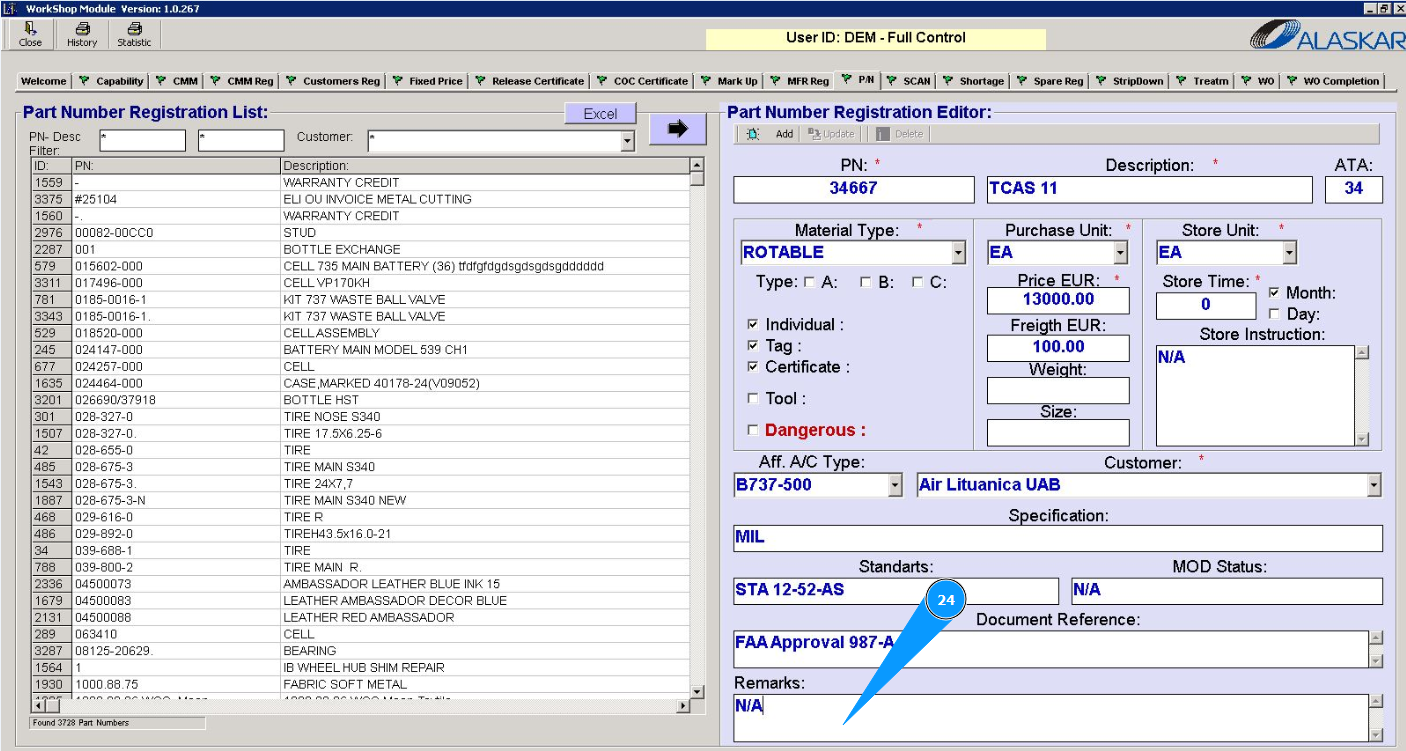
21. If necessary, enter the component standard in the field "Standards".
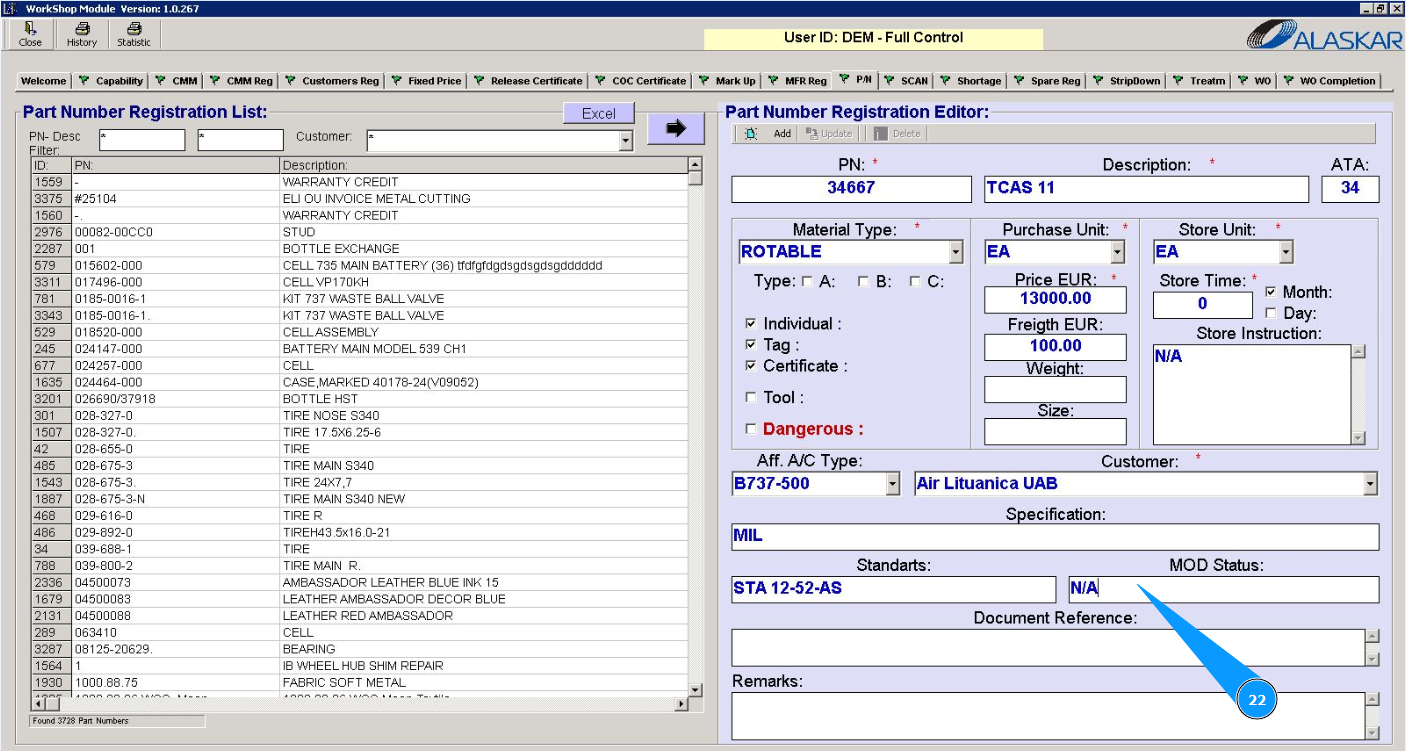
22. If necessary, enter the component modification number in the field "Mod. Status".
23. If necessary, enter reference of documentation in the field "Document Reference".
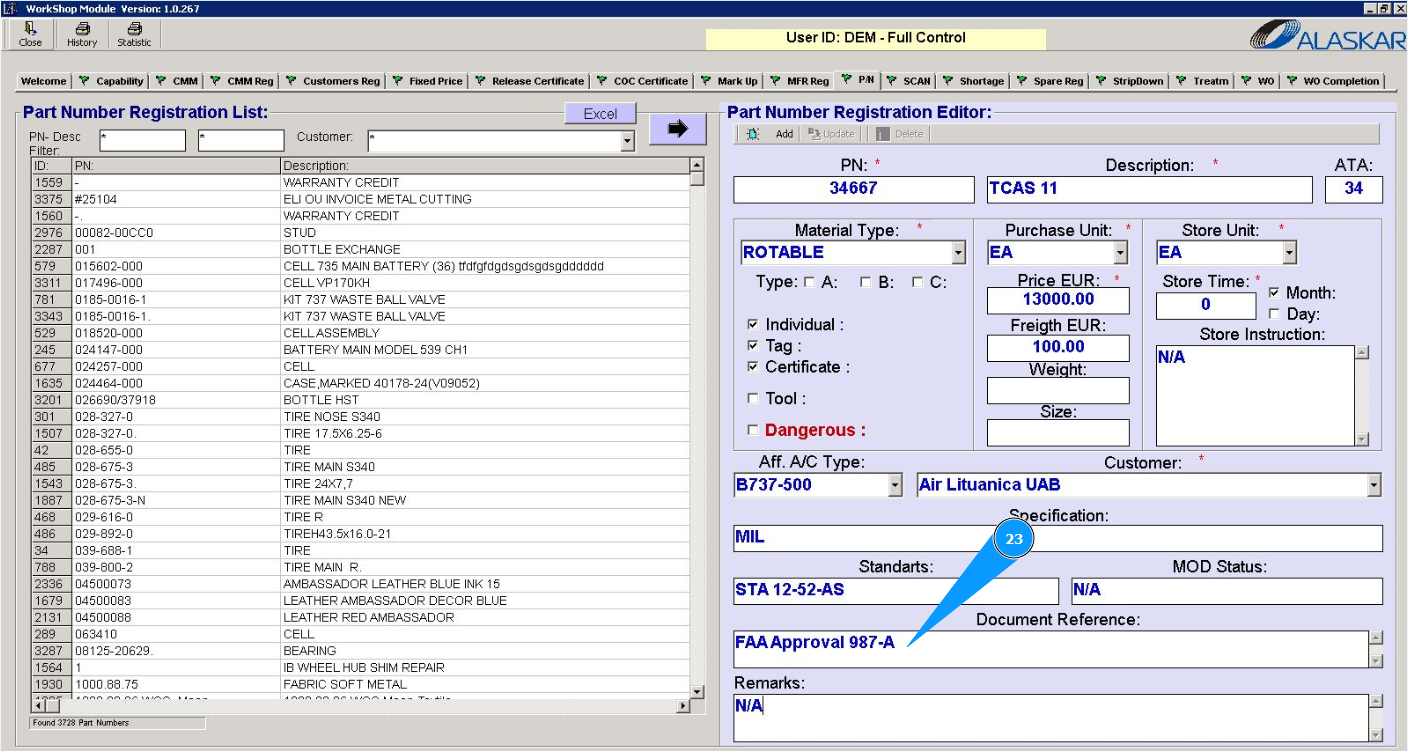
24. If necessary, add any comments in the field "Remarks".
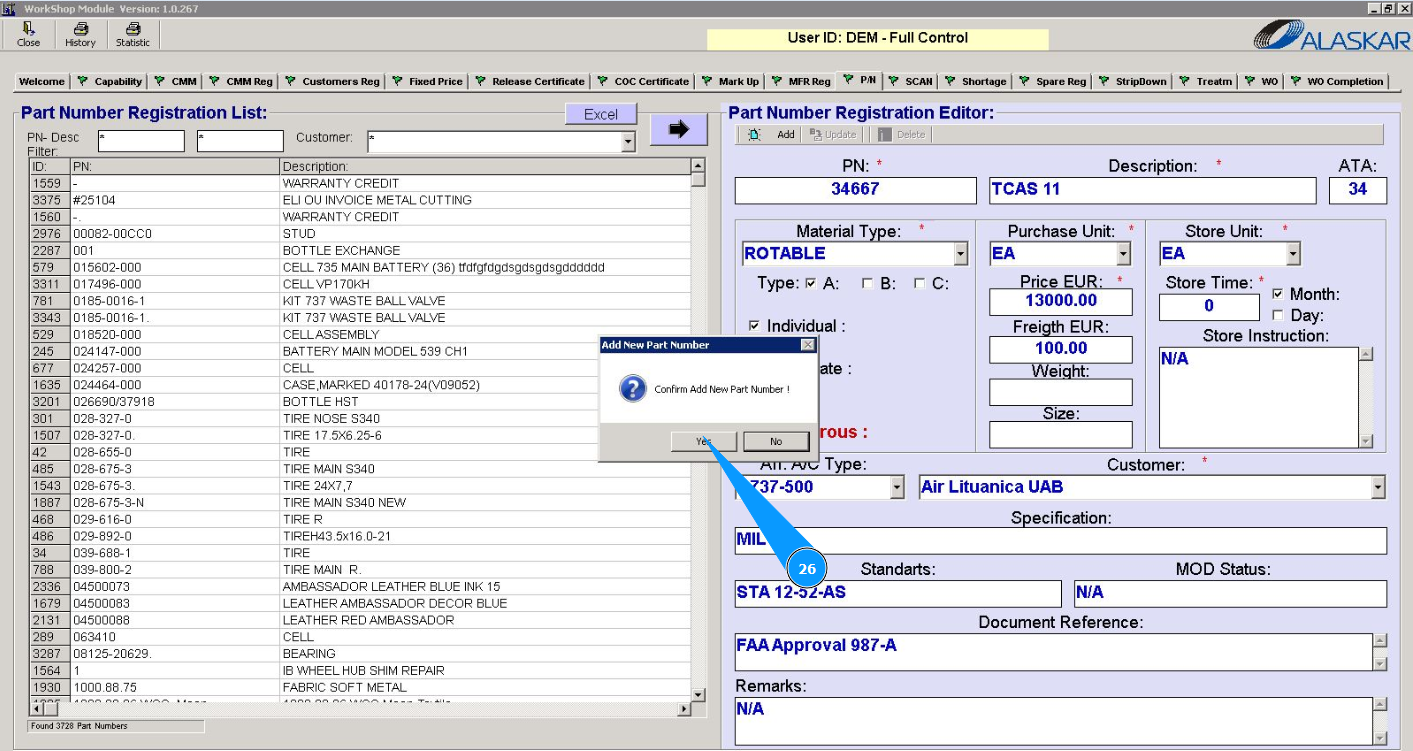
25. Click on the button "Add" to add the part number data to the program.

26. Click on the button "Yes" to confirm adding data to the program.
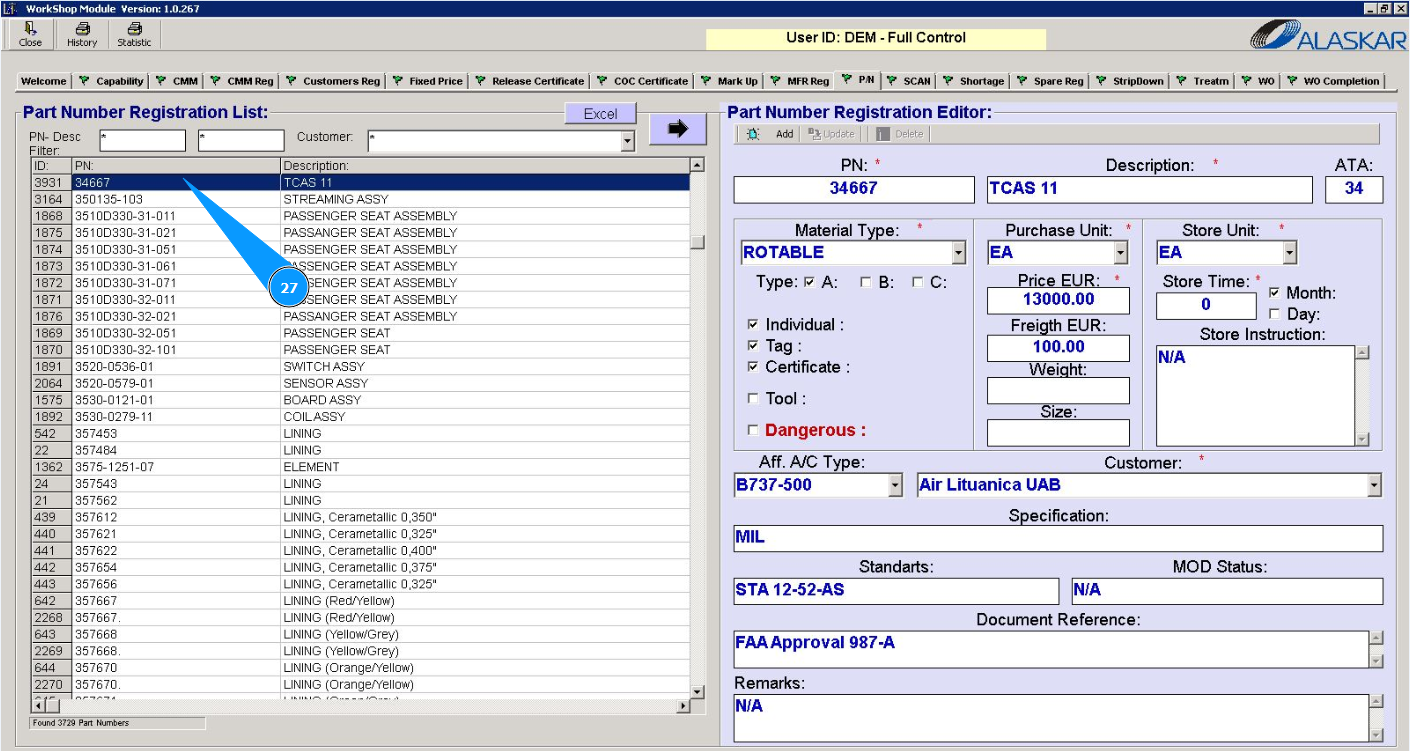
27. Check that your part number is displayed in the window "Part Number Registration List".