How to set up tool substitution
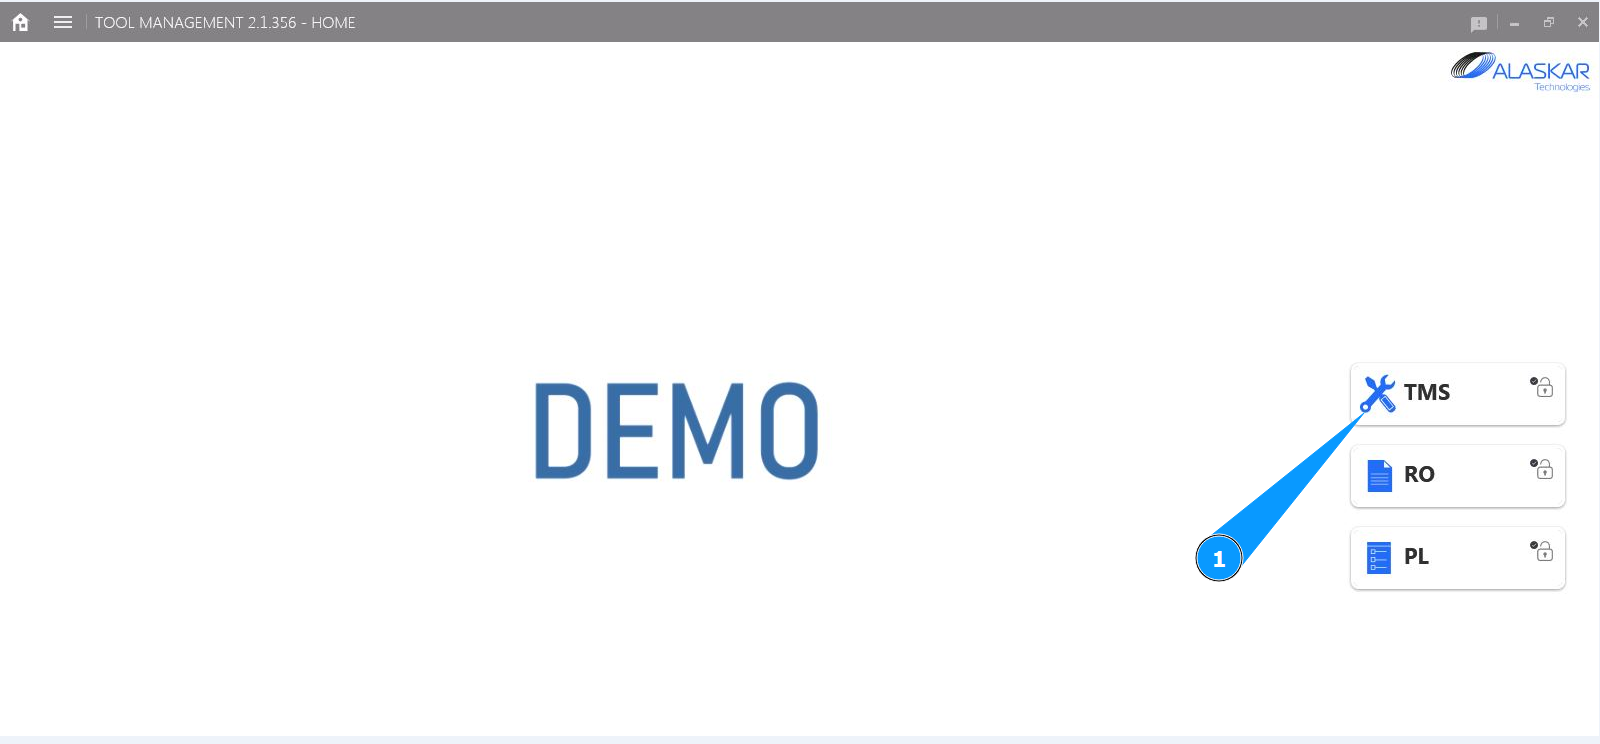
1. In order to set up tool substitution, go to the submodule "TMS".
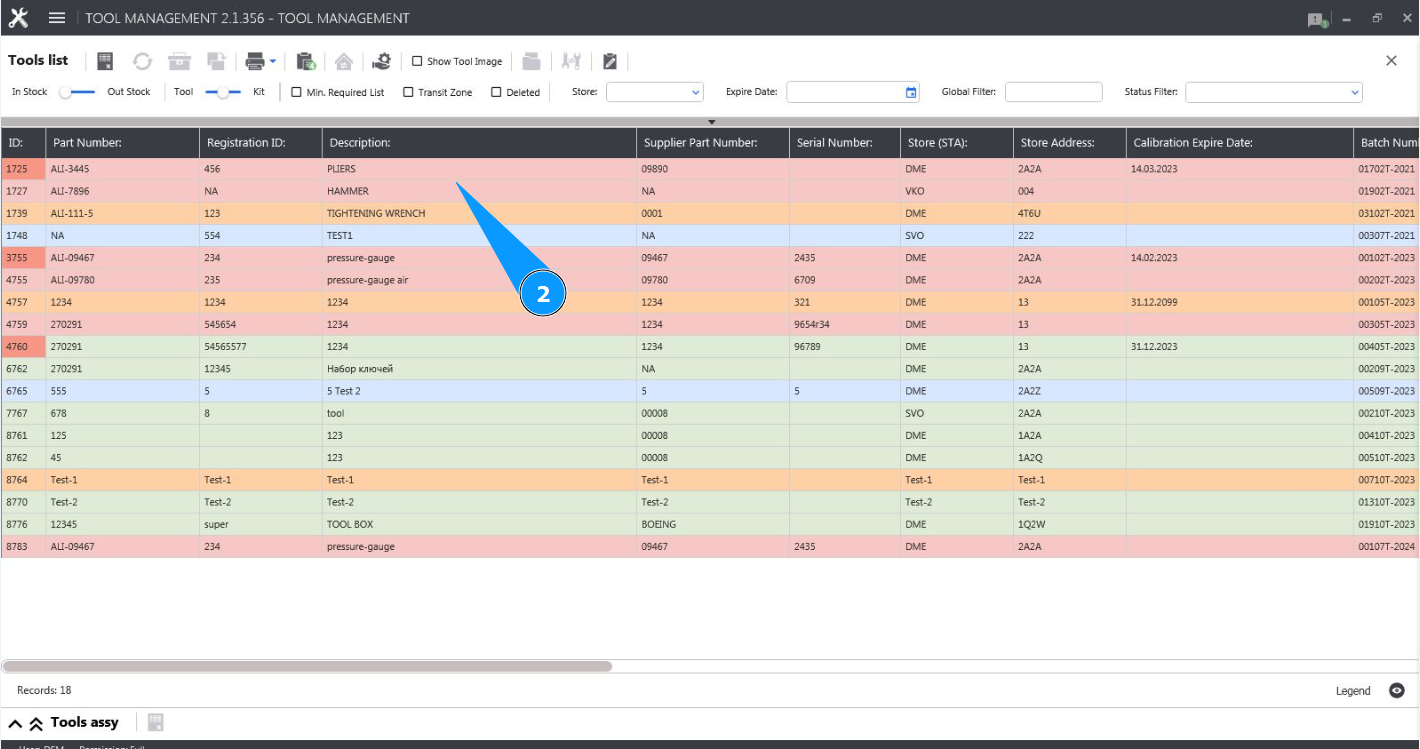
2. Select the required line with the tool and click on it in the window "Tool List".
3. Click on the button "Substitution Editor" to open the tool substitution editor.

4. Check that the editor is open and accessible in the "Tool Substitution Registration" tab.

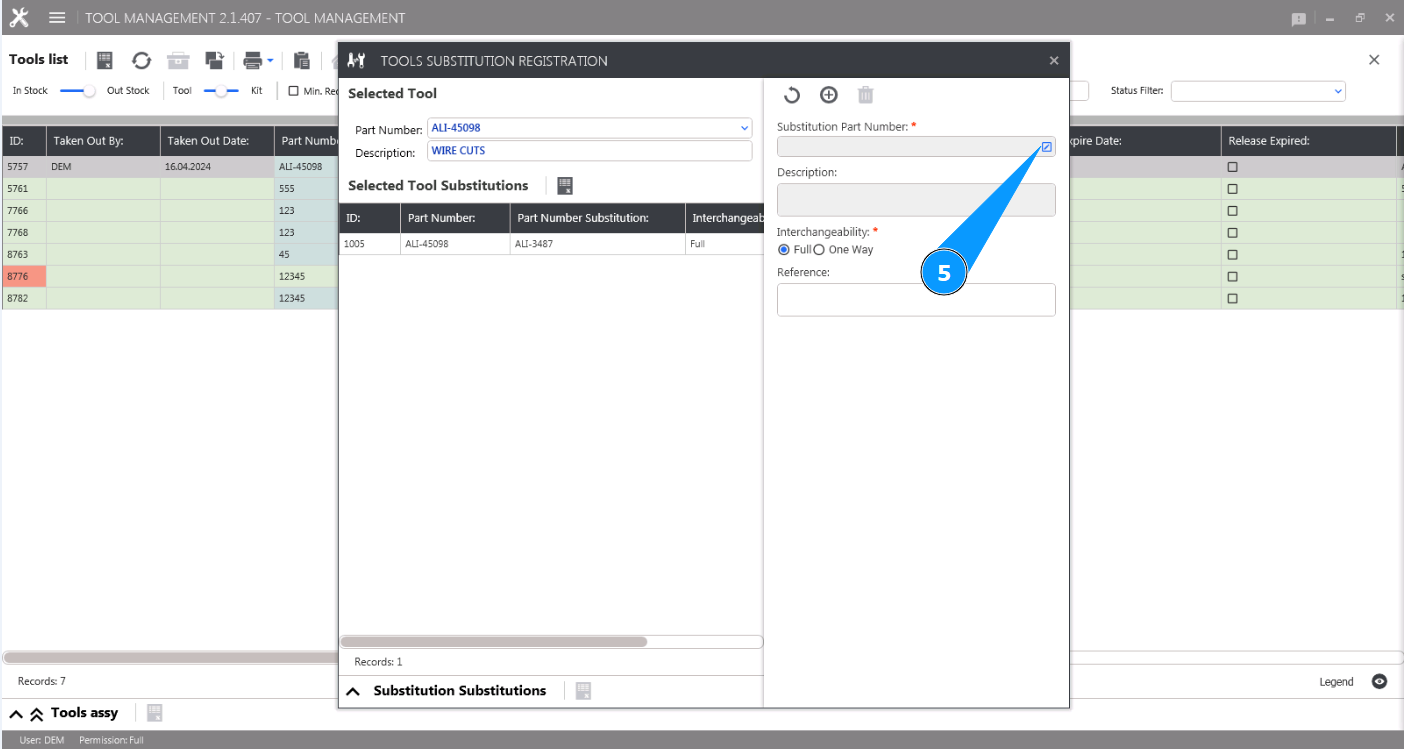
5. Click on the dropdown list in the field "Substitution Part Number".
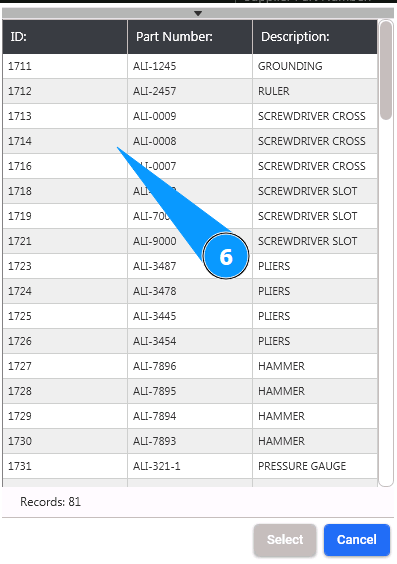
6. From the drop-down list, select the interchangeable tool you want to design, click on the corresponding line.
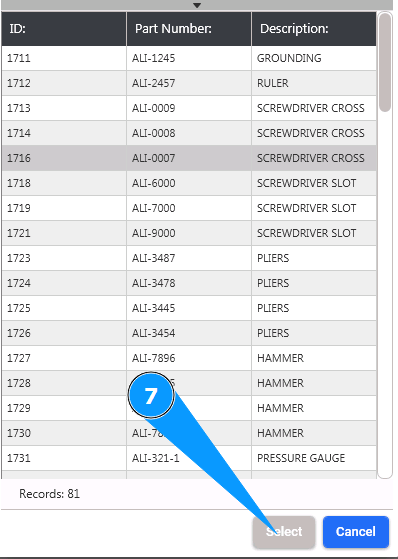
7. Click on the button "Select" to select the required to be substituted tool.
8. Check that the part number and description of the substituted tool are displayed in the field "Substitution Part Number".
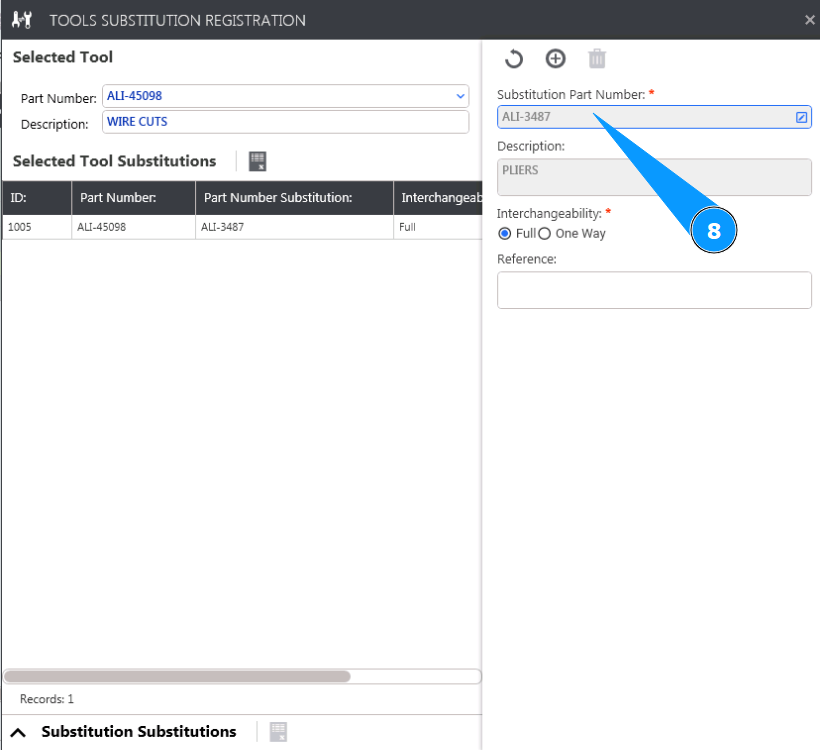
9. Enter the type of interchangeability: full interchangeability or one-way (when tool 123 can replace tool 321, but 321 cannot replace 123). Check the appropriate boxes in the fields: "Full" or "One Way".
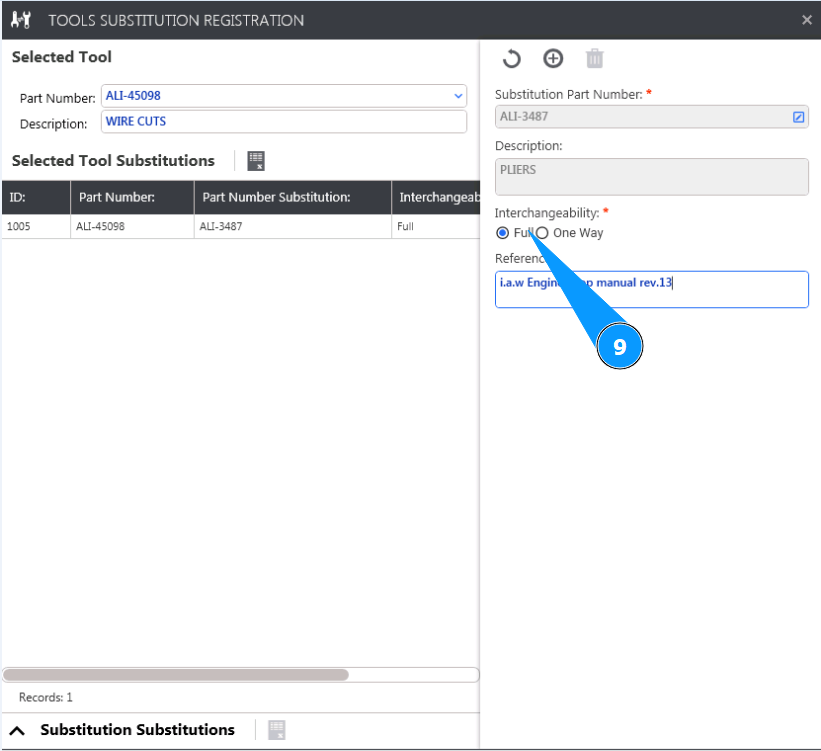
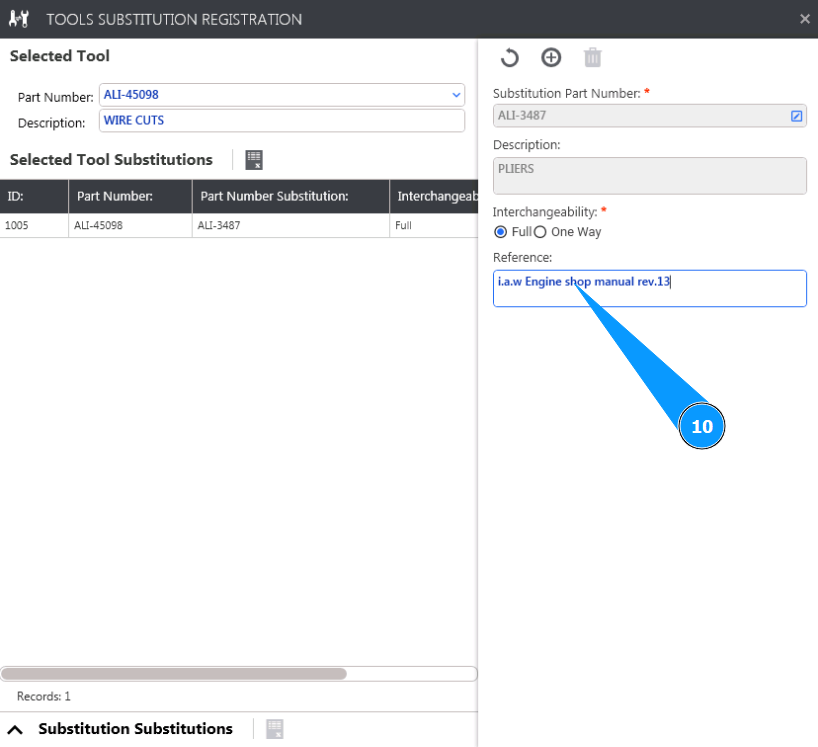
10. If necessary, add a reference to the document establishing interchangeability in the field "Reference".
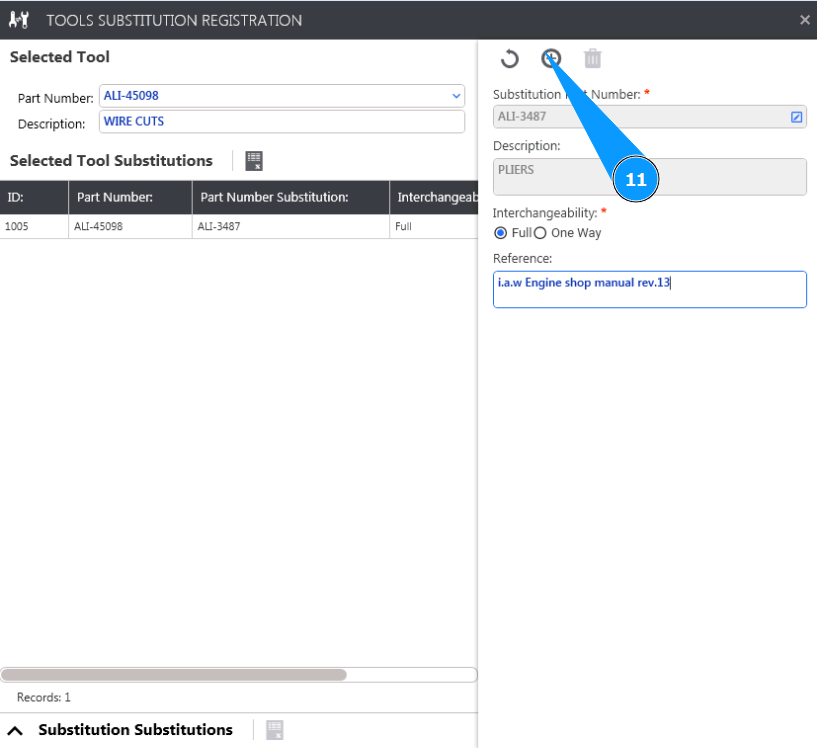
11. Click on the button "Add" to add the interchangeable tool to the list.
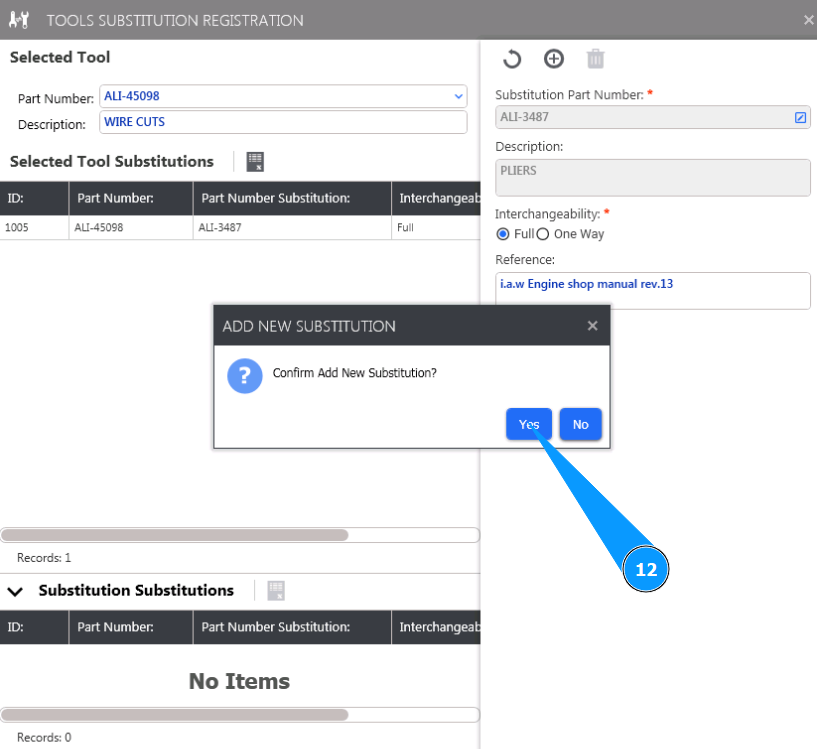
12. Click on the button "Yes" to confirm adding new substituted tool.
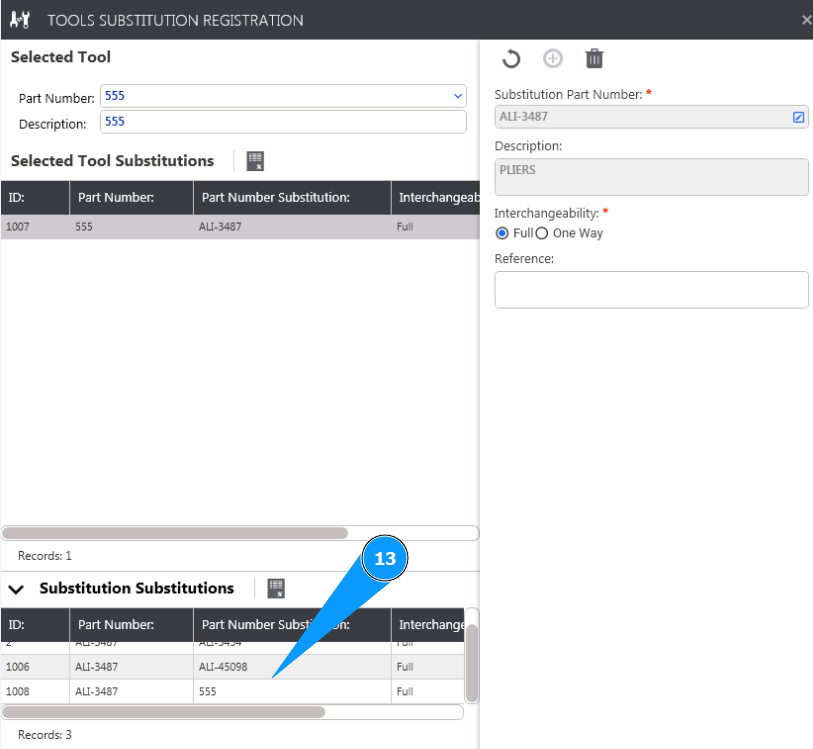
13. Check that the new substituted tool is displayed in the window "Substitution Substitutions".