How to add a new tool to the tool store
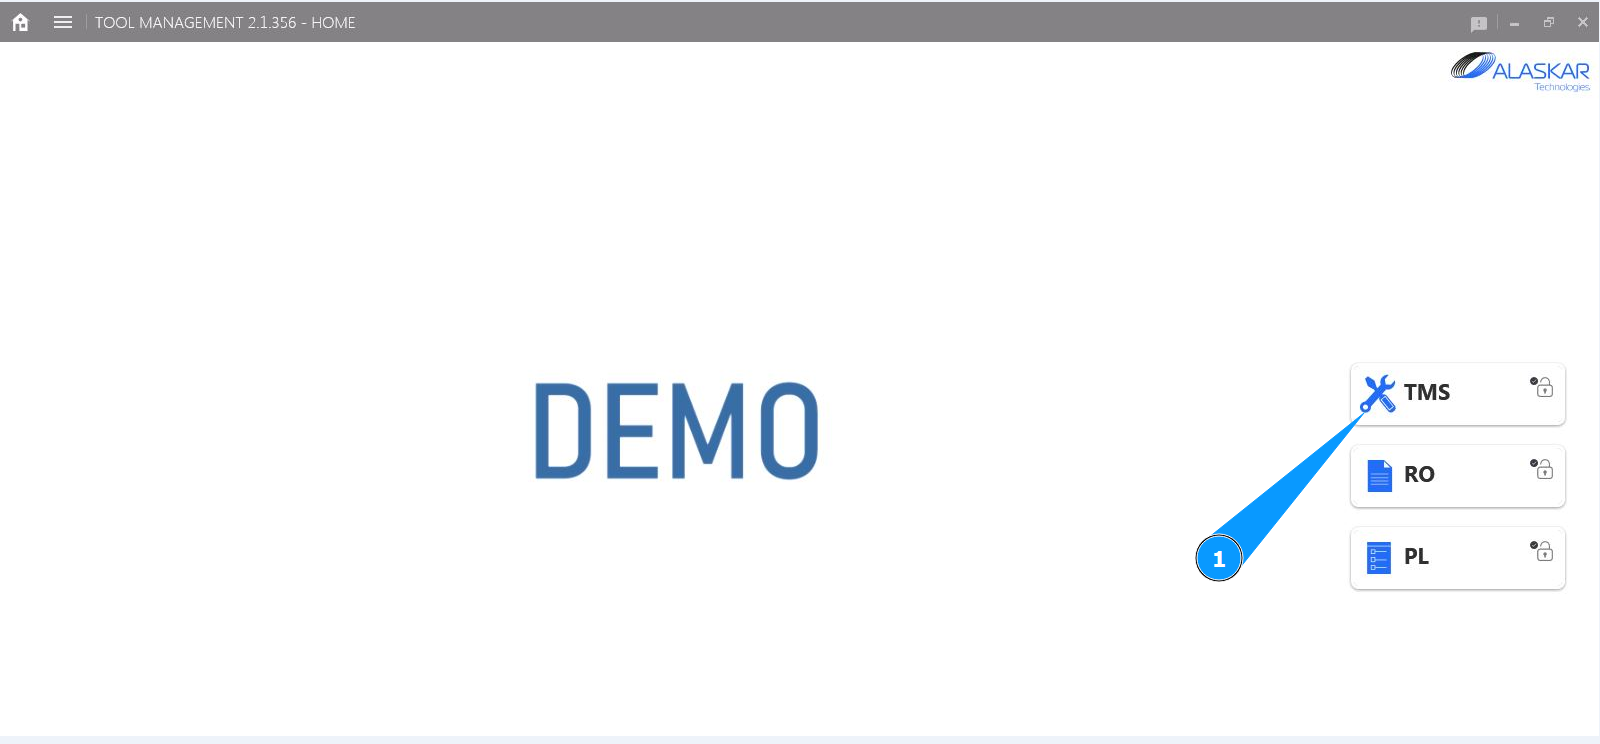
1. In order to add a new tool to the tool store, go to the submodule "TMS".
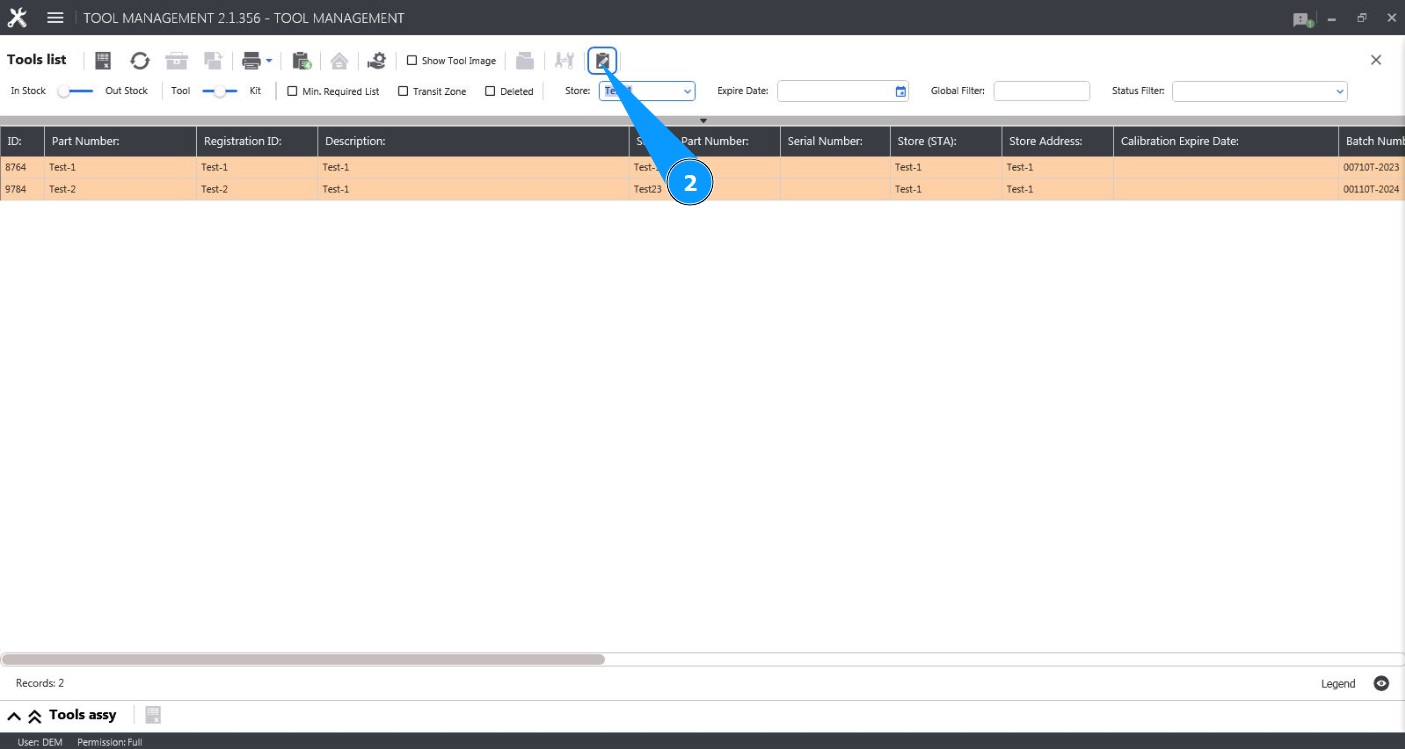
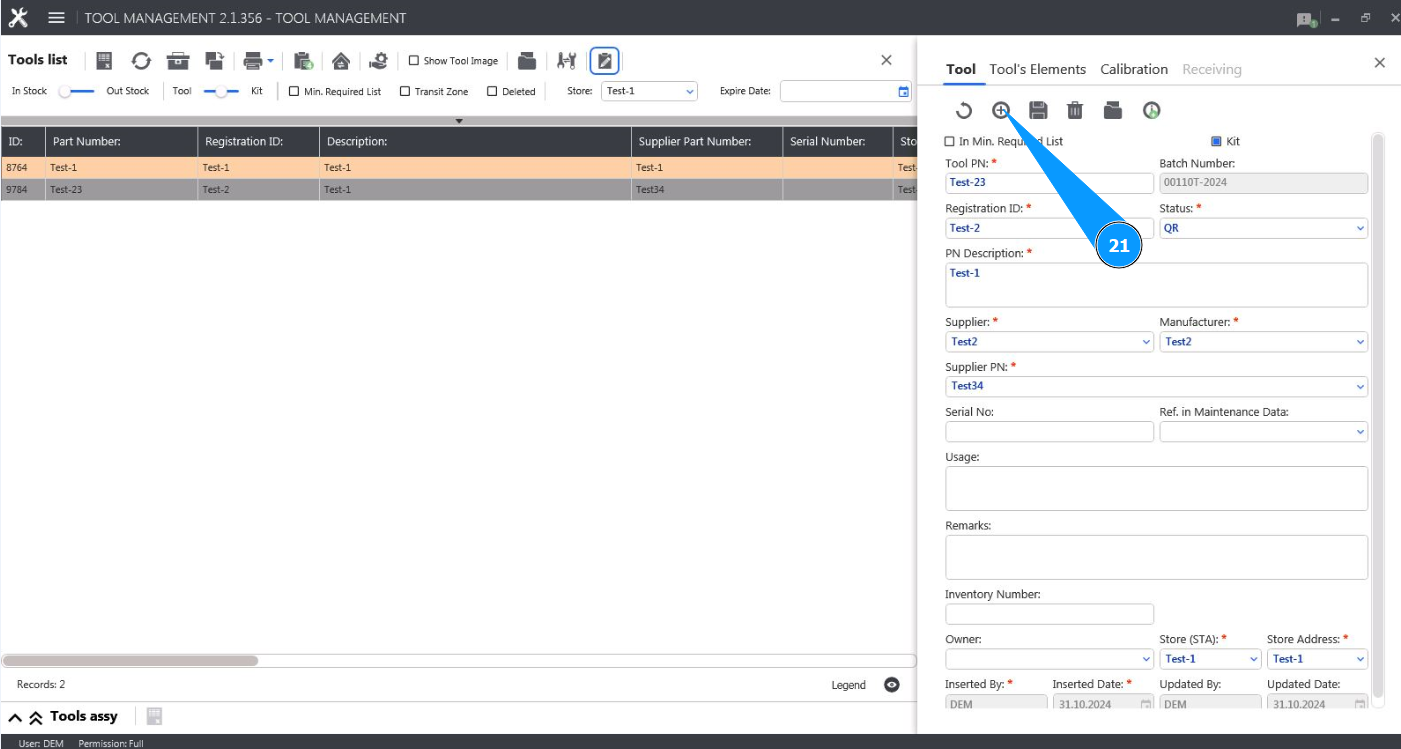
2. Click on the button "Show Editor" to open the tool editor.
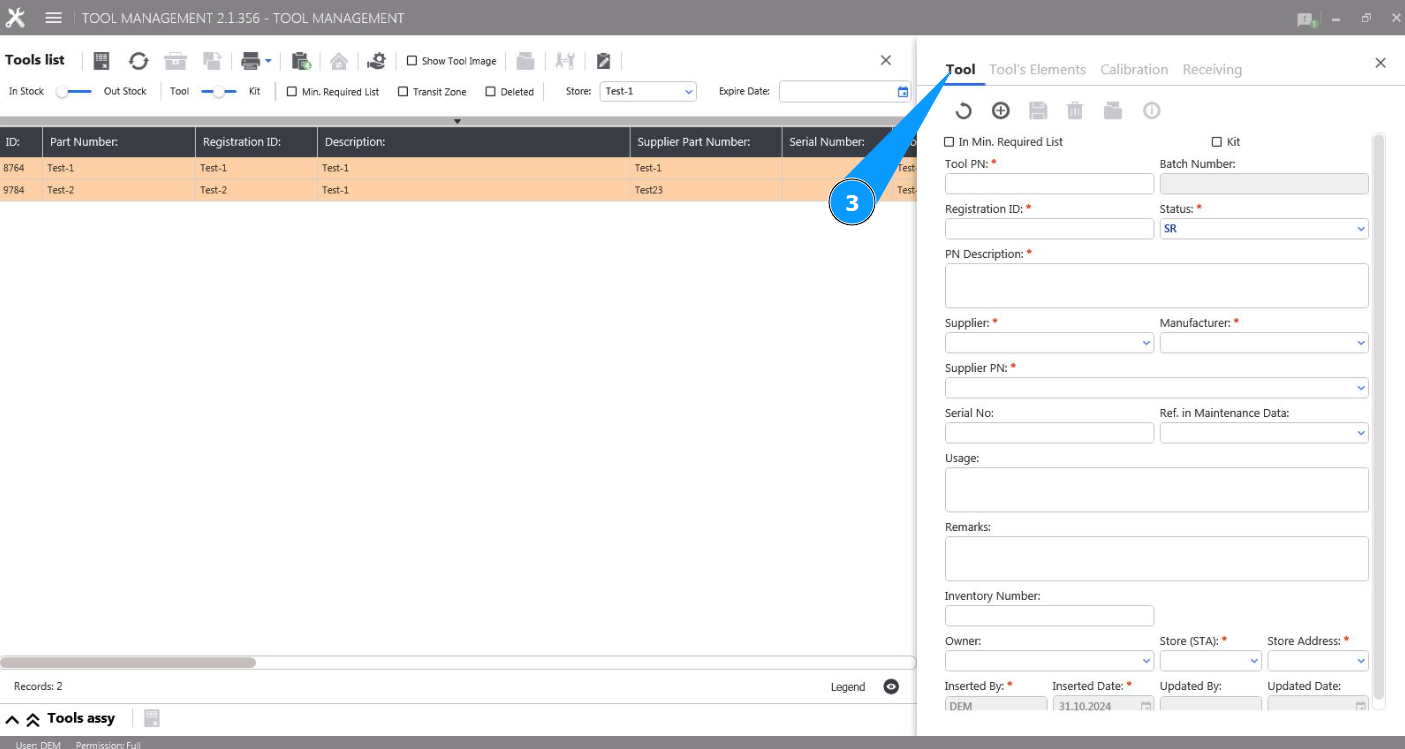
3. Check that the editor is open and available on the tab "Tool".
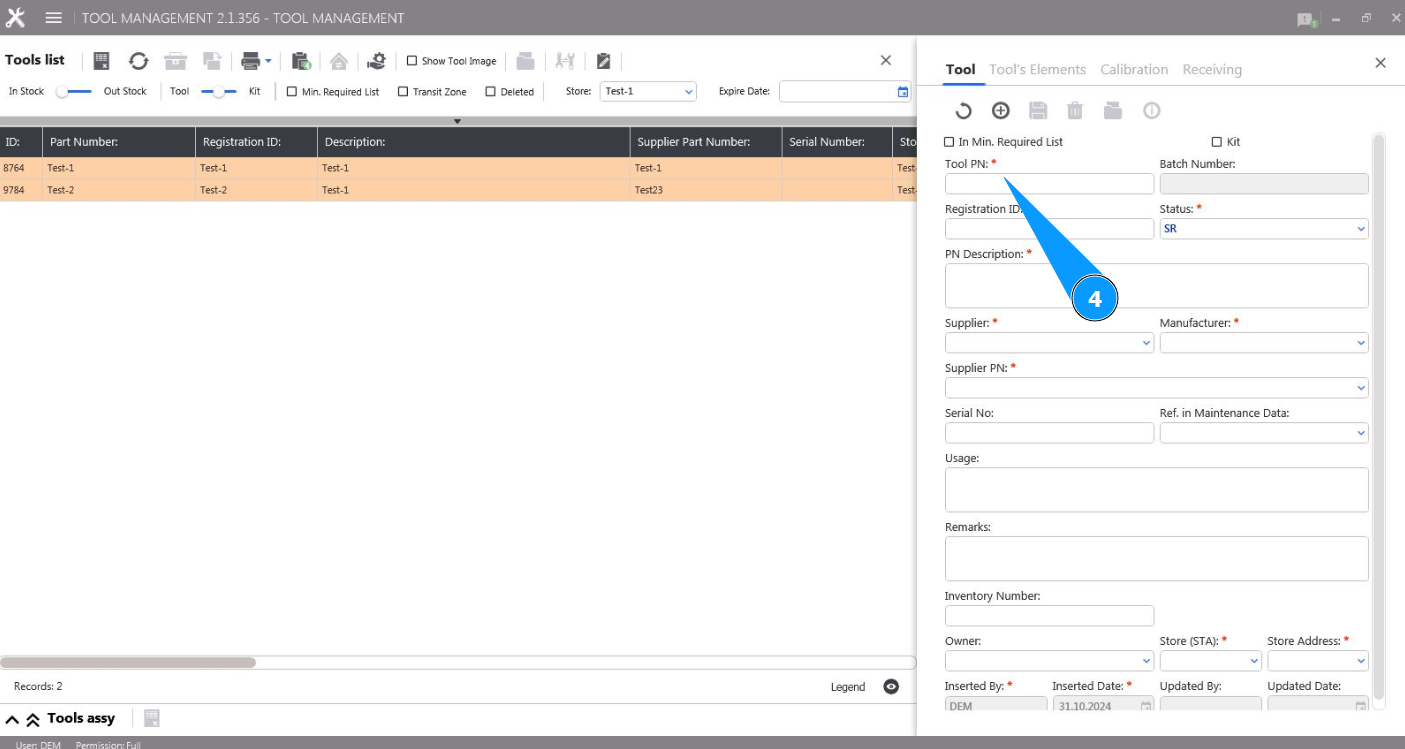
4. Enter the part number of the tool in the field "Tool PN".
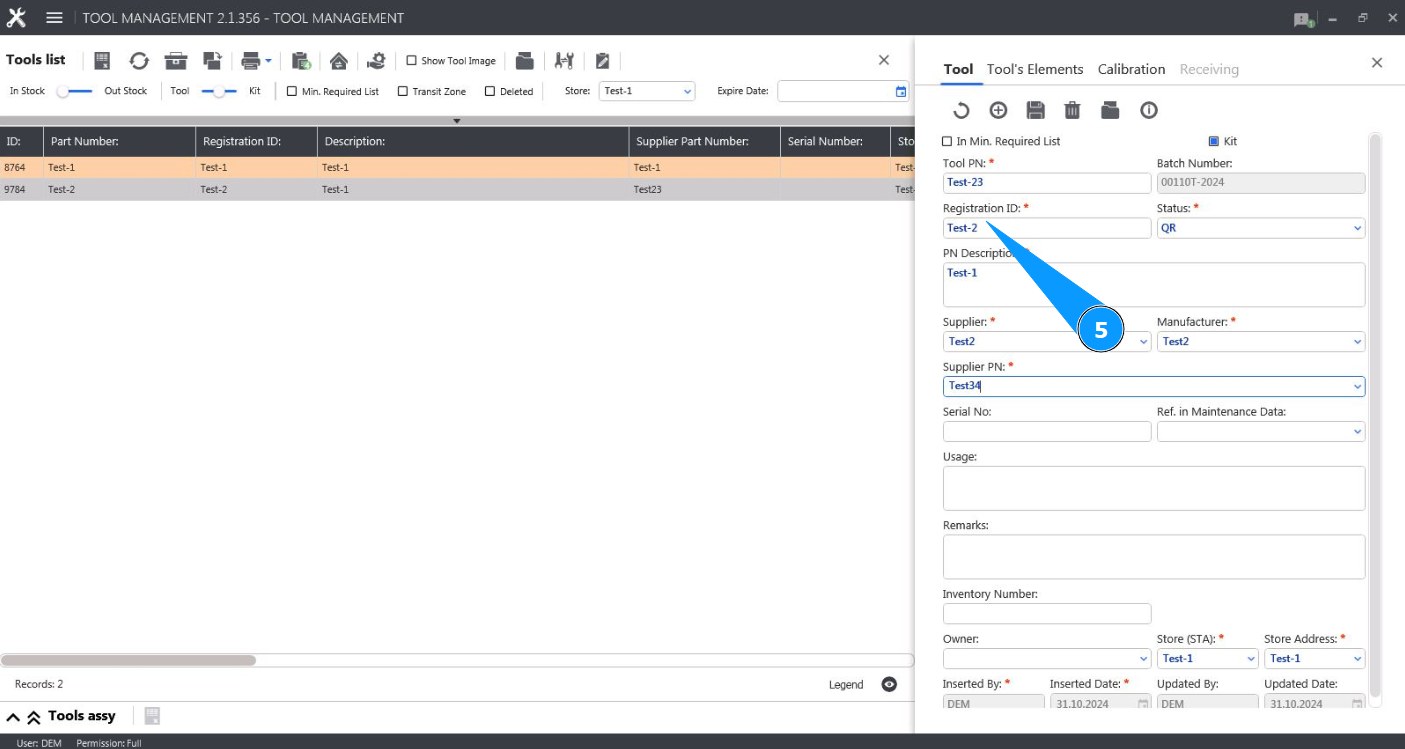
5. Enter the registration number of the tool in the field "Registration ID".
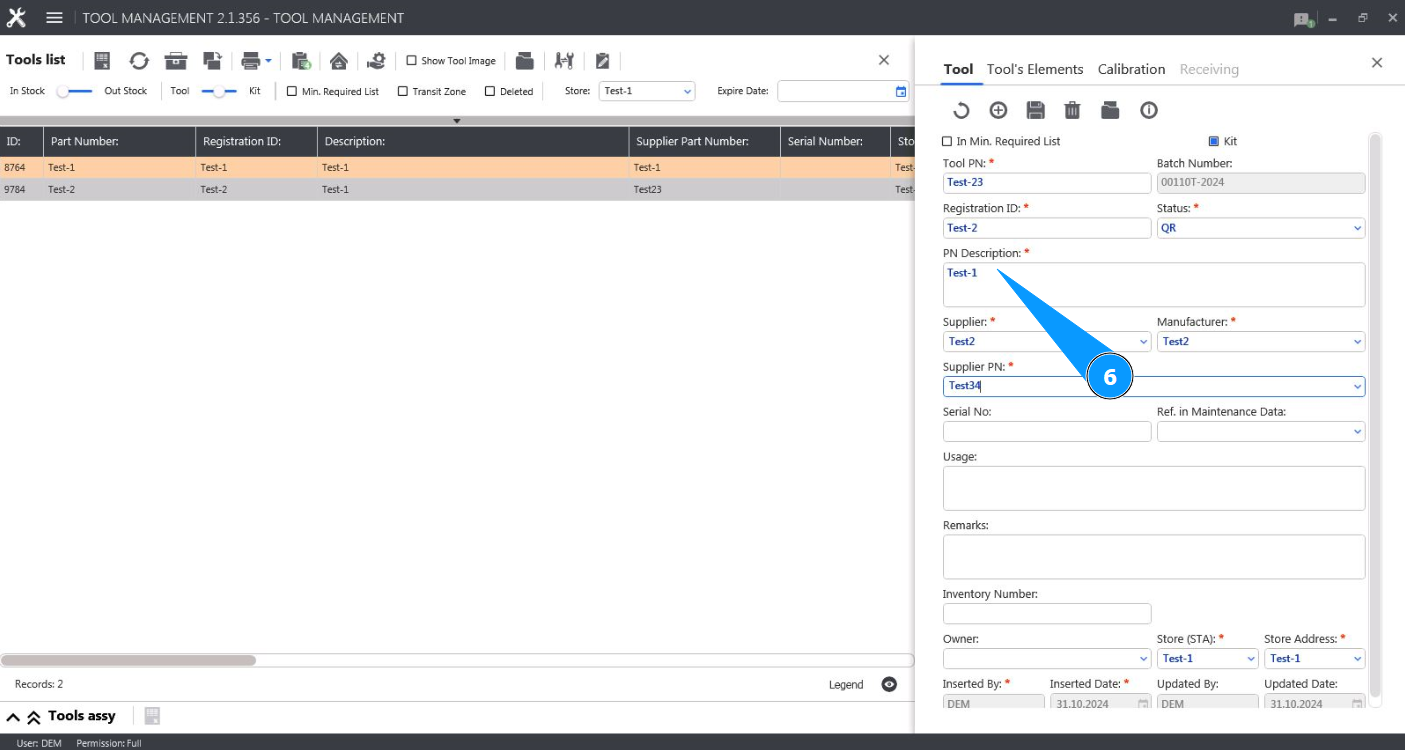
6. Enter the description of the tool in the field "PN Description".
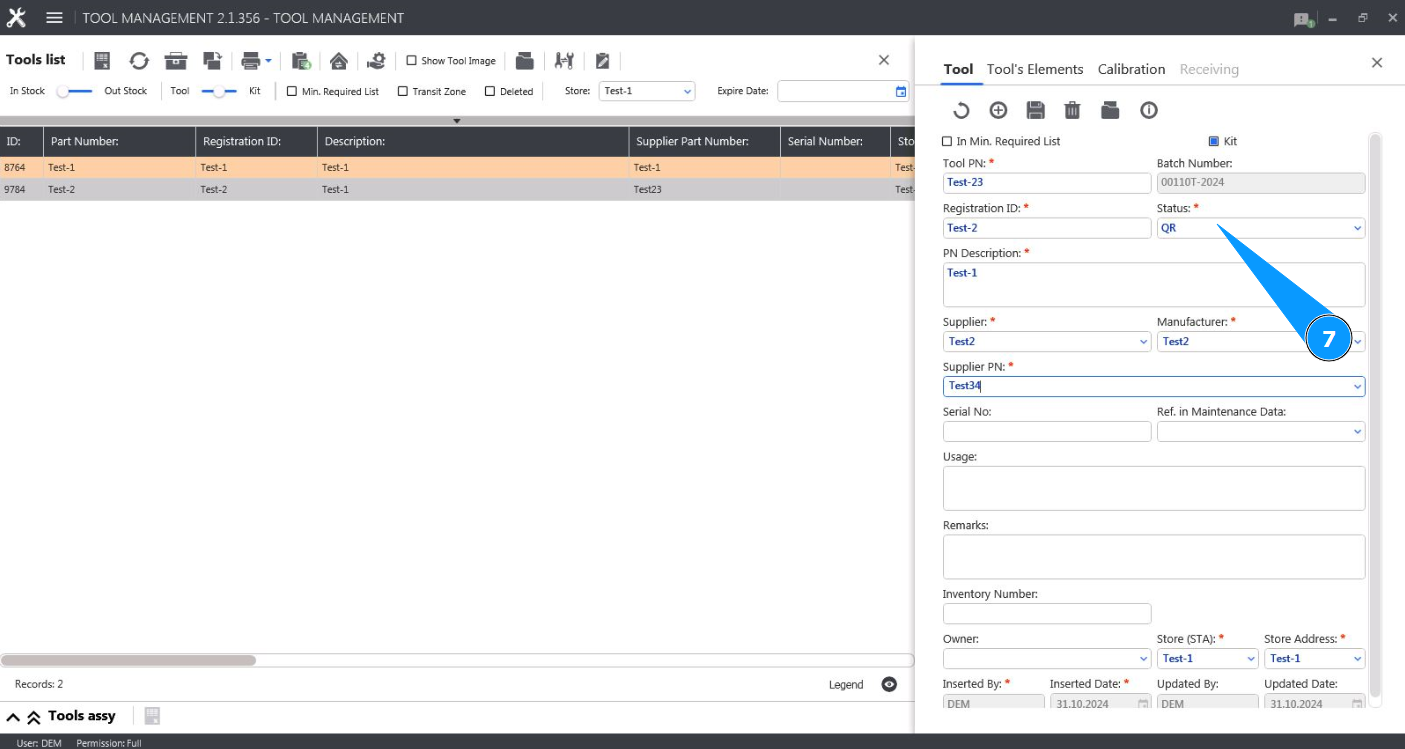
7. Select the tool status from the dropdown list in the field "Status".
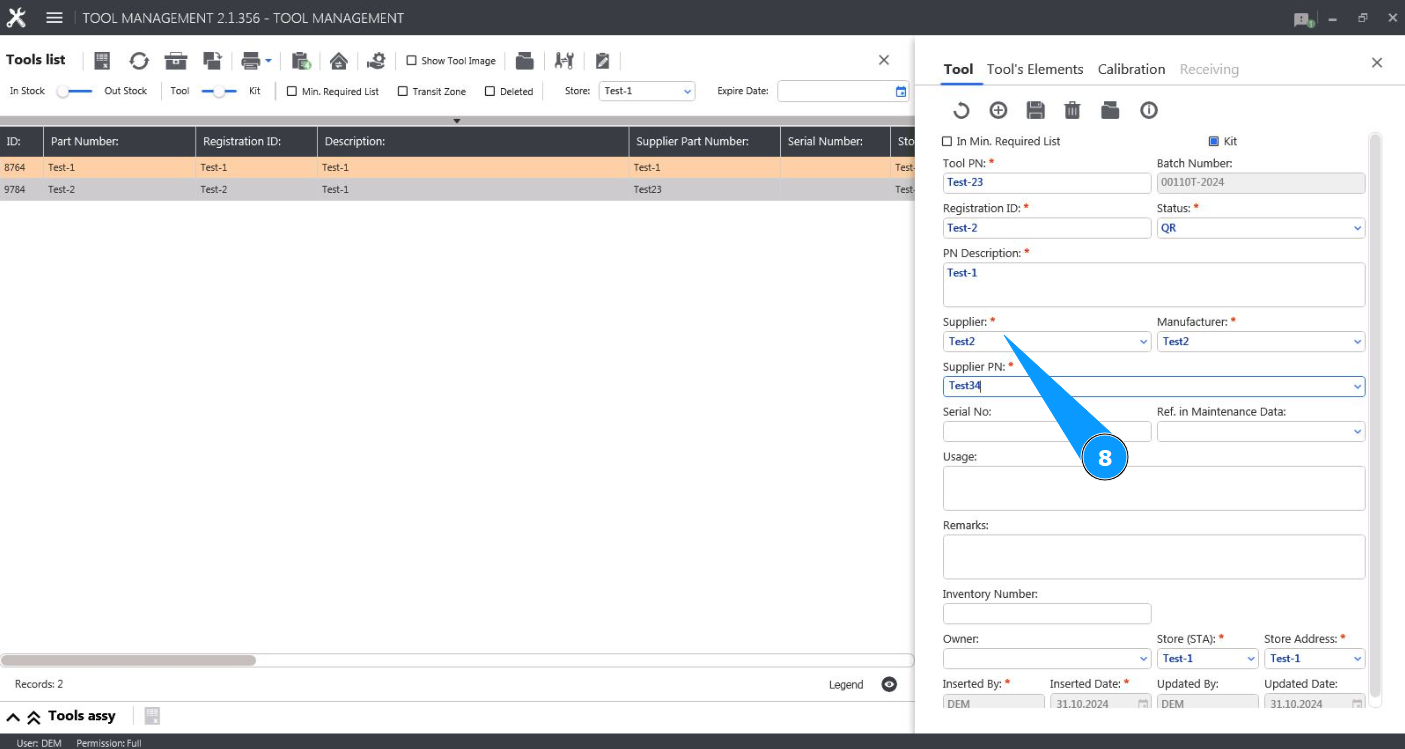
8. Enter the name of the tool supplier in the field "Supplier".
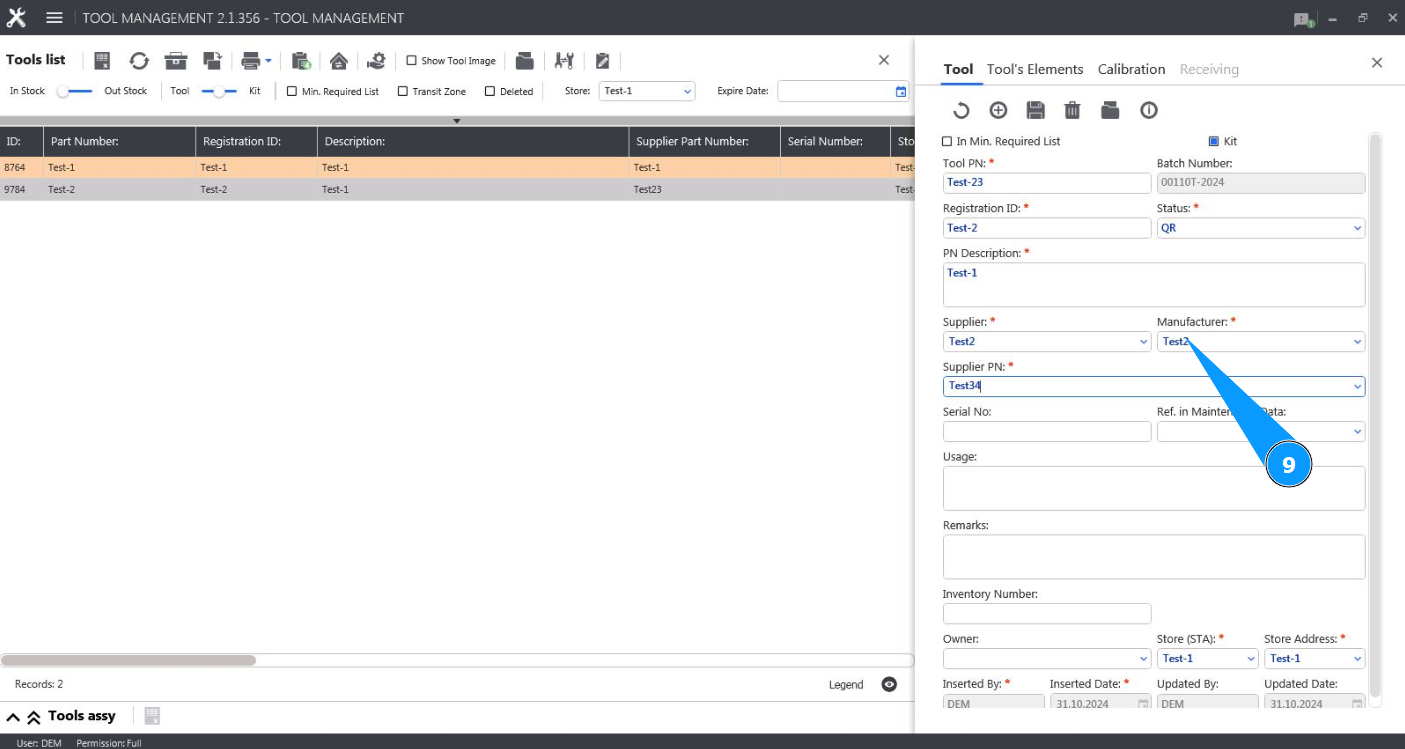
9. Enter the name of the tool manufacturer in the field "Manufacturer".
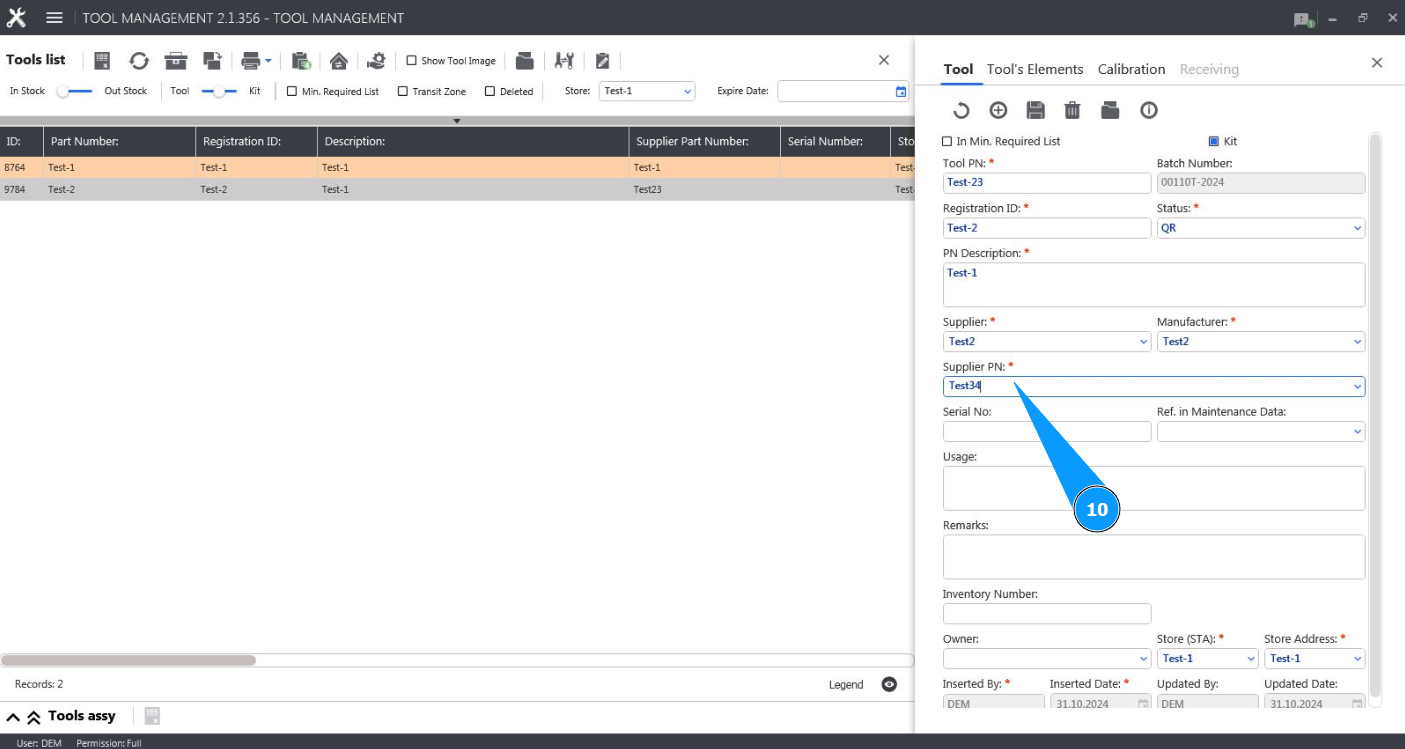
10. Enter the part number of the tool supplier in the field "Supplier PN".
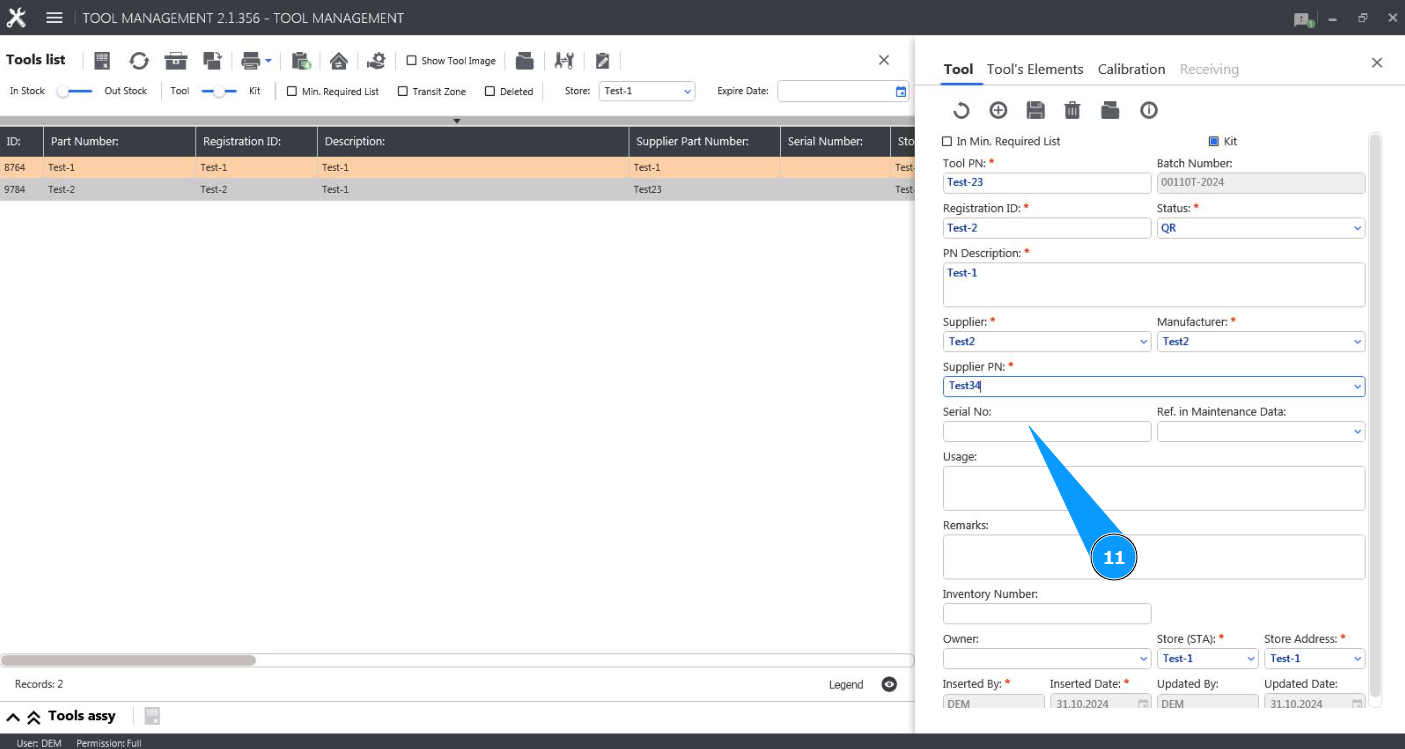
11. If necessary, enter the serial number of the tool in the field "Serial №".
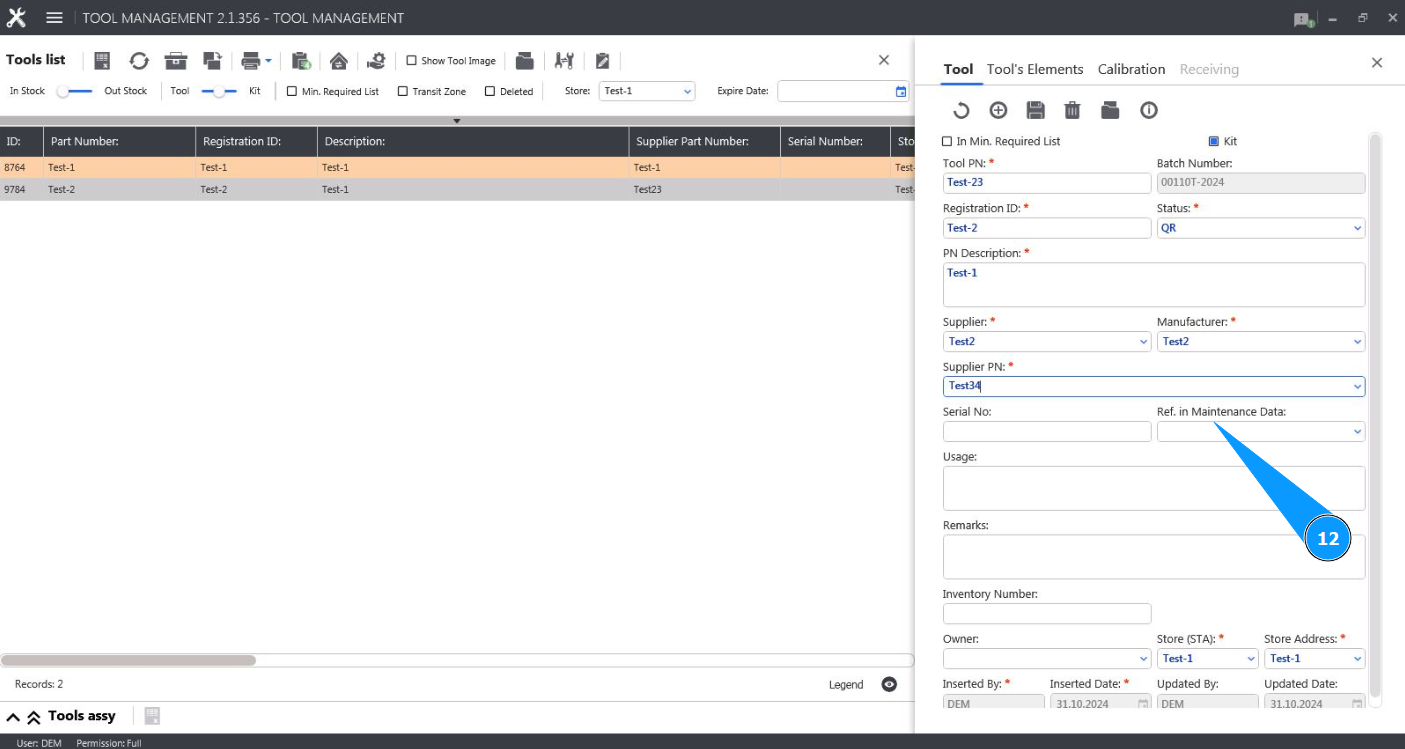
12. If necessary, enter a reference to the technical (maintenance) documentation in the field "Ref. in Maintenance Data".
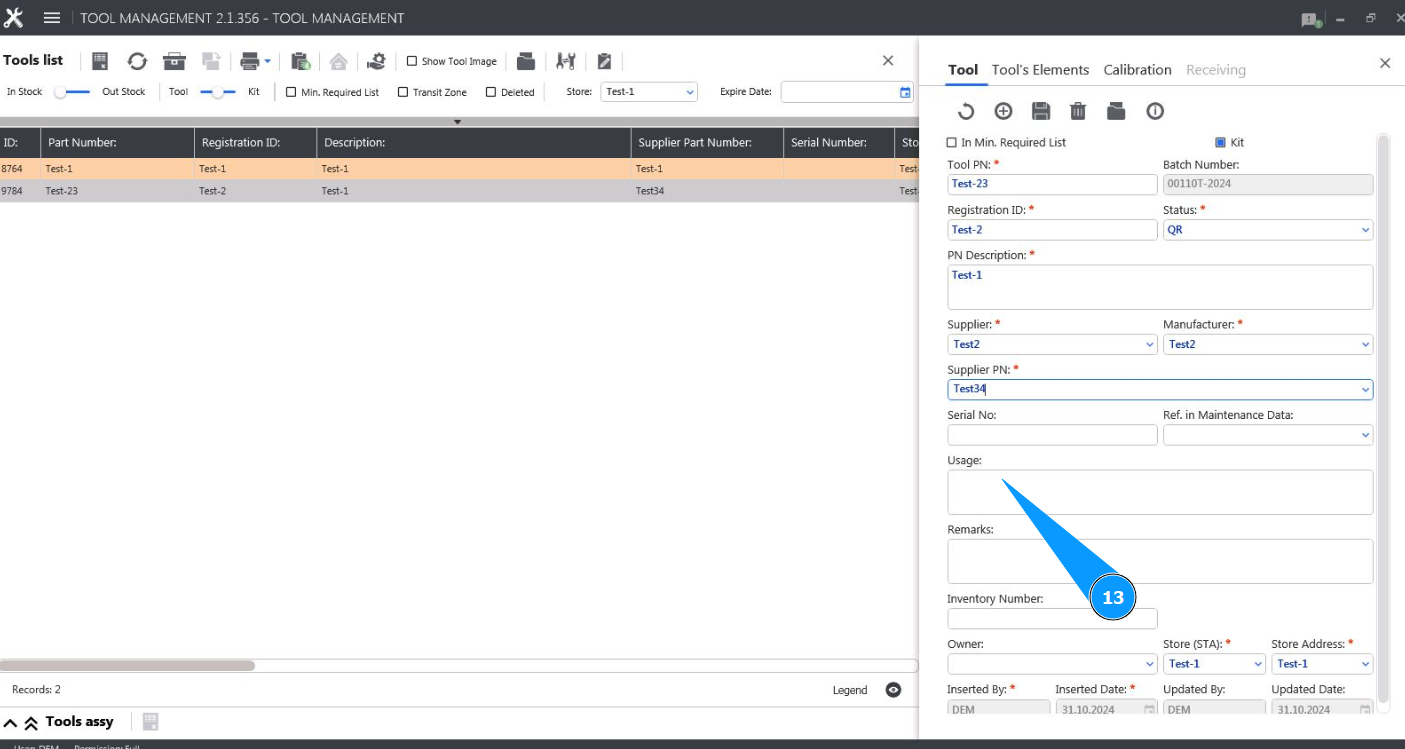
13. If necessary, enter information about what the tool is used for in the field "Usage".
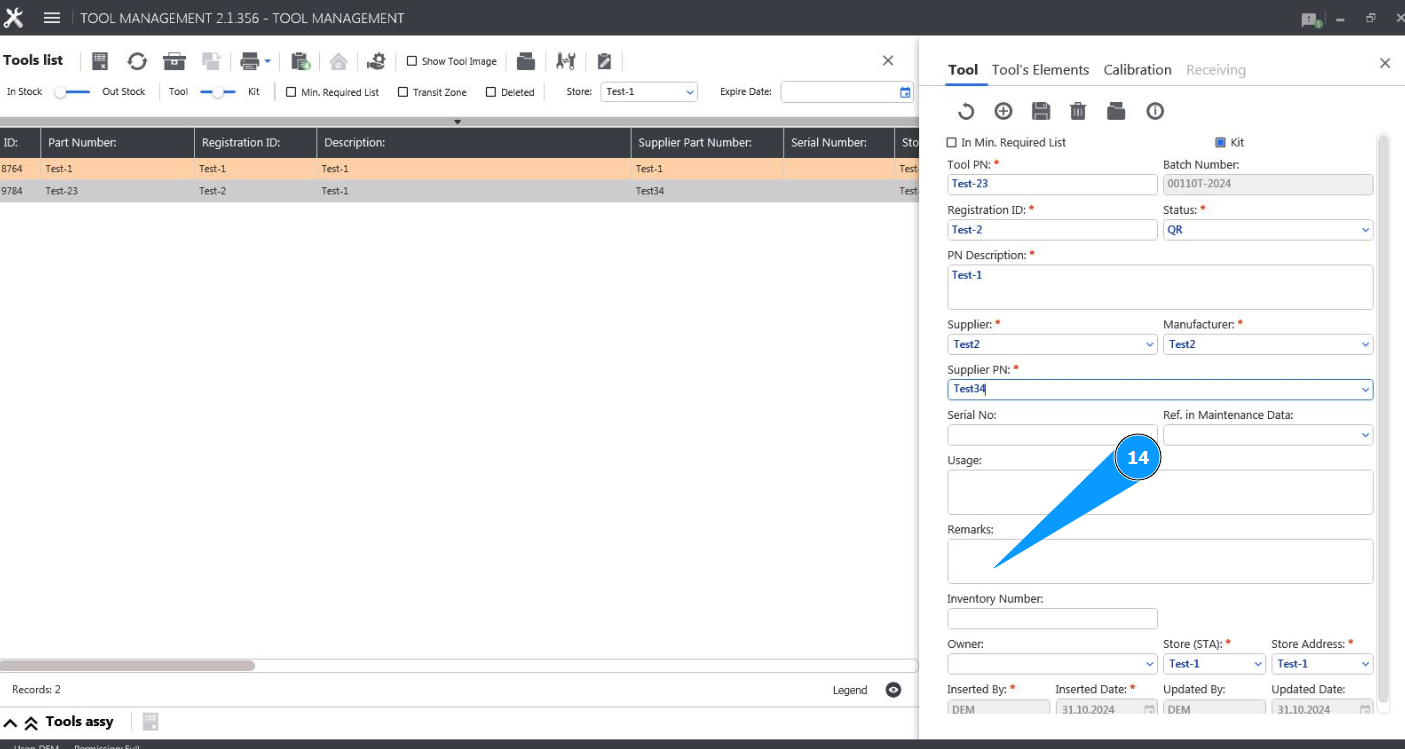
14. If necessary, enter any other information in the field "Remarks".
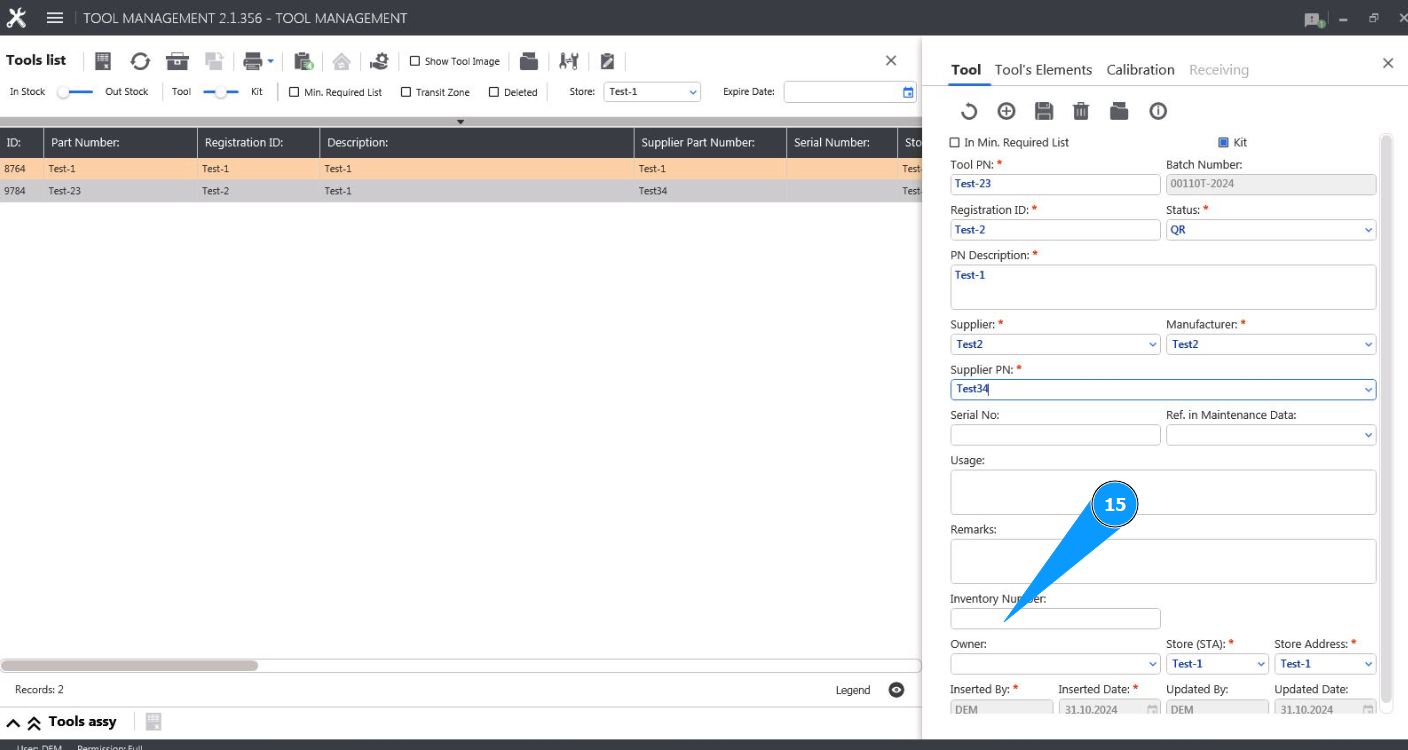
15. If necessary, enter the tool's inventory number in the field "Inventory Number".
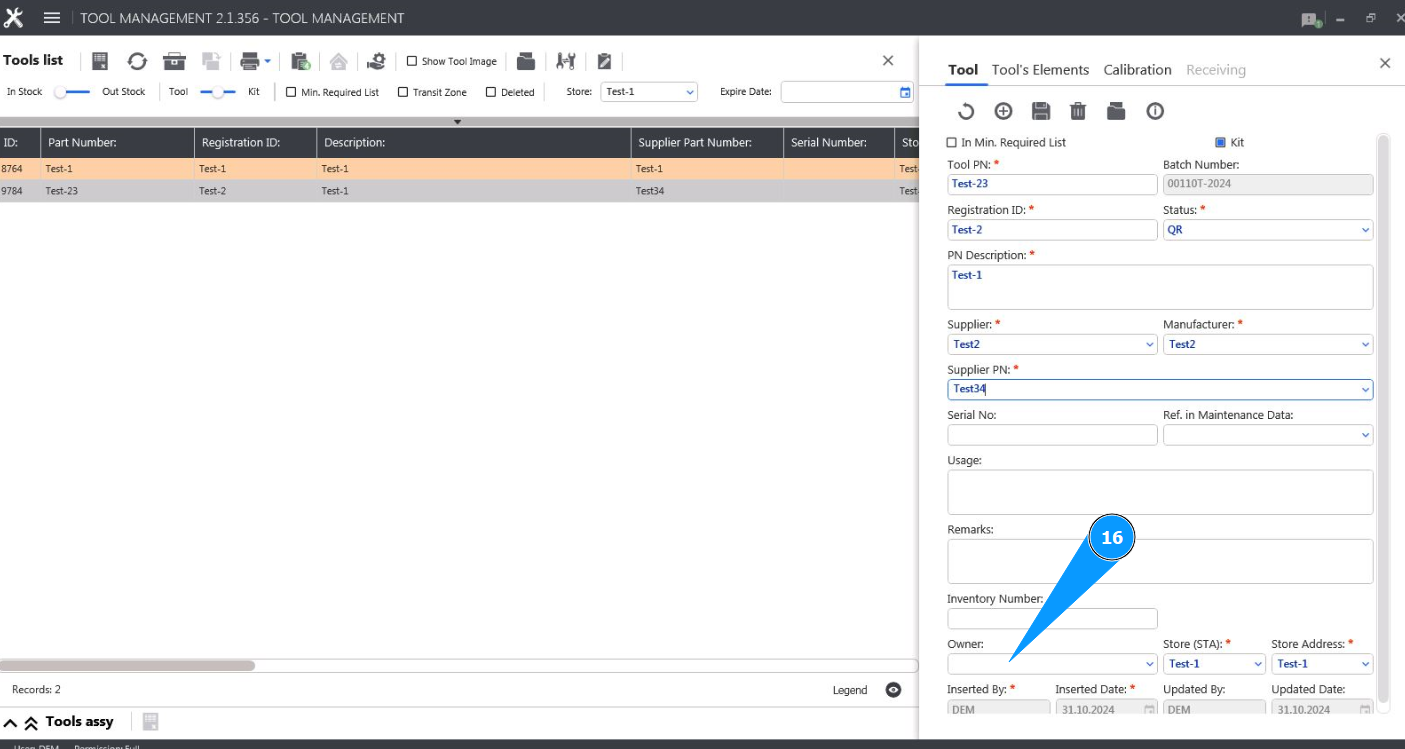
16. If necessary, enter the name of the tool owner in the field "Owner".
17. Enter the name of the tool tool store or line station name in the field "Store(STA)".

18. Enter the storage location of the tool in the field "Store Address". Note: The login of the specialist who entered the tool data and the date of entry will be displayed by the program automatically in the fields "Inserted By" and "Inserted Date".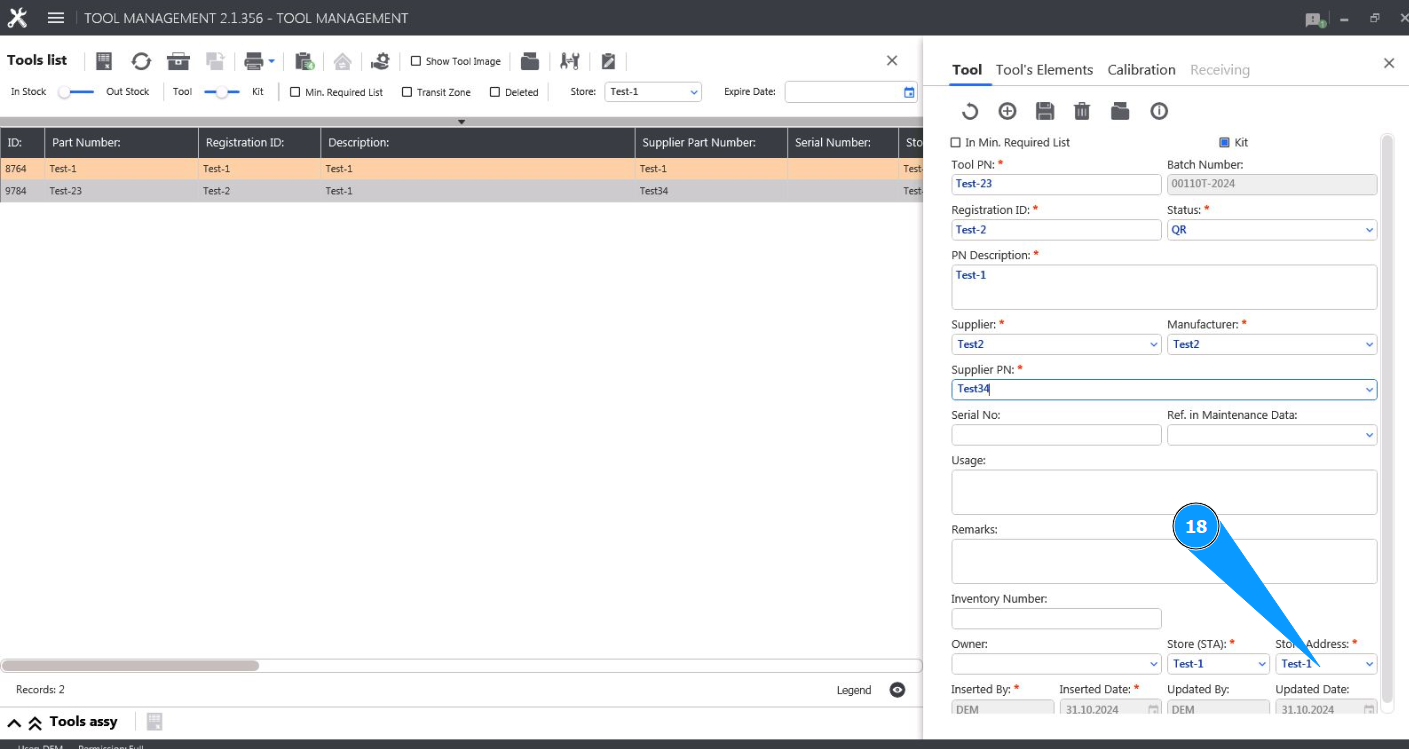
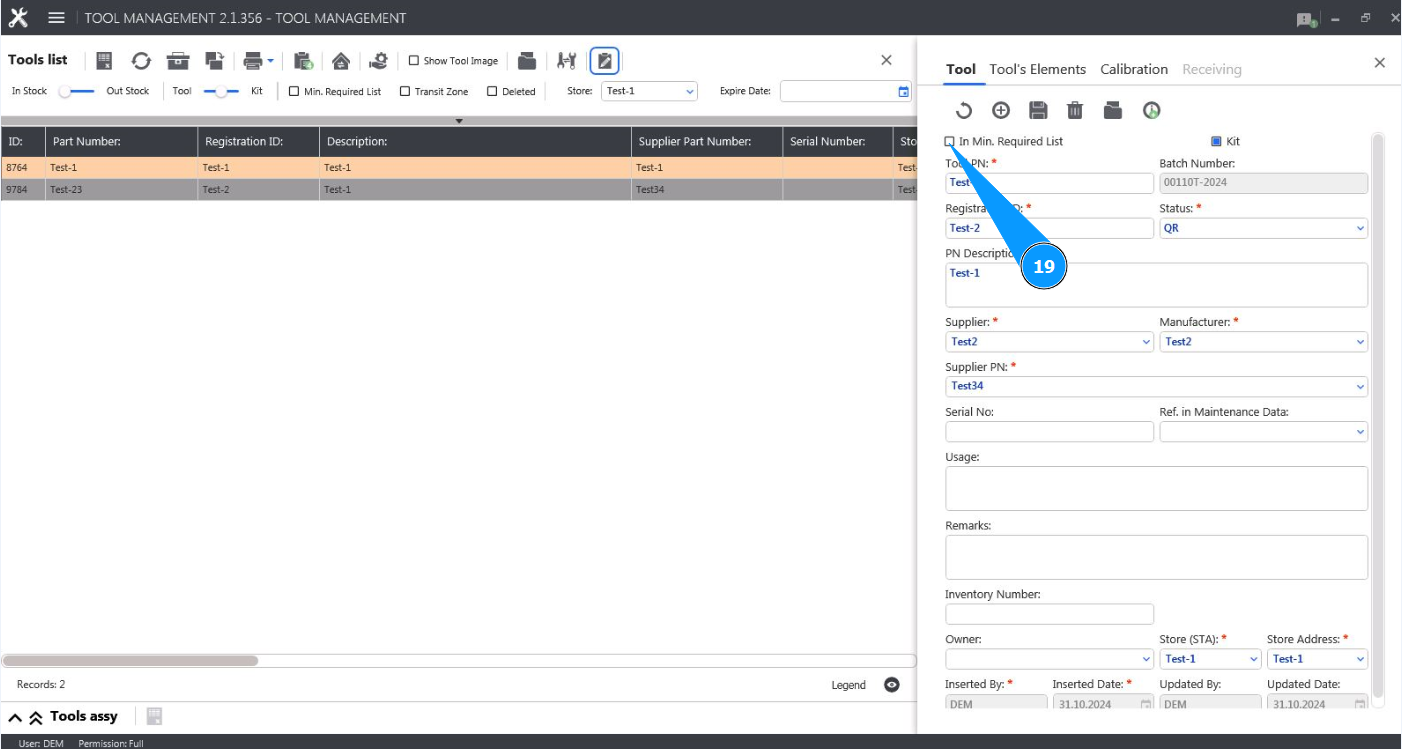
19. If necessary, put a marker to add the tool to the list of required tools in the field "In min.Reqired List".
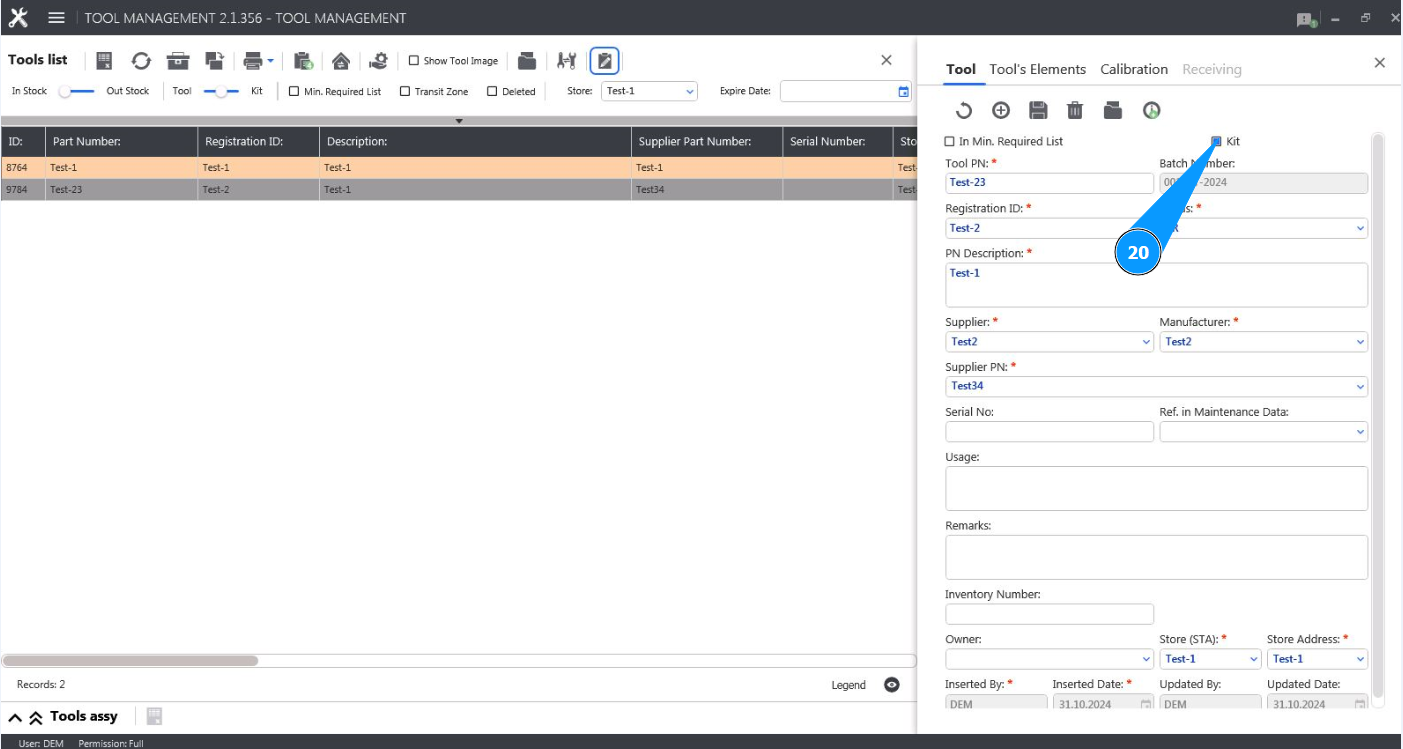
20. If necessary, put a marker that the tool is included in the kit in the field "Kit".
21. Click on the button "Add" to add the tool to the tool store.
22. Click on the button "Yes" to confirm adding the new tool to the tool store.
23. Check that the line with the newly added tool is displayed in the window "Tool List".