How to issue a tool from the tool stock
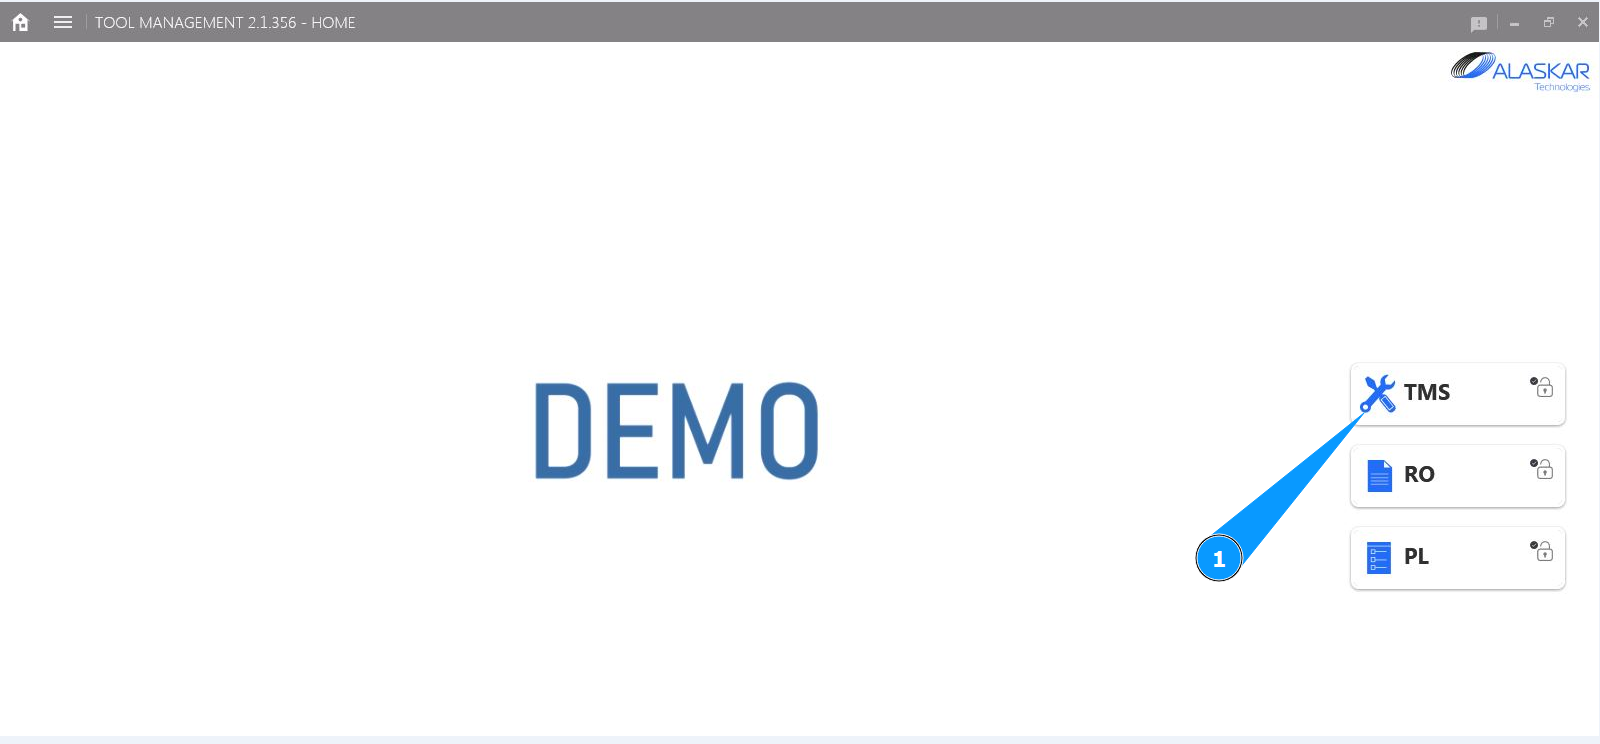
1. In order to issue a tool from the tool stock, go to the submodule "TMS".
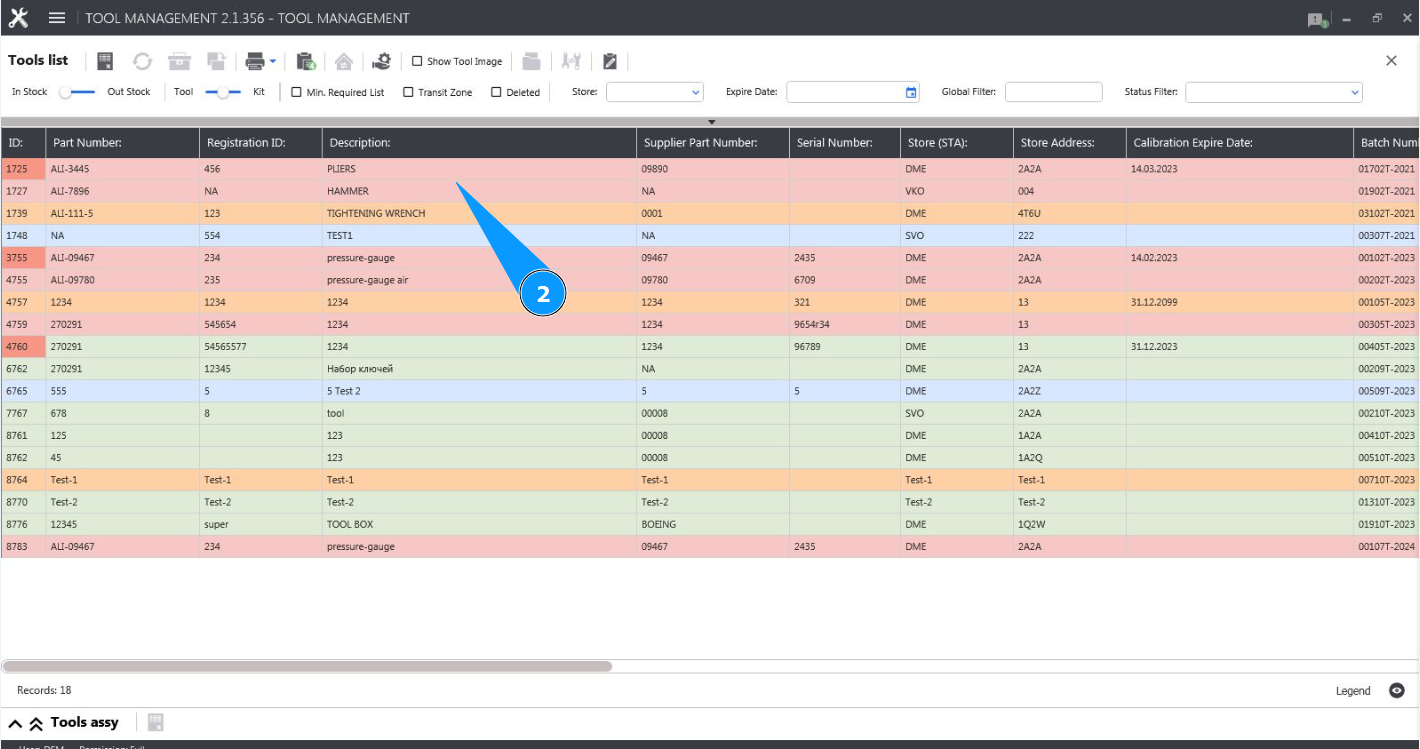
2. Select the required line with the tool in the window and click on it in the window "Tool List".
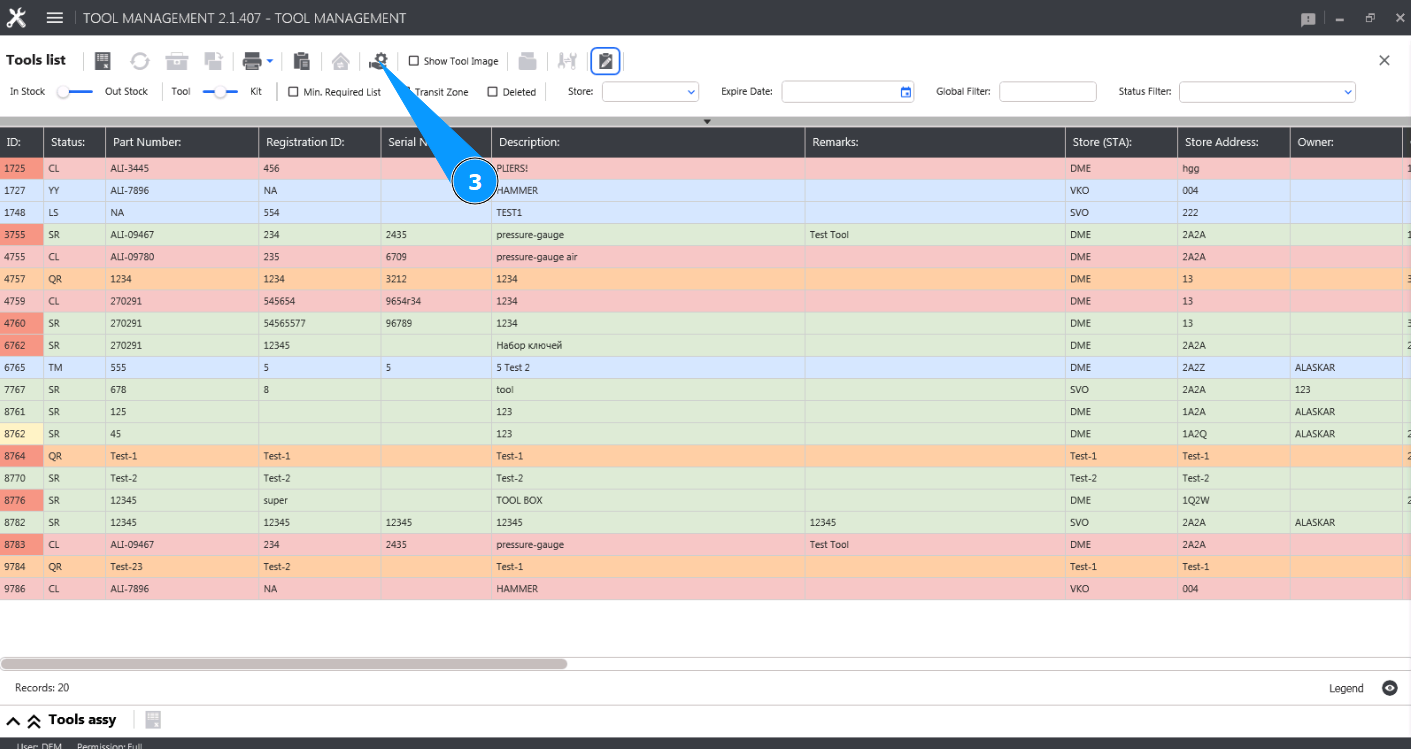
3. Click on the button "Issue or Return Tool" to open the editor for issuing a tool from the tool stock.
4. From the dropdown list, select the required tool stock for issue in the field "Store".
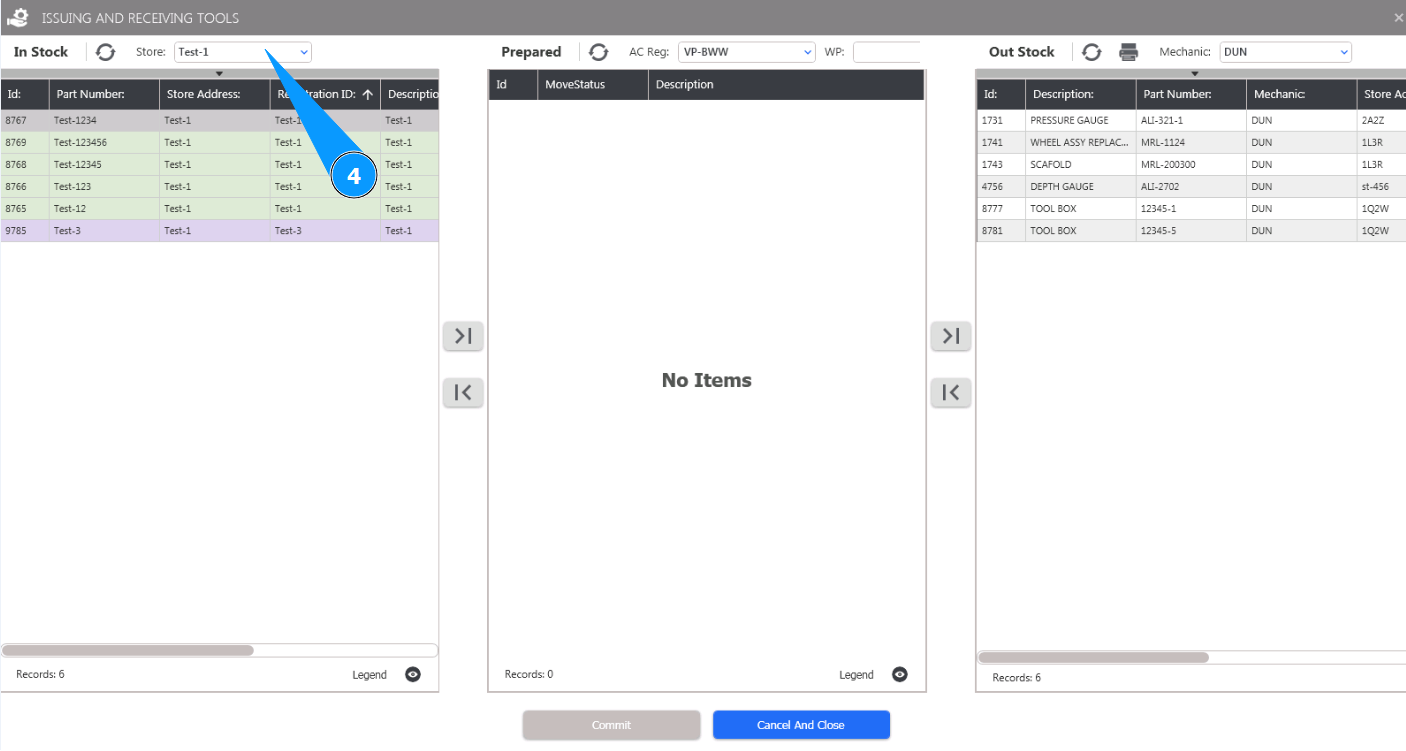
5. Check that the tool stock contents are displayed and available for selection in the window "In Stock".
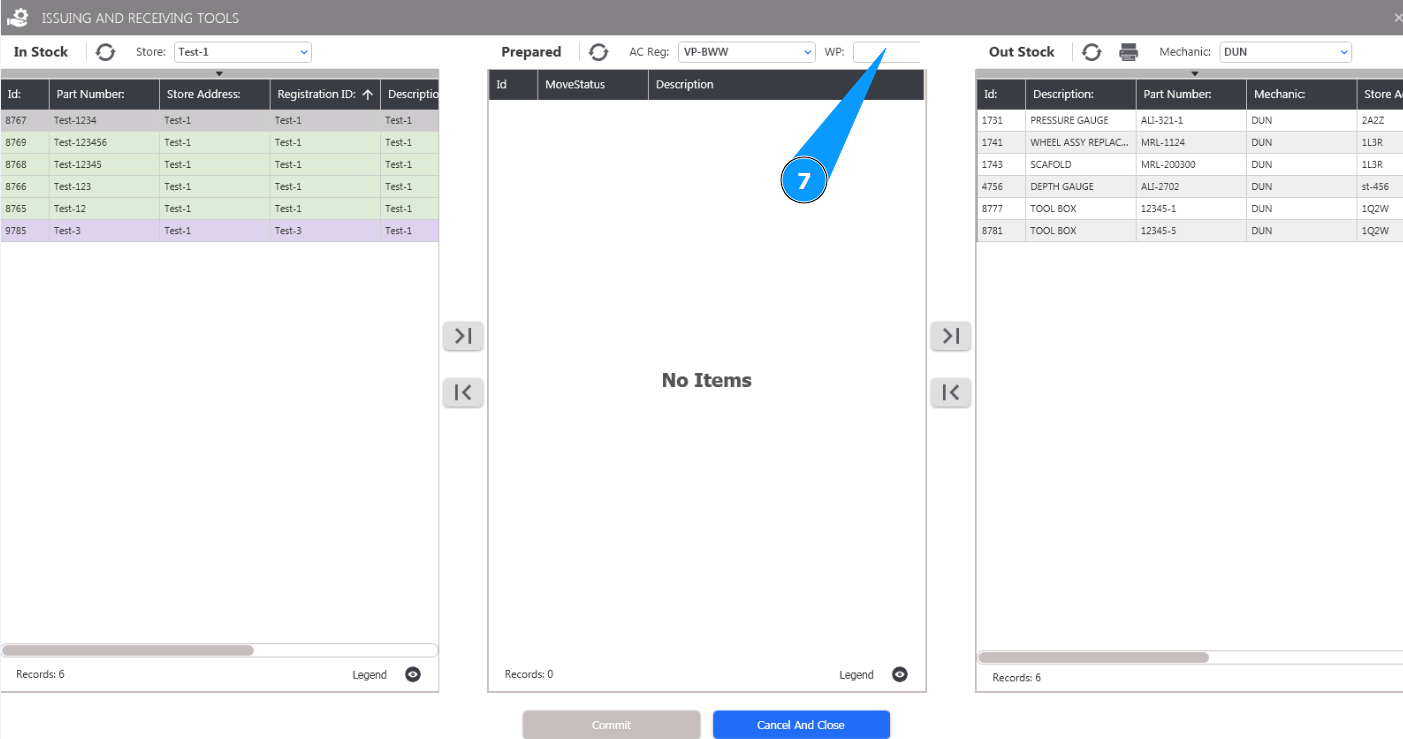
6. From the dropdown list, select the A/C for work on which the tool is issued in the field "AC Reg.".

7. If necessary, enter the work package (WP) number in the field "WP".
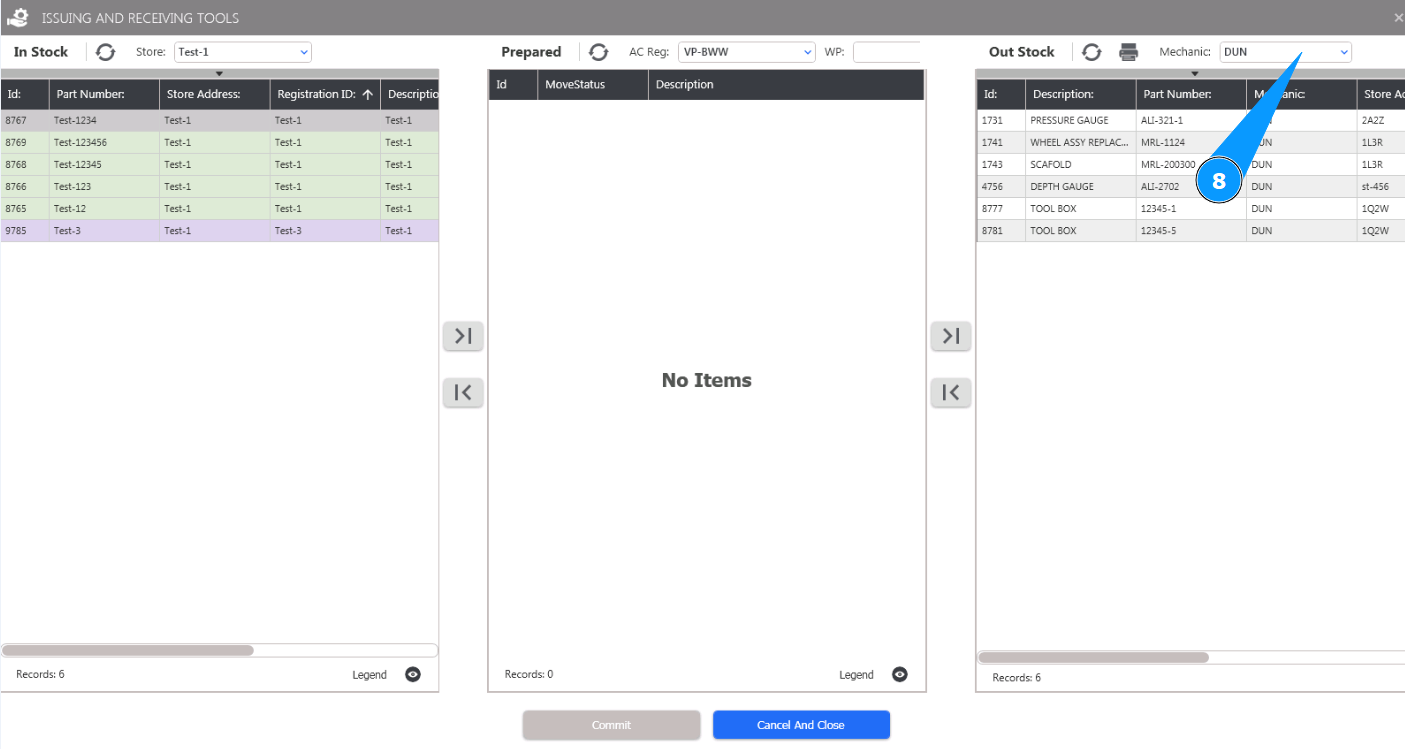
8. From the dropdown list, select the login of the personnel to whom the tool is issued in the field "Mechanic".
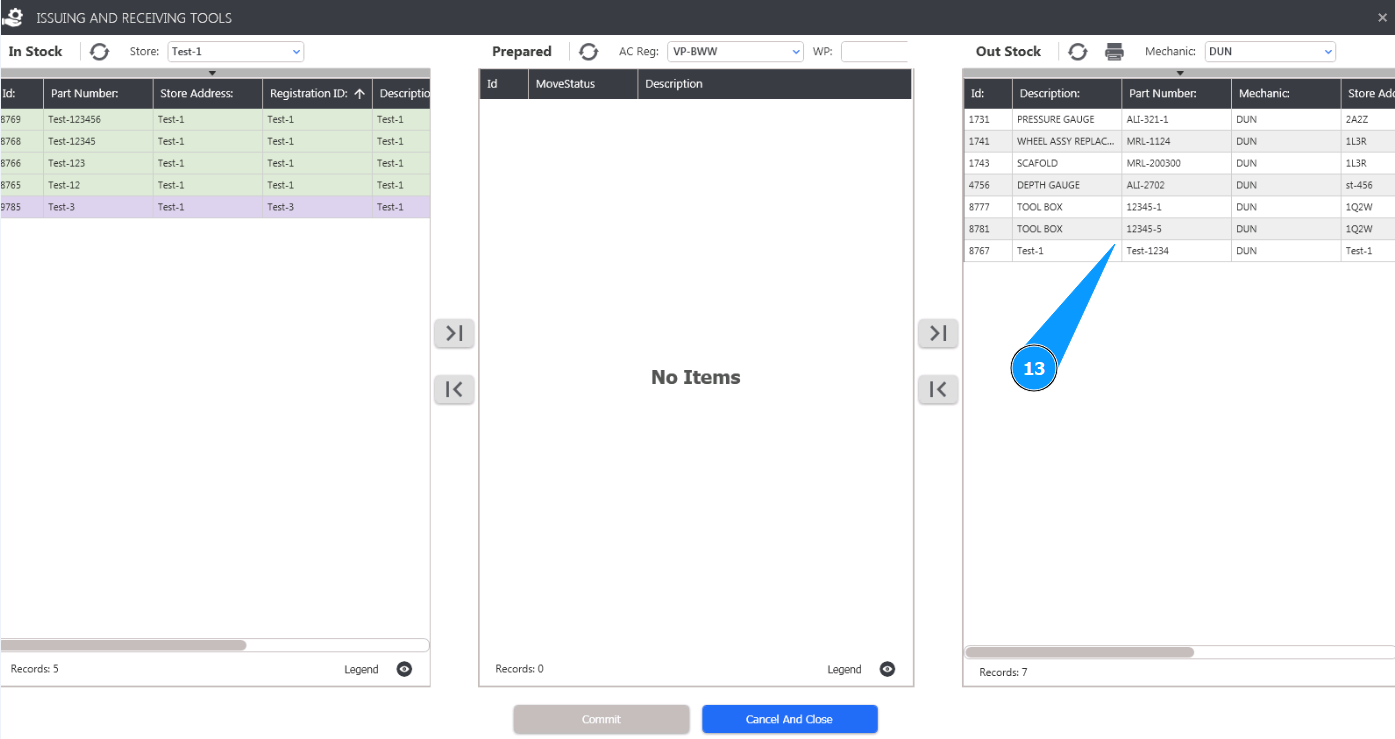
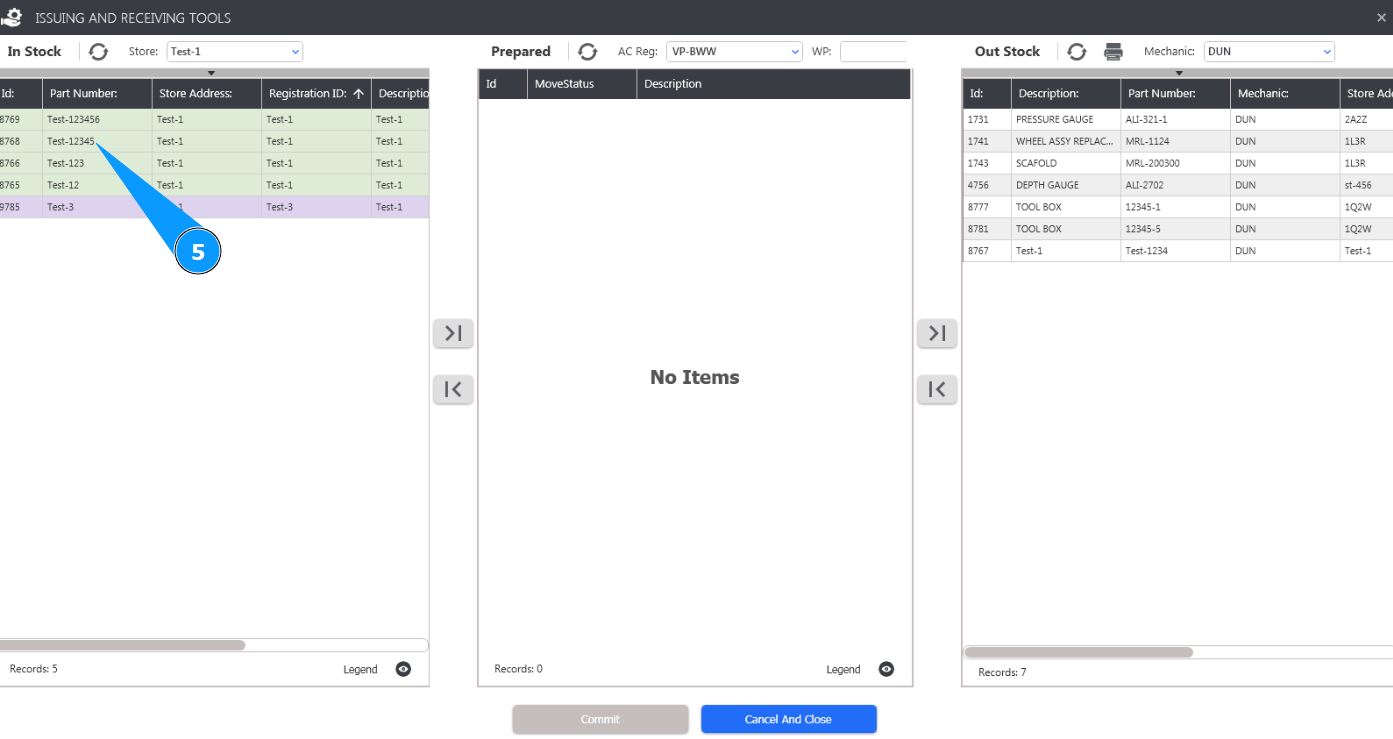
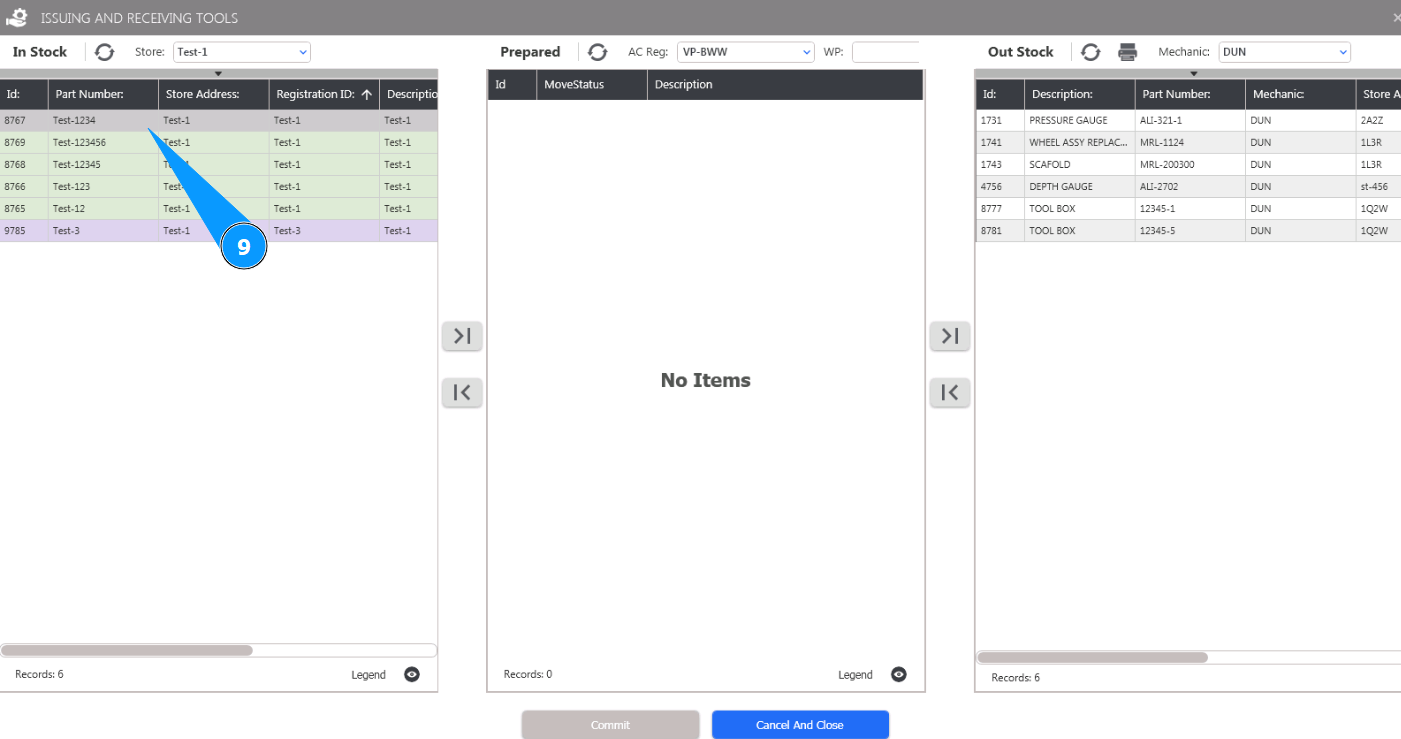
9. Select the required line with the tool and click on it in the window "In Stock".
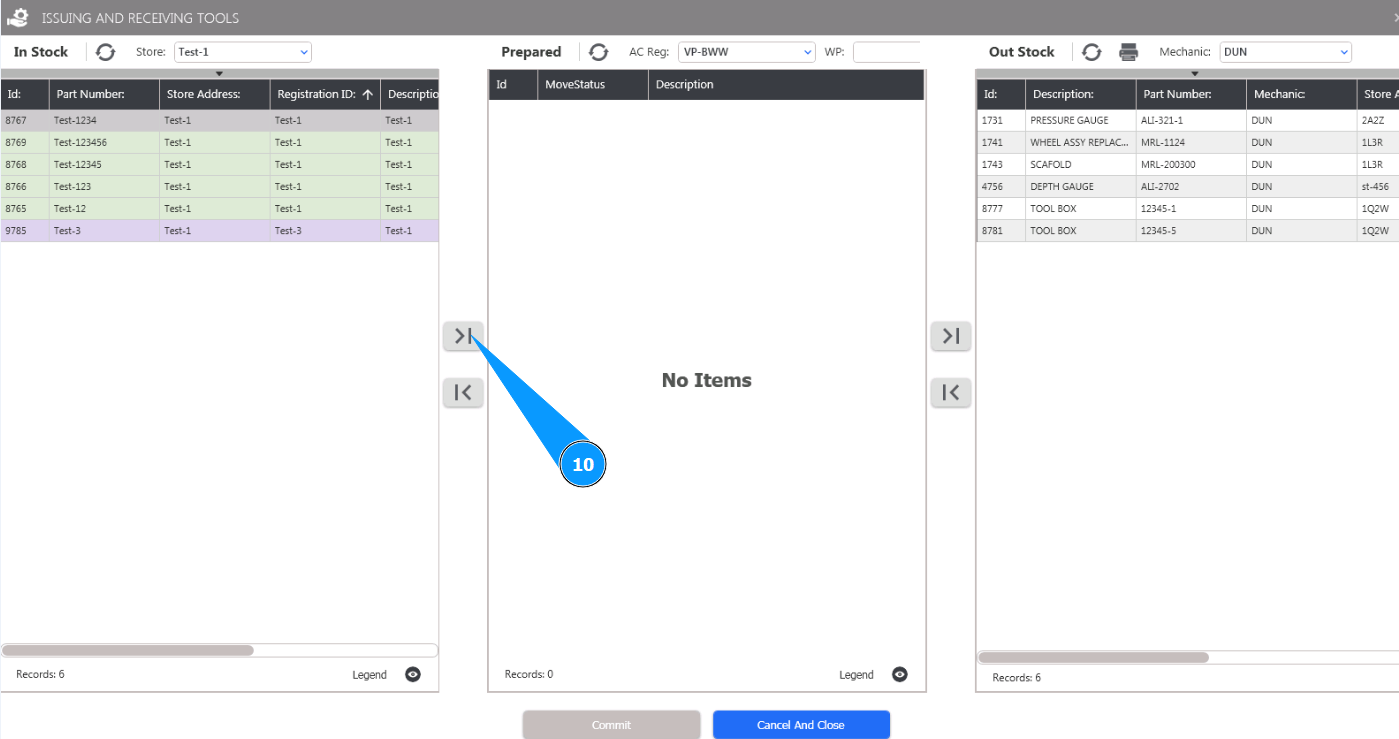
10. Click on the button "Move Out" to move the tool to the pre-issue window "Prepared".
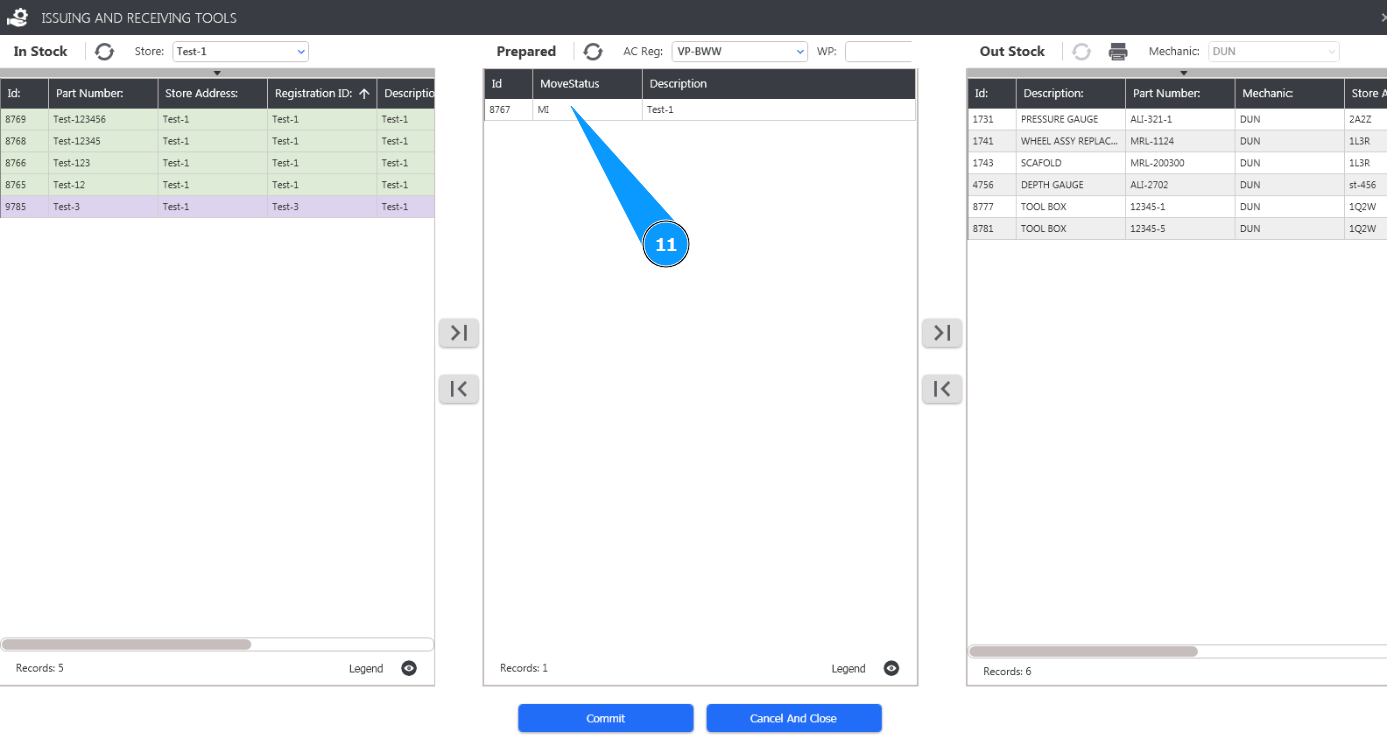
11. Check that the tool has moved and is displayed in the pre-issue window "Prepared".
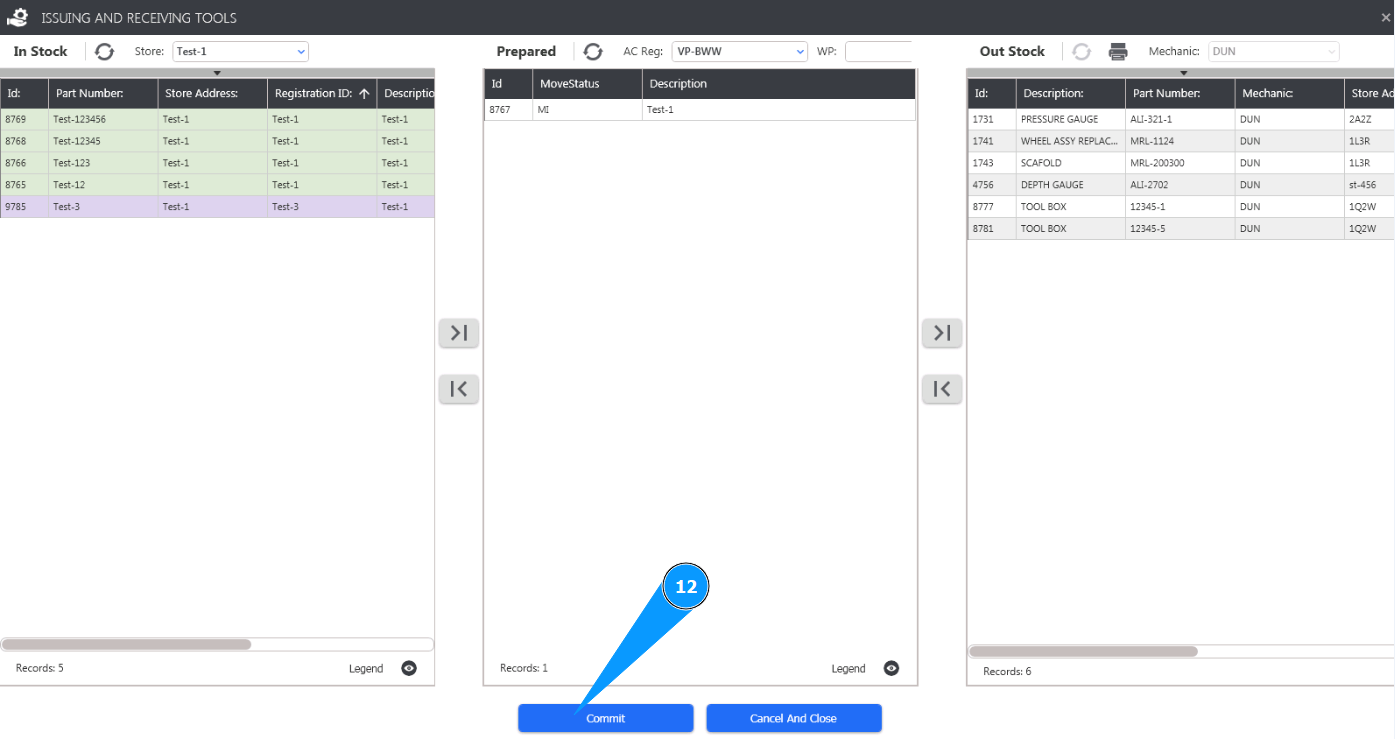
12. Click on the button "Commit" to move the tool to the staff issue window.
13. Check that the tool has moved and is displayed in the issue window "Out Stock". The tool has been issued successfully.