How to create a Repair order
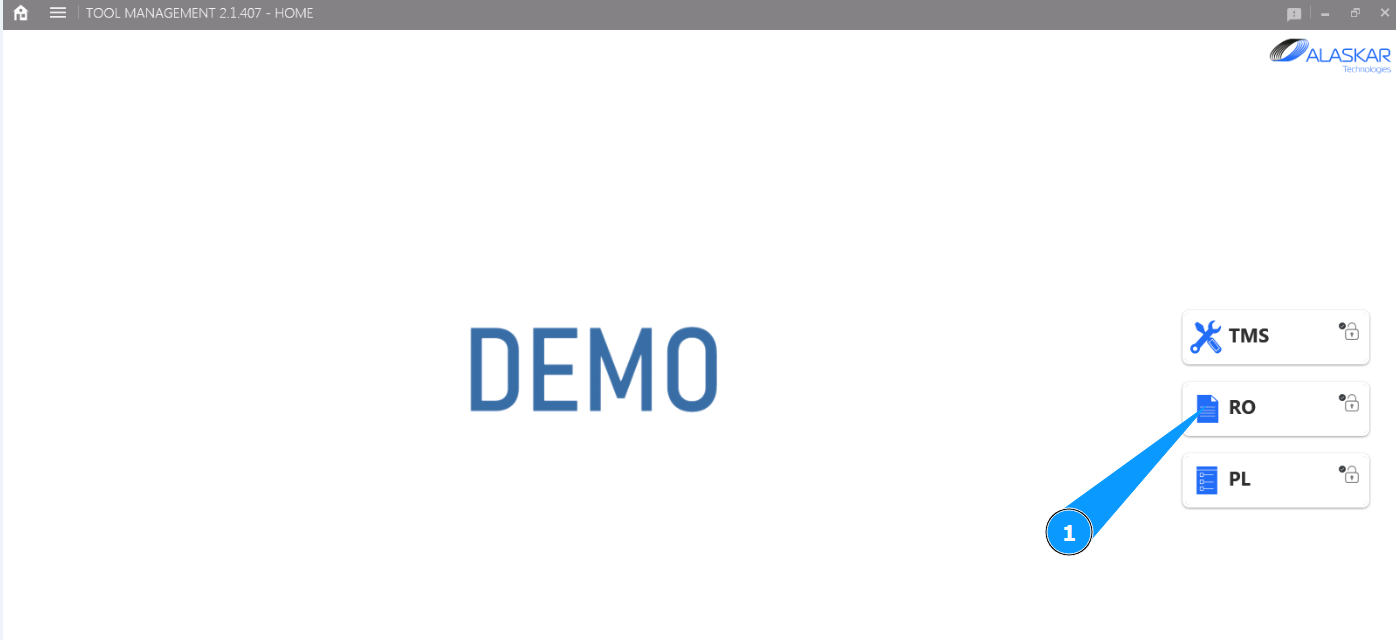
1. In order to create a Repair order, go to the submodule "RO".
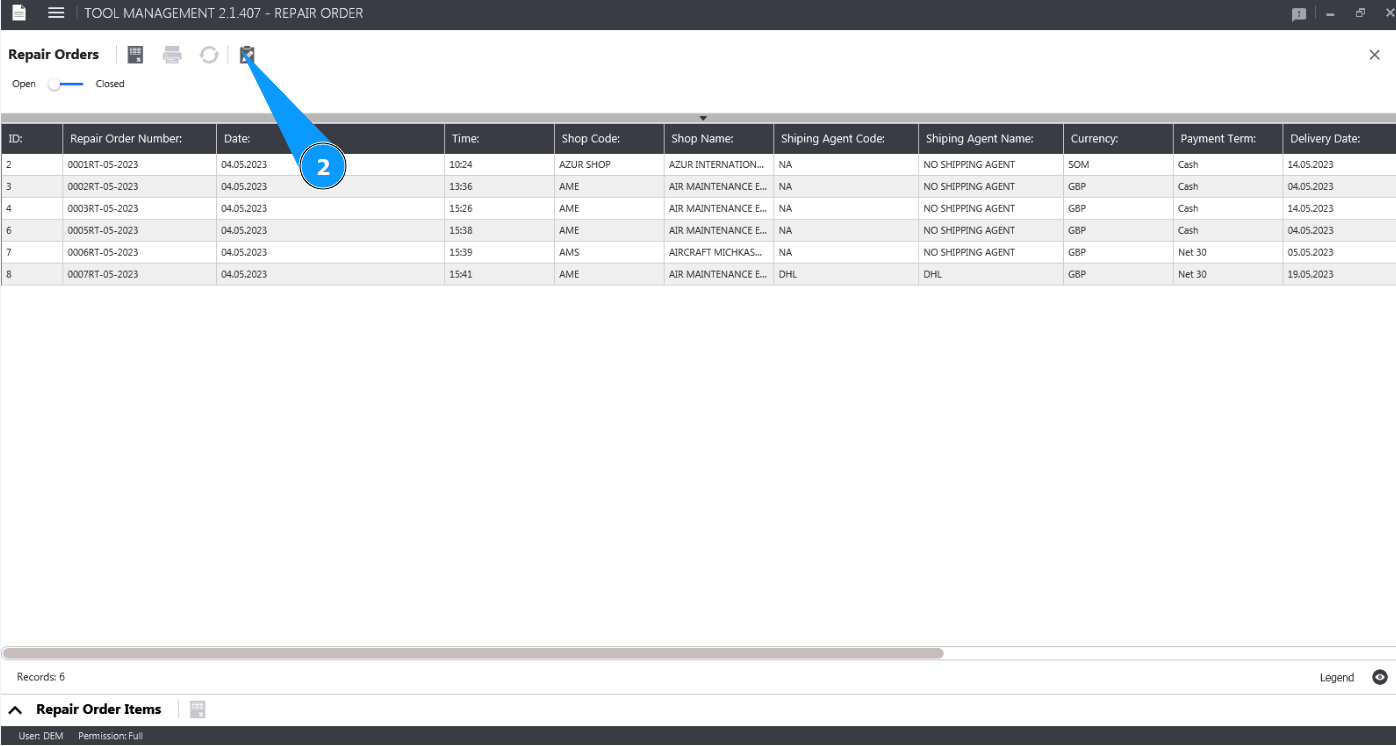
2. Click on the button "Show Editor" to open the Repair order editor.
3. Check that the window "Repair Order Editor" opens. You need to fill it with data.
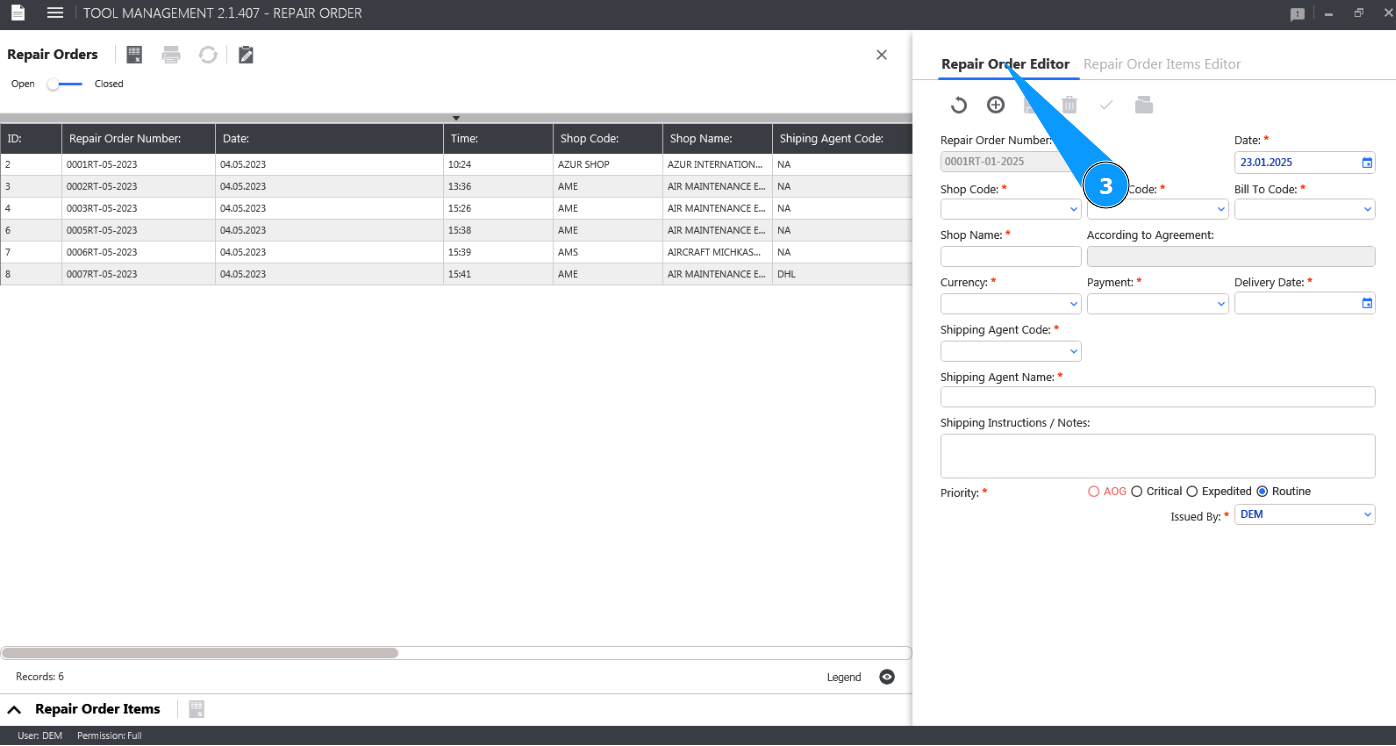
4. The current date is set by default. If necessary, change the Repair Order creation date. Note: The Repair Order number (abbreviated RO) is created by the program automatically, without the ability to edit.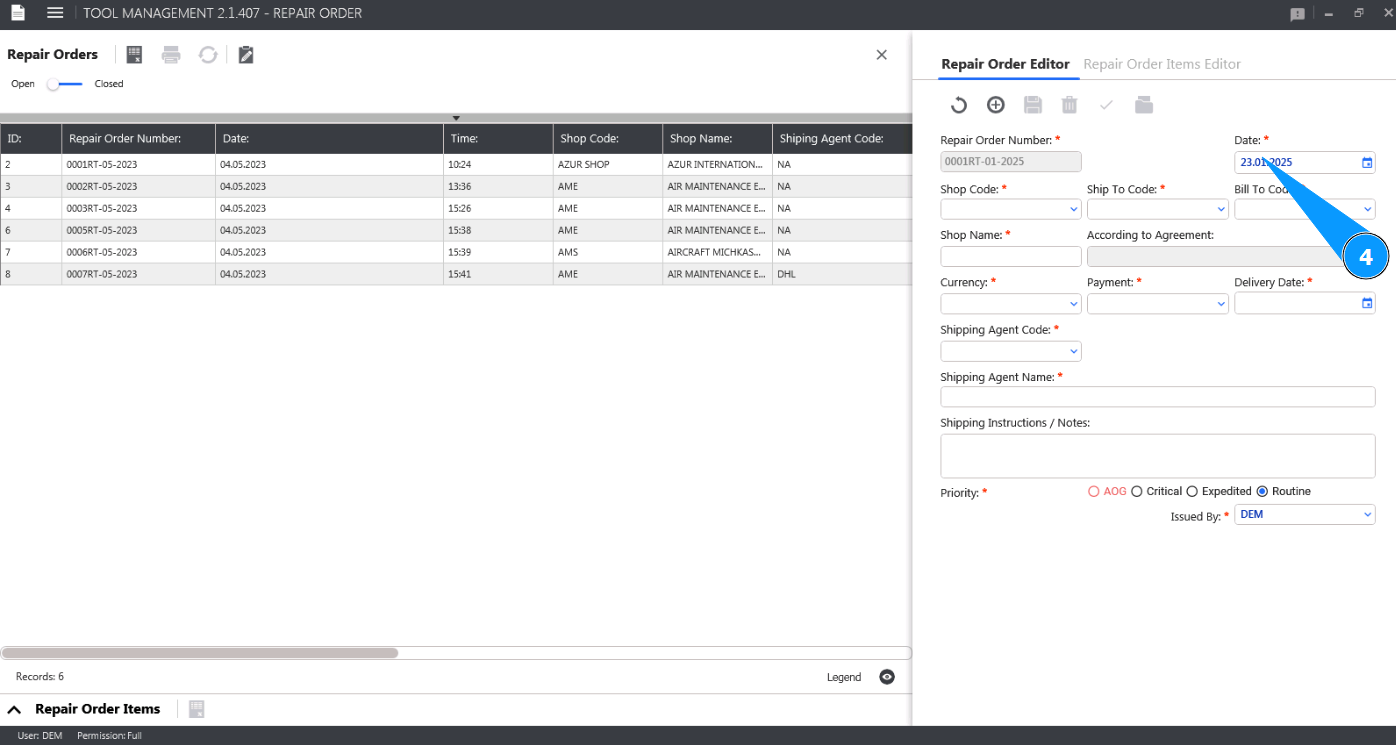
5. Select the name of the shop where the component is sent from the dropdown list in the field "Shop Code". Note: The shop name will be displayed by the program automatically in the field "Shop Name".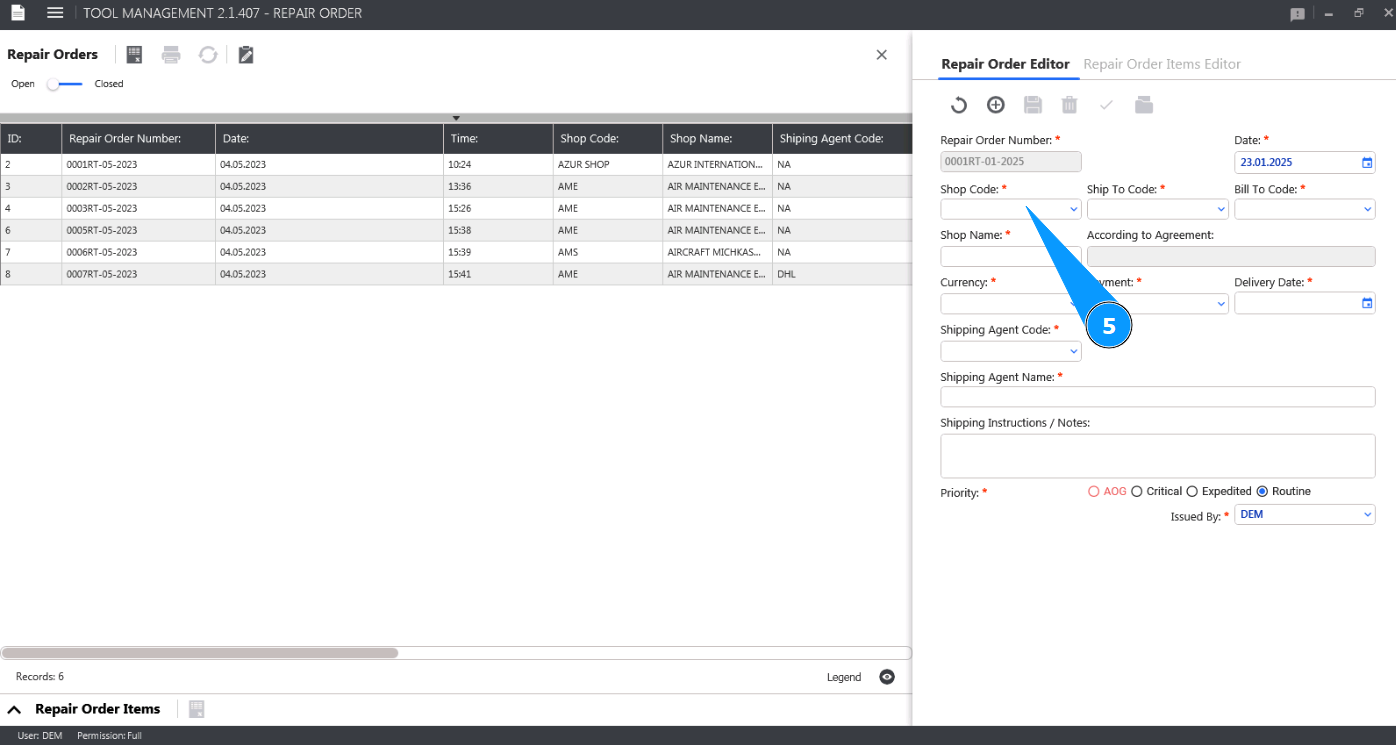
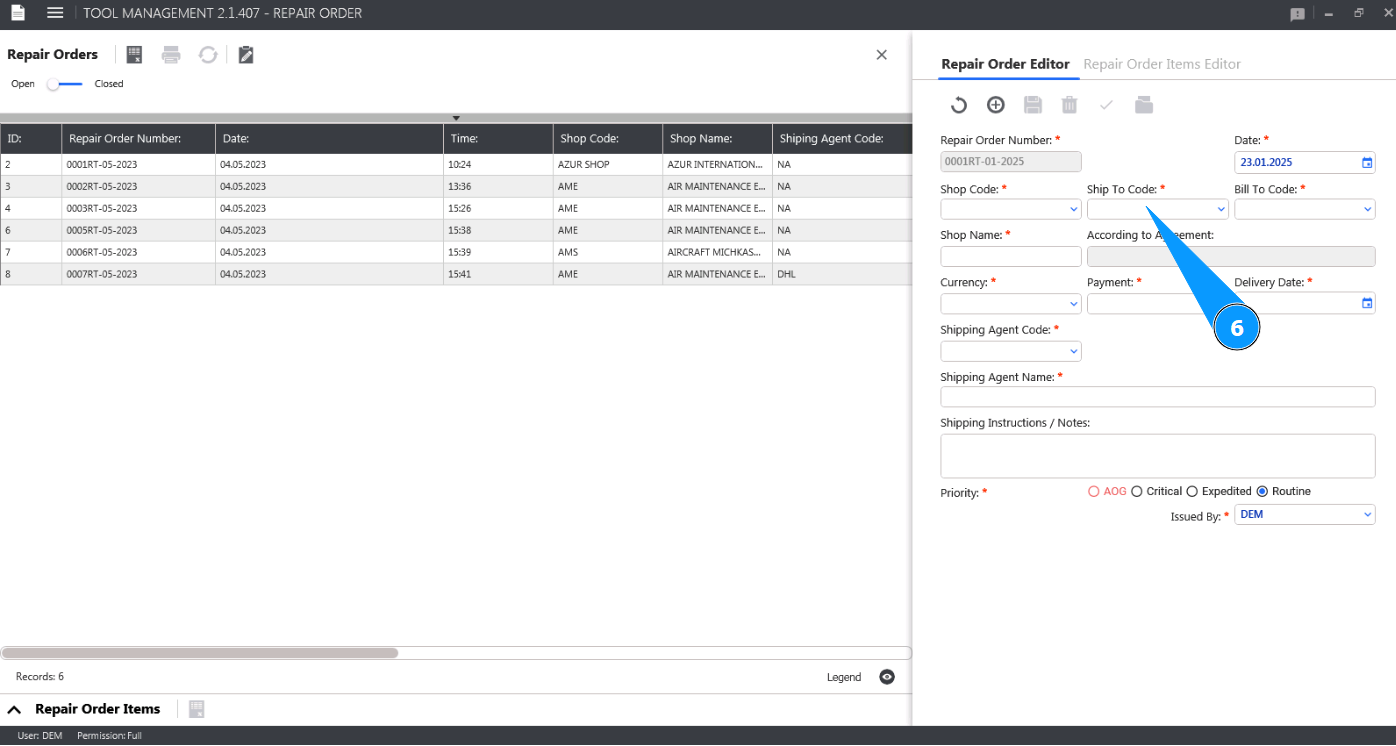
6. Select the name of the return shipping location where the component will be returned from the dropdown list in the field "Ship to Code".
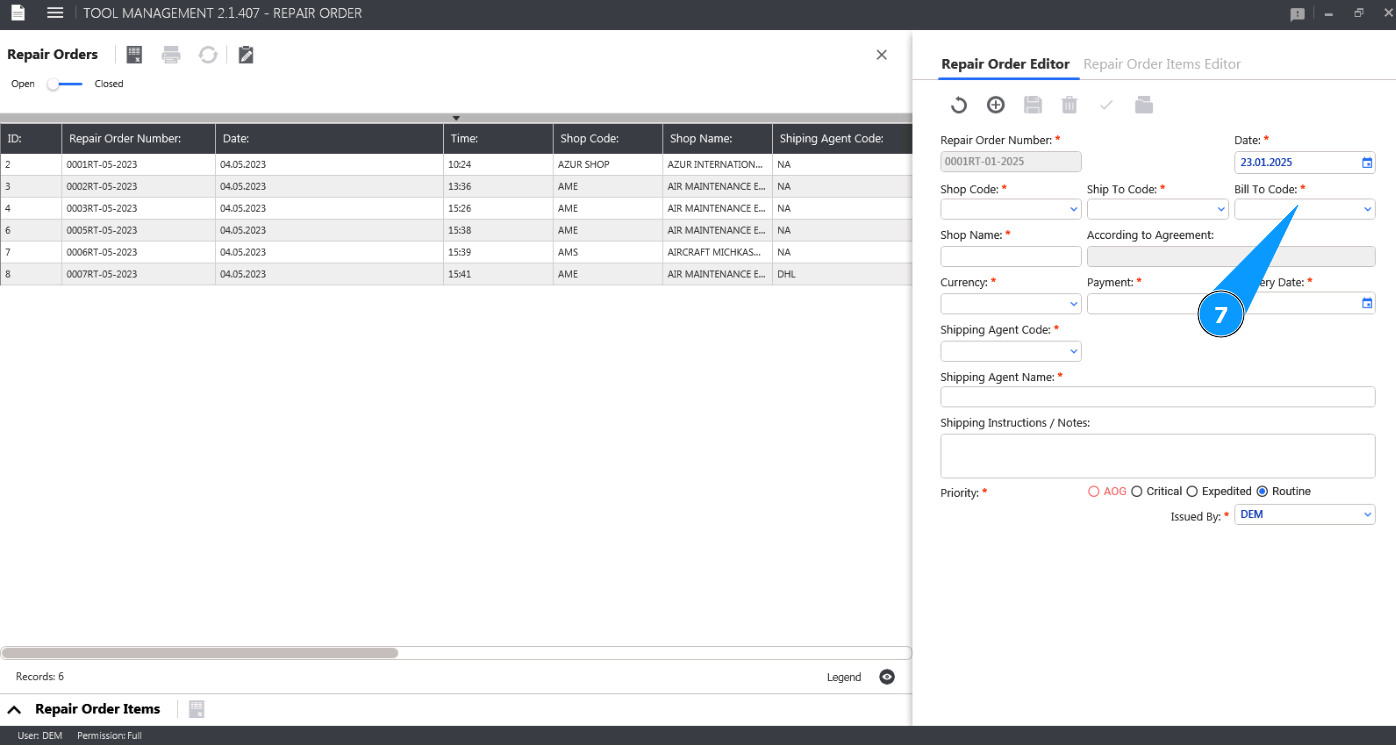
7. Select your company's billing information from the dropdown list in the field "Bill to Code".
8. Select the invoice payment currency from the dropdown list in the field "Currency".

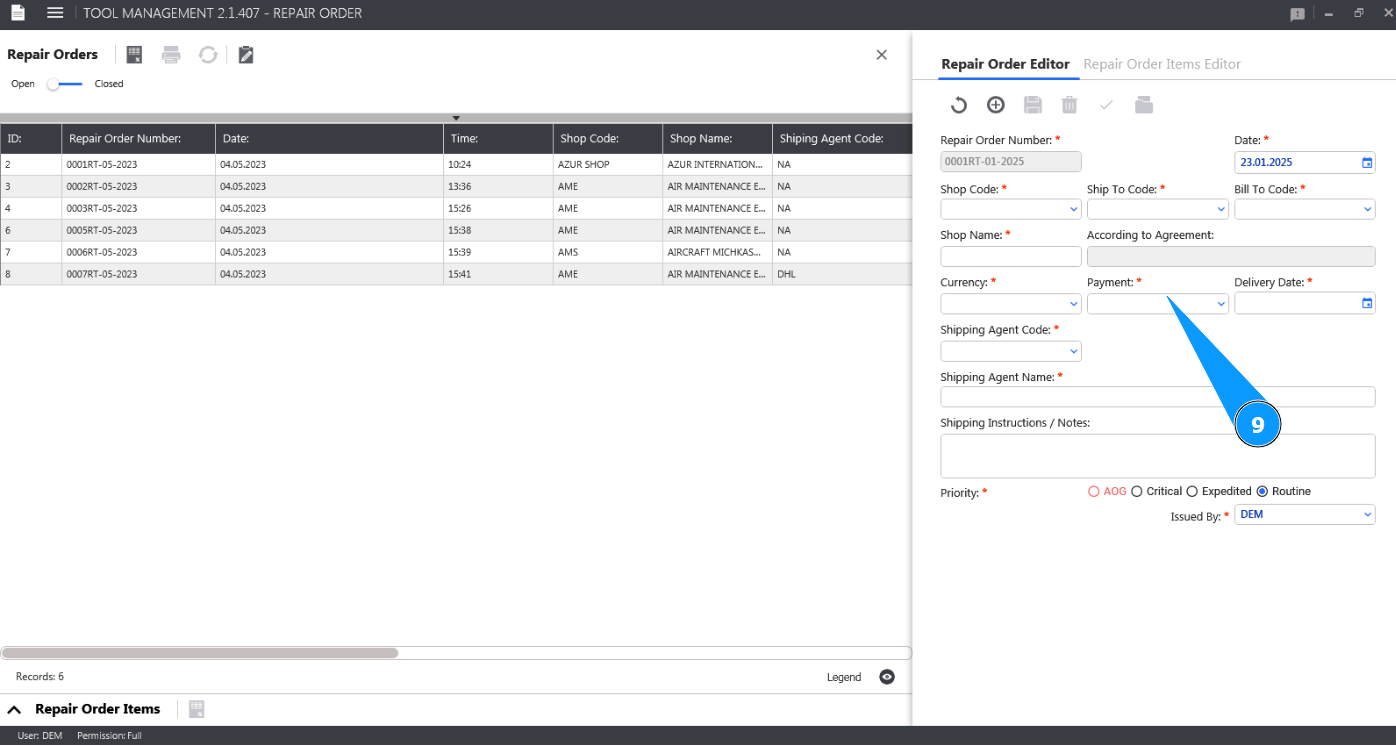
9. Select the payment type from the dropdown list in the field "Payment".
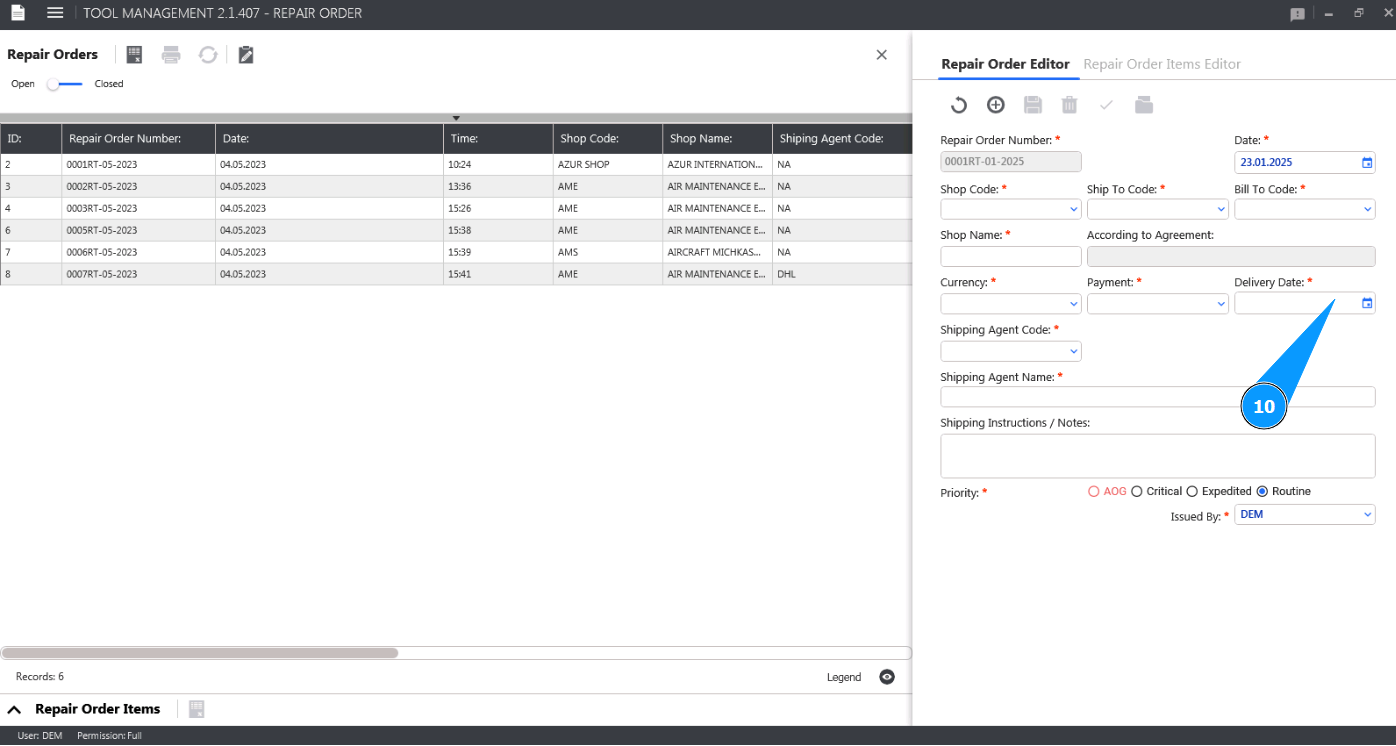
10. Enter the date the tool is returned from repair in the field "Delivery Date".
11. Select the name of the shipping company from the dropdown list in the field "Shipping Agent Code". Note: The name of the shipping company will be displayed automatically by the program in the field "Shop Name".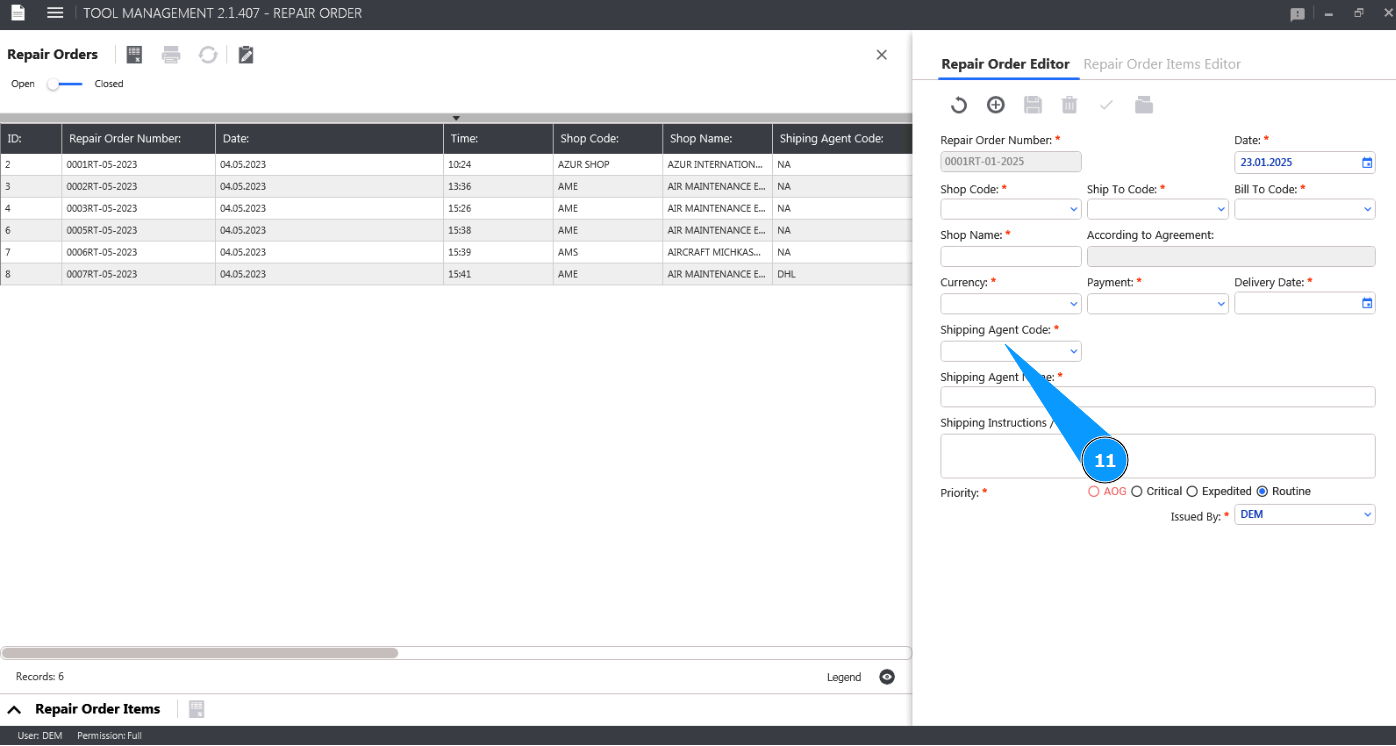
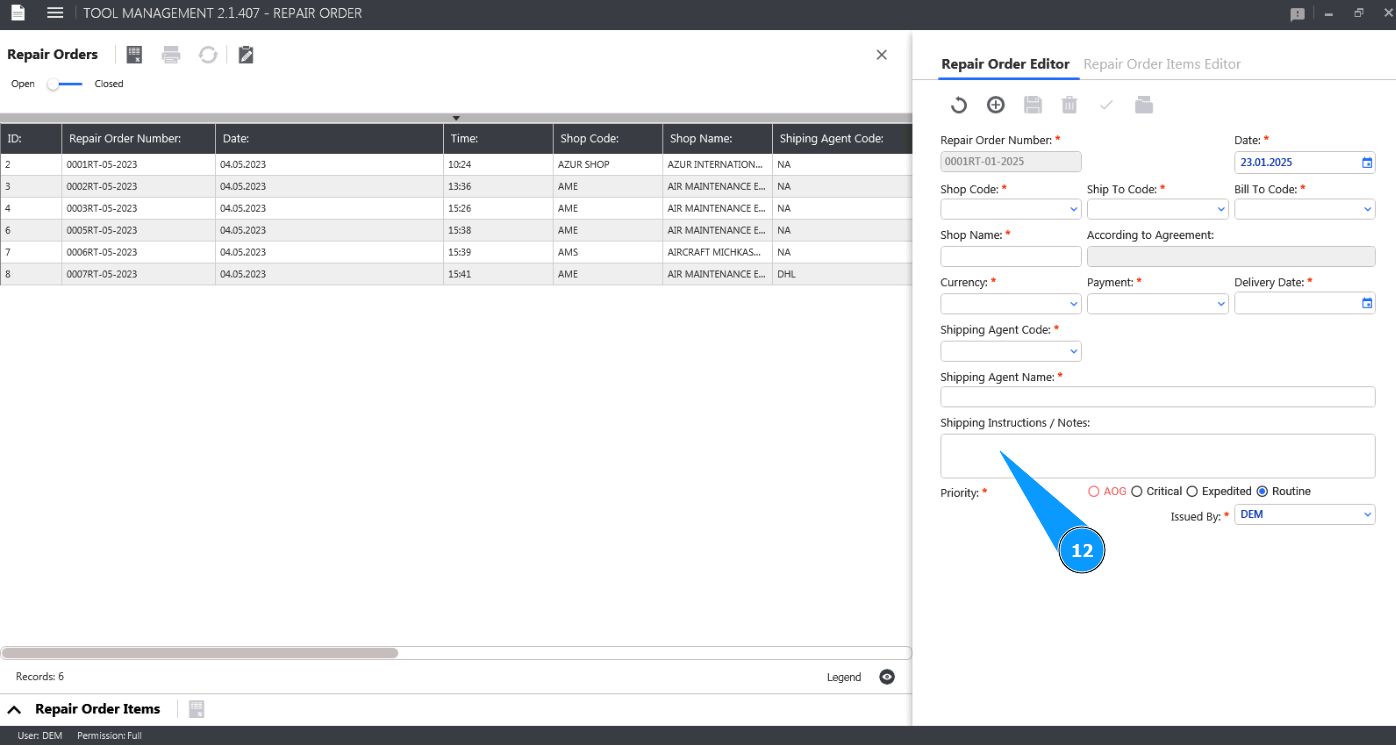
12. If necessary, enter additional comments or instructions for shipping the tool in the field "Shipping Instructions/Notes".
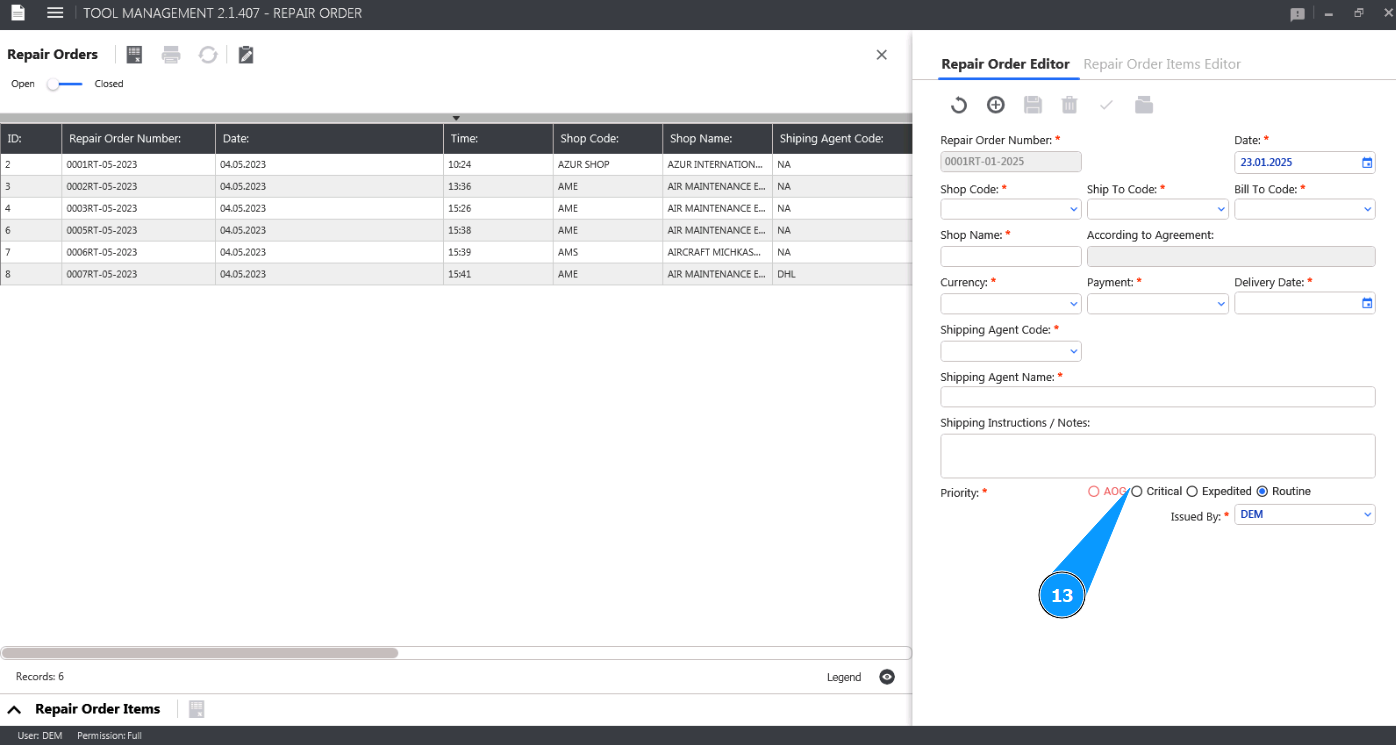
13. Enter the priority of the tool repair in the appropriate field.
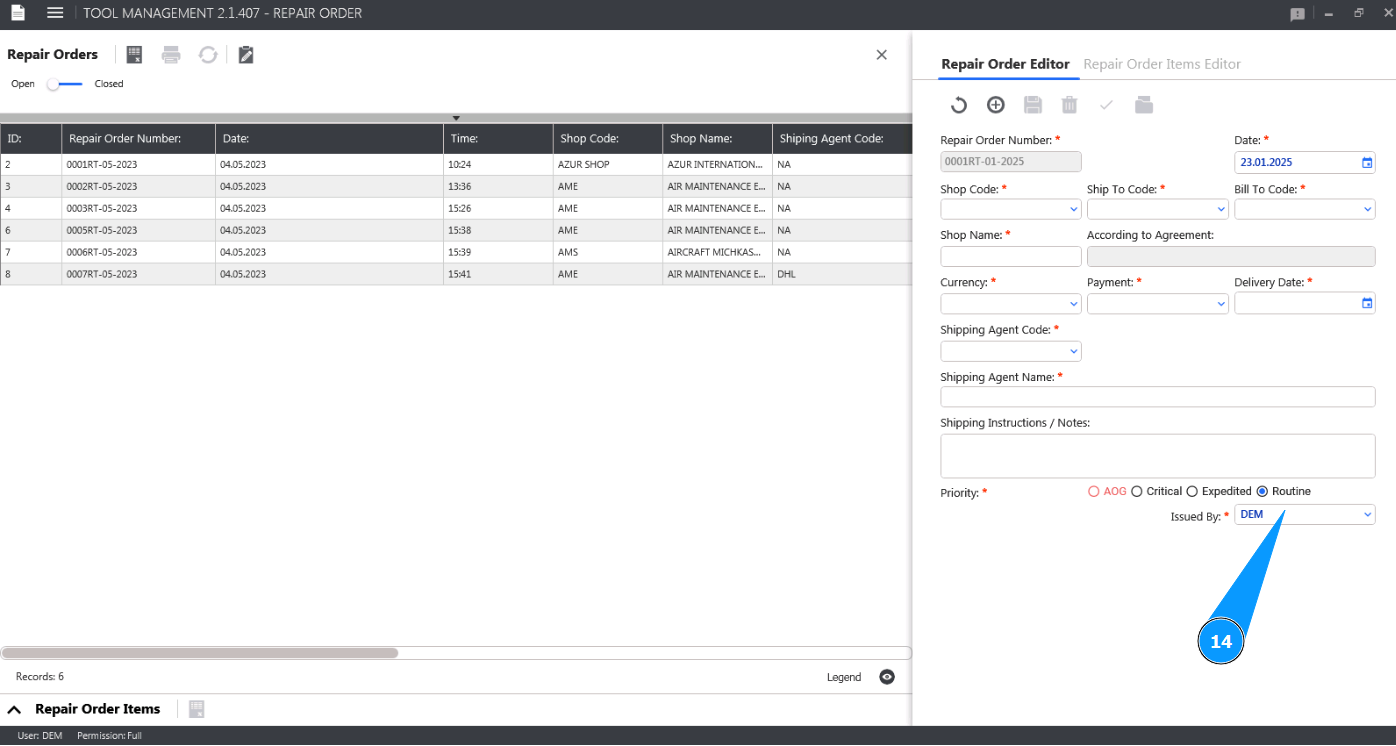
14. Select the login of the personnel who created the Repair Order from the dropdown list in the field "Issued By".
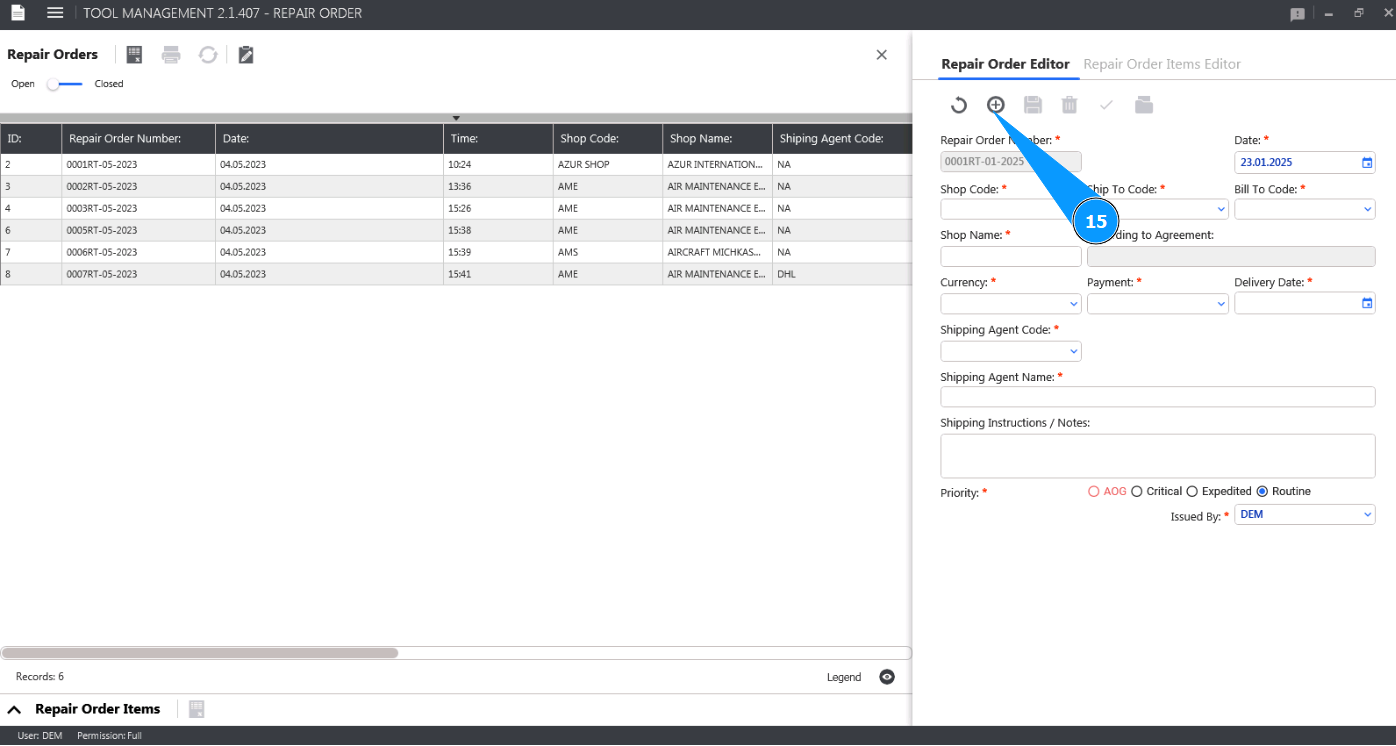
15. Click on the button "Add" to write the created Repair Order to the program memory.
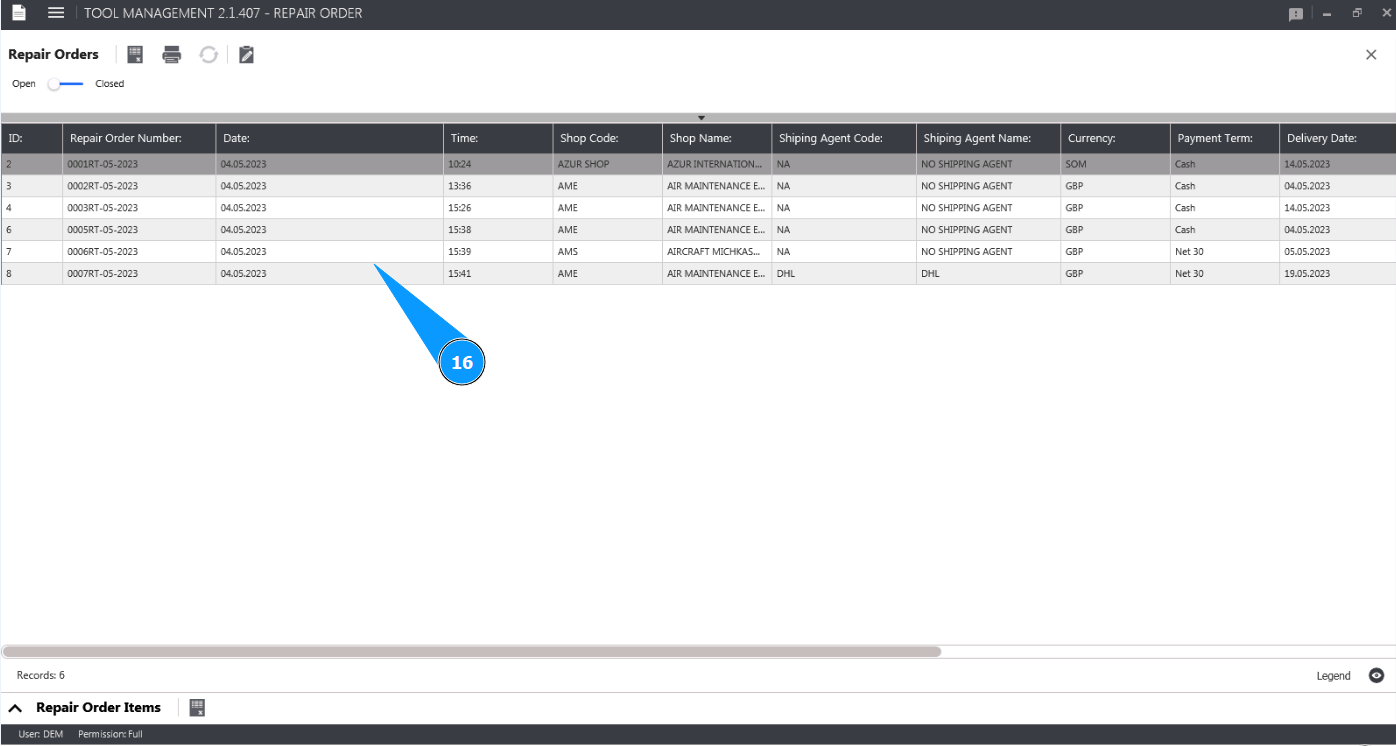
16. Check that your Repair Order is displayed in the window "Repair Orders".