How to receive serviceable components to store
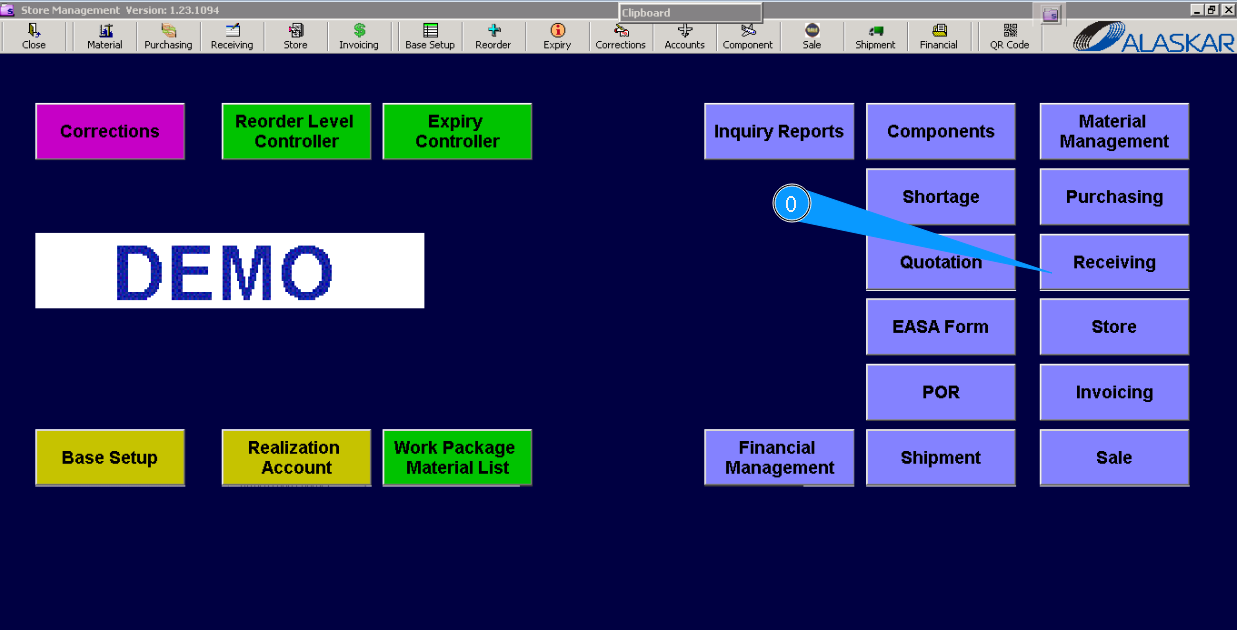
0. To start the receiving process of a serviceable component, go to submodule "Receiving".
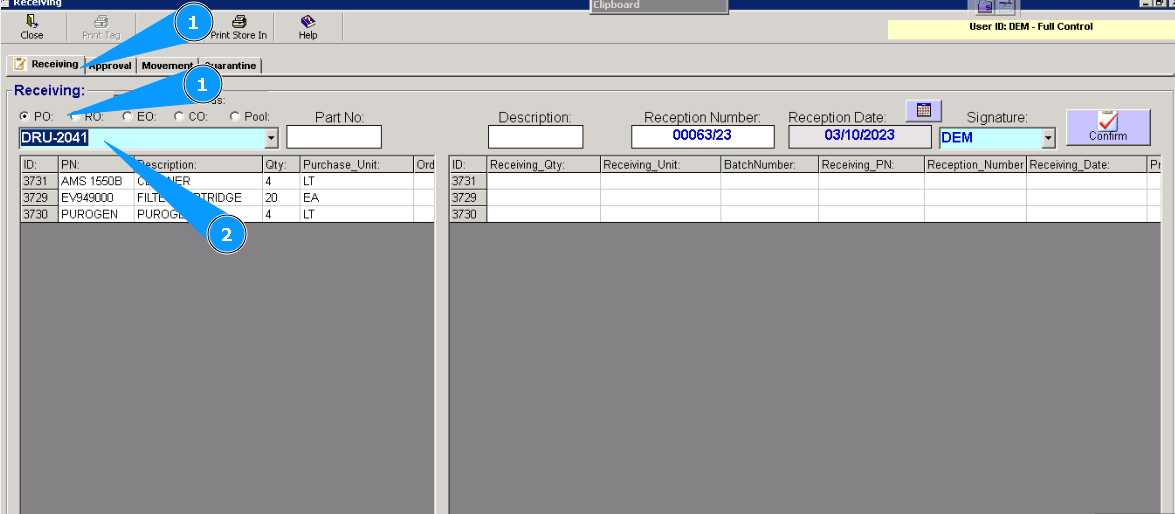
1. Then go to the tab "Receiving". Select one of the following Order types: PO, RO, EO, CO, or Pool.
2. Enter the Order number to find the line, and press the button "Enter" on your keyboard or select from dropdown list.
Note: Receiving is possible if Order number (PO, RO, EO, CO, or POOL) exists.
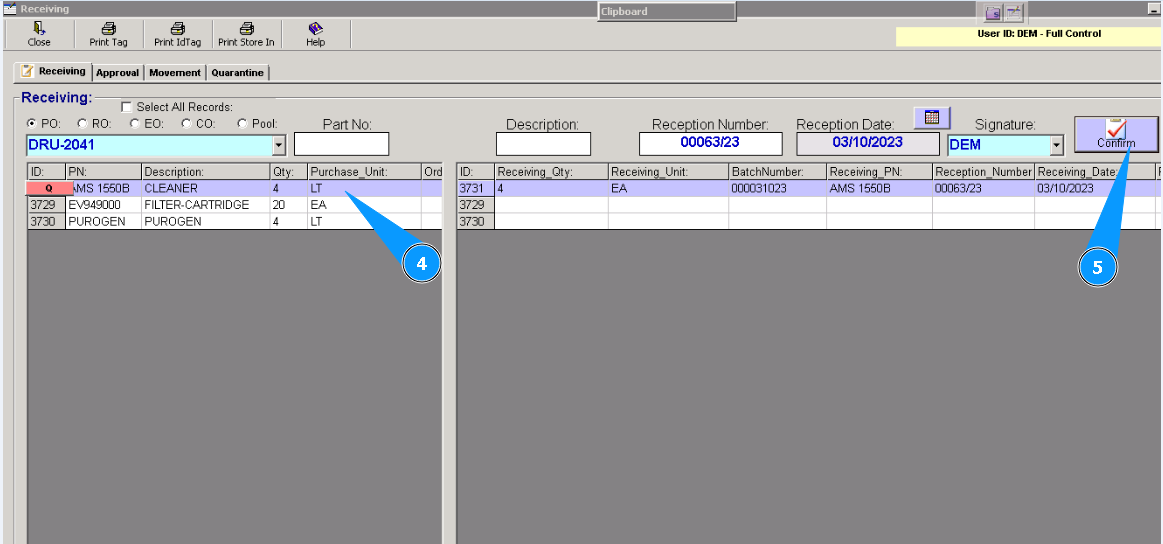
3. Visually, check that the necessary components are identified in the line below.
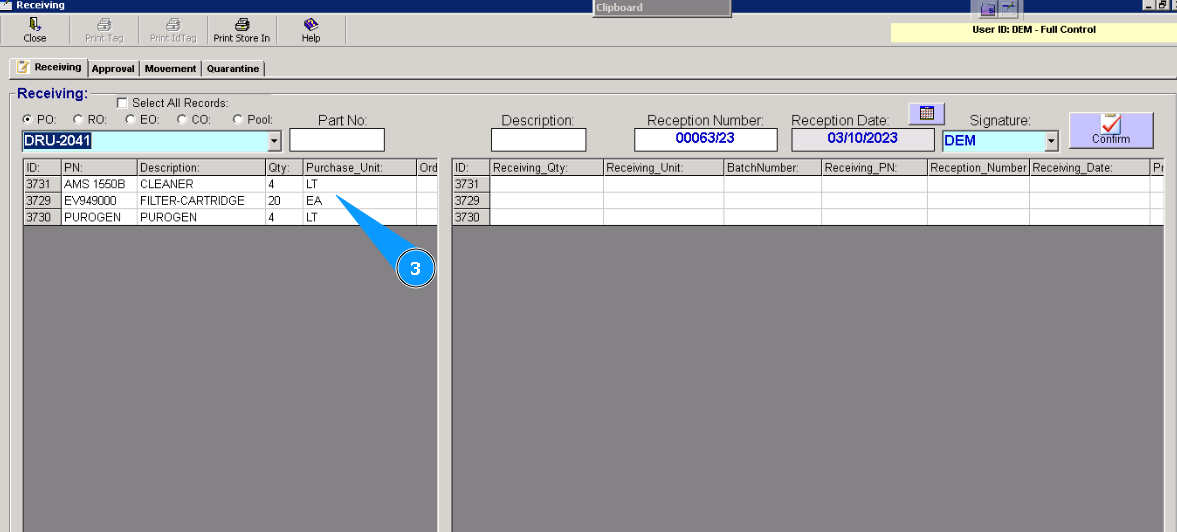
4. Highlight the necessary line below.
5. Click on the button "Confirm".
Note: Click on the field "Select all Records" to select all lines in the Order simultaneously.
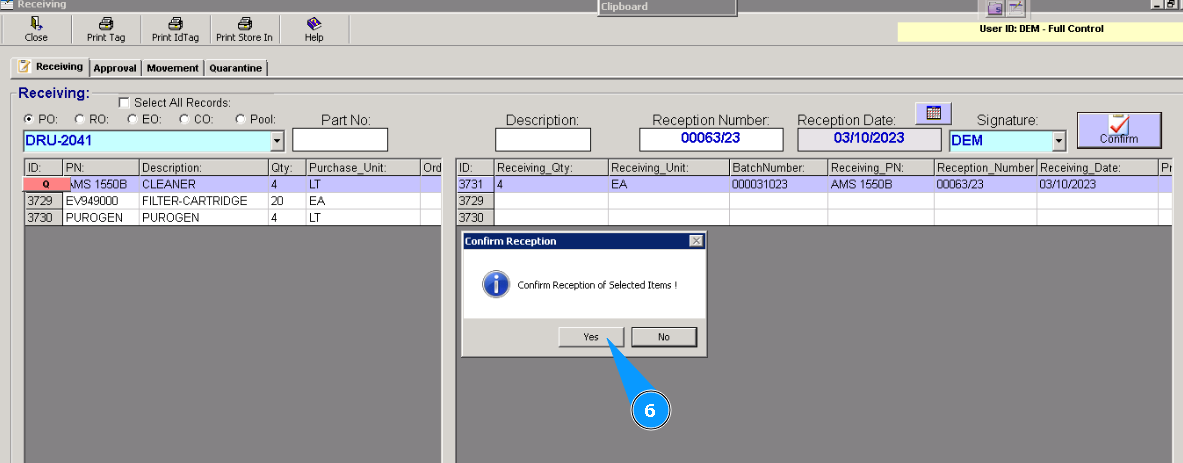
6. Click **"Yes" to confirm loading information.
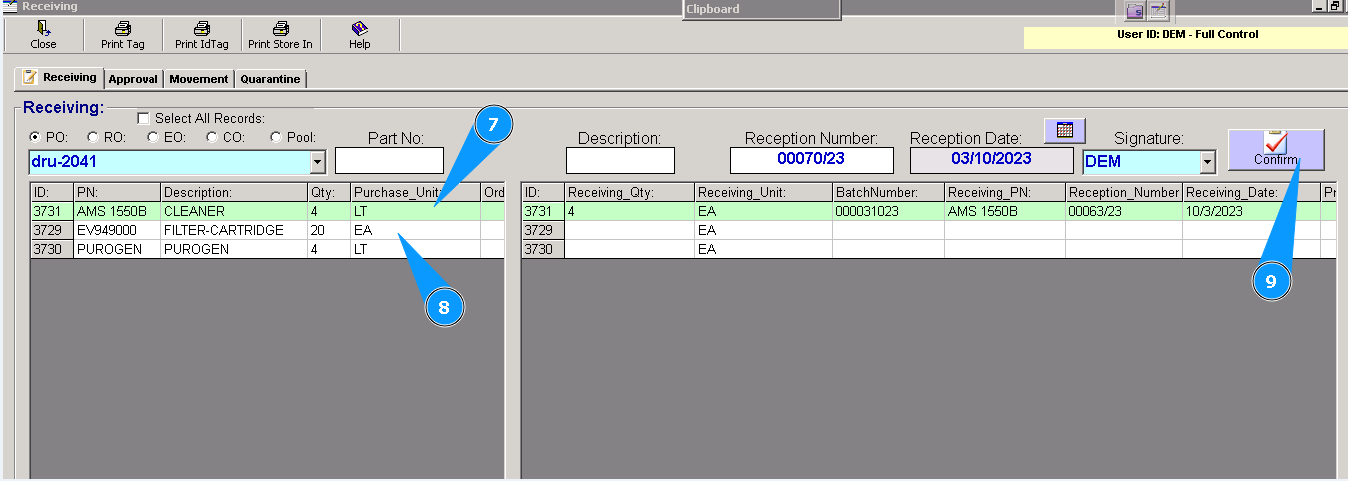
7. Check if the applicable line has changed its color to green.
8. Highlight the necessary line (if more than one line is presented).
9. Click the button "Confirm".
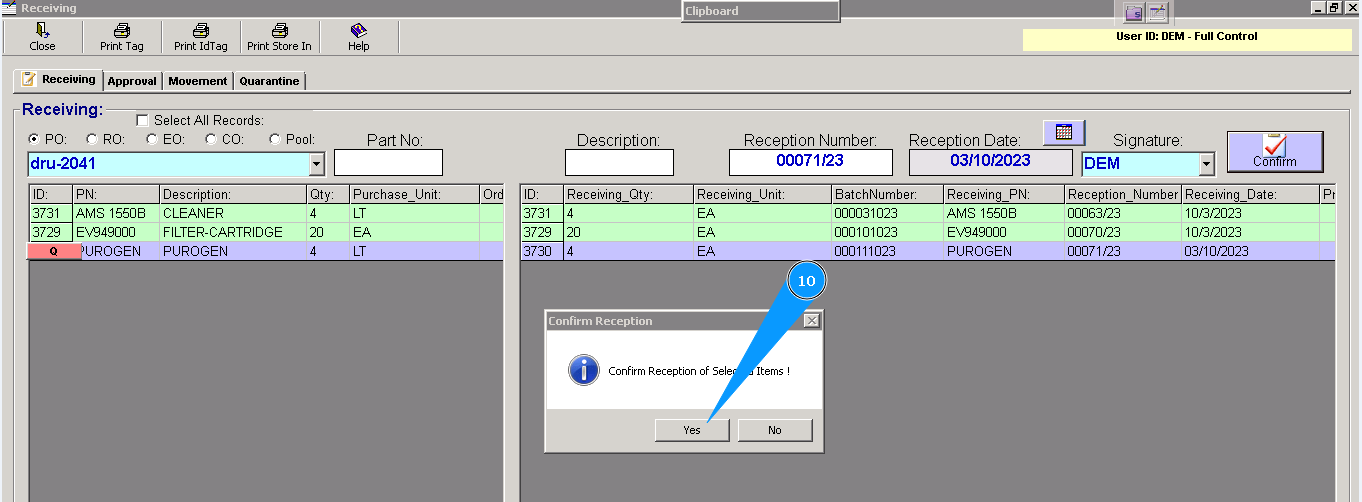
Note: The white color means the component has not been received and isn't approved.
A Green color means a component is well received but isn't approved.
The Yellow color means the component is well received and well approved, and the shelf is identified.
10. Click "Yes", to end the first part of the receiving process. Check that all lines are colored green.
11. In the same submodule, "Receiving," go to the tab "Approval".
12., 13. , 14. By default, Order number, Order type and its line with components should be presented on your screen.
Note: If the Order number, Order type and its line with components are not presented on your screen, select one of the following Orders: PO, RO, EO, CO, or Pool. Enter the Order number to find the line, press the button "Enter" on your keyboard, or select from the dropdown list.
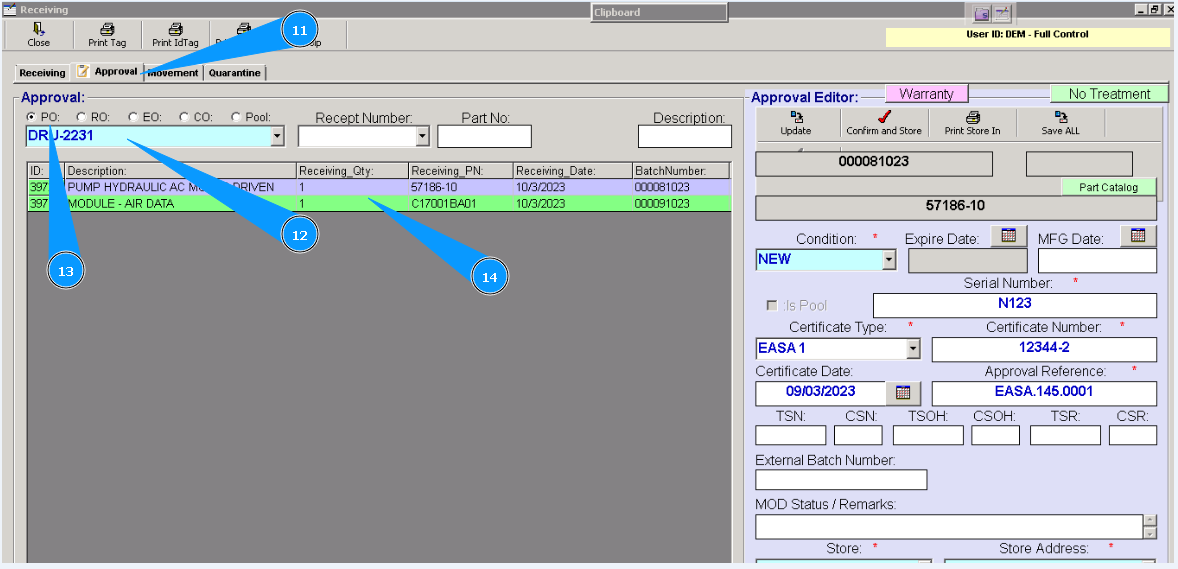
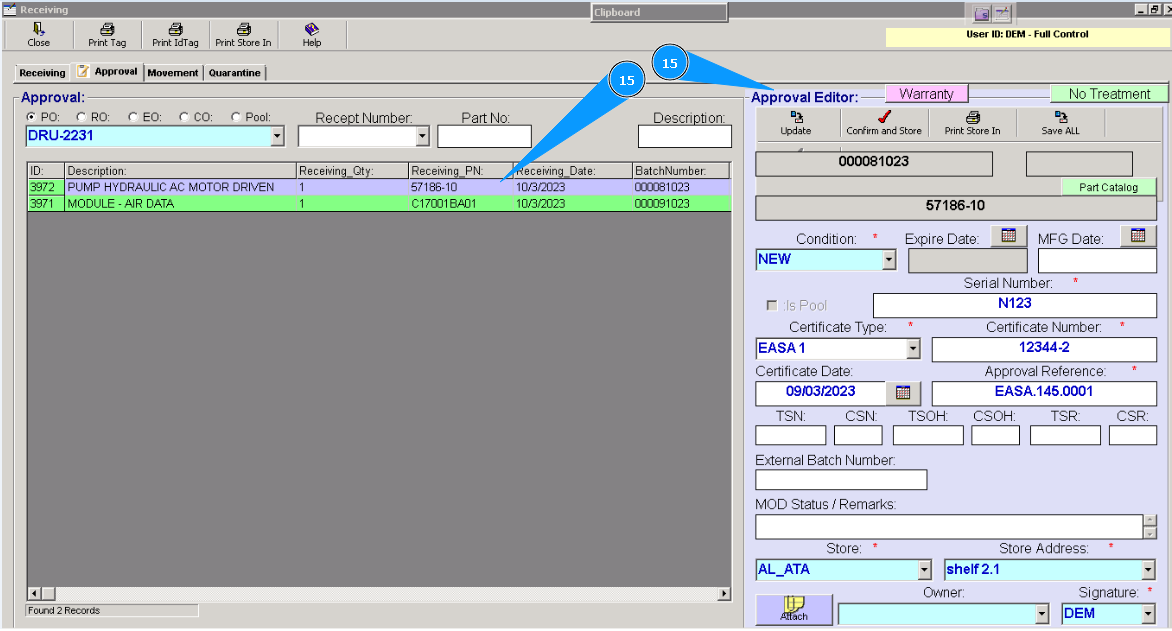
15. Highlight the line with the component, and check that the "Approval Editor" window is opened and active
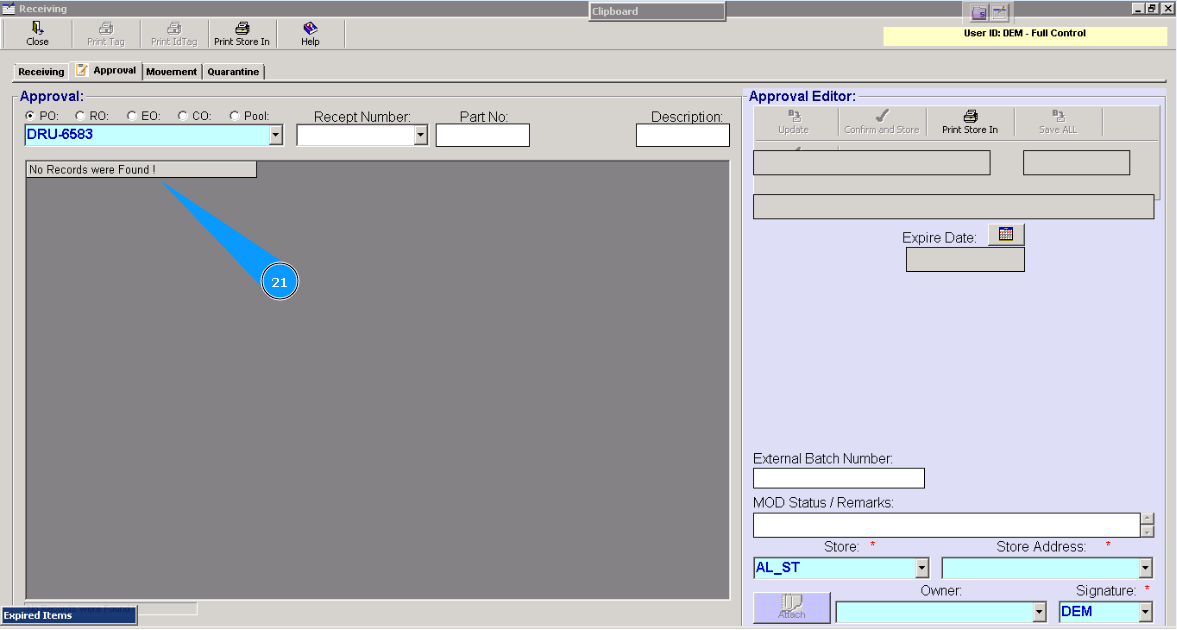
Note: All fields marked by red stars are mandatory to be filled in. These empty fields are forbidden.
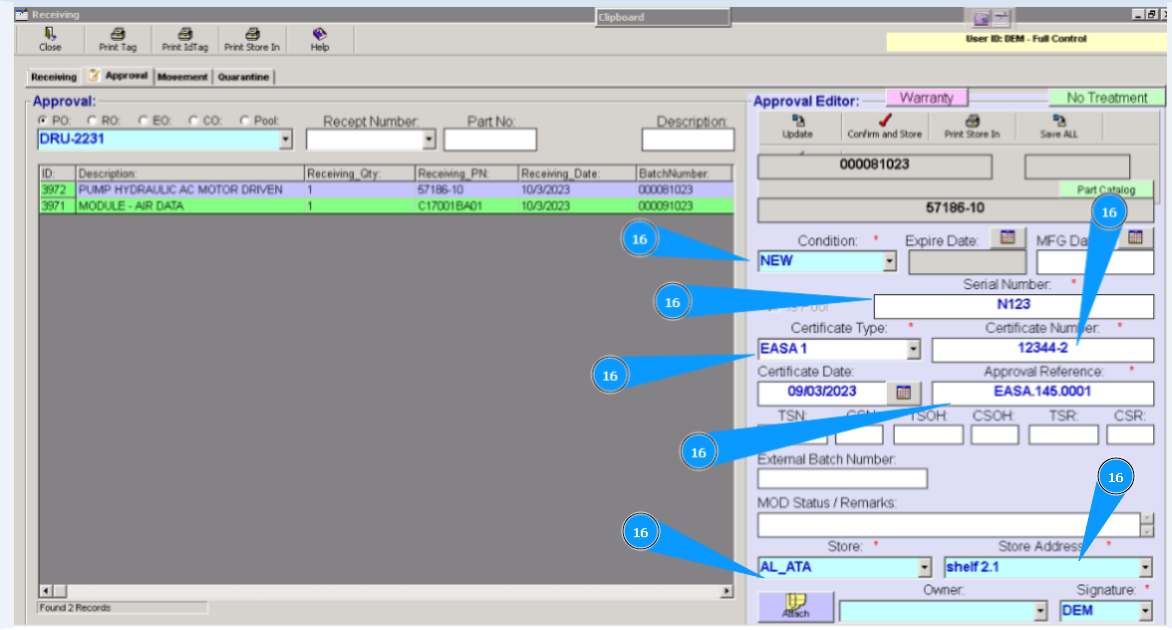
16. Put missing data on the component, such as: condition, serial number, certificate type, certificate number, certificate validity date, approval reference, applicable store, shelf number (room, rack и etc.), your signature.
Note: If applicable, attach the necessary documents. Click on the button "Attach".
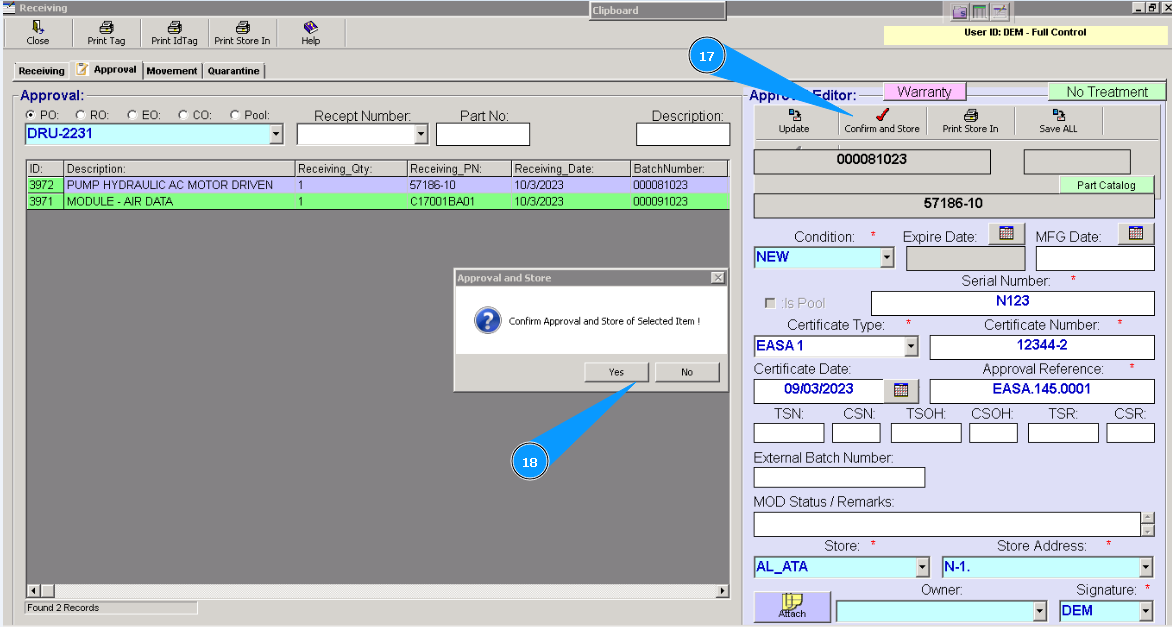
17. Click on the button "Confirm and Store".
18. To confirm approval, click on the button "Yes".
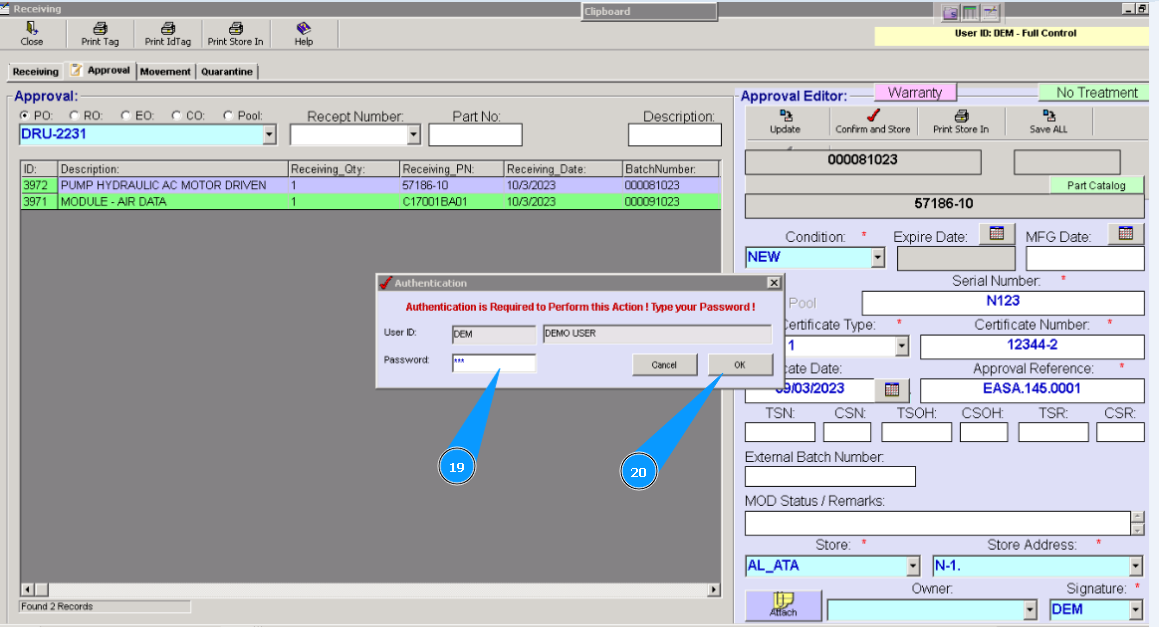
19. Enter your Alaskar password in the window that appears.
20. Click on the button "OK". Approval process is finished.
21. Check that the line with the component is disappeared in the window "Approval". Receiving of component to store is fully completed.