How to move a removed component to repair shelf
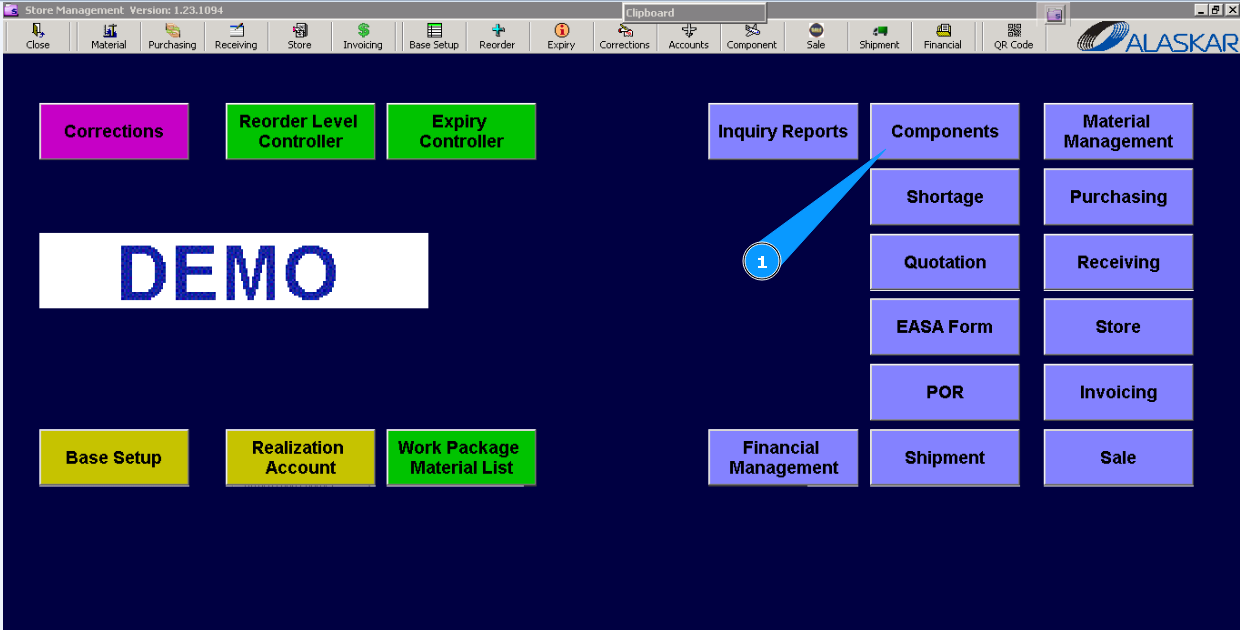
1. For moving a removed component to the repair shelf, go to submodule "Components".
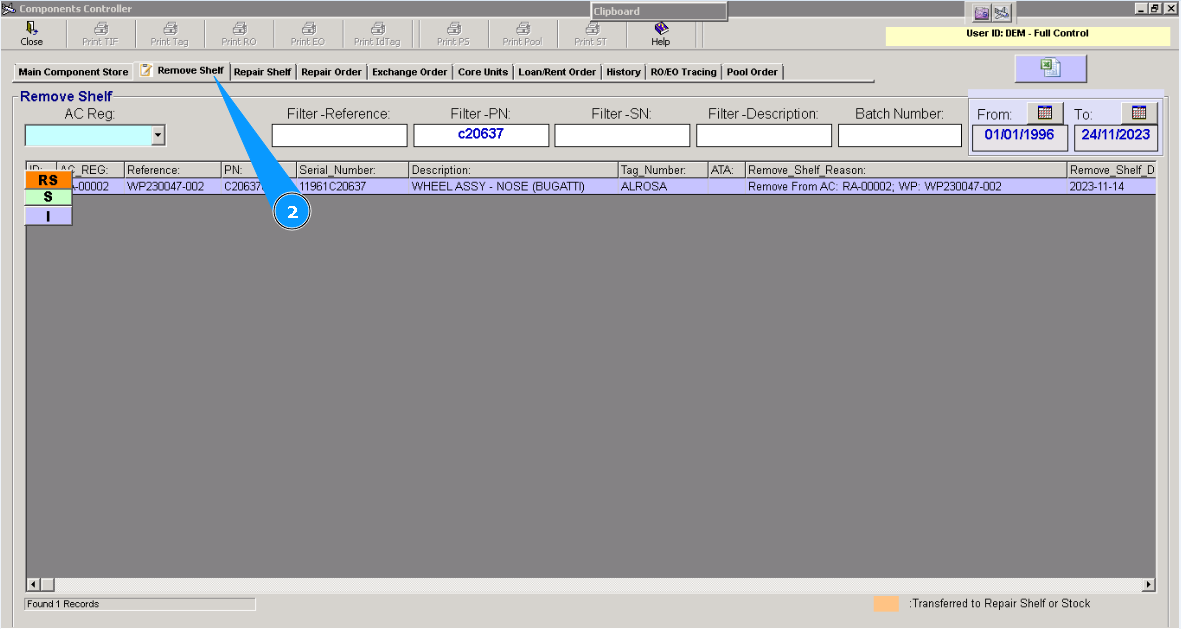
2. Then go to the "Remove Shelf".
Note: If necessary, you can use additional criteria for searching: "Filter-Description", "Filter-SN", "AC Reg" etc.
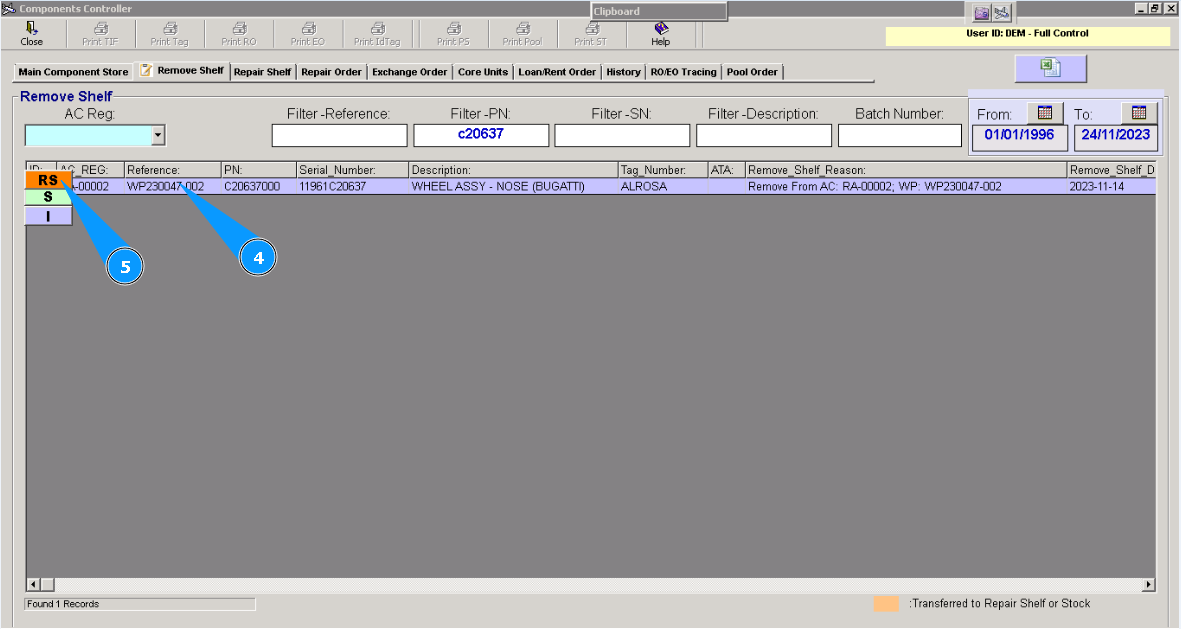
3. Enter the part number in the search field "Filter-Part Number", and press the button "Enter" on your keyboard.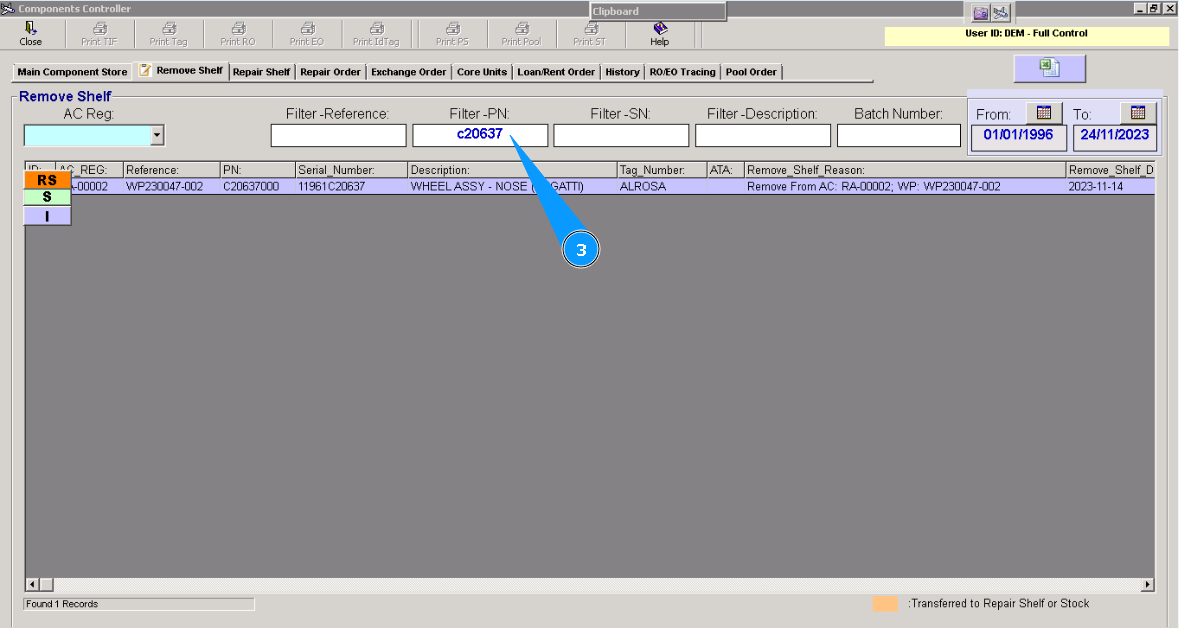
4. Highlight an applicable line with the found component.
5. Click on the button "RS" (Transfer to Repair Shelf).
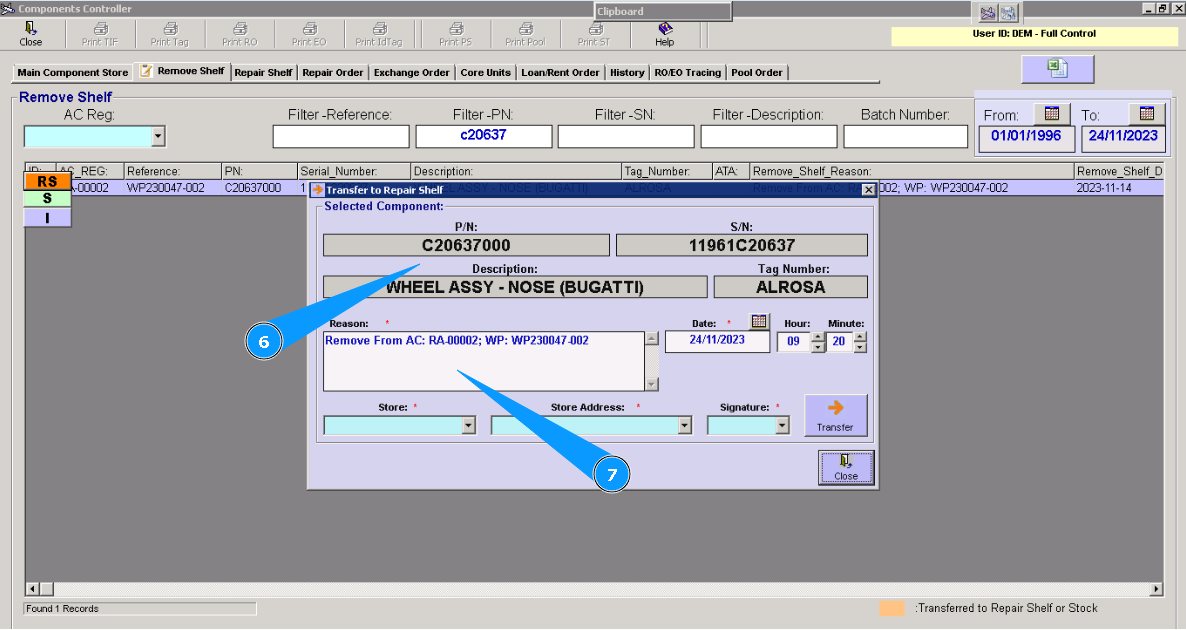
6. Check the information on the component.
7. There is data for removing in the field "Reason". If necessary, you can change it.
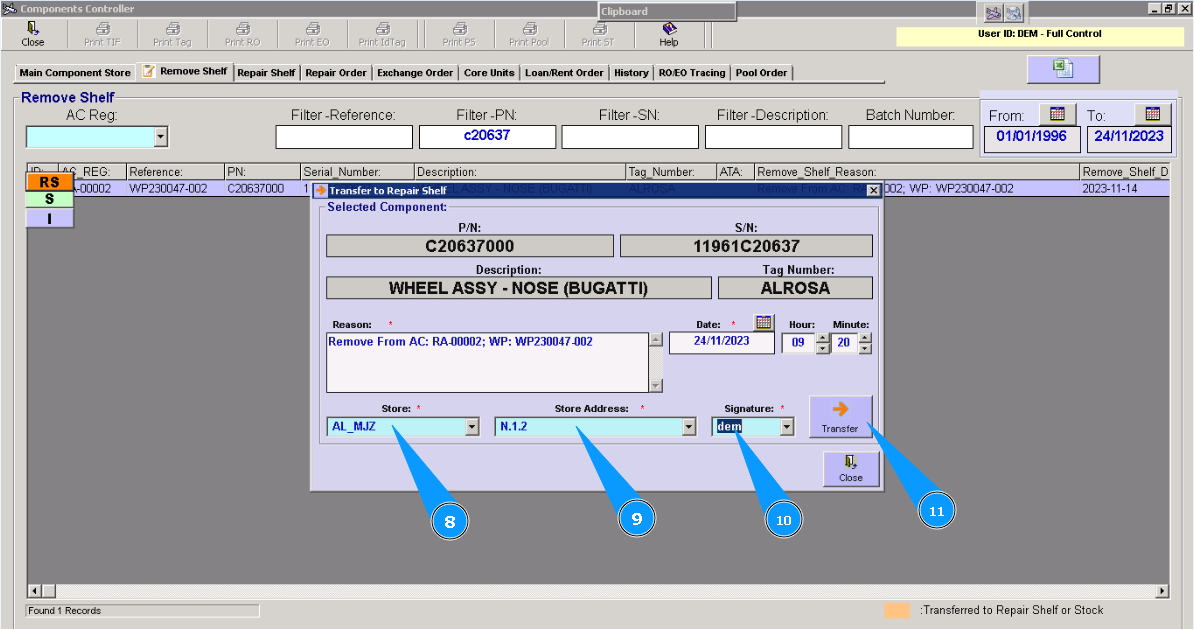
8. Enter the store name in the field "Store".
9. Enter the shelf number in the field "Store Address".
10. Enter your Alaskar login in the field "Signature".
11. Click on the button "Transfer".
Note: The current date is displayed by default. If necessary, you can change the date of your move.
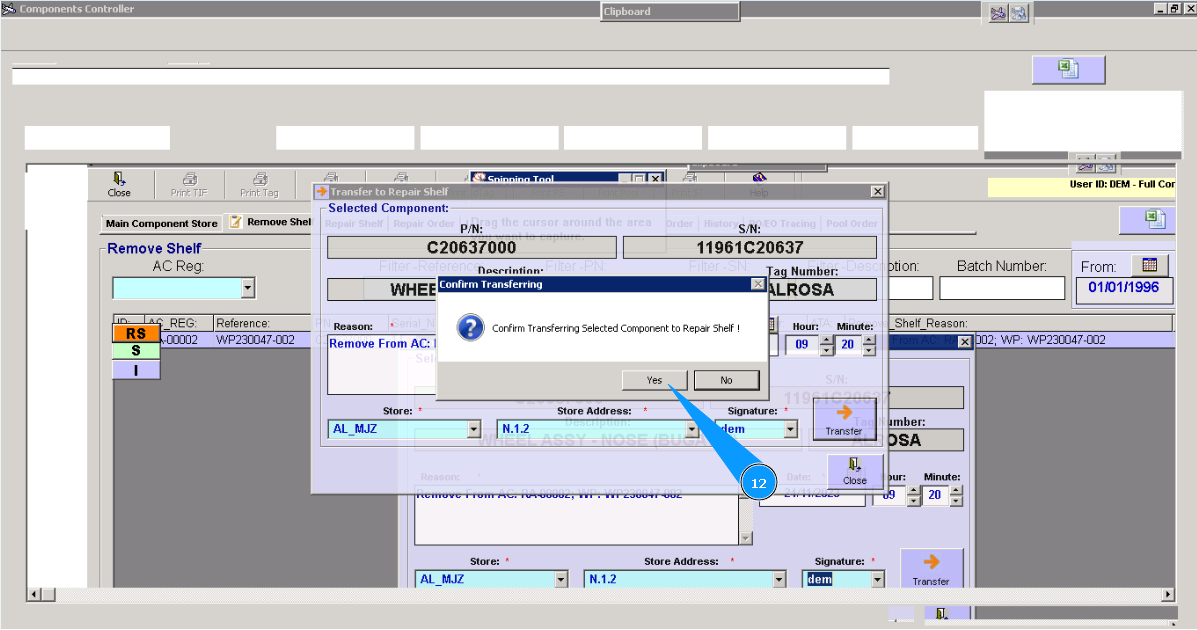
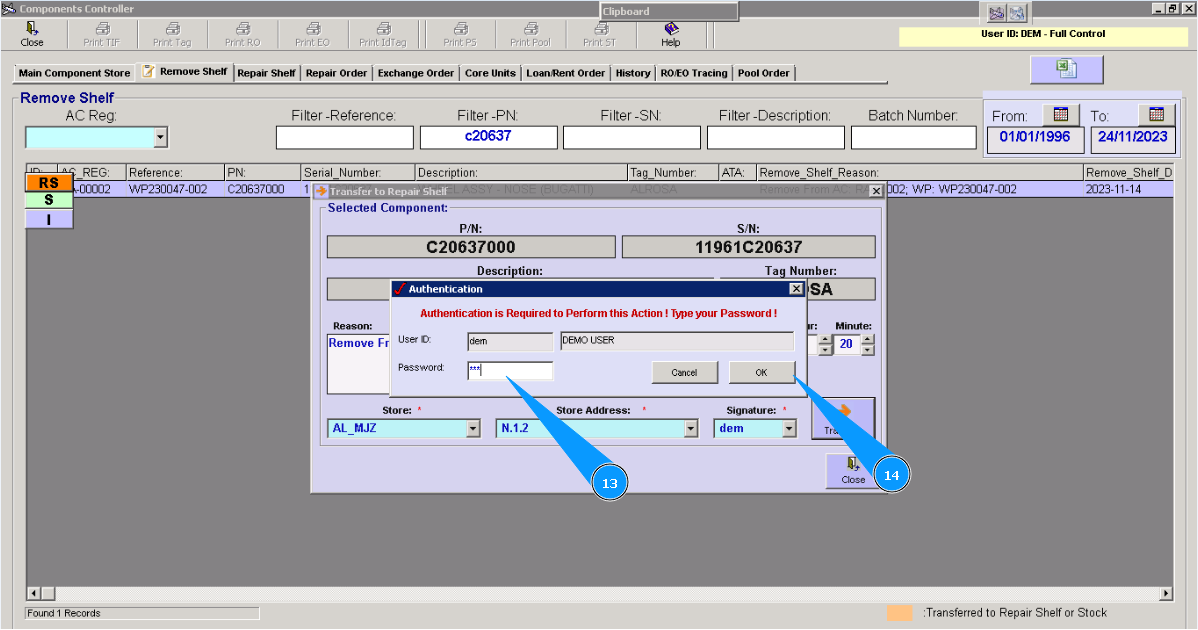
12. Click on the button "Yes", to confirm moving the component to the repair shelf.
13. Enter your Alaskar password.
14. Click on the button "OK".
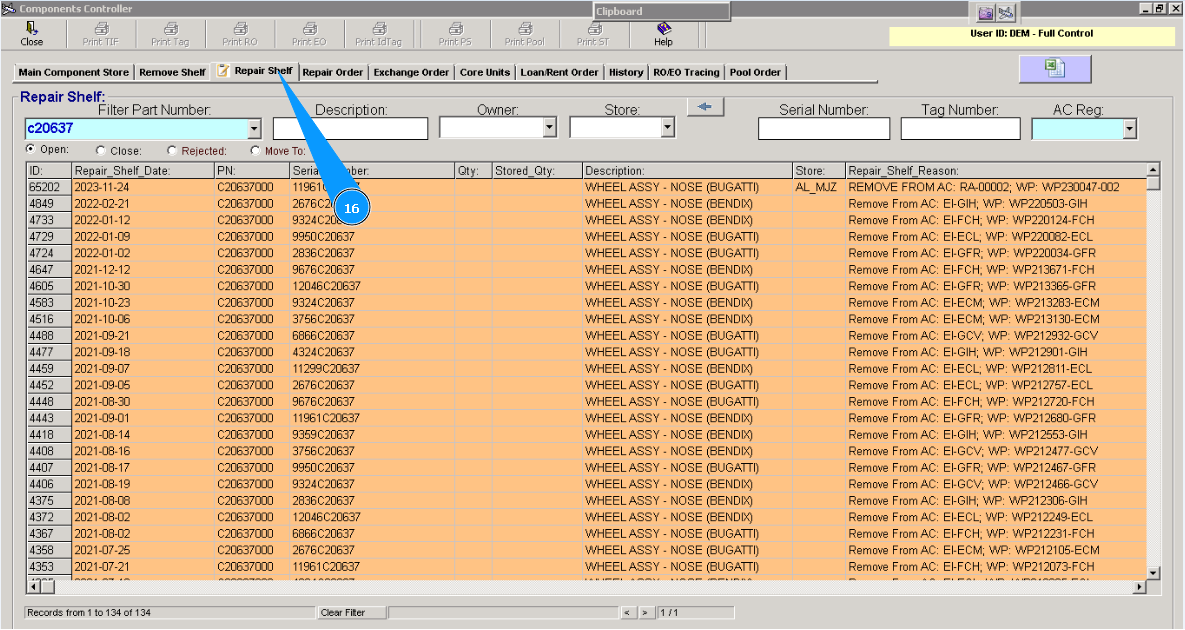
15. Check that the color of the line has changed. Transfer to the repair shelf is fully completed.
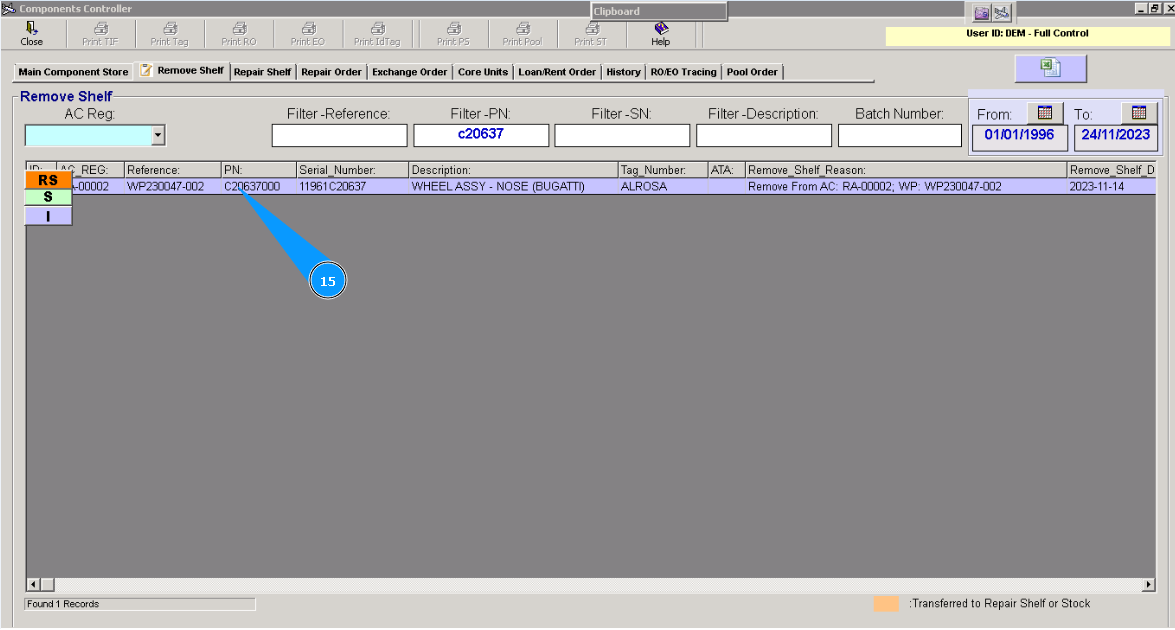
16. To make sure and perform other actions with the component, you can click on the tab "Repair Shelf".