How to create a request to replenish store
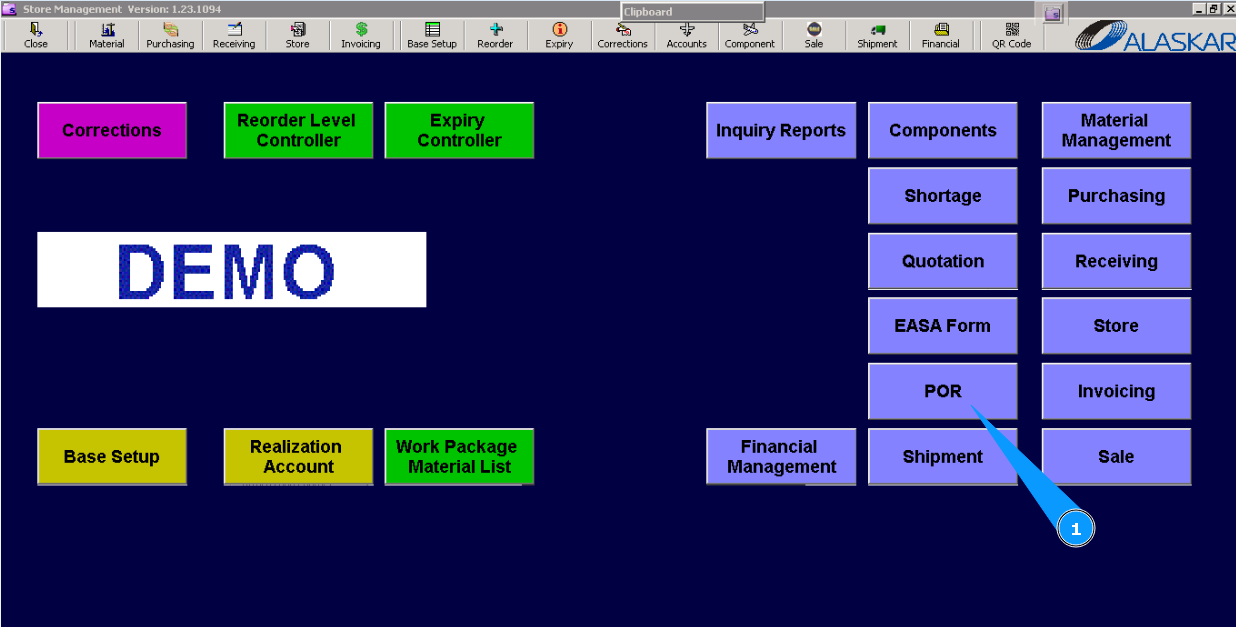
1. For the creation of "Part Order Request (POR)" for store replenishment reasons, go to submodule "POR (Part Order Request)".
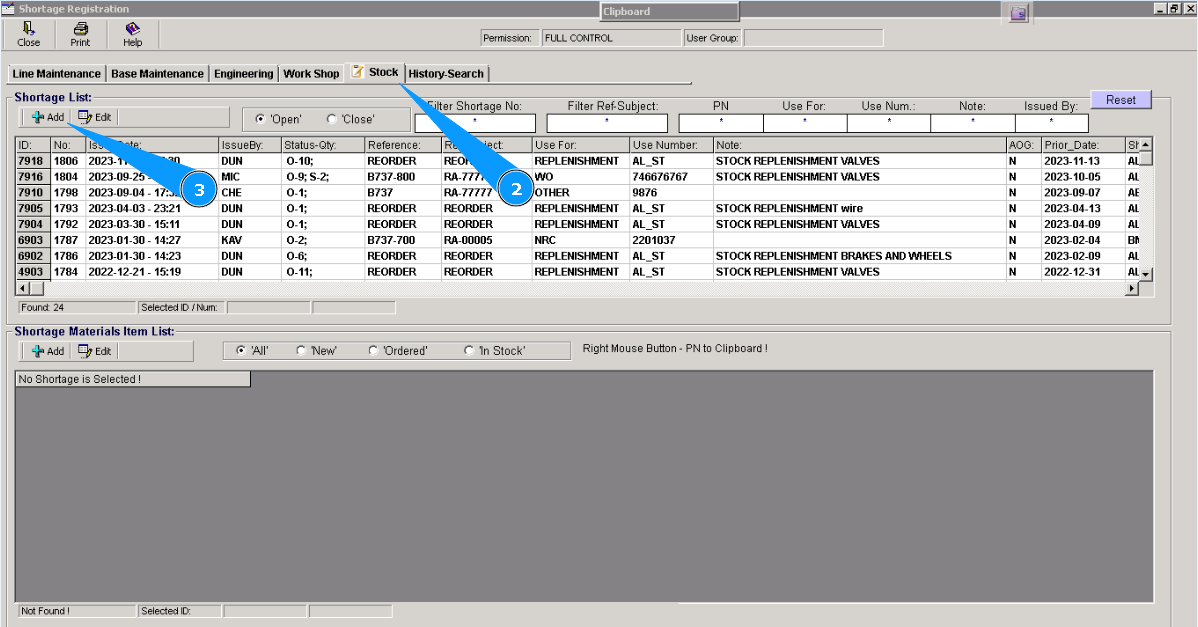
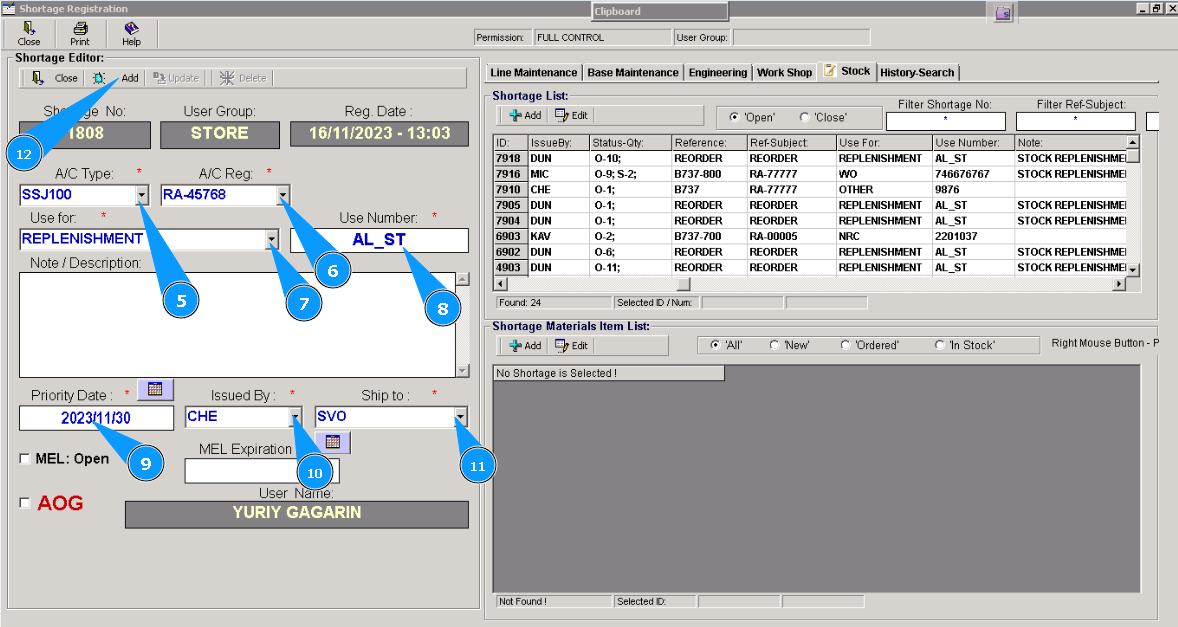
2. Then go to tab "Stock".
3. Click on the button "Add".
Note: The fields of the editor "Shortage №", "User Group", "Reg.Date" are to be automatically filled in.
4. Check that the window of the editor "Shortage Editor" is opened. It should be filled in with data.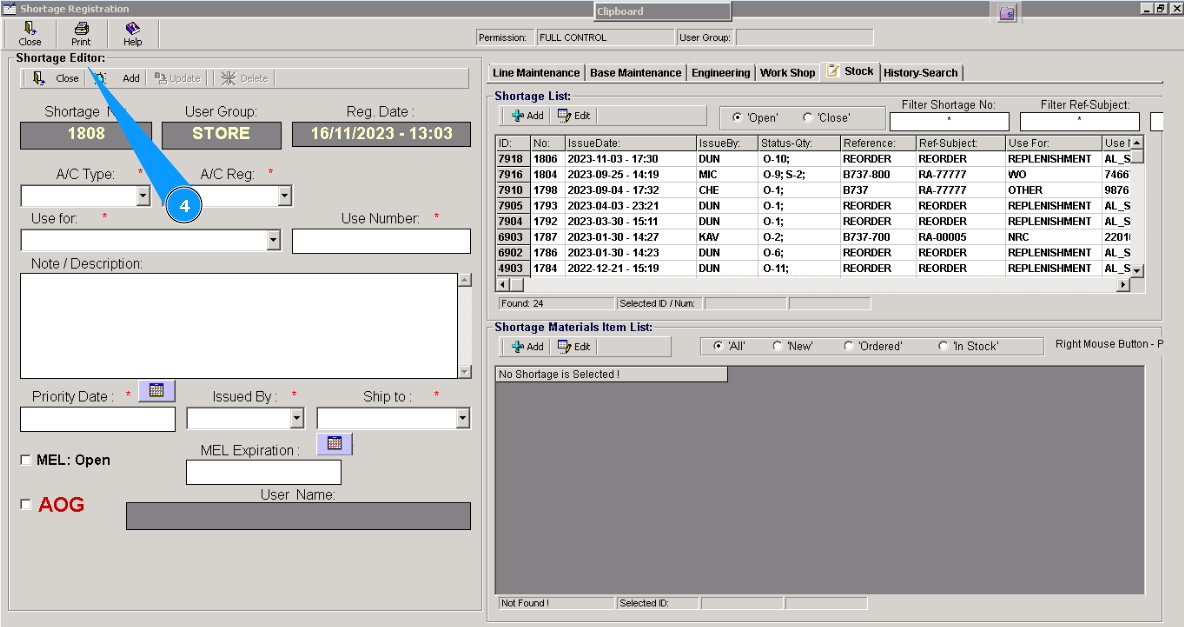
5. Select aircraft type from dropdown list in the field "A/C Type:".
6. Select the registration number of the aircraft from the dropdown list in the field "A/C Reg:".
7. Select the criterion "Replenish" from dropdown list in the field "Use for".
8. Enter the store name in the field "Use Number".
9. Enter the necessary shipping date in the field "Priority Date".
10. Enter your login from Alaskar in the field "Issued by".
11. Enter the place of delivery where POR should be transferred in the field "Ship to Code".
12. Click on the button "Add", to add POR to program.
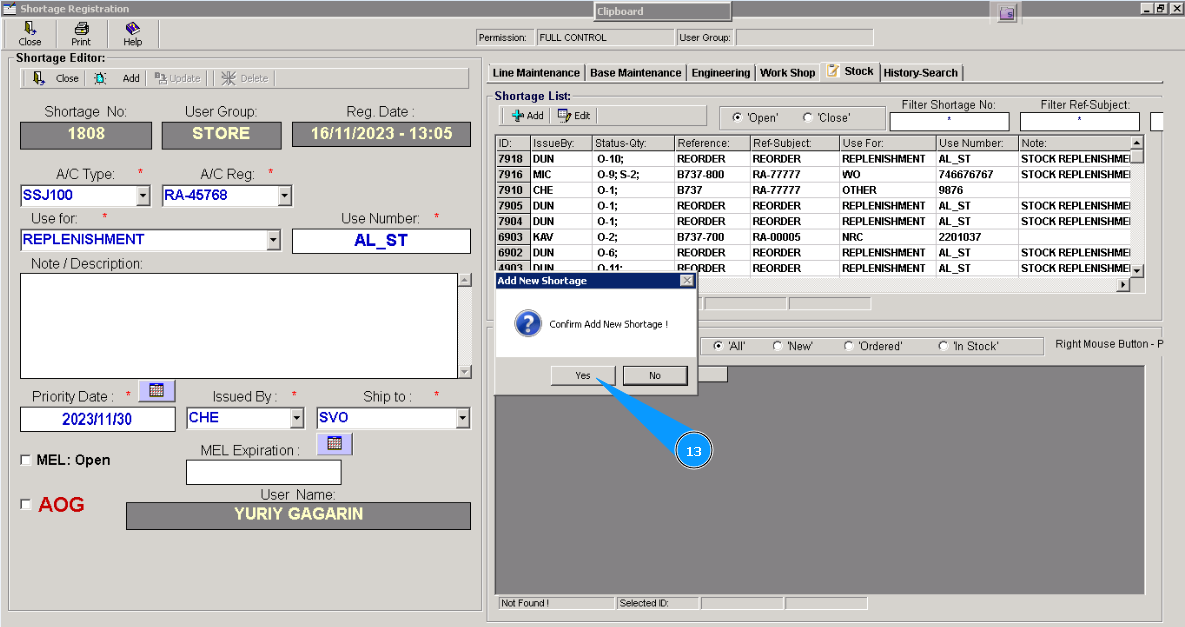
13. Click on the button "Yes", to confirm adding POR to the program.
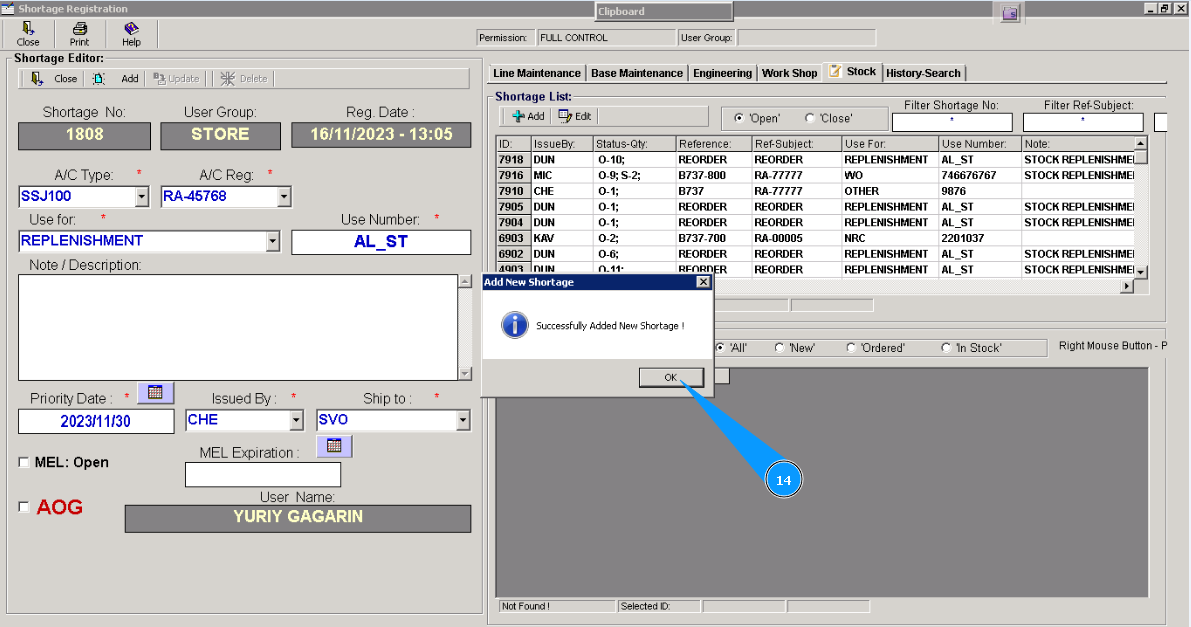
14. Click on the button "Ok". Creation of the POR form is finished
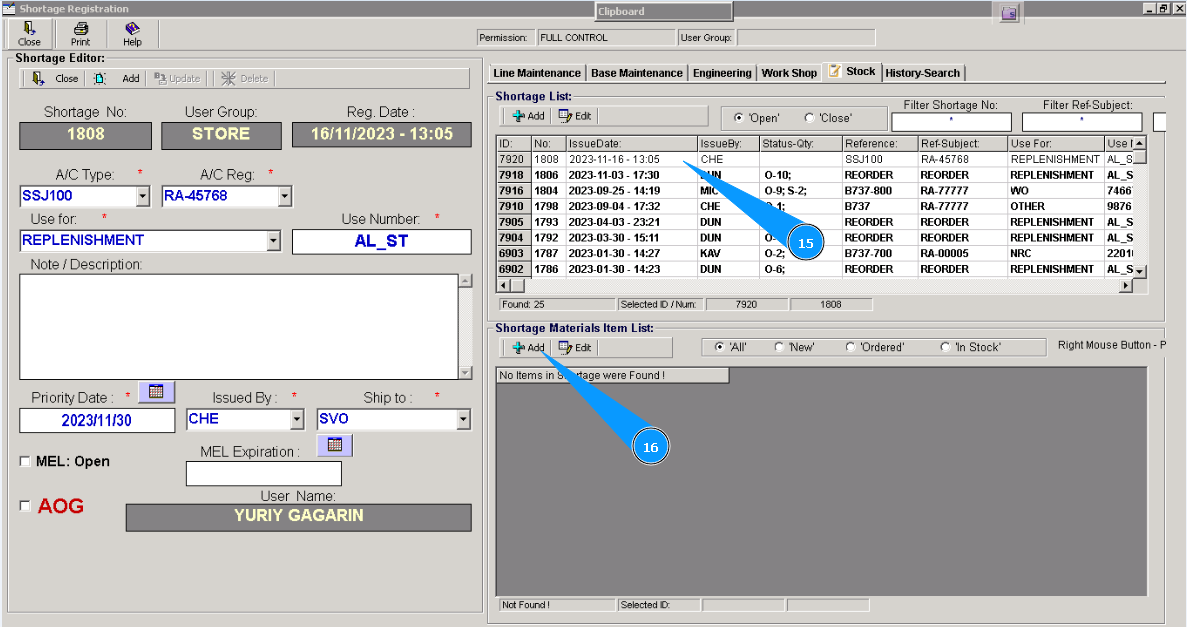
15. Check that the new line with your created POR appears in the window "Shortage List".
16. Click on the button "Add" in the window "Shortage Material Item List", for adding materials or tools to POR.
Note: The fields in the editor "Shortage №", "Item ID", "Reg.Date" are to be automatically filled in.
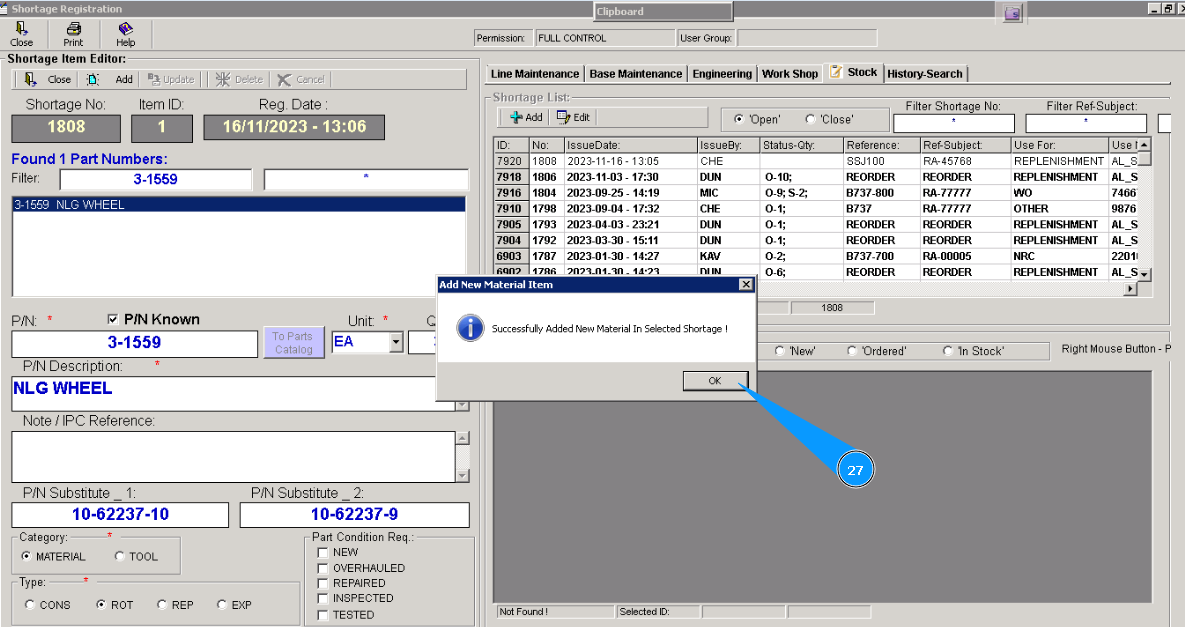
17. Check that the window of the editor "Shortage Item Editor" is opened. It should be filled in with data.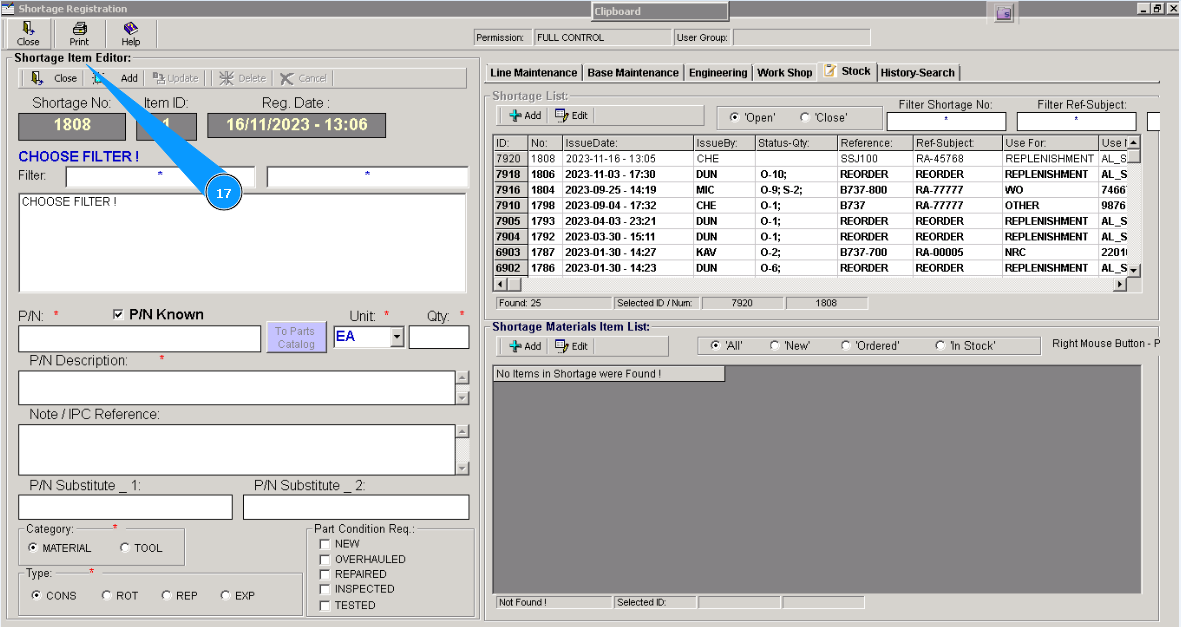
18. Enter the part number of the material or tools in the field "Filter PN" and press the button "Enter" on your keyboard
19. Check that the entered part number appears in the window, click on this line twice by left knob of your mouse.
20. Mandatory fields "PN", "PN Description", are to be automatically filled in. 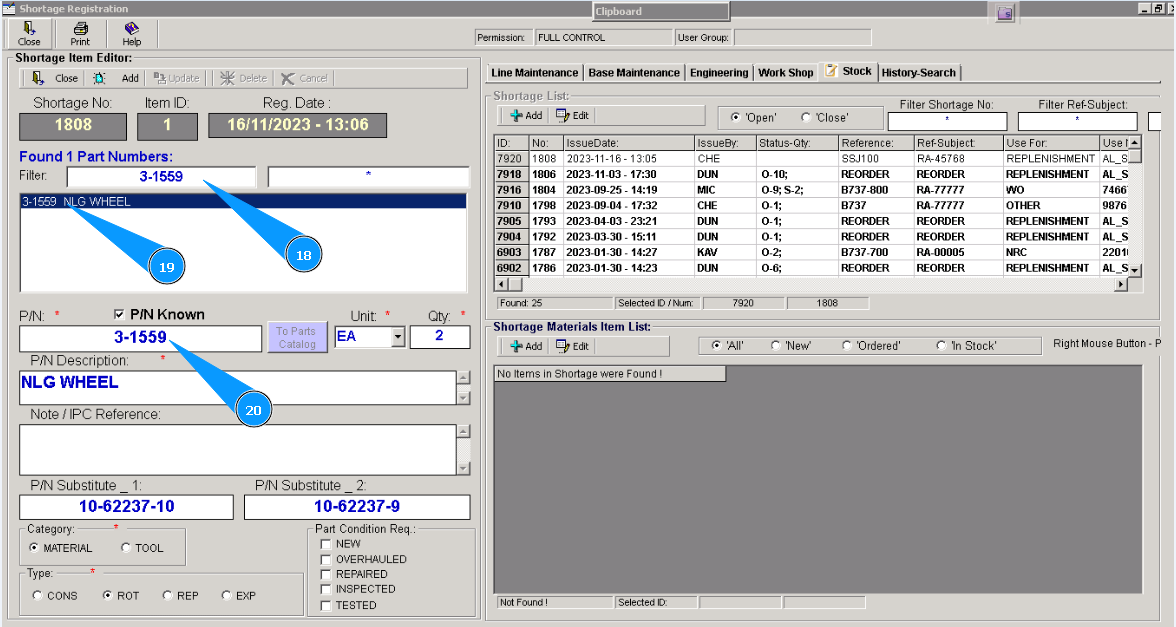
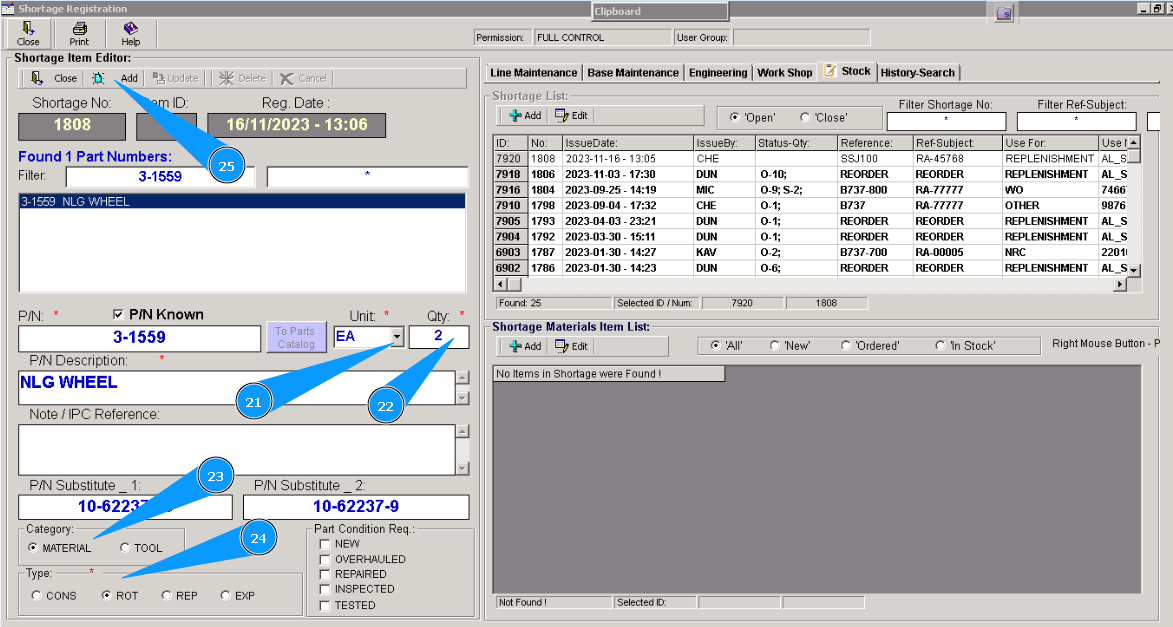
21. Select units of requested material or tools in the field "Unit".
22. Enter the quantity of requested material or tools in the field "Qty".
23. Select type: material or tools in the field "Category".
24. Select material type in the field "Type".
25. Click on the button "Add" in the window **"Shortage Item Editor" to add selected material or tools to POR.
26. Click on the button "Yes", to confirm adding material or tools to the program.
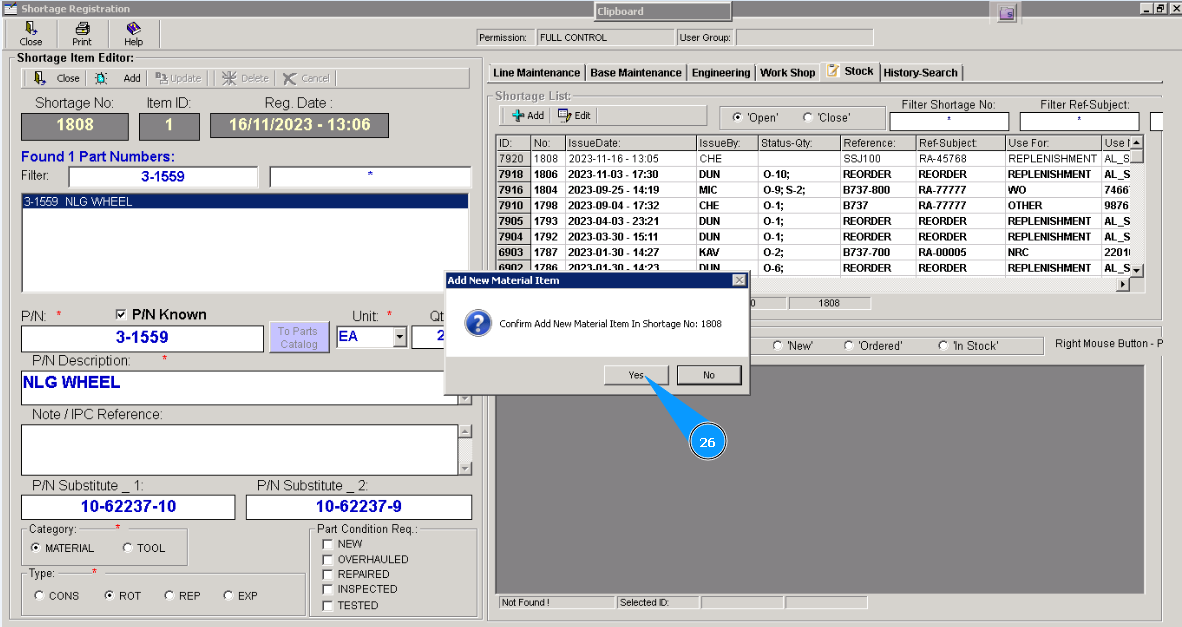
27. Click on the button "Ok". Adding material or tools is finished.