How to create Exchange order
1. For the starting process of creation "Exchange order", go to the submodule "Components".

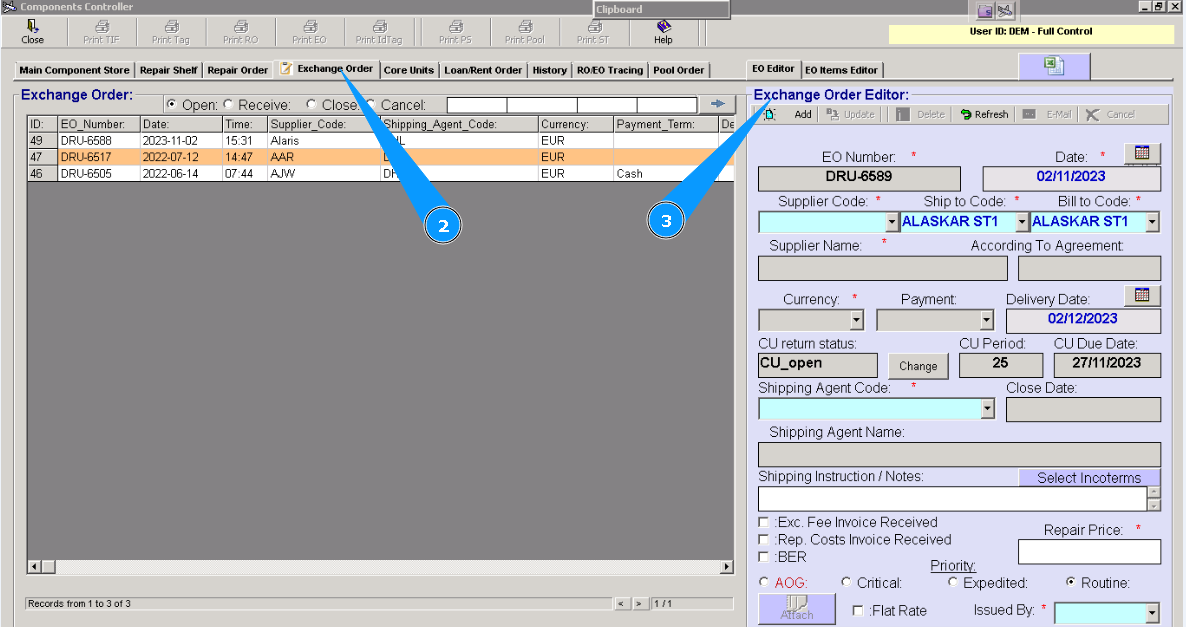
2. Then go to tab "Exchange order". Note: If the editor "Exchange Order Editor" was not opened, click on the button with an arrow.
3. Check that the window of the editor, "Exchange Order Editor" is opened. It should be filled in with data. 
4. Enter the supplier name of the component in the field "Supplier Code". Note: Number of Exchange order (abbreviation:EO) is automatically generated by the program without the possibility of change.
5. Enter the store name, where the component should be delivered, in the field "Ship to Code".
6. Enter the financial department or store in the field "Bill to Code".
7. Enter the used currency for payment of the bill in the field "Currency".
8. Enter the shipping company name in the field "Shipping Agent Code".
9. Enter the repair price in the field "Repair Price".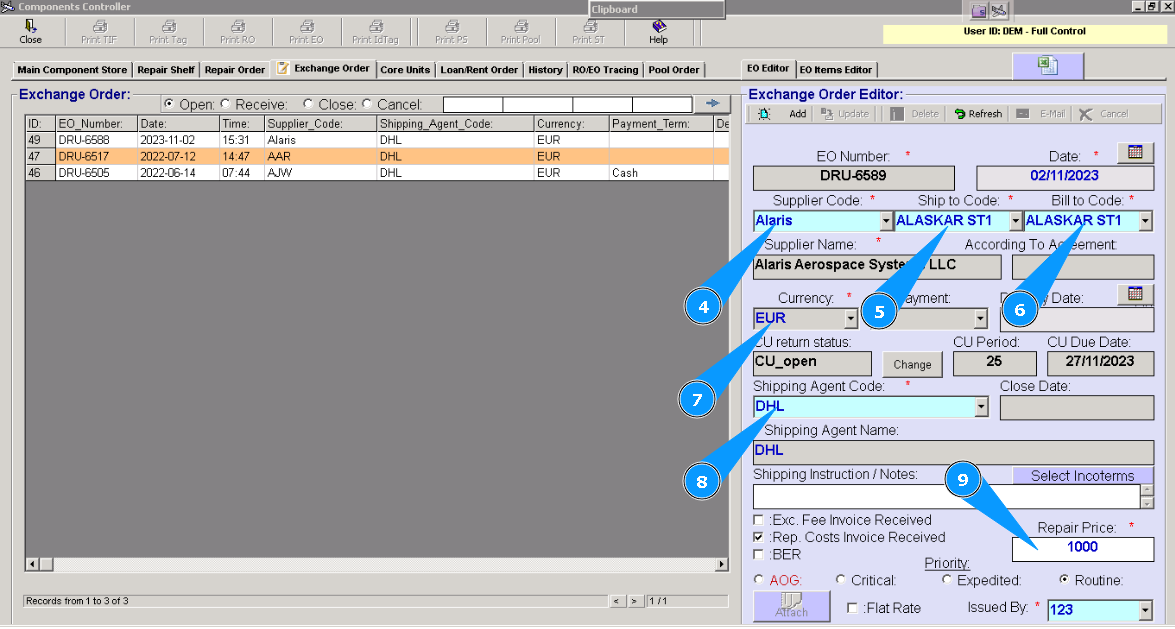
10. Enter your login from Alaskar in the field "Issued by".
11. Click on the button **"Add" to add "EO" and loading data in the program.
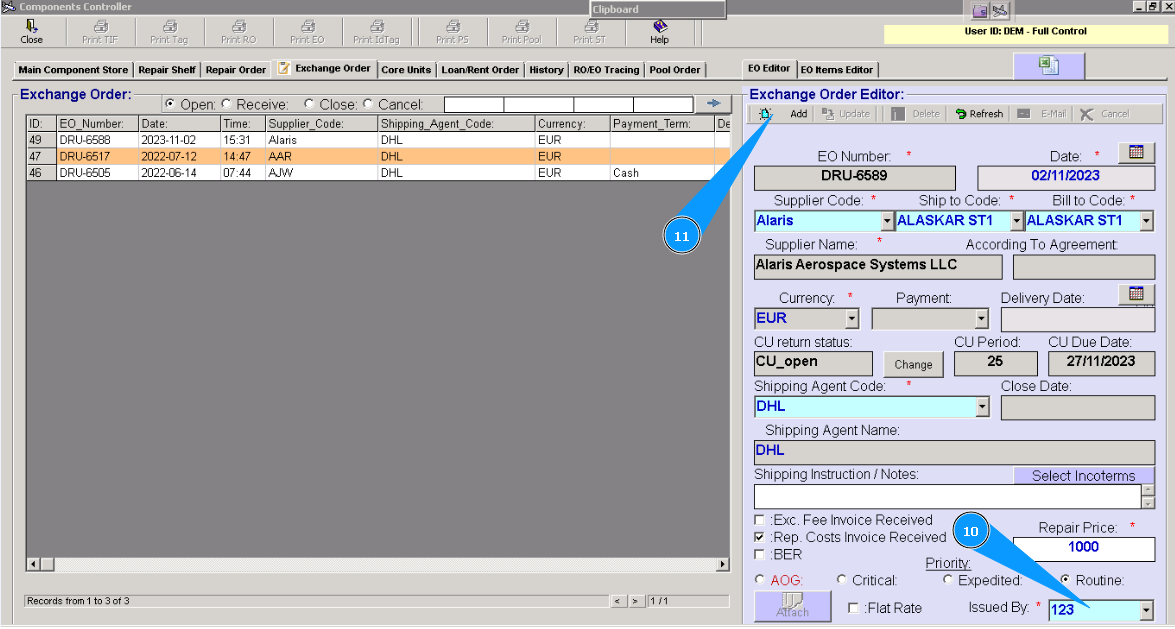
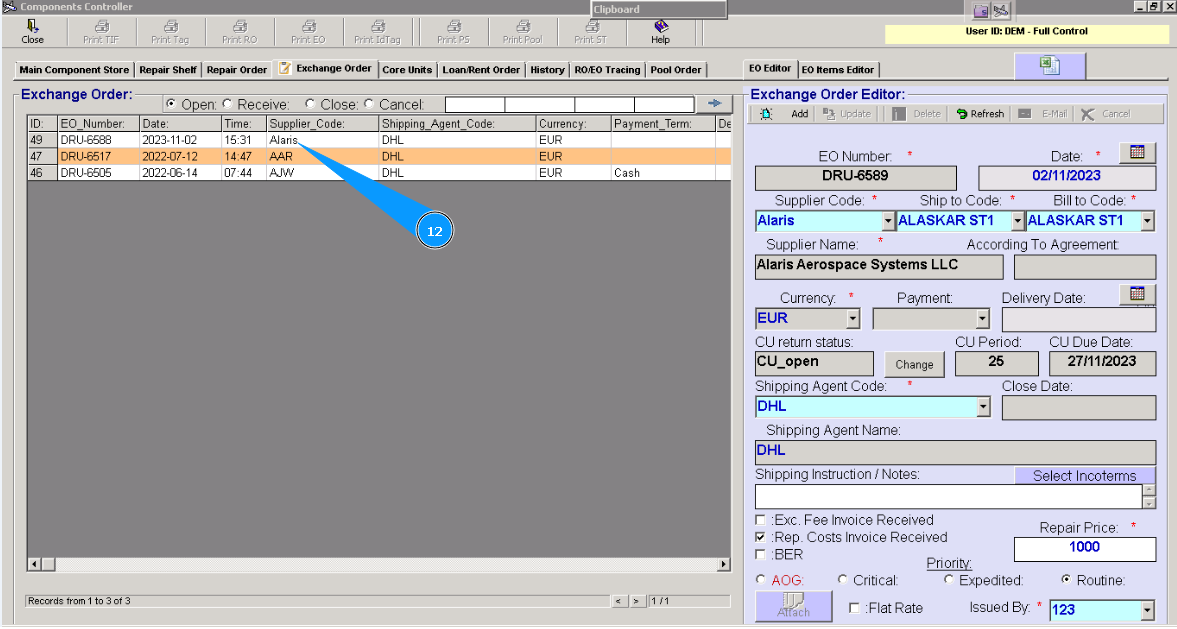
12. Check that the line with the newly created EO appears in the window "Exchange Order".
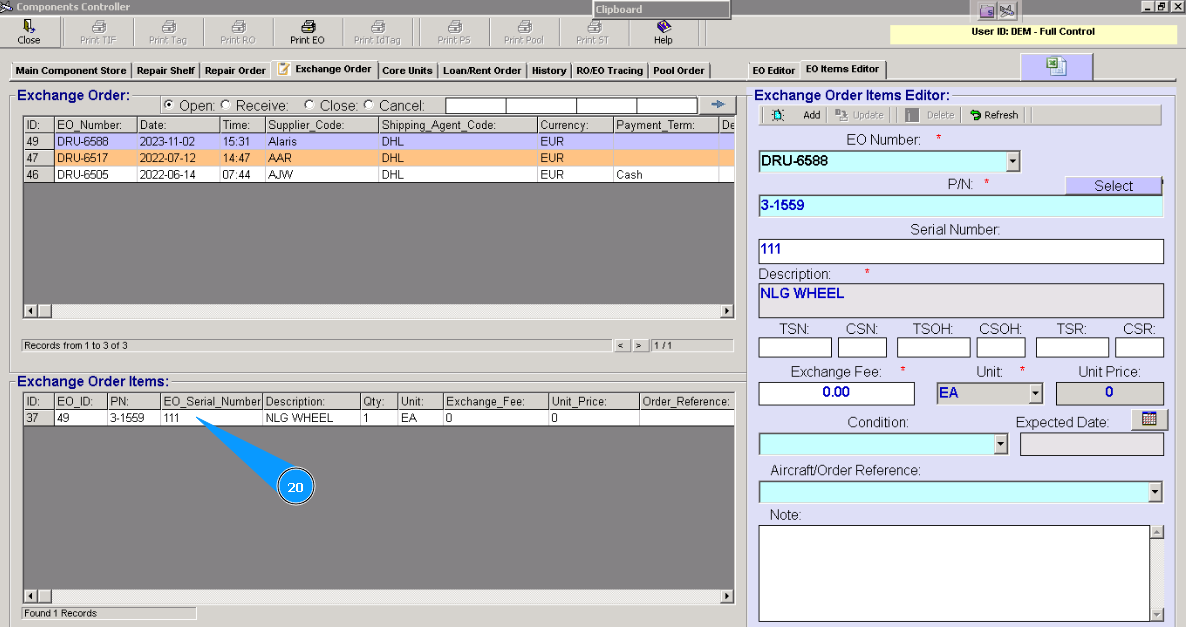
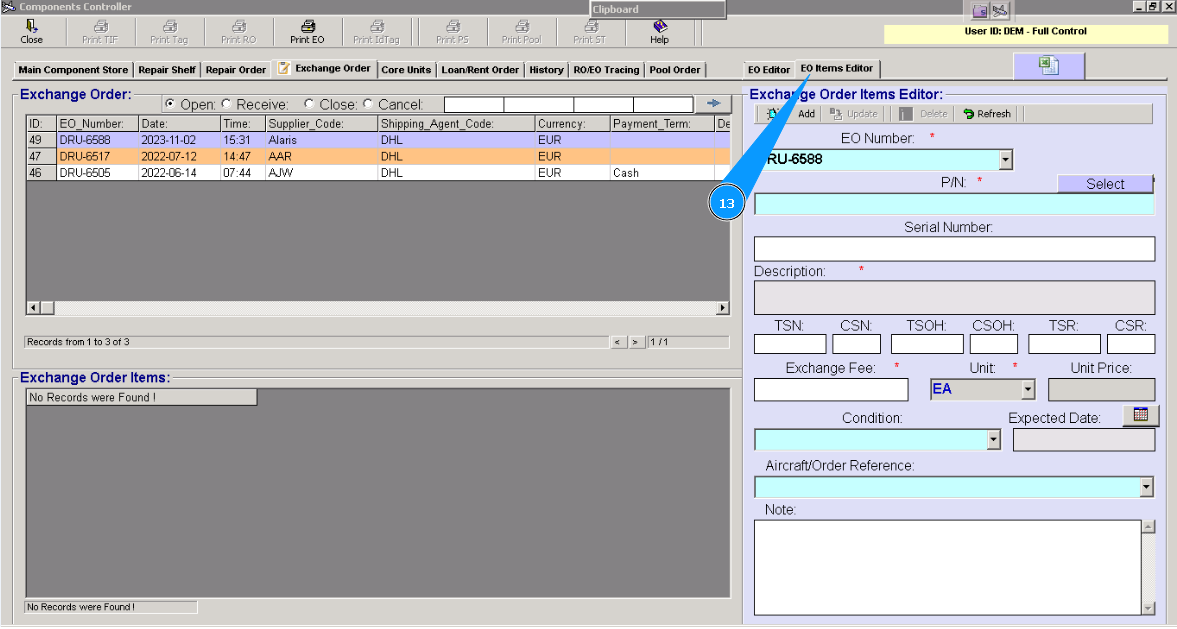
13. For adding necessary components, go to the tab "EO Items Editor" in the editor window.
14. Enter the part number of the necessary component in the searching field "P/N" and press on the button "Enter" of your keyboard.
15. Check that the description is automatically entered in the field "Description".
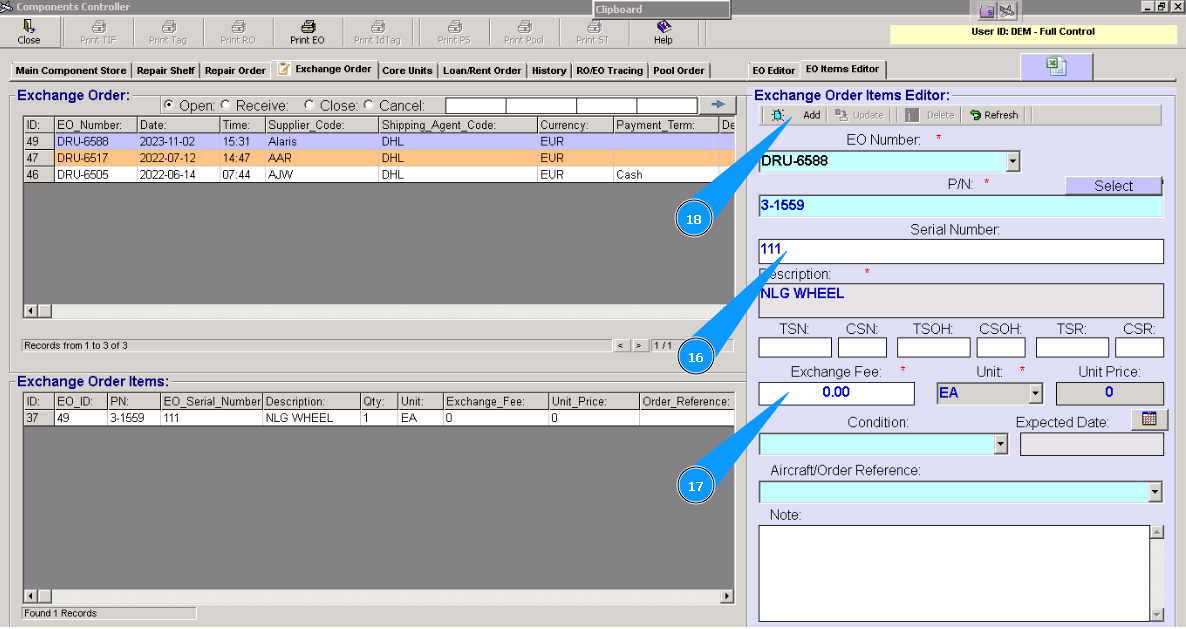
16. Enter the serial number of the necessary component in the searching field "Serial Number" and press the button "Enter" on your keyboard.
17. Enter data on the exchange fee in the field "Exchange Fee".
18. Click on the button "Add".
19. Click on the button "Yes", to confirm adding a component to the "Exchange Order".
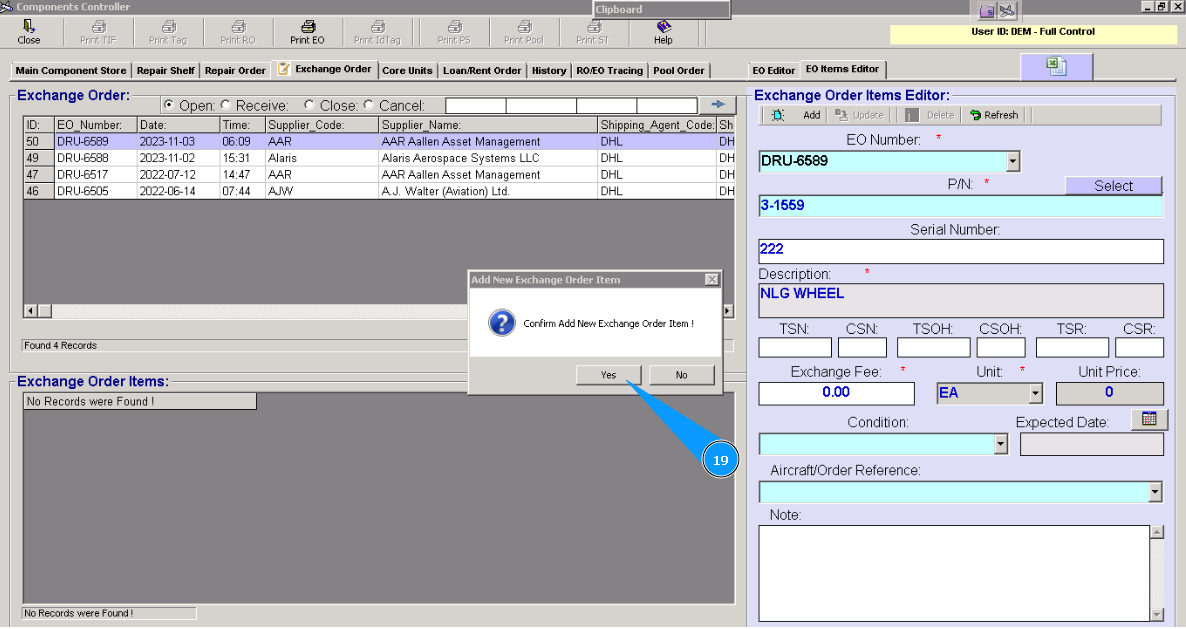
20. Check that a new line with your component appears in the window "Exchange Order Items".