How to create delivery note form
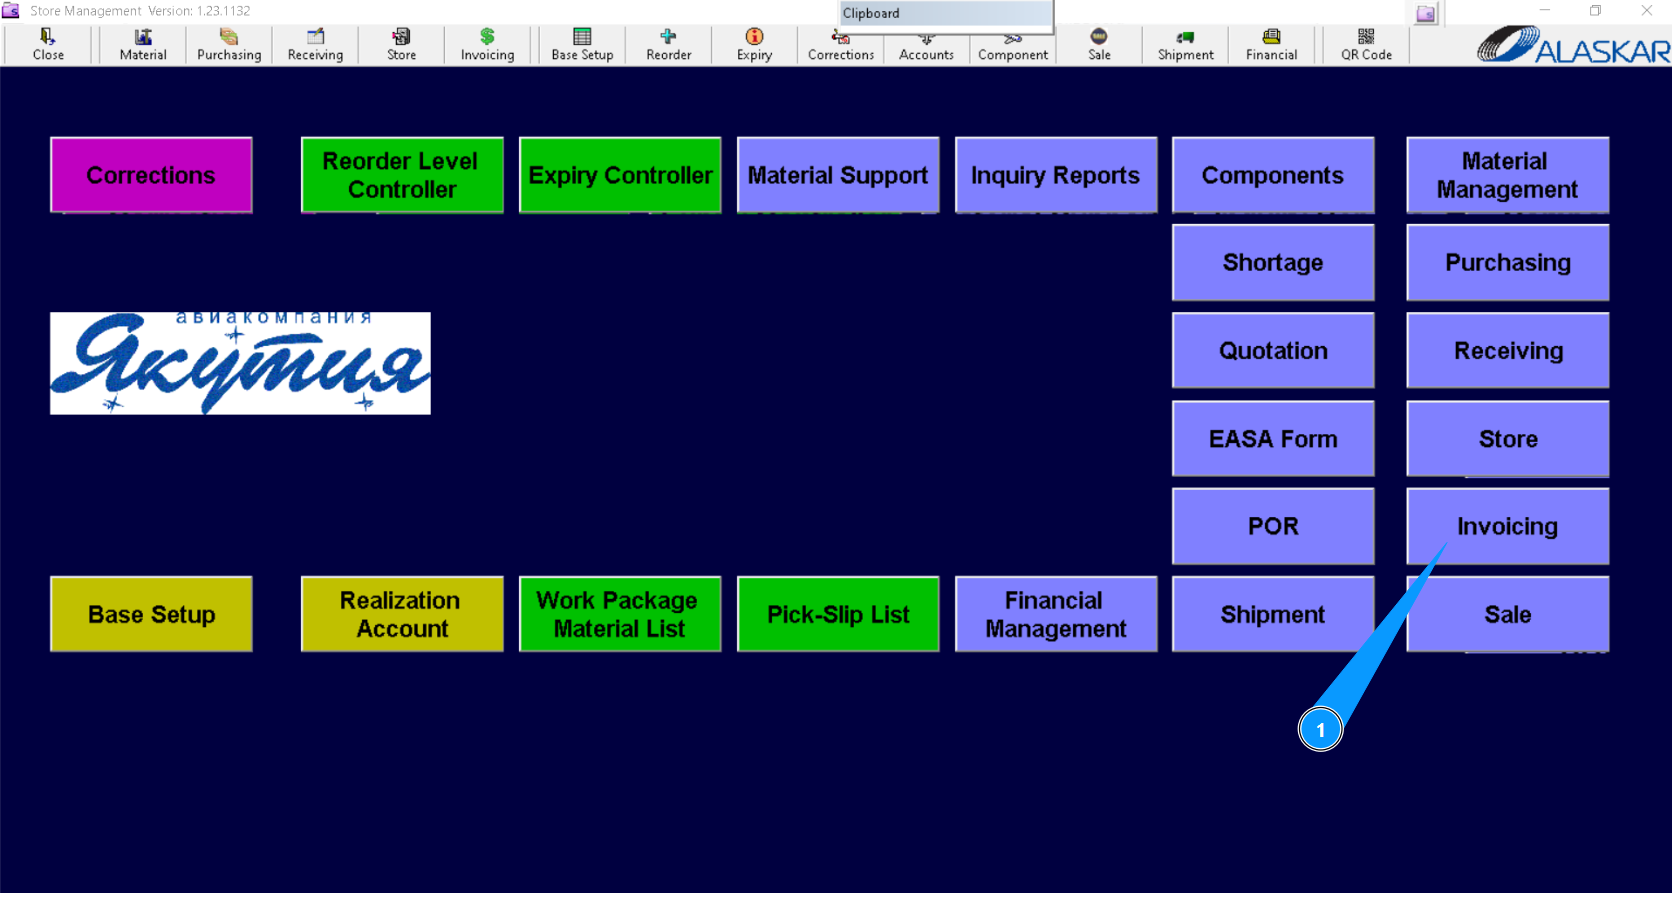
1. In order to create a delivery note, go to the submodule "Invoicing".
2. Then go to the tab "Delivery Note".
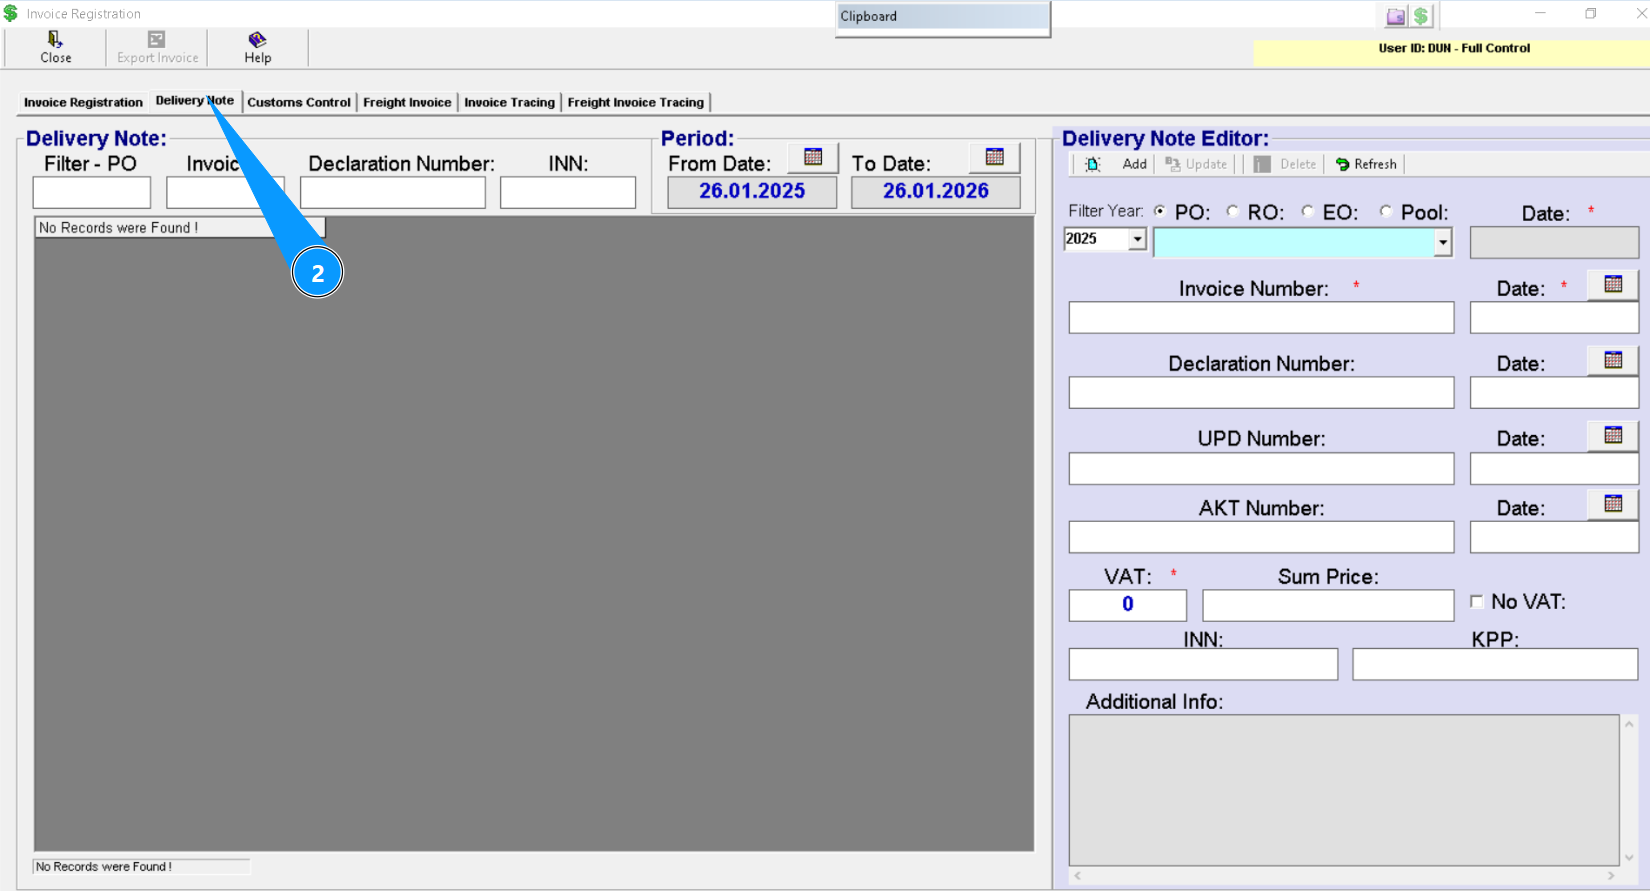
3. Make sure the "Delivery Note Editor" is open and available for you to work with it.
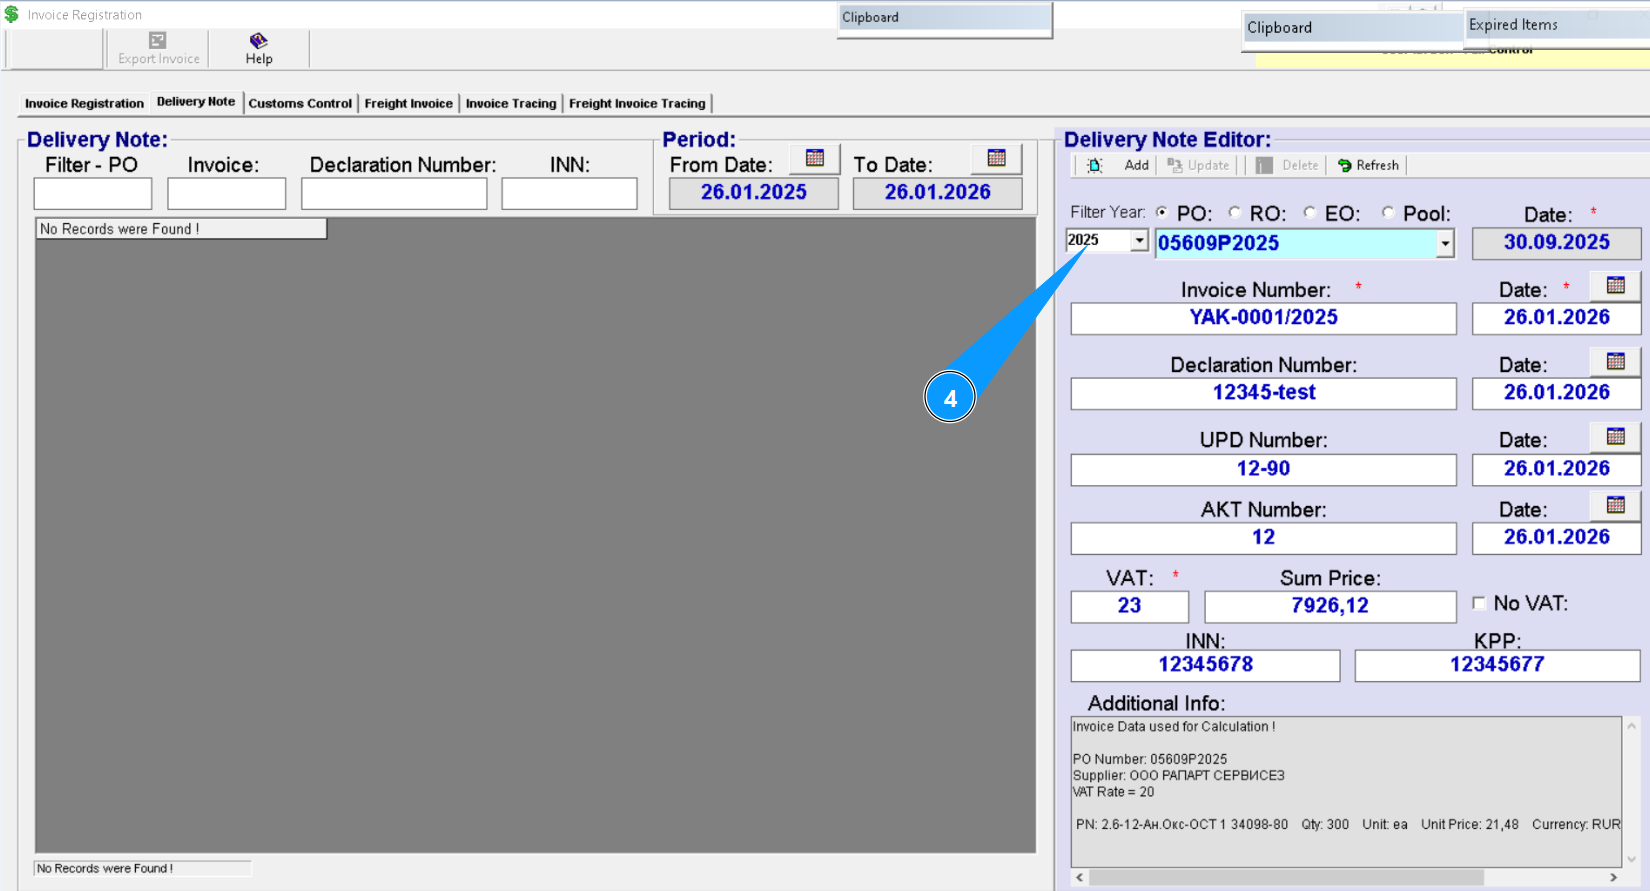
4. From the dropdown list, select the year in which the order was created.
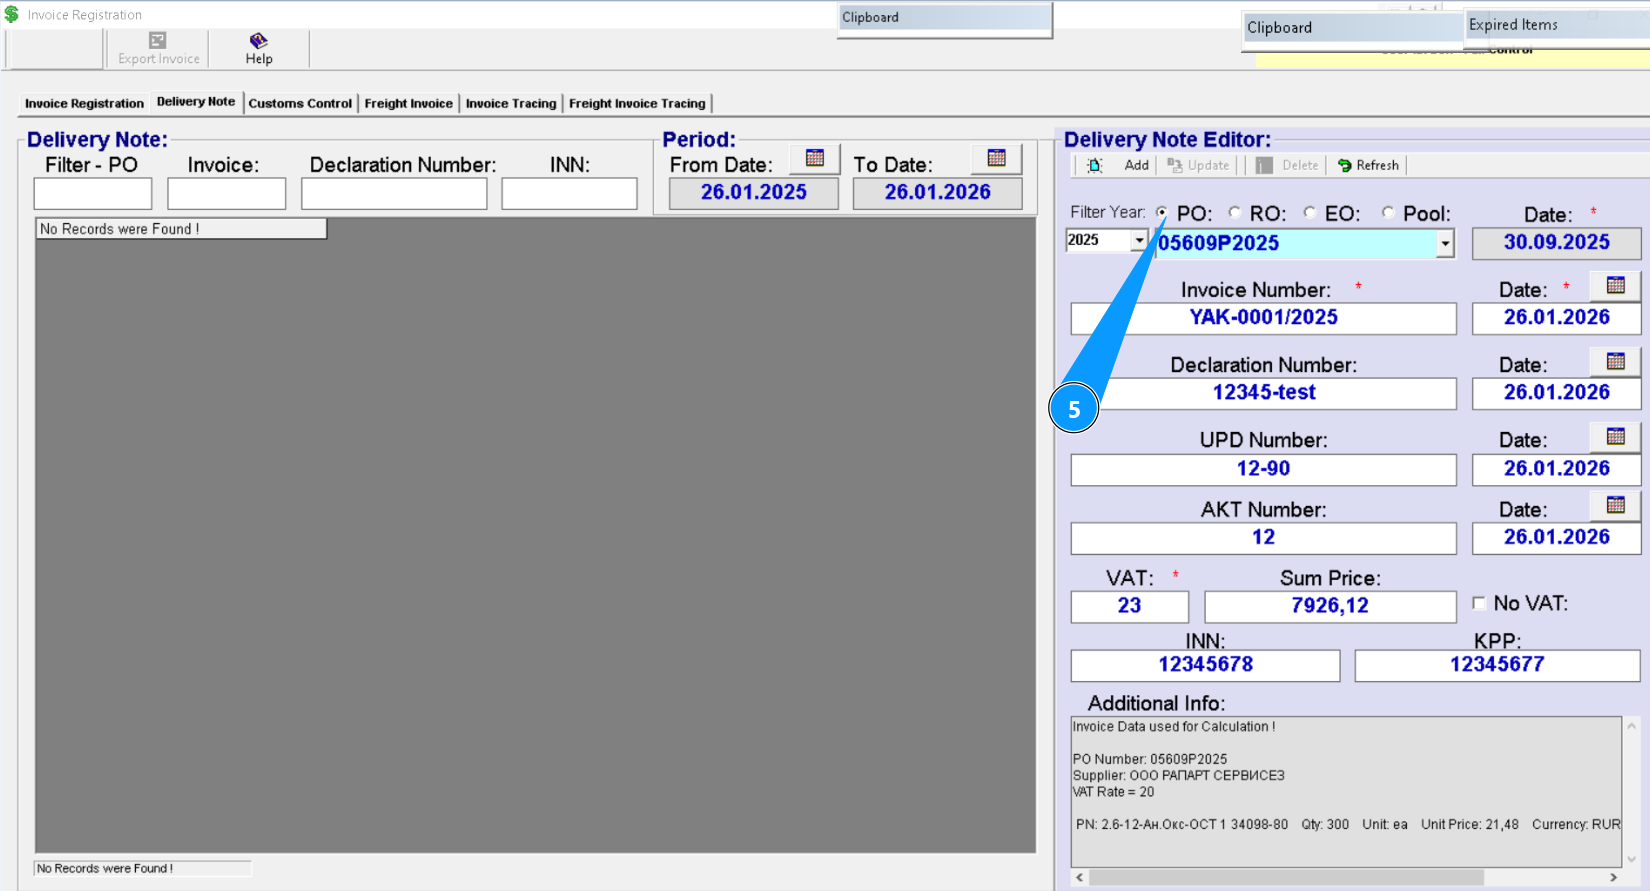
5. Select one of the following order types: PO, RO, EO, or Pool.
6. Enter the order number to find the line and press "Enter" on your keyboard or select from the dropdown list.
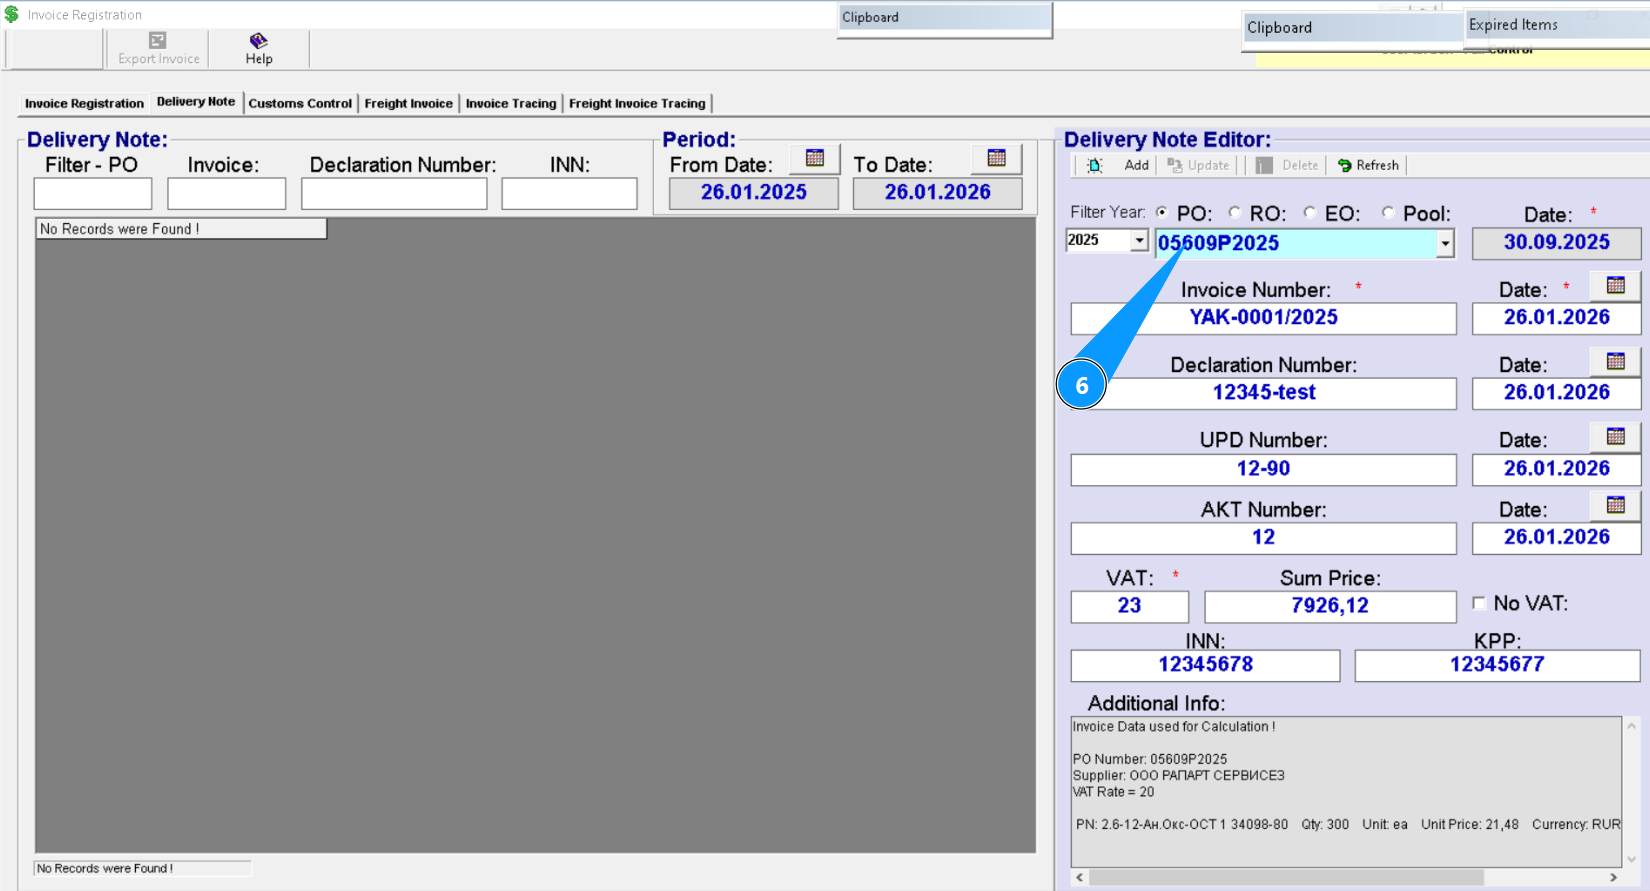
Note: The date in the field "Date" will be automatically entered from the your selected order number.
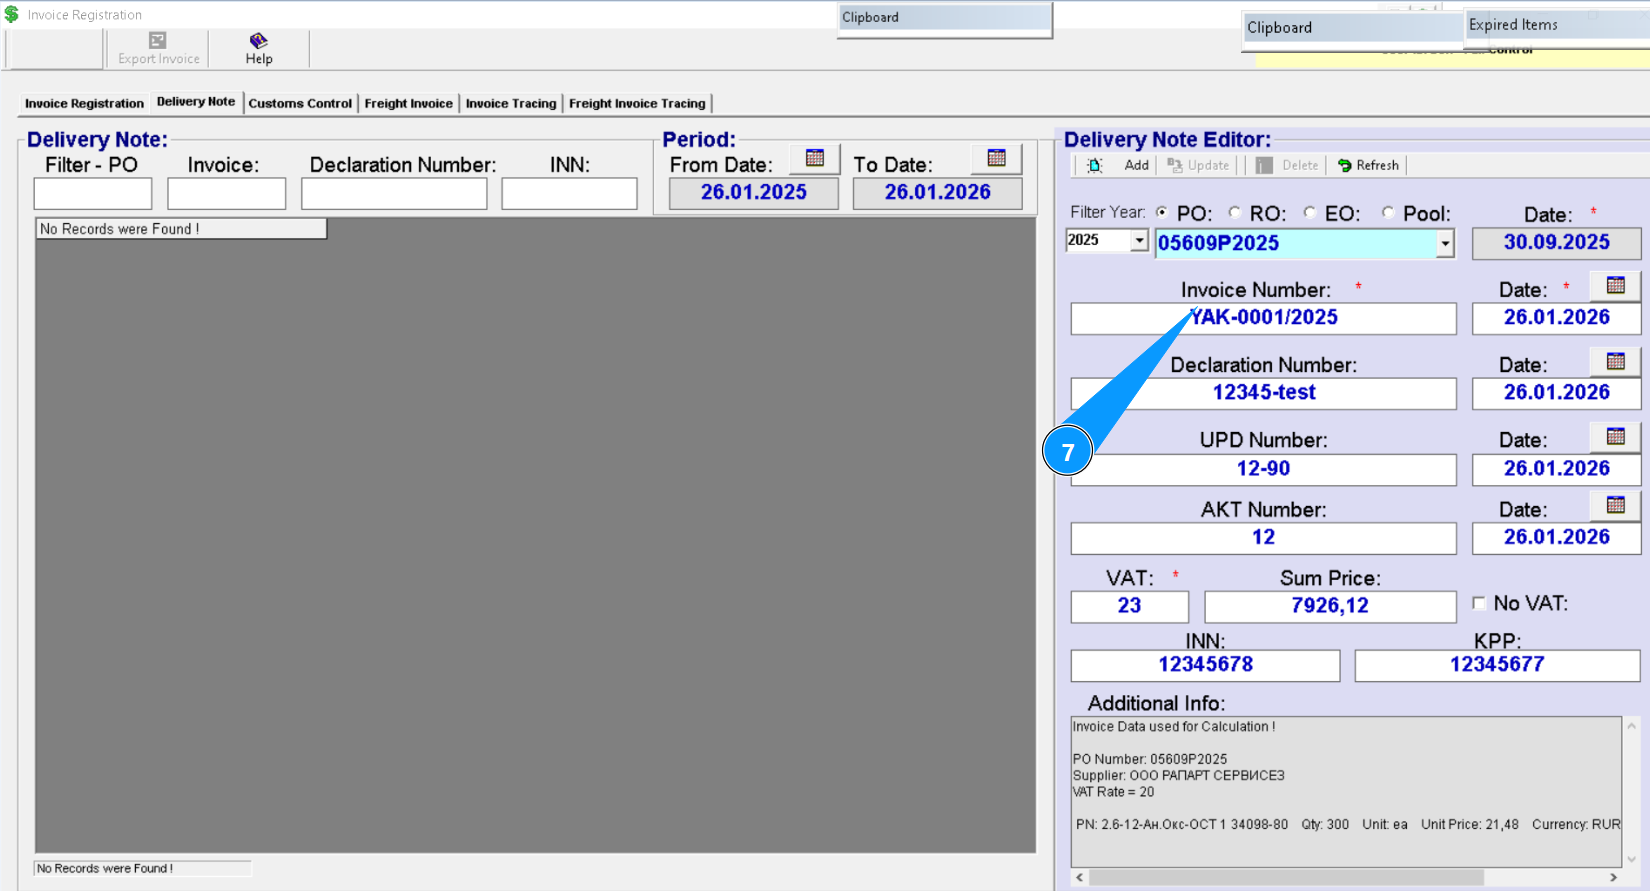
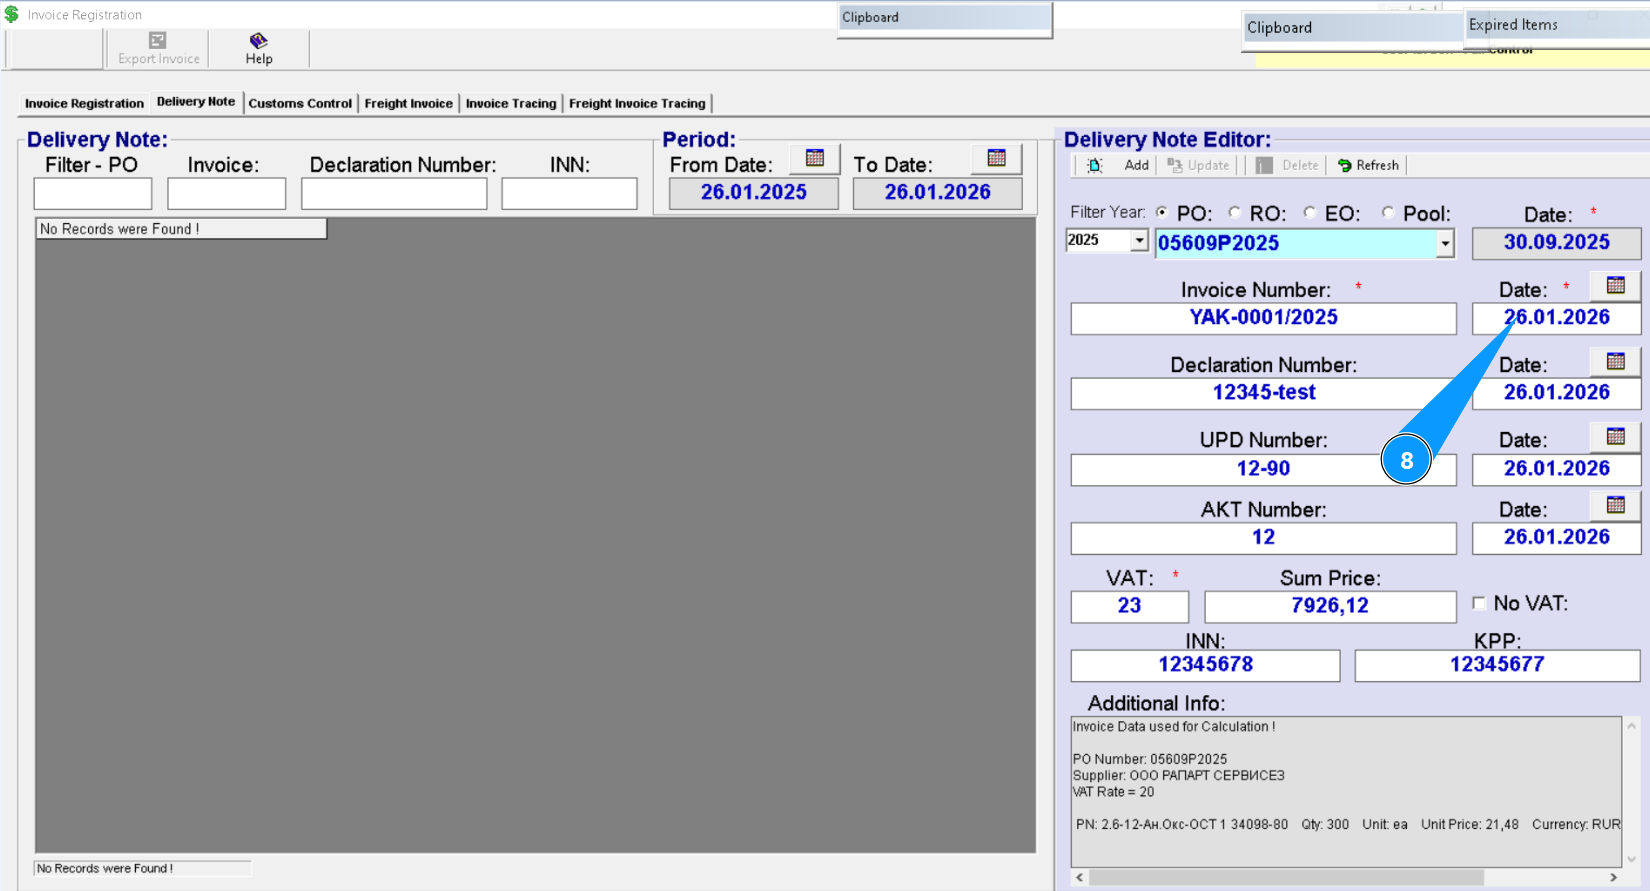
7. Enter the invoice number in the field "Invoice number".
8. Enter the date of the creating nvoice in the field "Date" or click the calendar icon and select it manually.
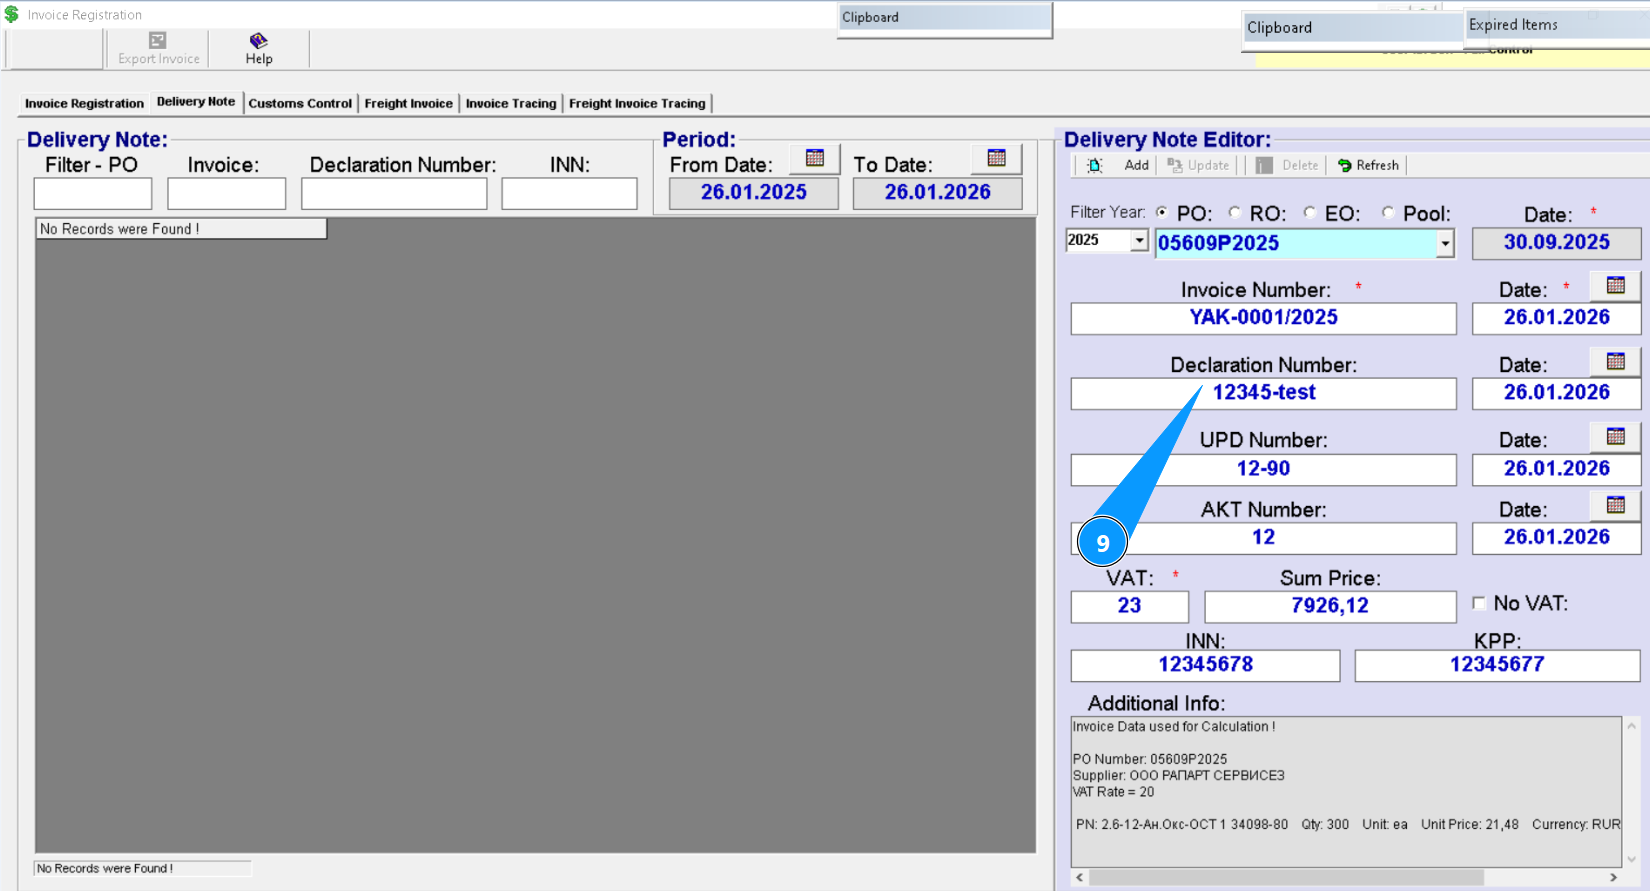
9. If necessary, enter the customs declaration number in the field "Declaration Number".
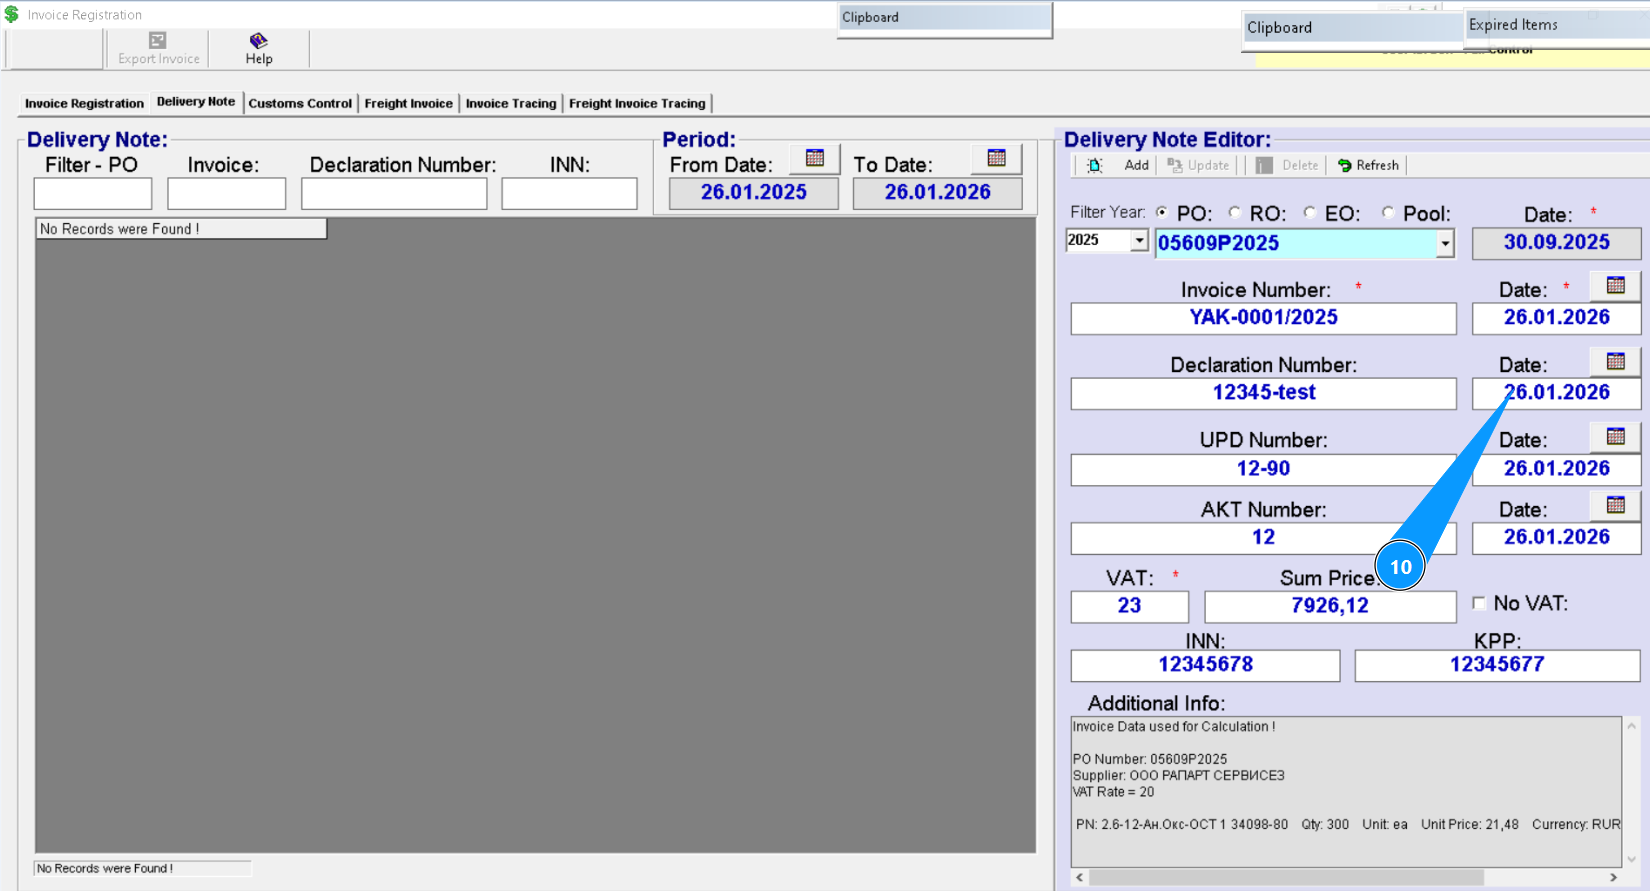
10. Enter the declaration creation date in the field "Date" or click the calendar icon and select it manually.
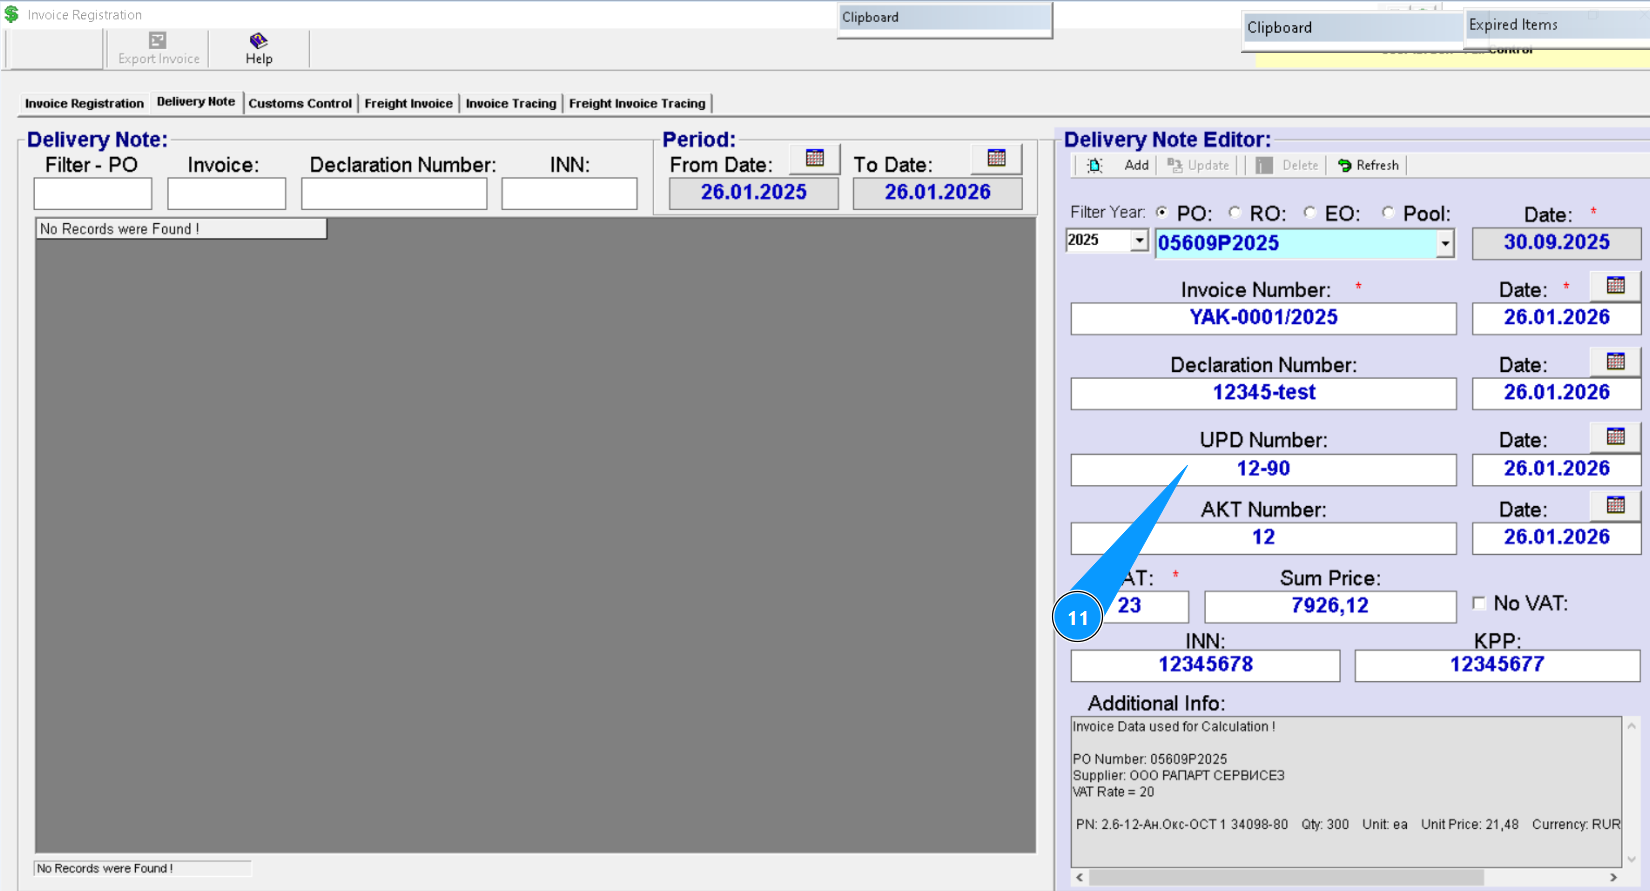
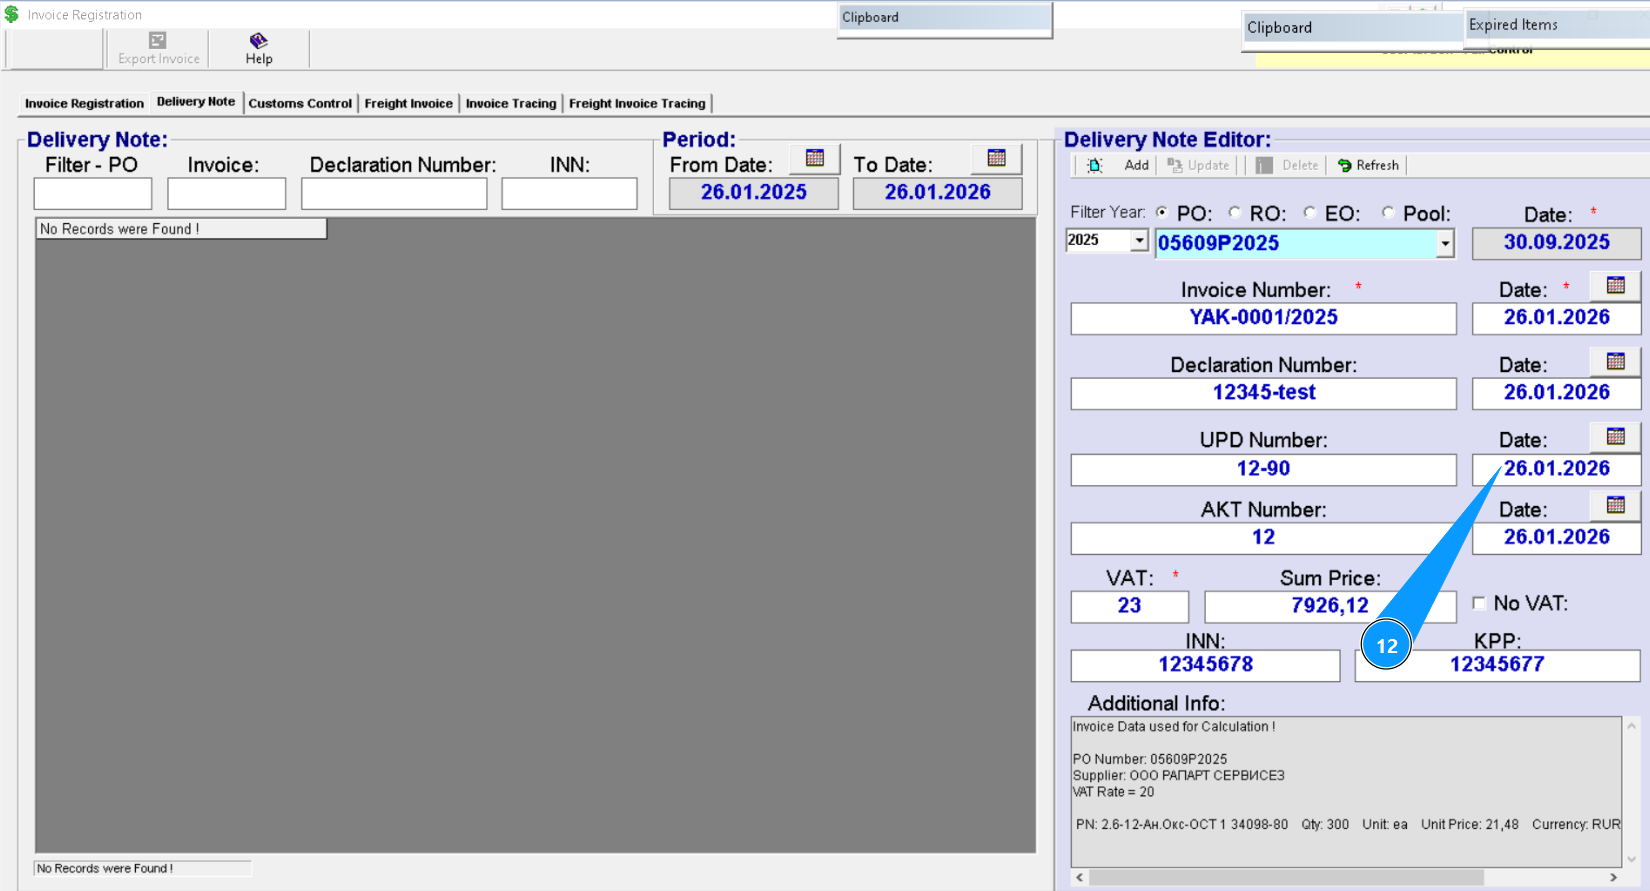
11. If necessary, enter the universal transfer document (UTD) number in the field "UPD Number".
12. Enter the UPD creation date in the field "Date" or click the calendar icon and select it manually.
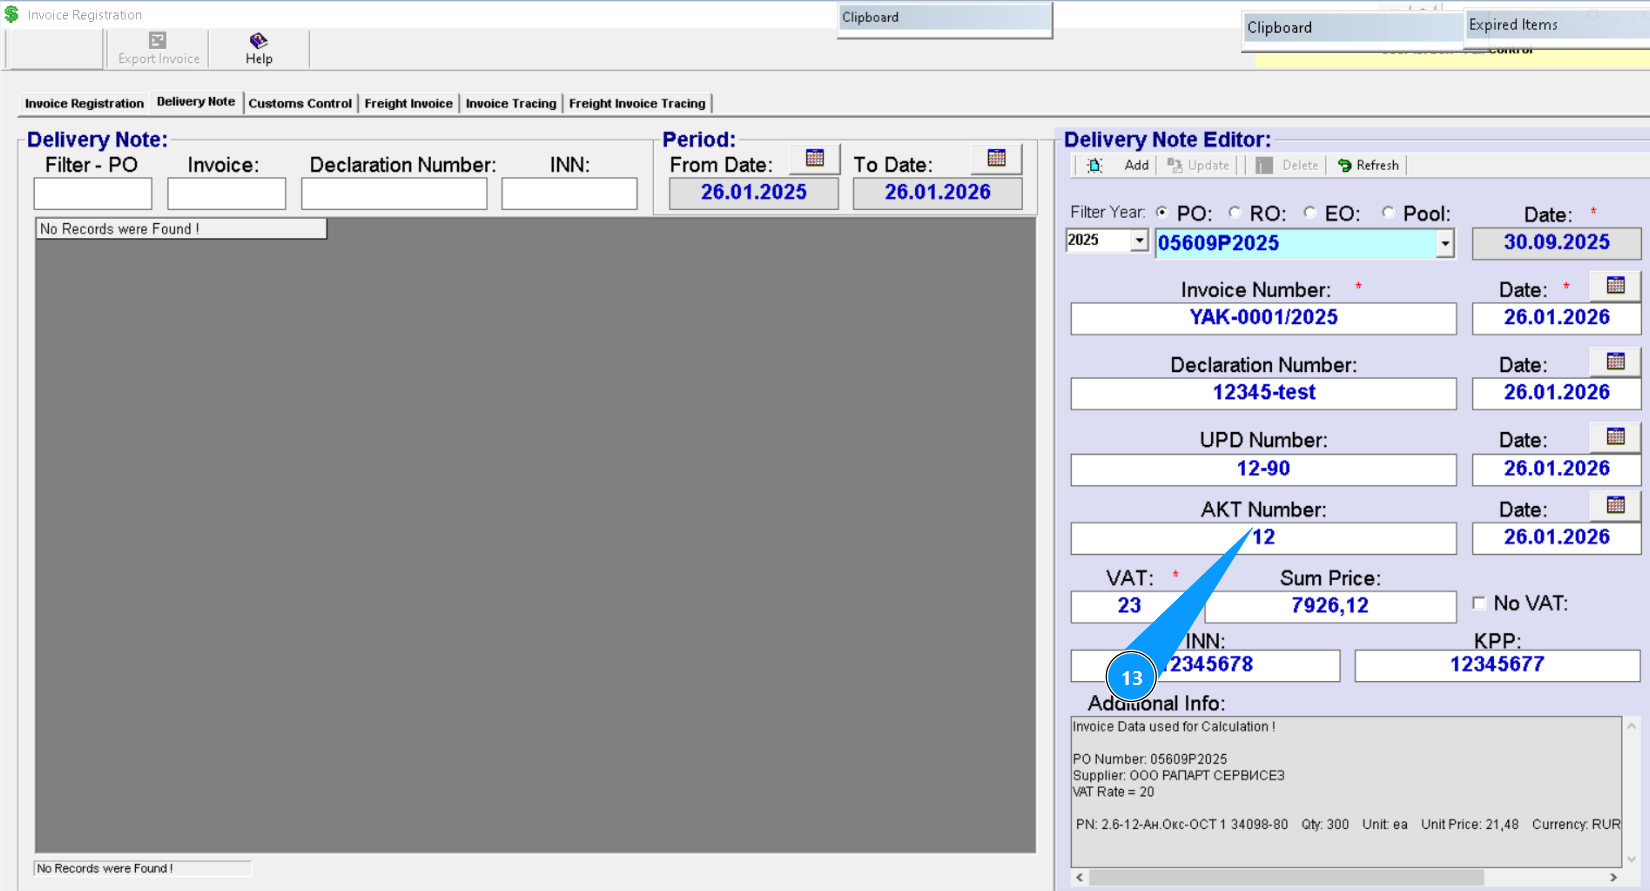
13. If necessary, enter the completion certificate number in the field "ACT Number".
14. Enter the completion certificate creation date in the field "Date" or click the calendar icon and select it manually. 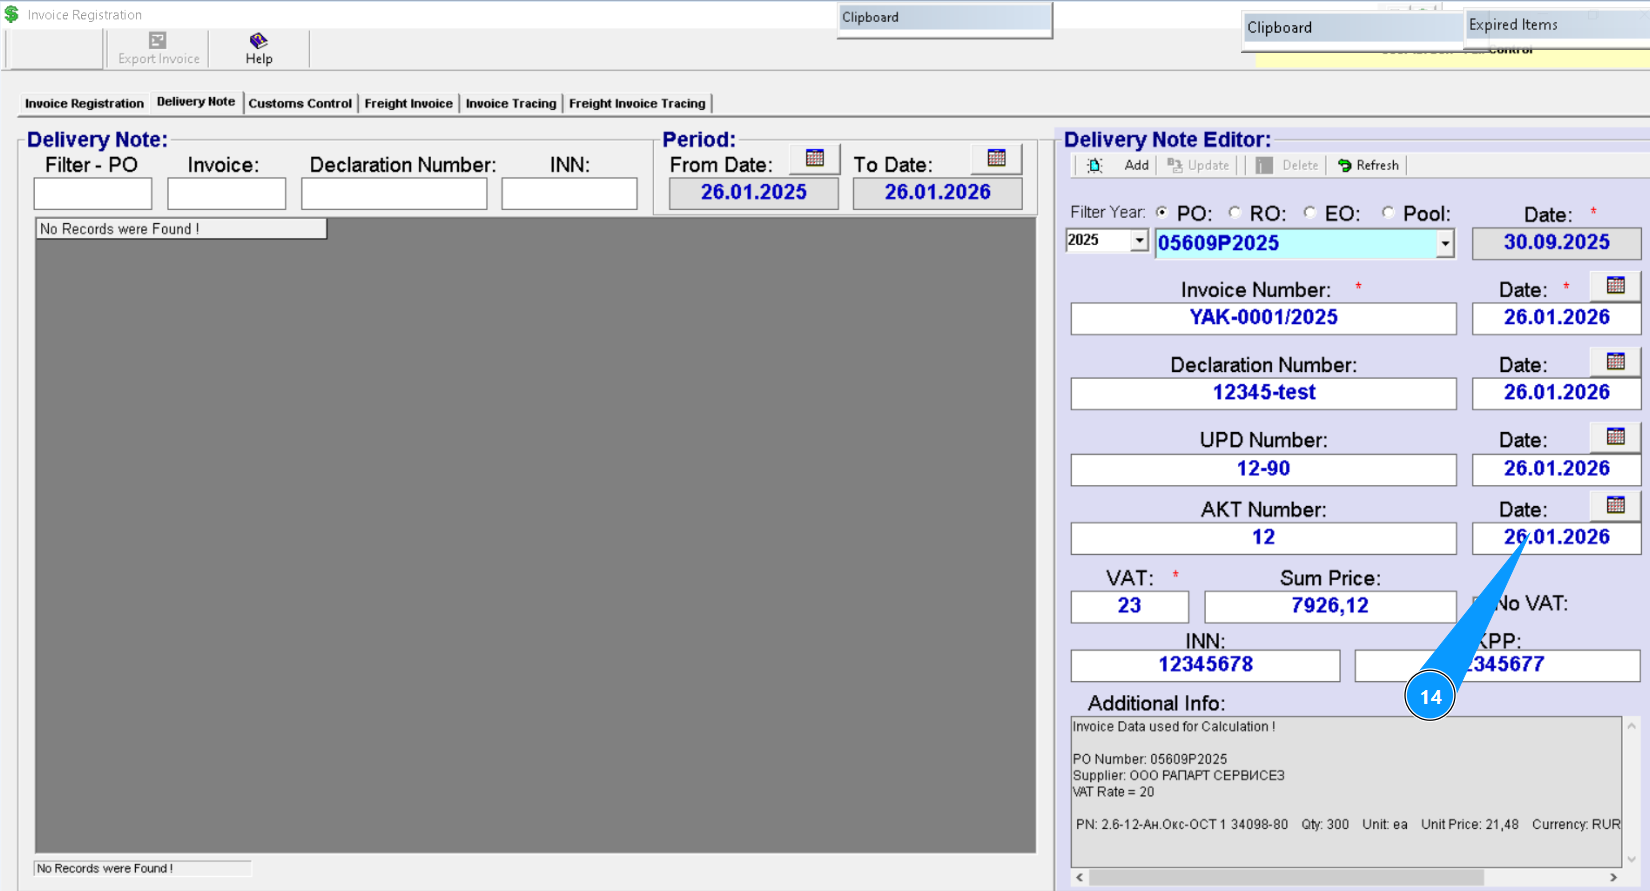
15. Enter the value-added tax (VAT) percentage, if applicable, in the field "VAT".

Note: Verify that the previously entered amount (taken from the order) has increased in the field "Sum Price" after entering the VAT.
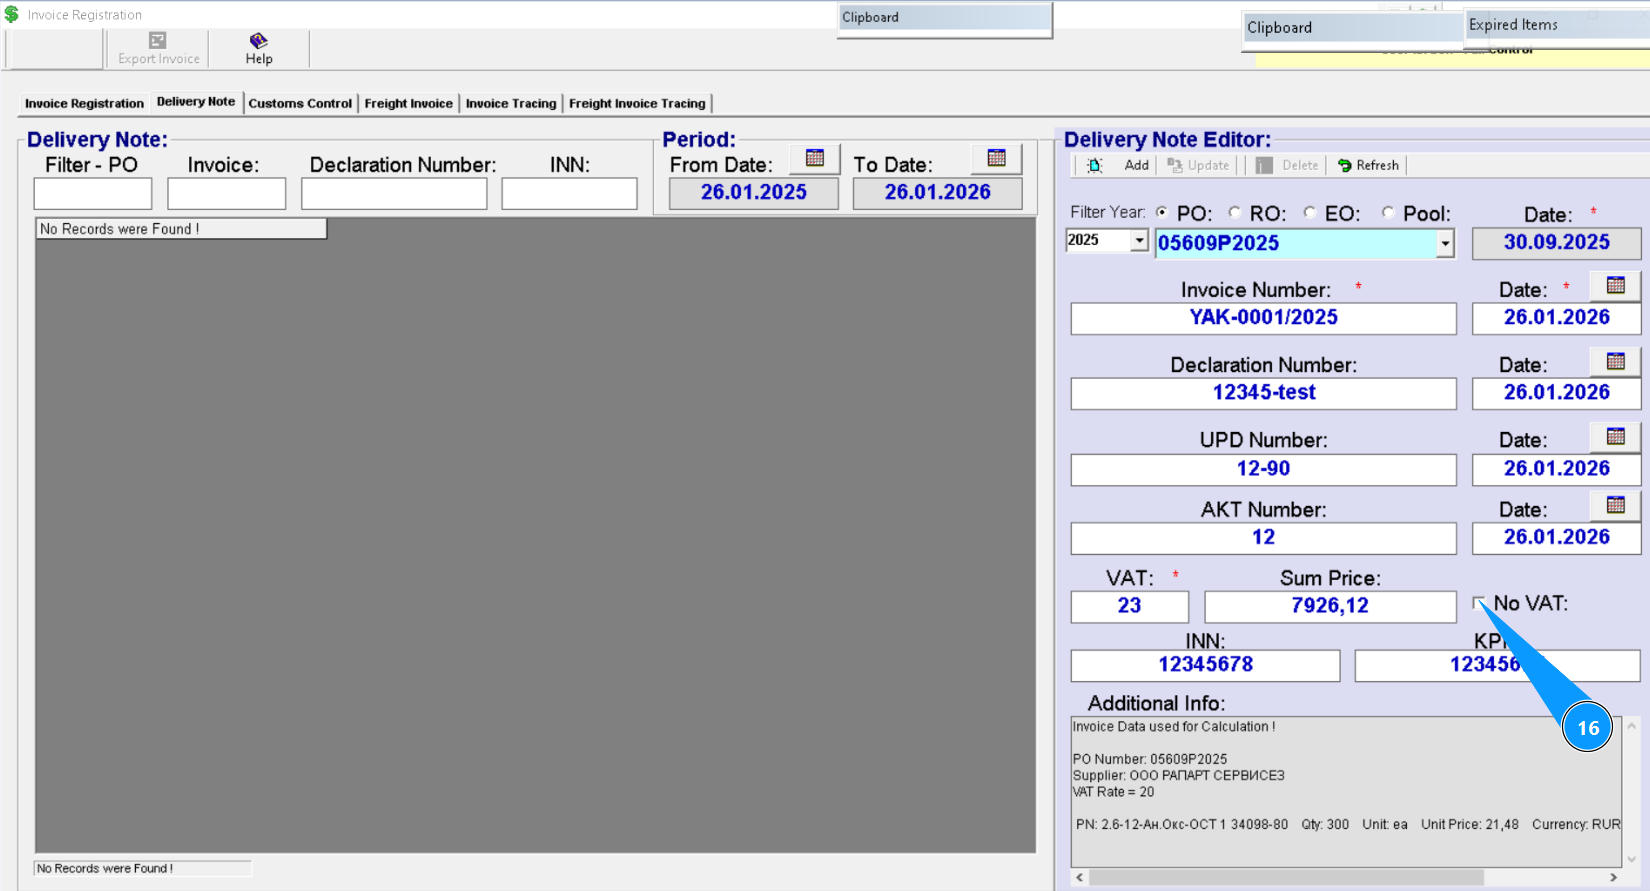
16. If value added tax is not applicable, check the box and tick in the field "No VAT".
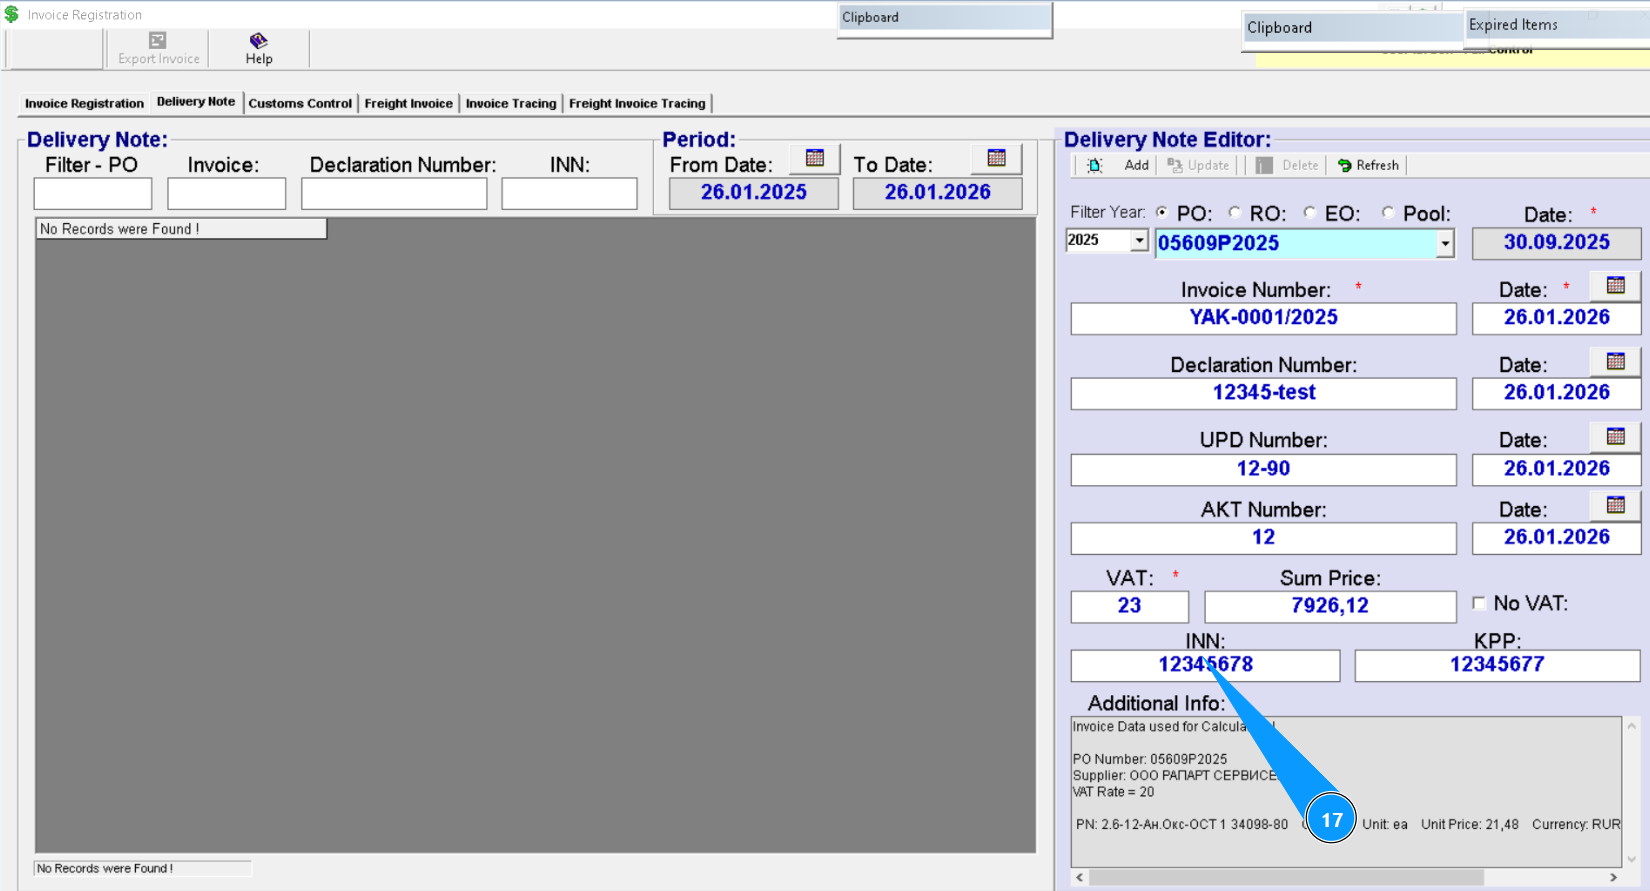
17. If necessary, enter the taxpayer identification number (INN) in the field "INN".
18. If necessary, enter the registration reason code (KPP) in the field "KPP".
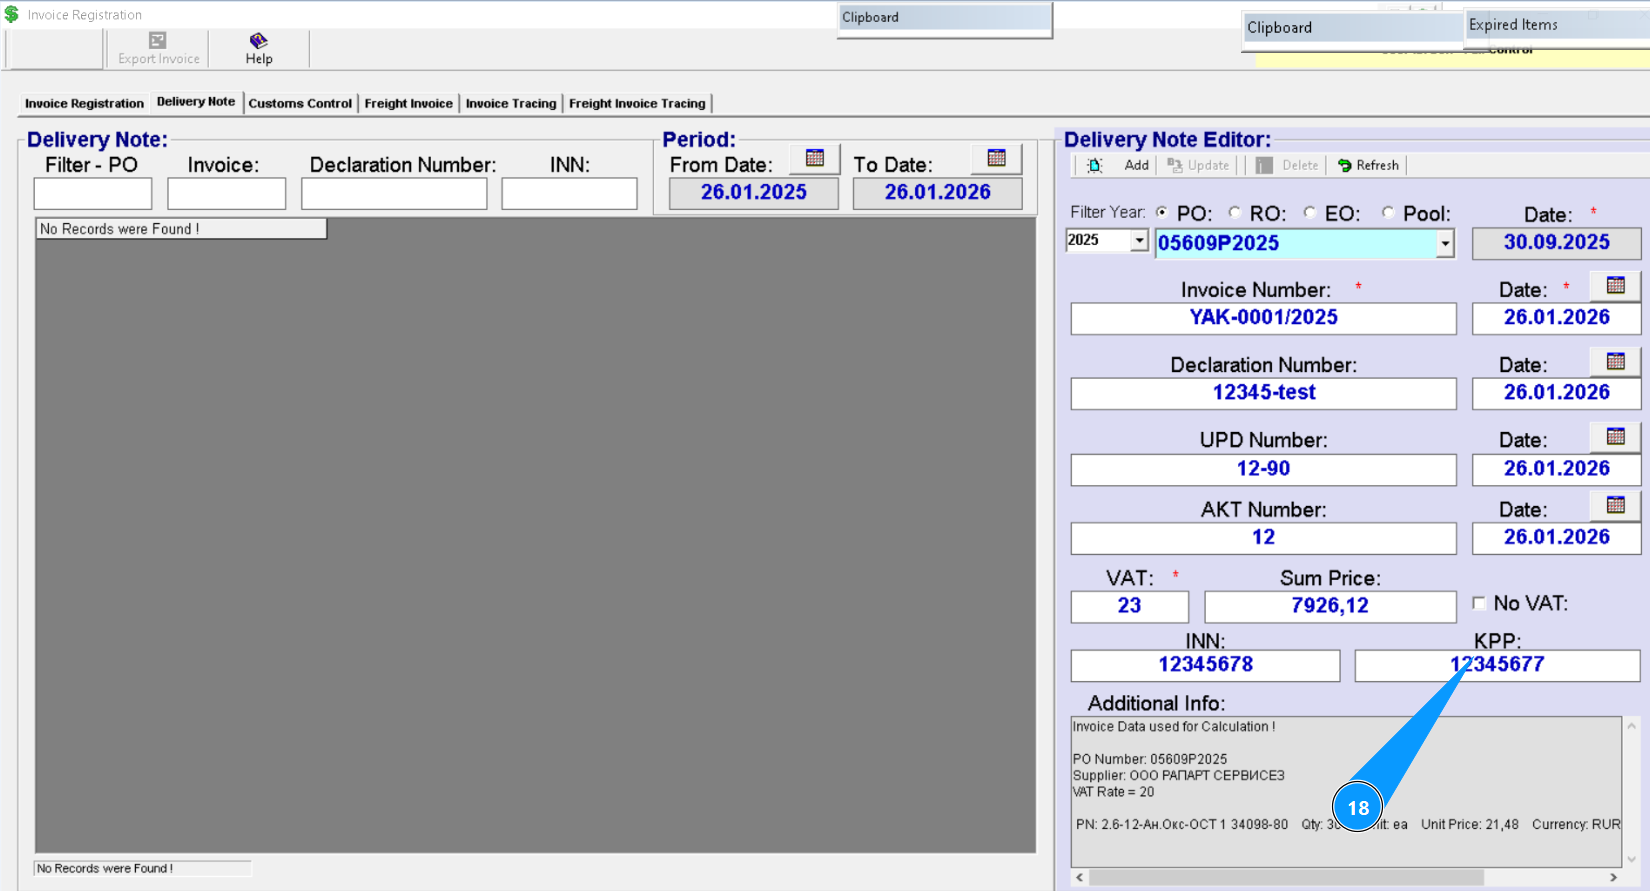
Note: Additional order information is available in the field "Additional Info".
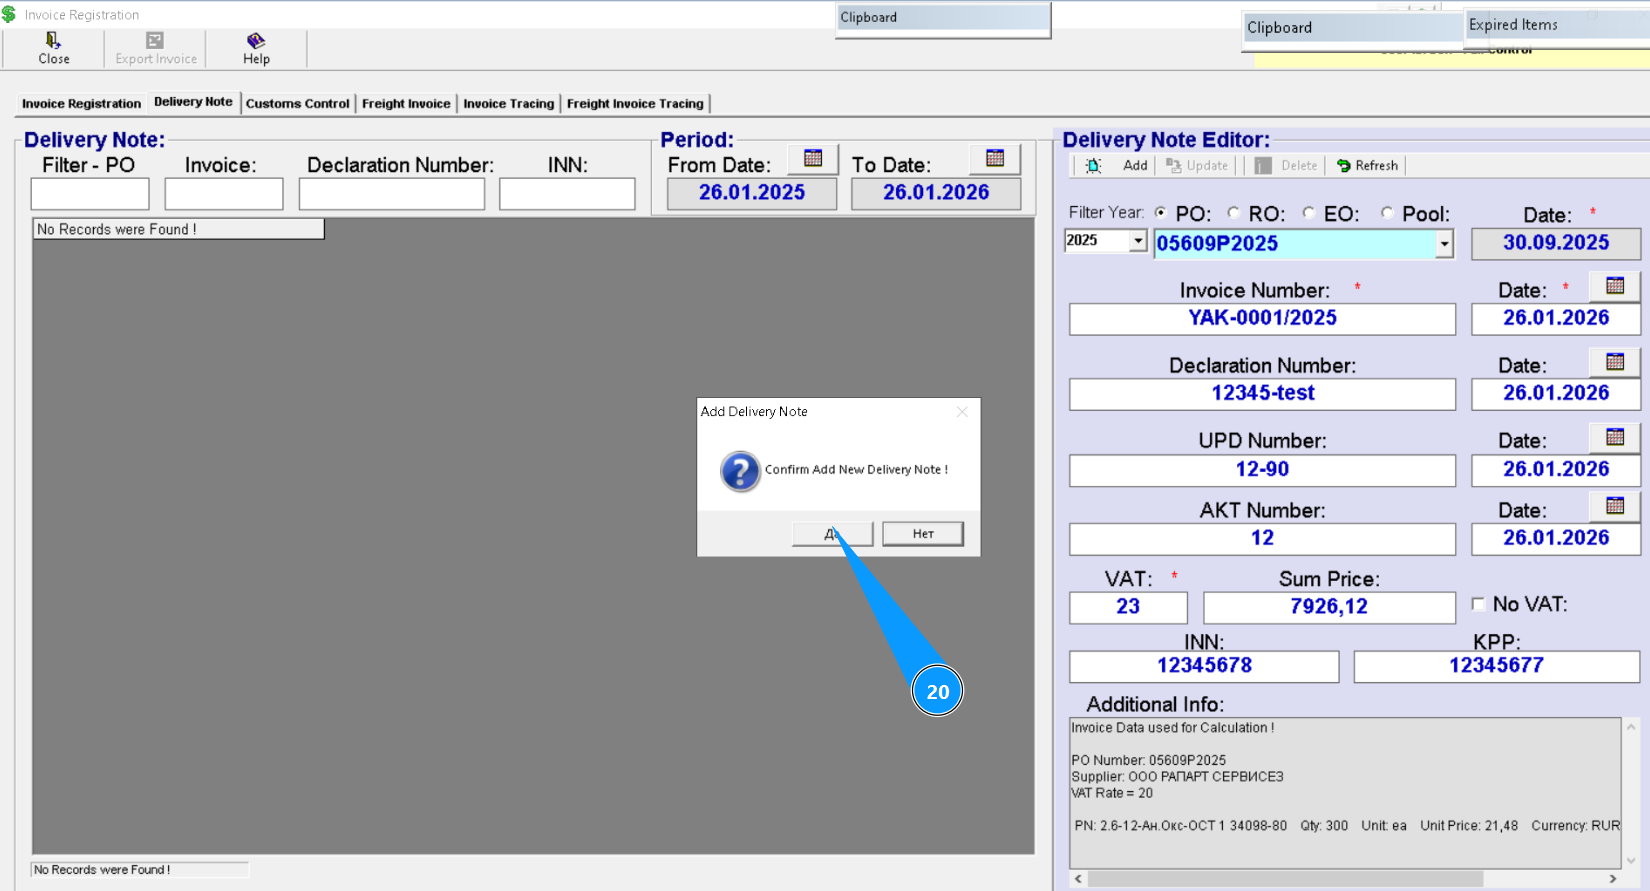
19. Click on the button "Add" to add the created delivery note form to the program.

20. Click on the button "Yes" to confirm adding the delivery note form to the program.
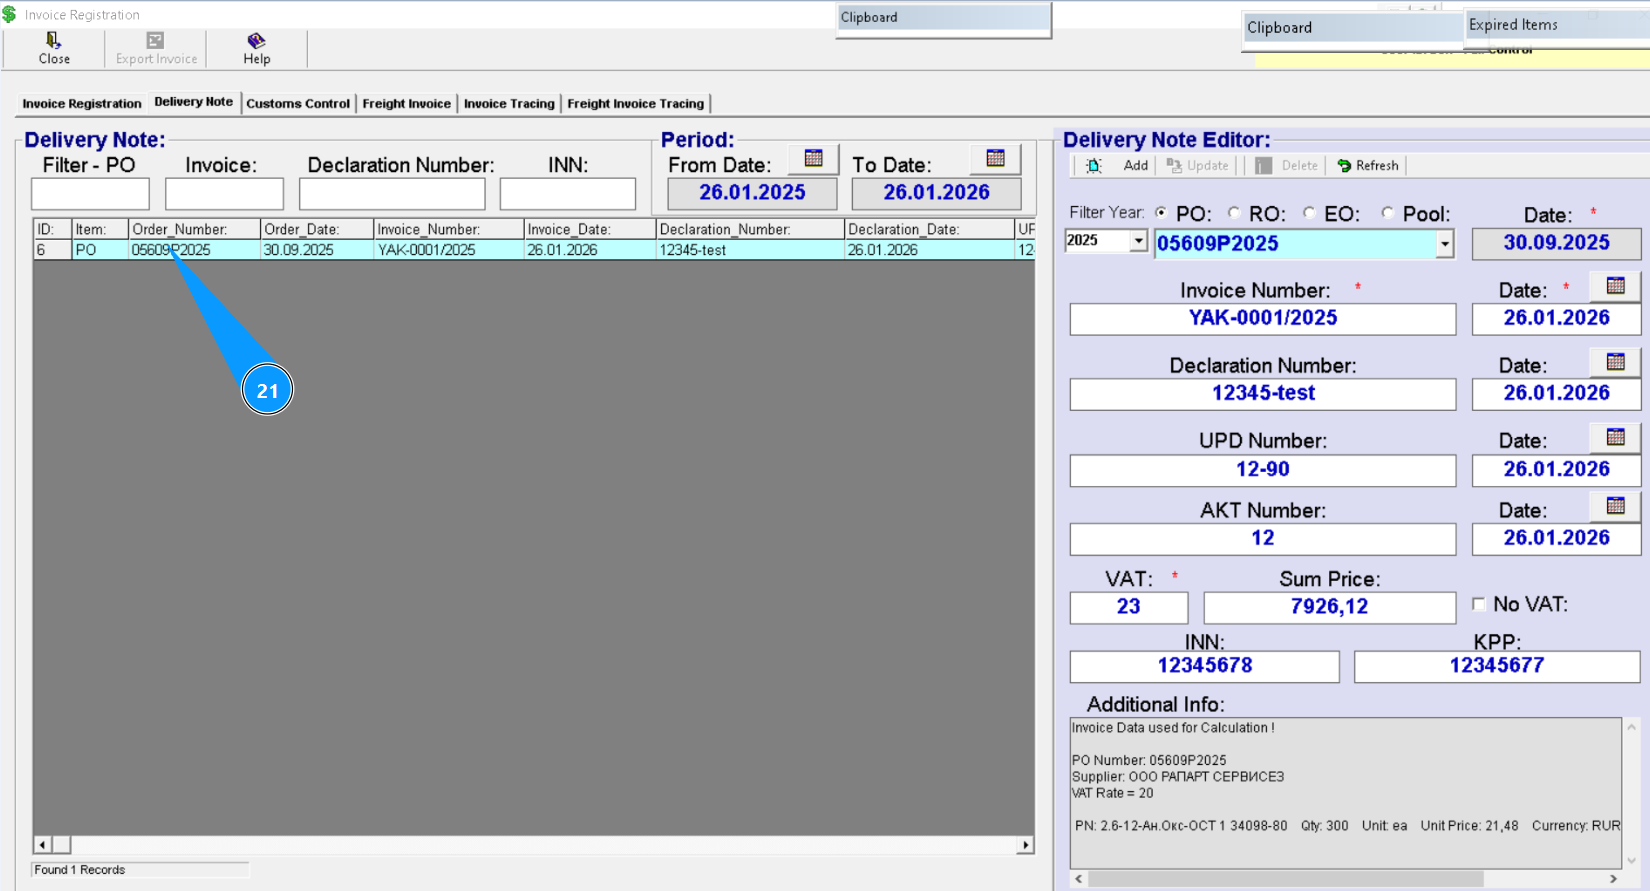
21. Check that the delivery note form is appeard in the window "Delivery Note".