How to create a Customs Declaration Form
1. In order to create a customs declaration form, go to the submodule "Invoicing".
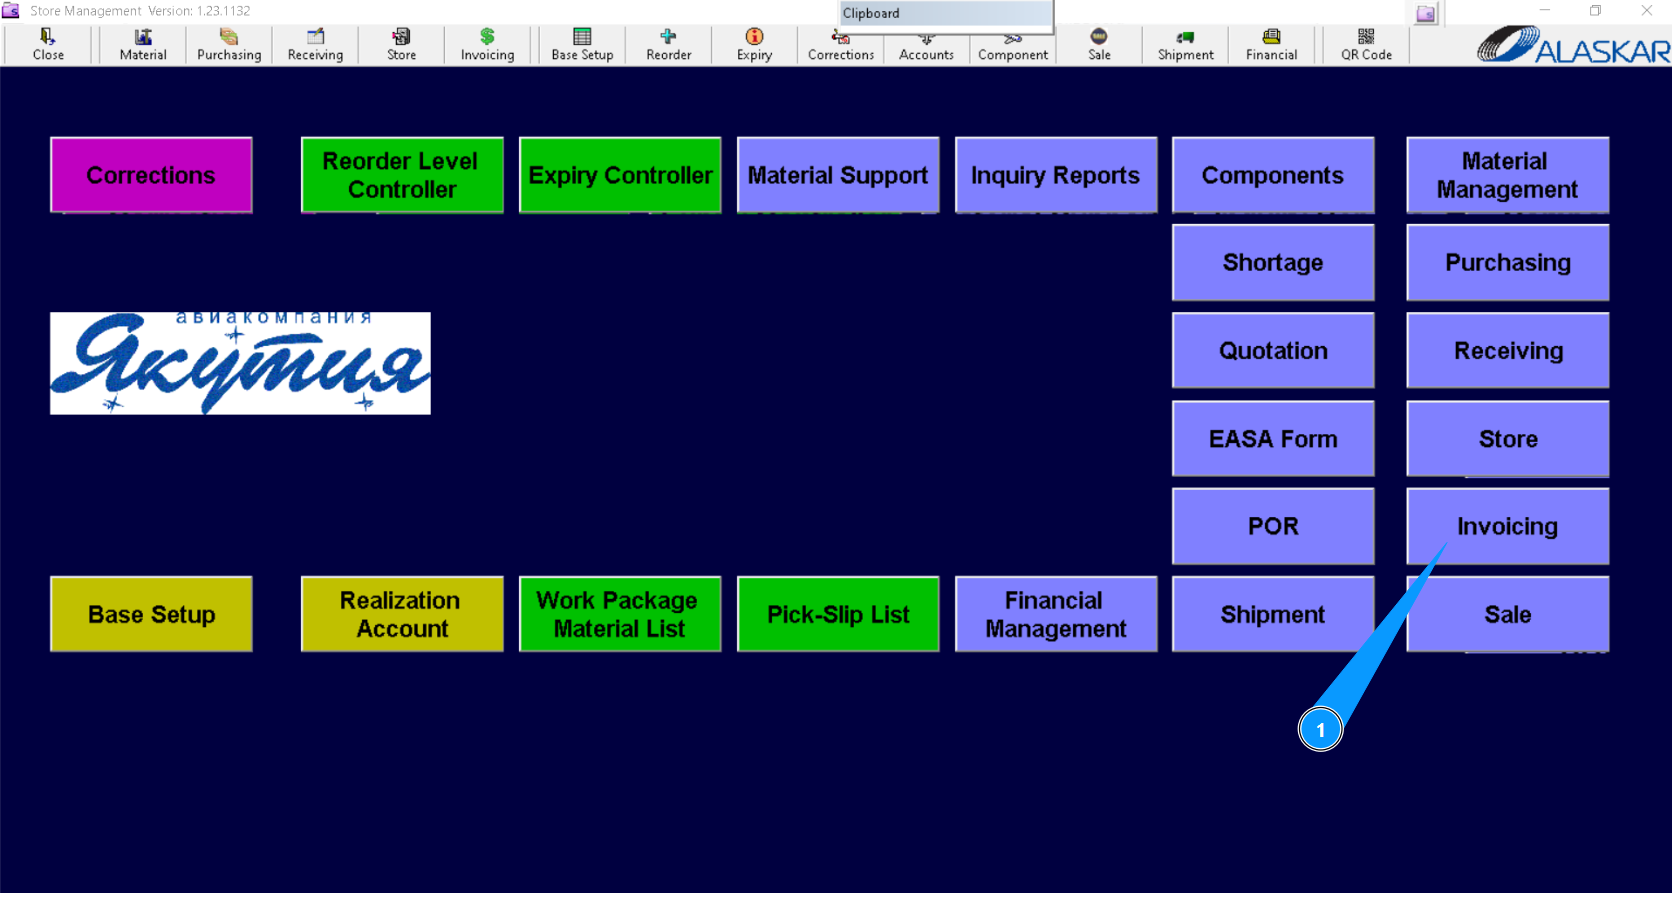
2. Then go to the tab "Customs Control".
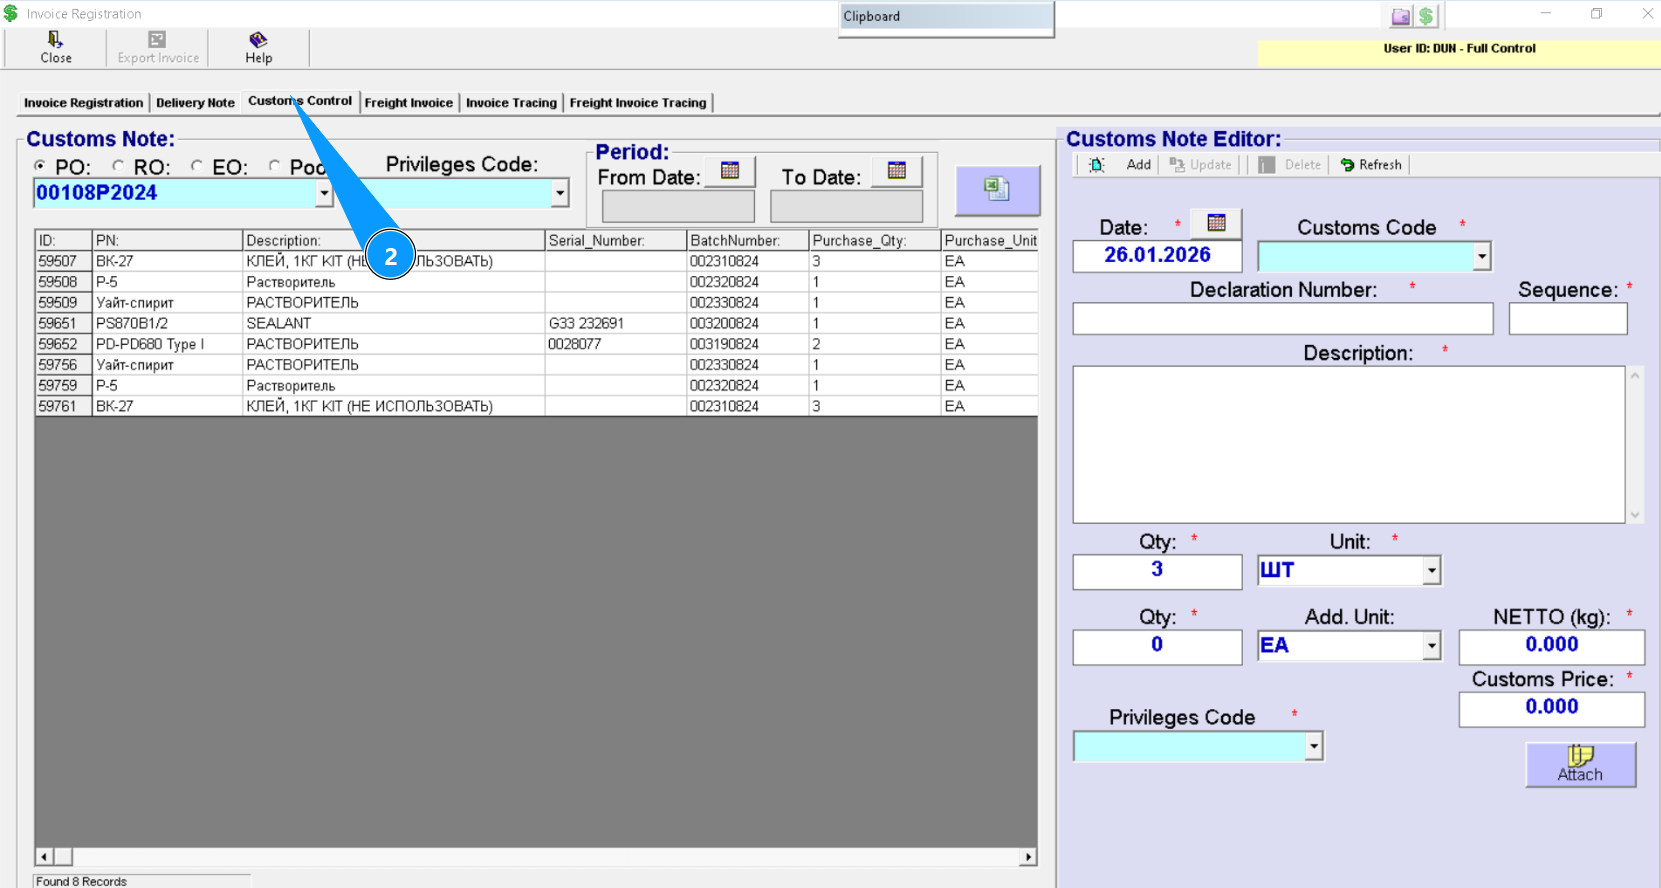
3. Make sure the window "Customs Note Editor" is open and available for you to work with.
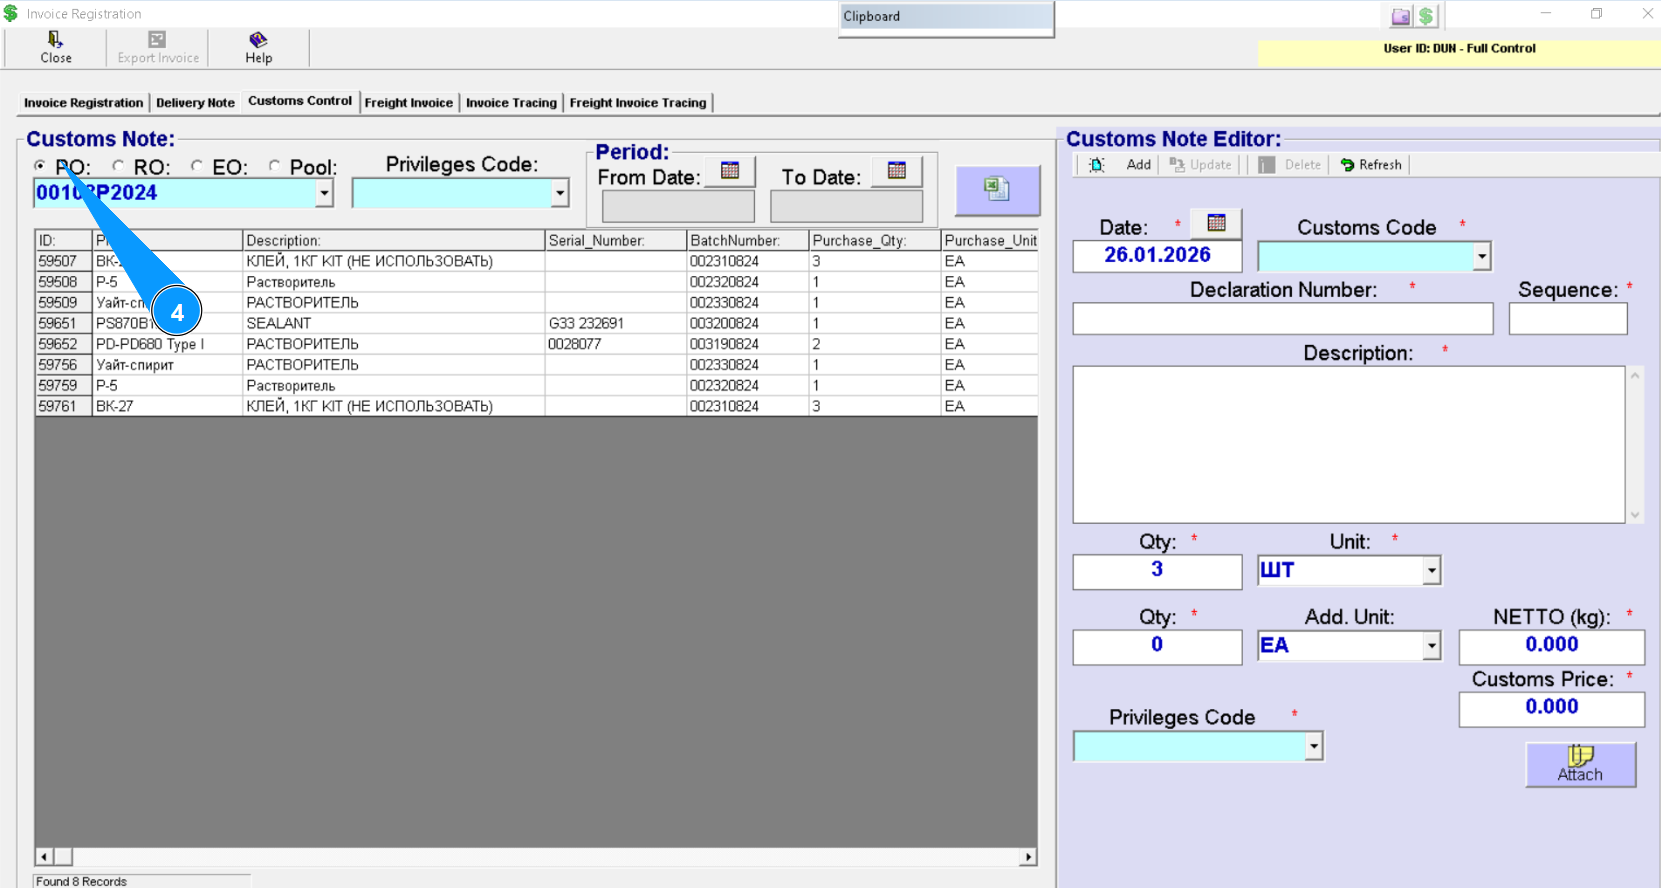
4. Select one of the following order types: PO, RO, EO, or Pool.
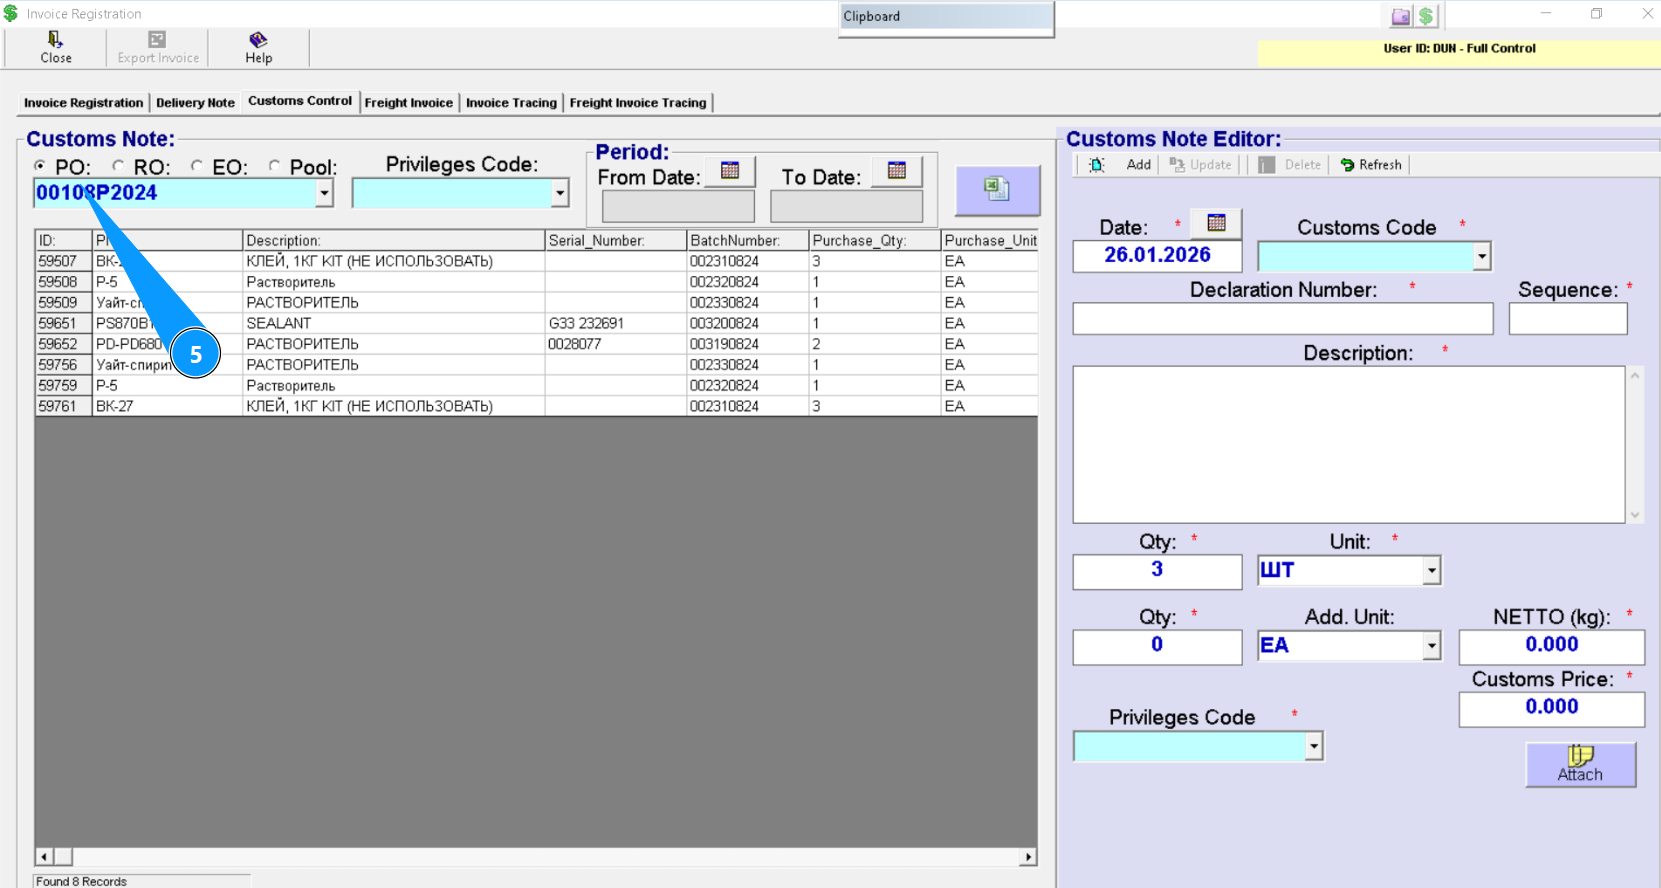
5. Enter the order number to find the line and press "Enter" on your keyboard or select from the dropdownlist.
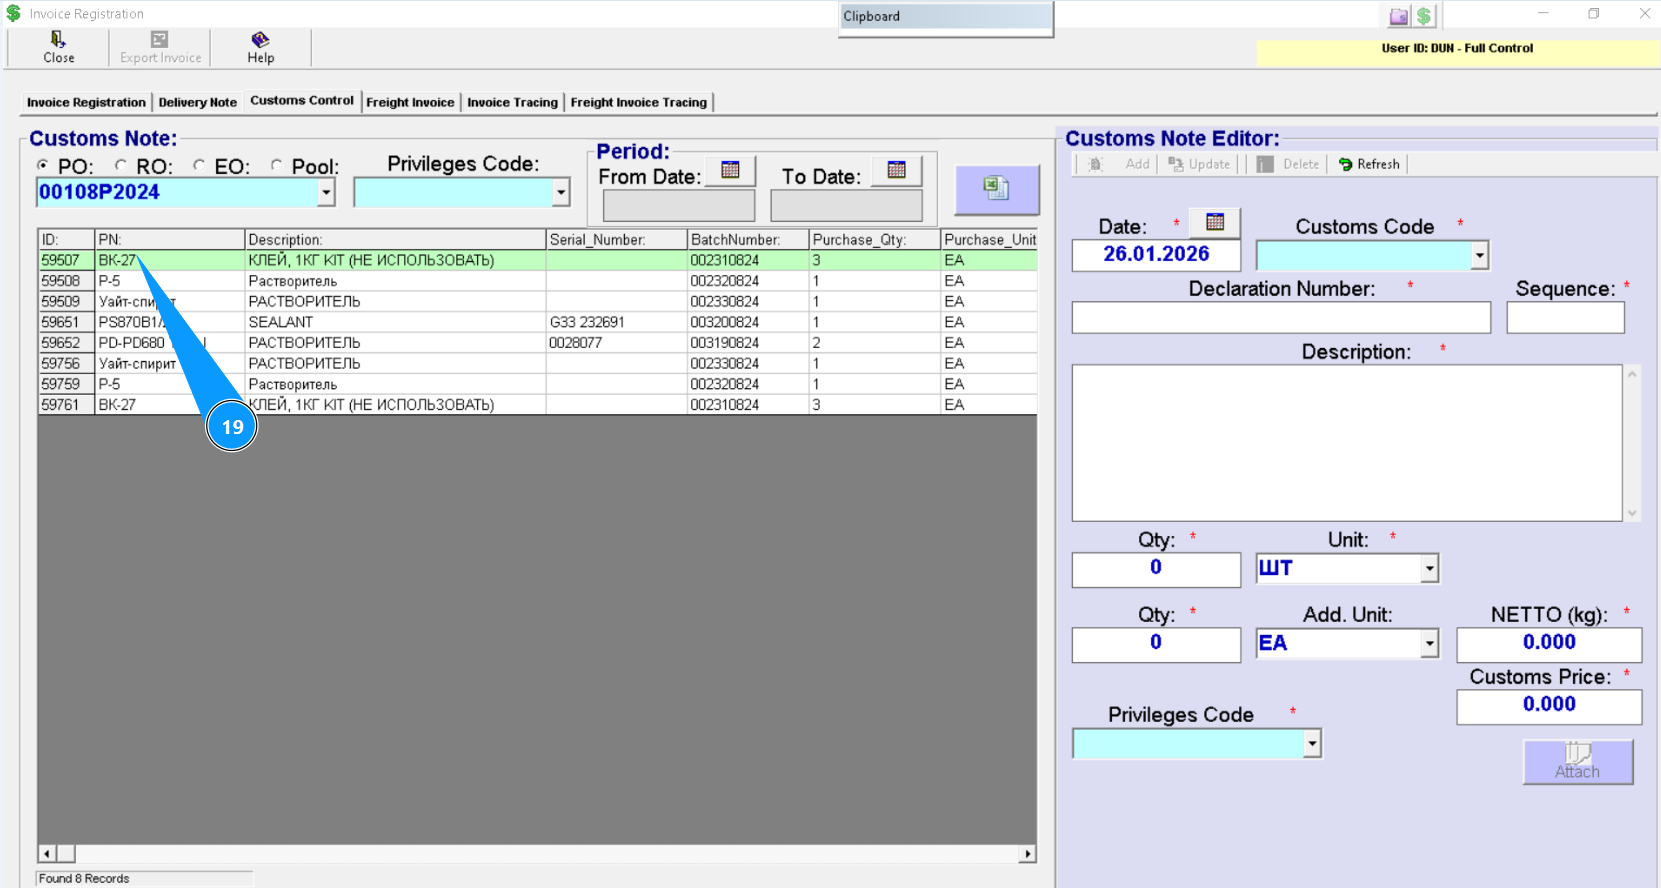
6. Select the item to be declared and click on the corresponding line to highlight it.
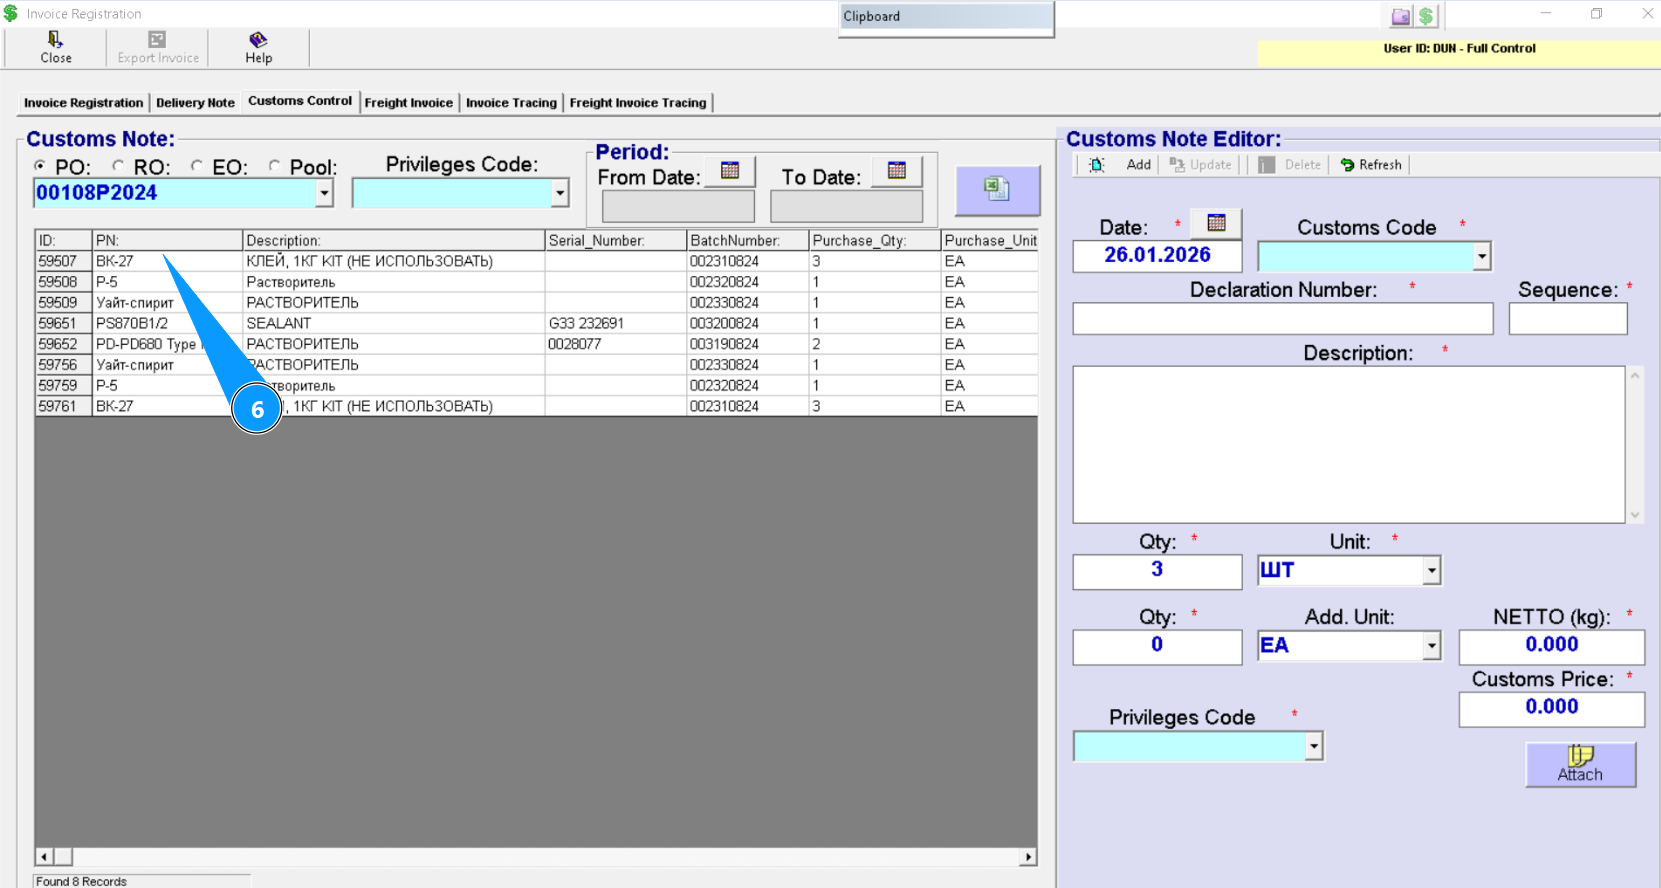
Note: The product quantity and units of measurement will automatically appear in the corresponding fields: "Qty" and "Unit".
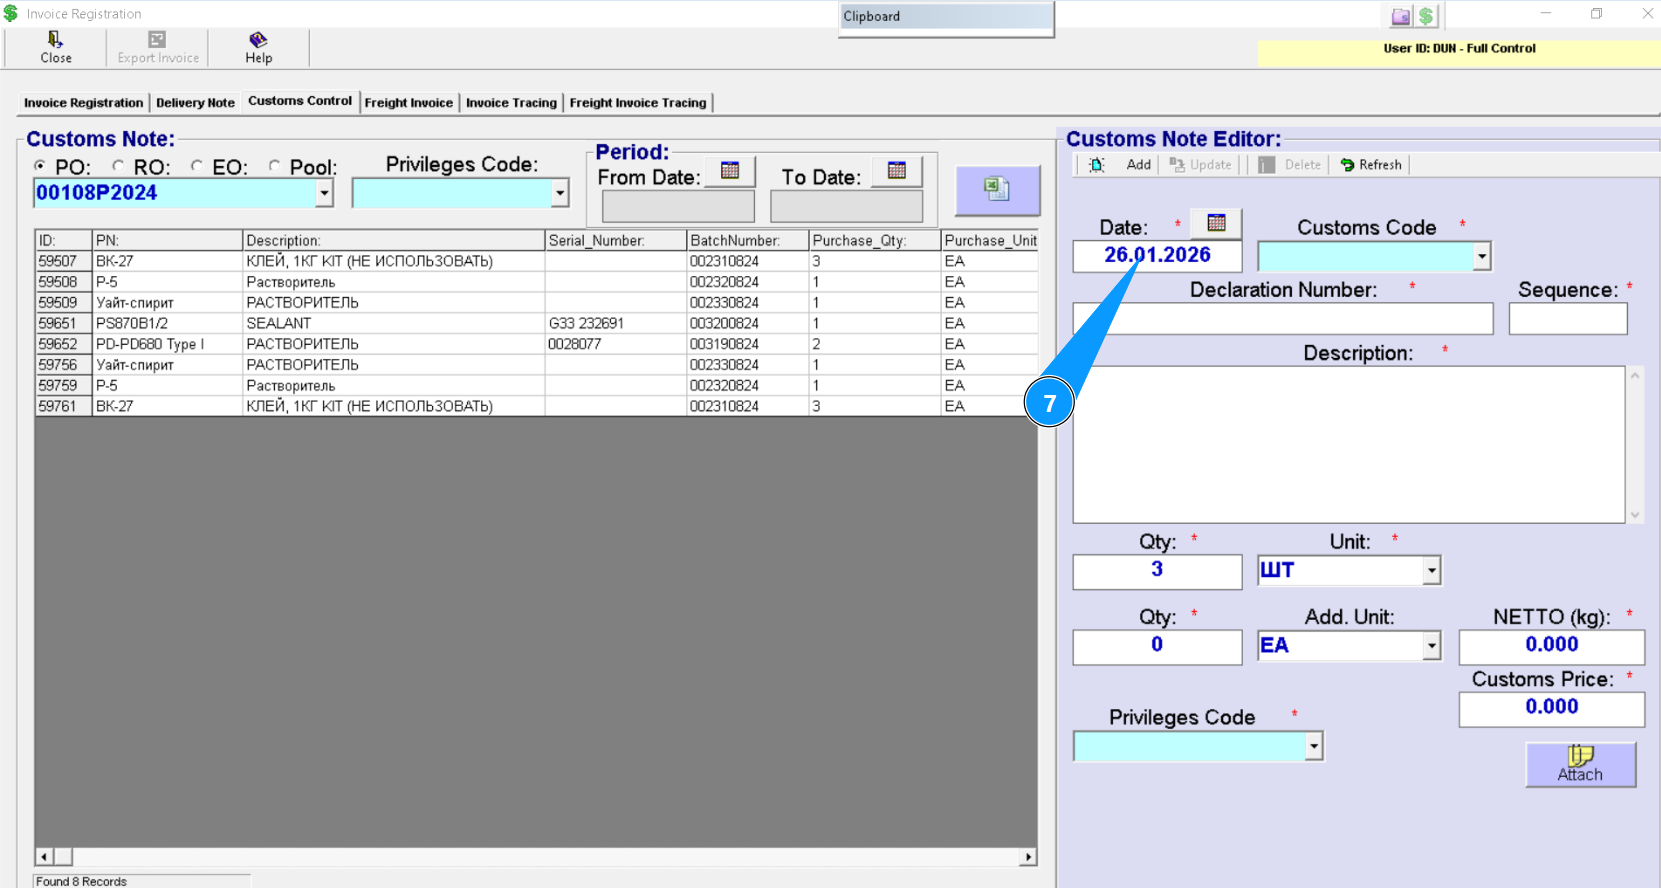
7. Enter the declaration creation date in the field "Date" or click the calendar icon and select it manually.
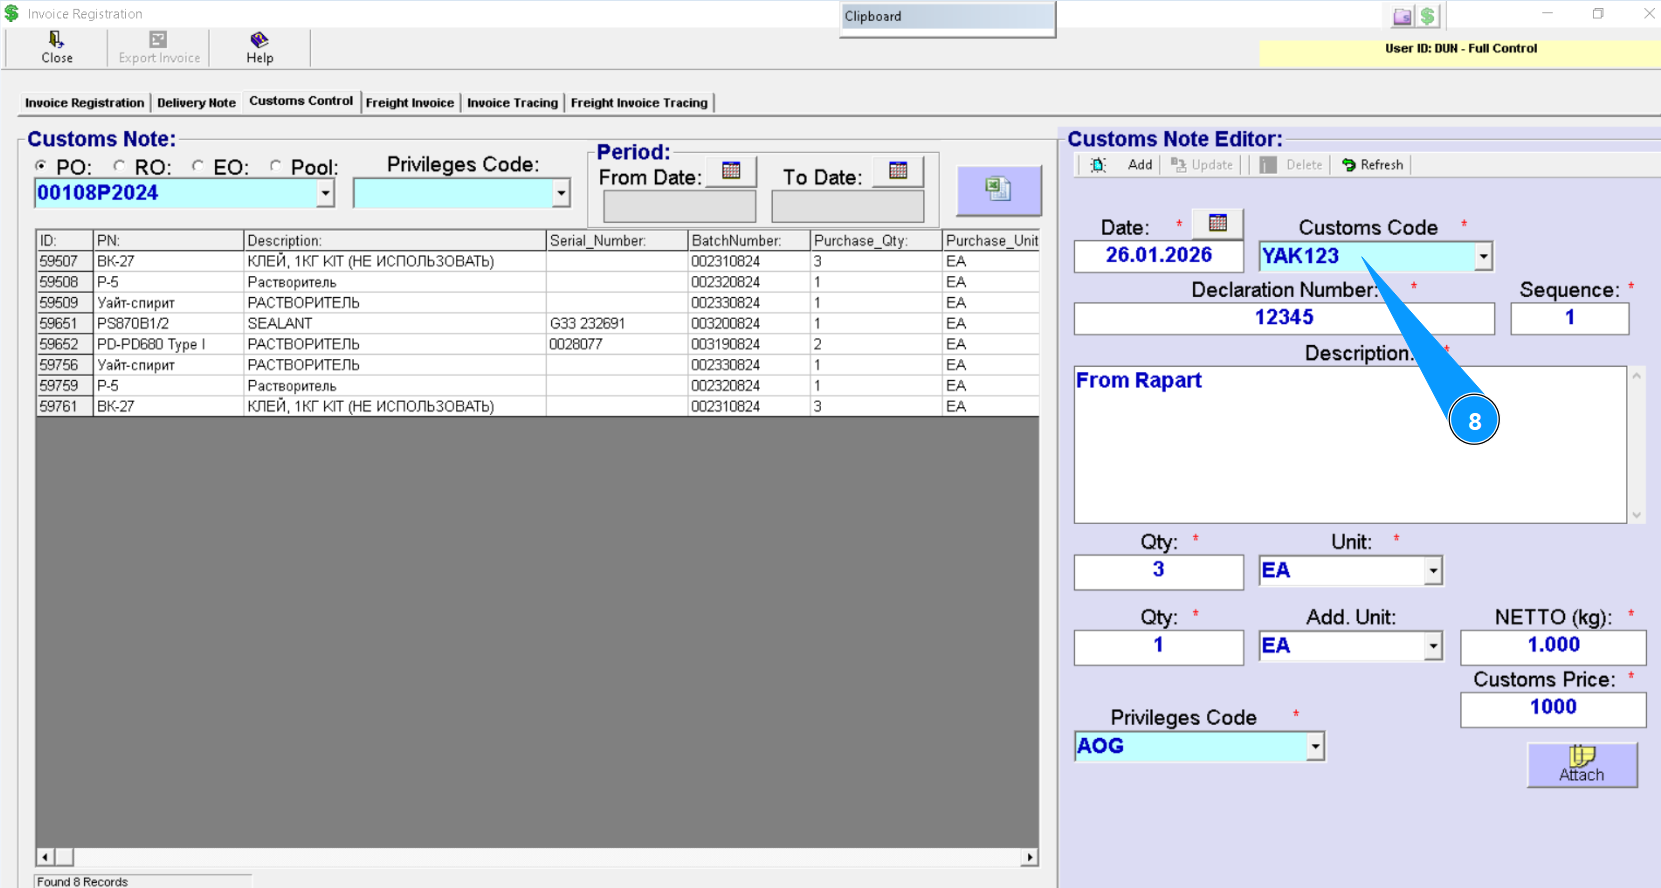
8. Enter the customs code or select it from the dropdownlist.
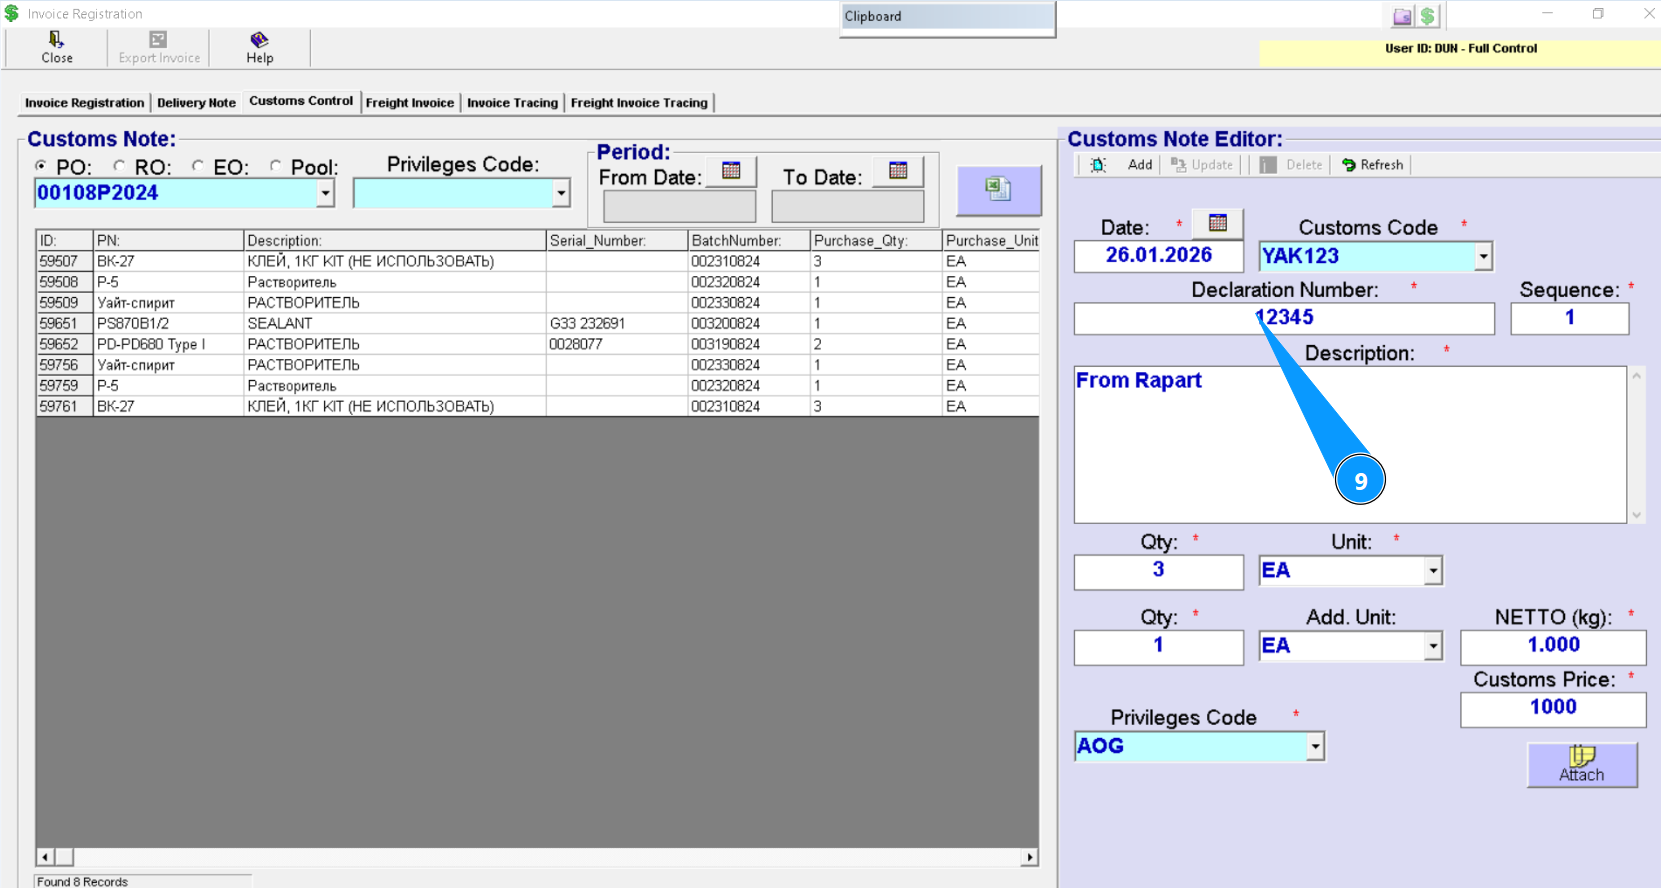
9. Enter the customs declaration number in the field "Declaration Number".
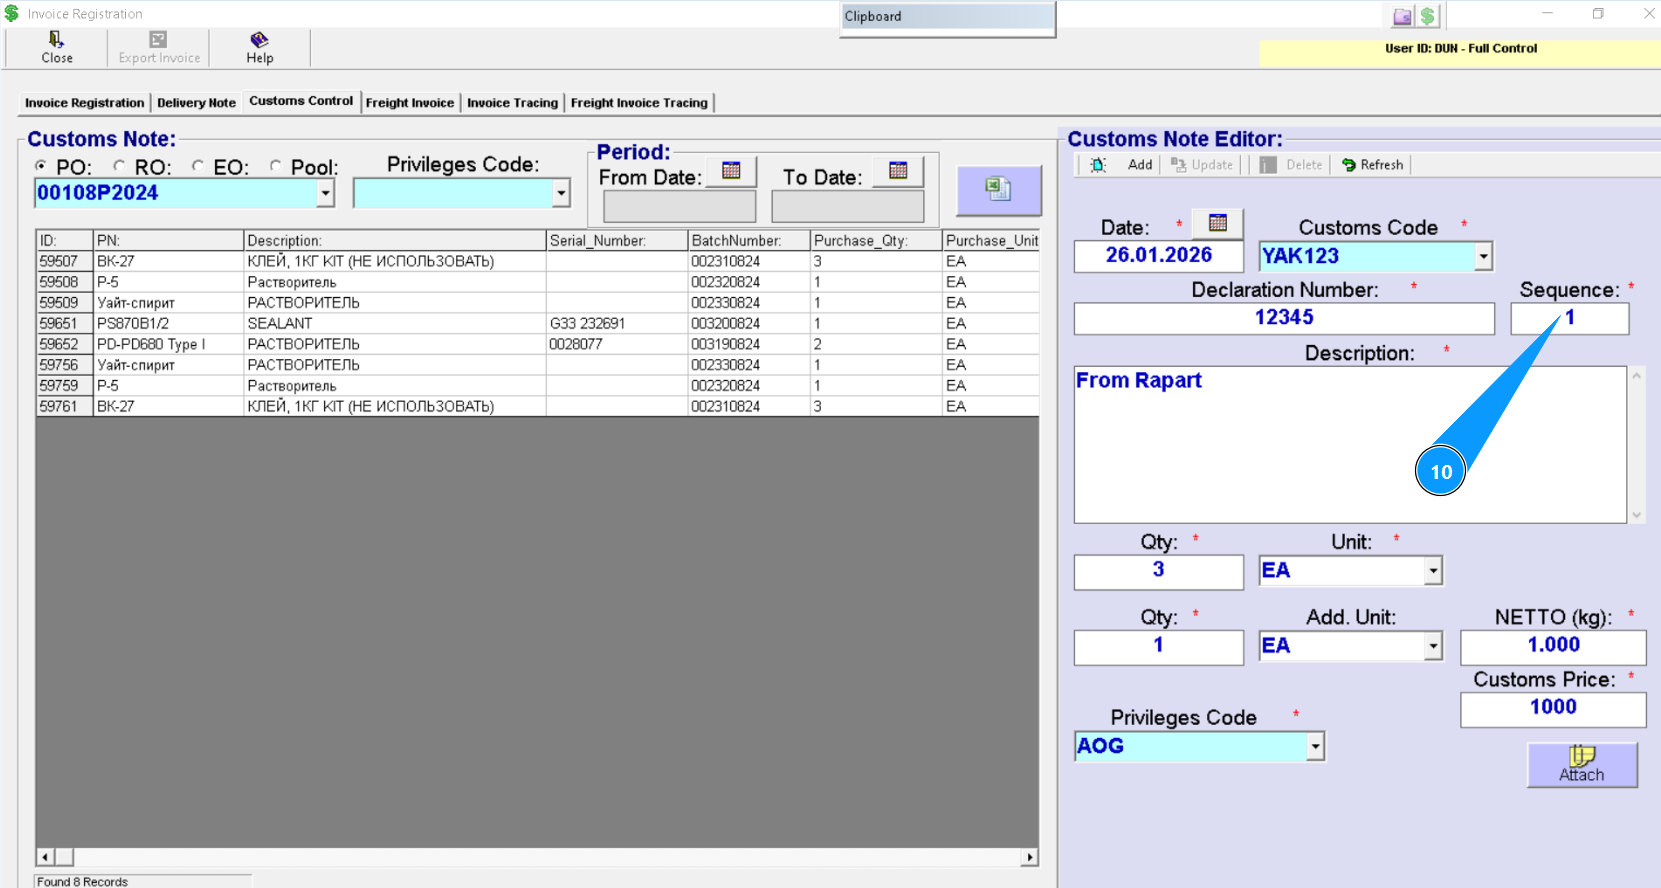
10. Enter the item of the declared goods from the customs declaration in the field "Sequence".
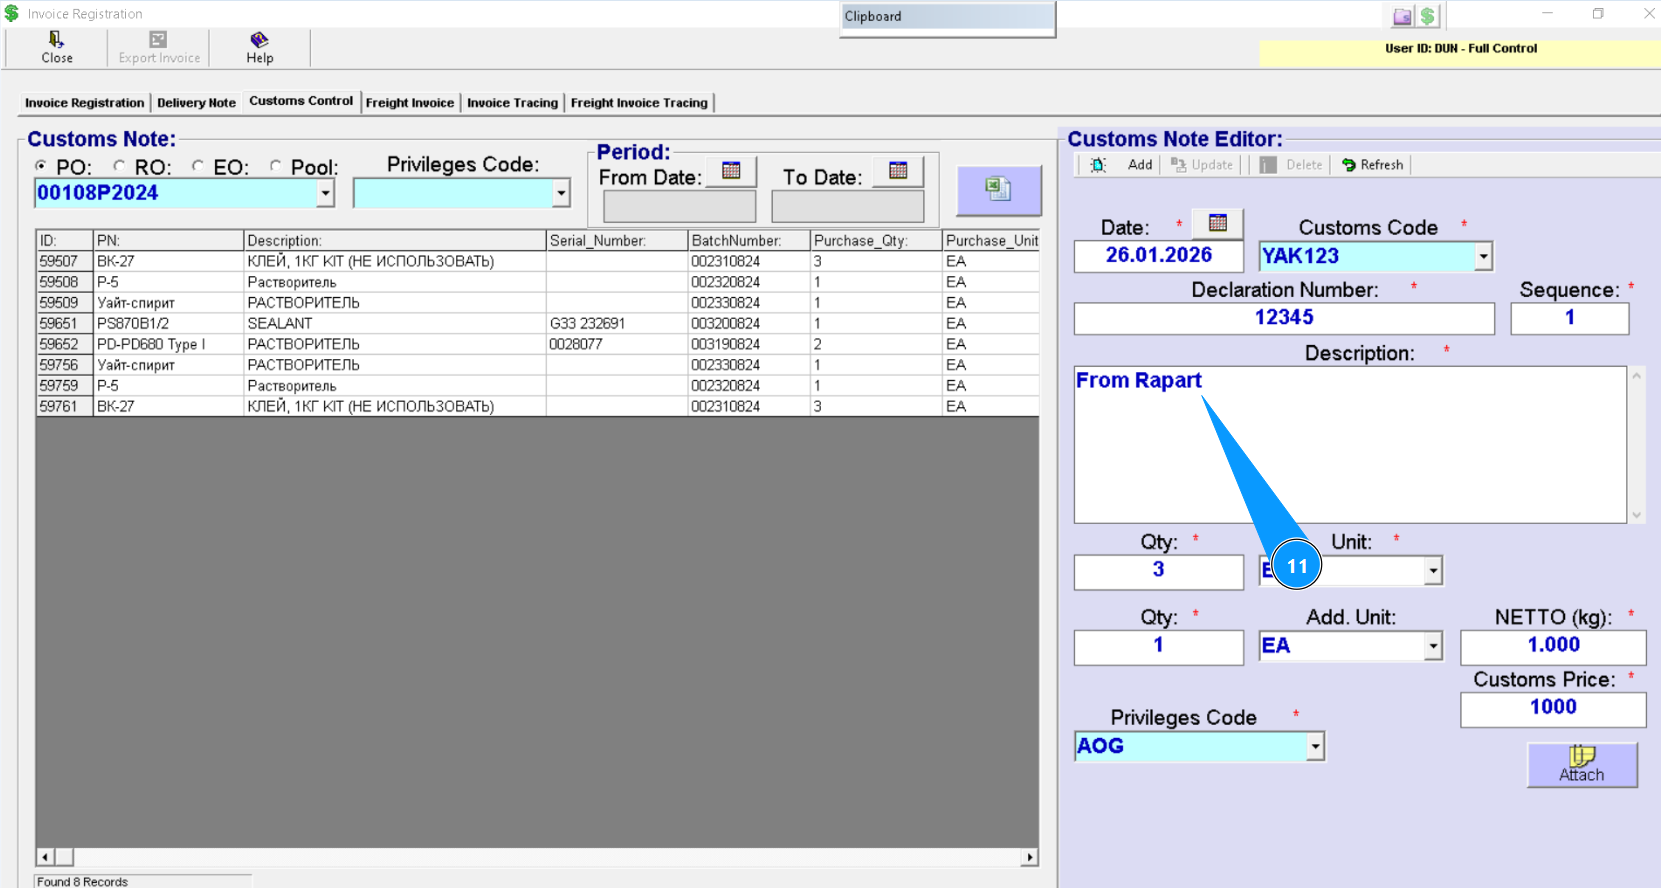
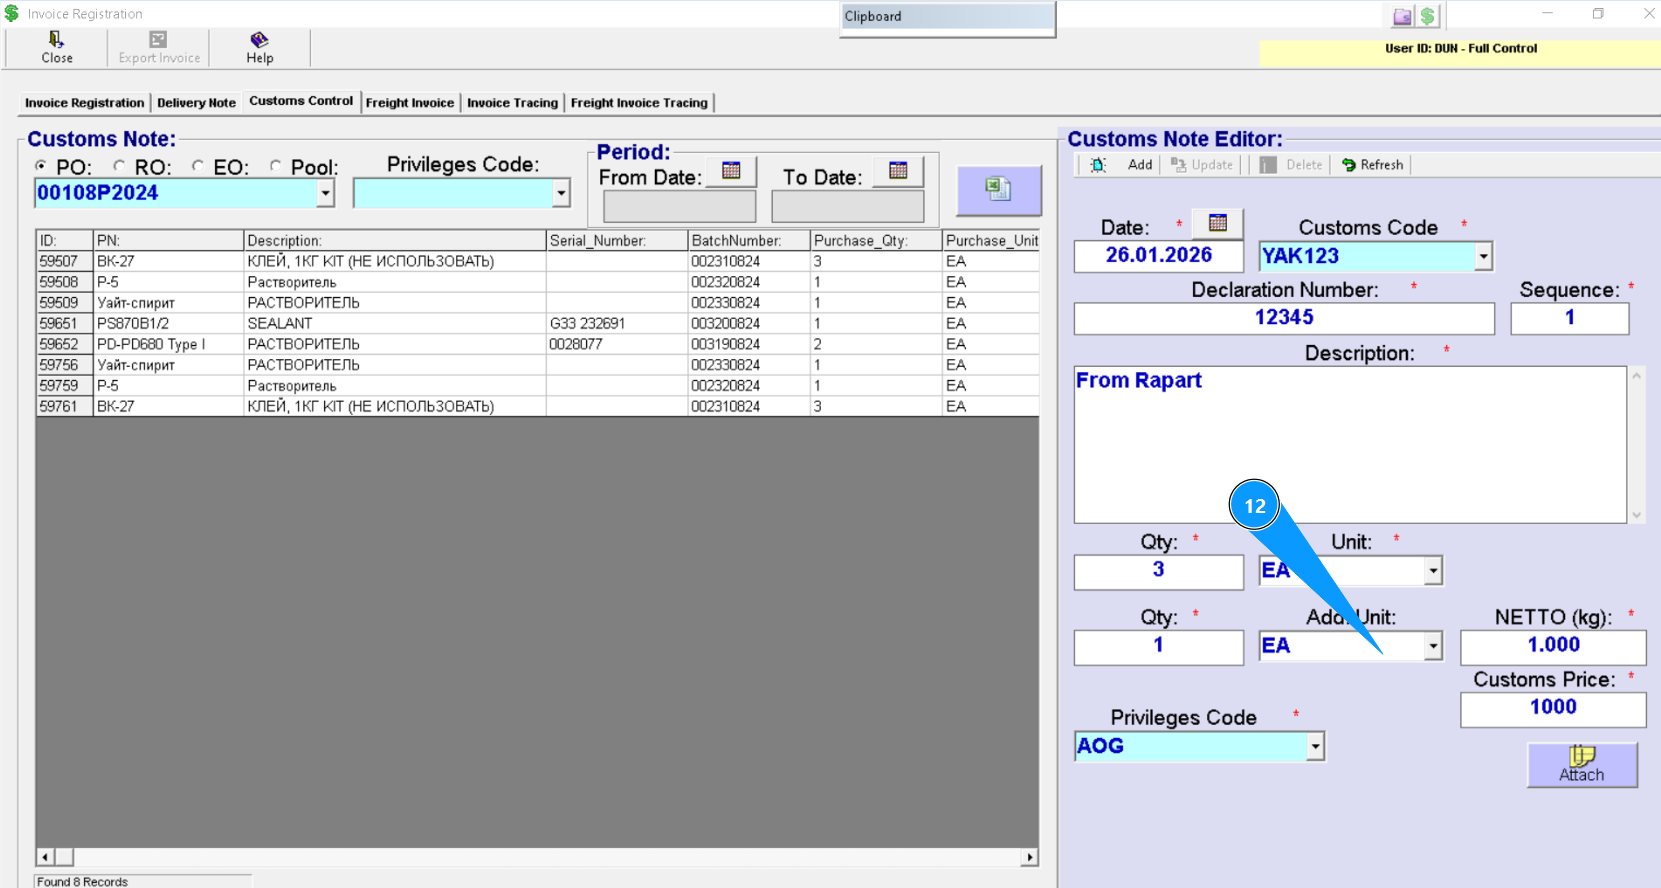
11. Enter a description of the declared goods and other additional information (if necessary) in the field "Description".
12. If necessary, you can increase the quantity of the declared item. Set the units of measurement in the field "Add.unit".
13. Set the quantity of the additionally declared item in the field "Qty".

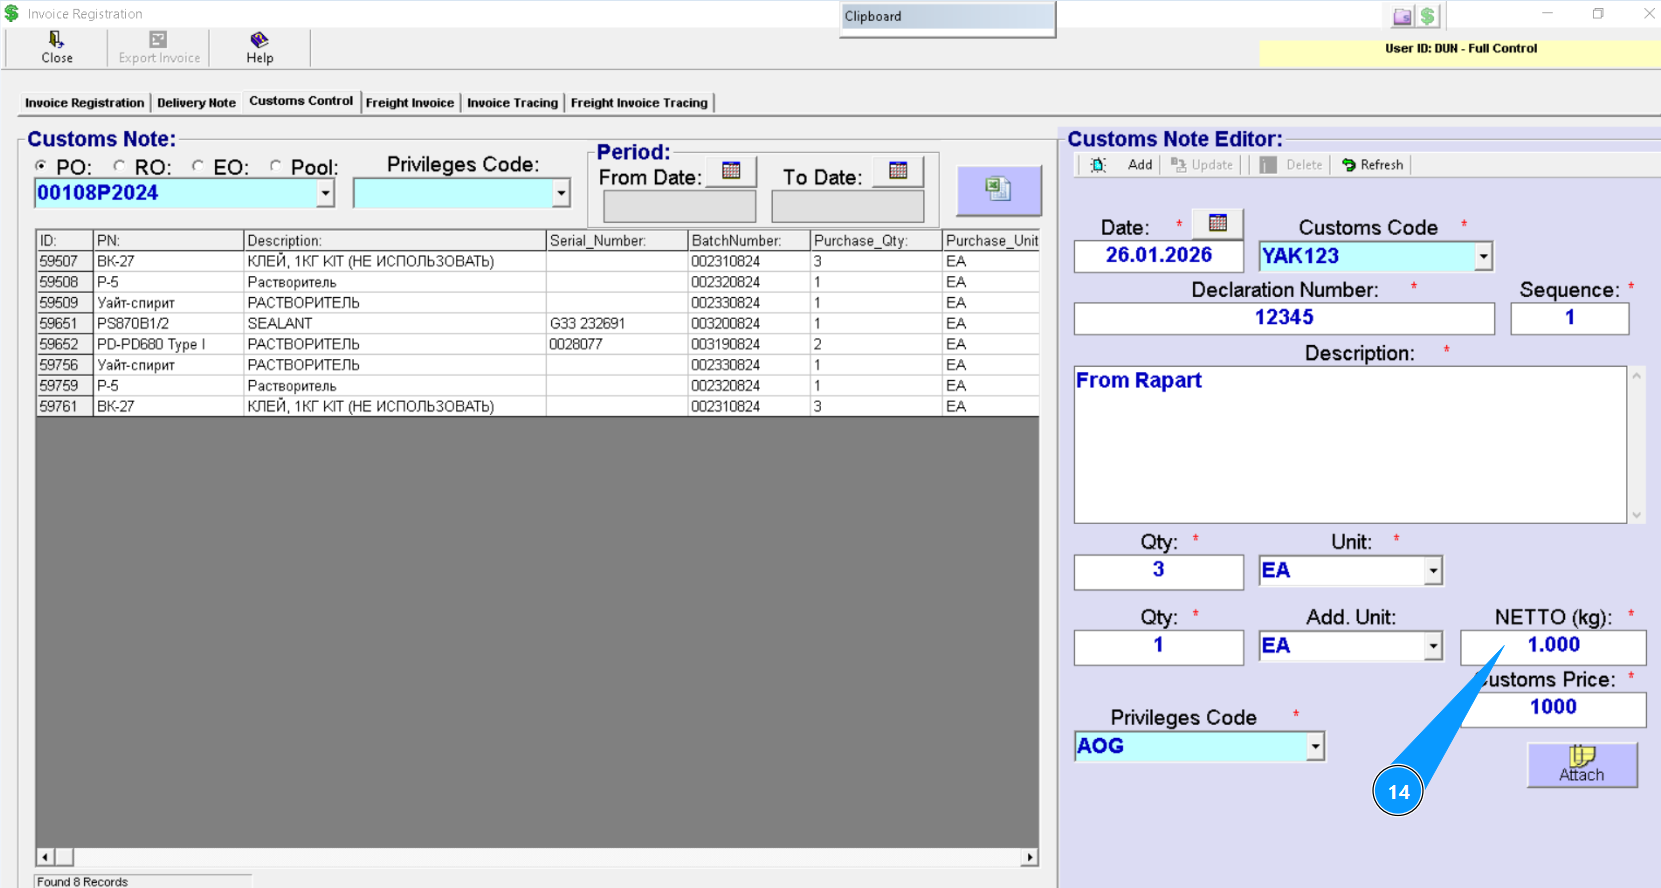
14. Enter the total weight of the item in kilograms in the field "NETTO(kg)".
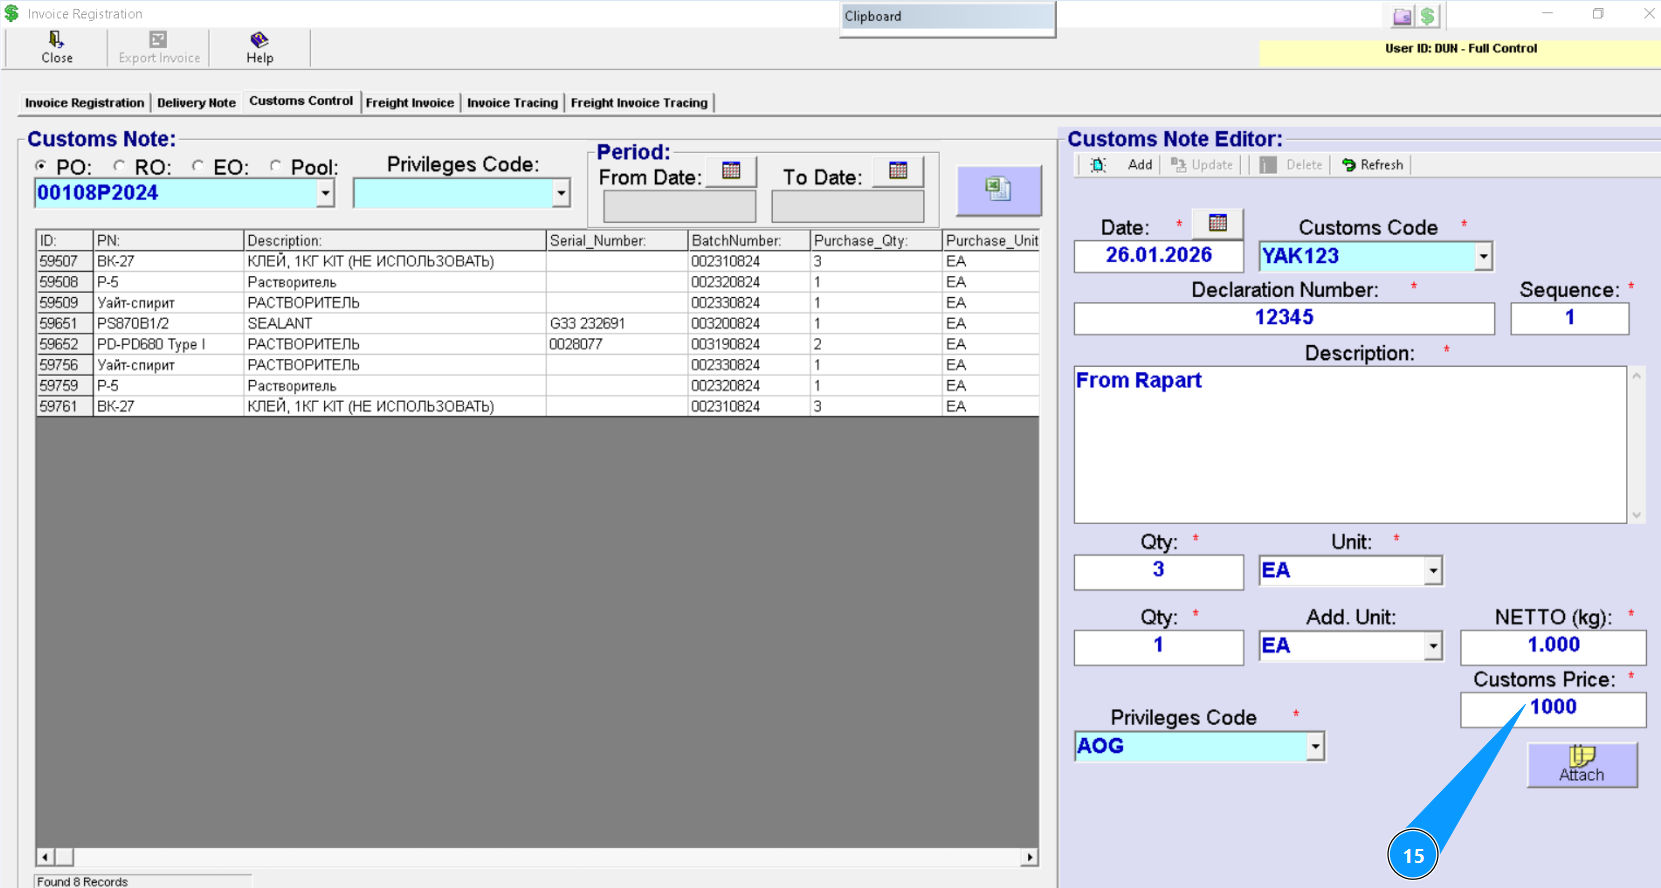
15. Enter the customs clearance cost in the field "Customs Price".
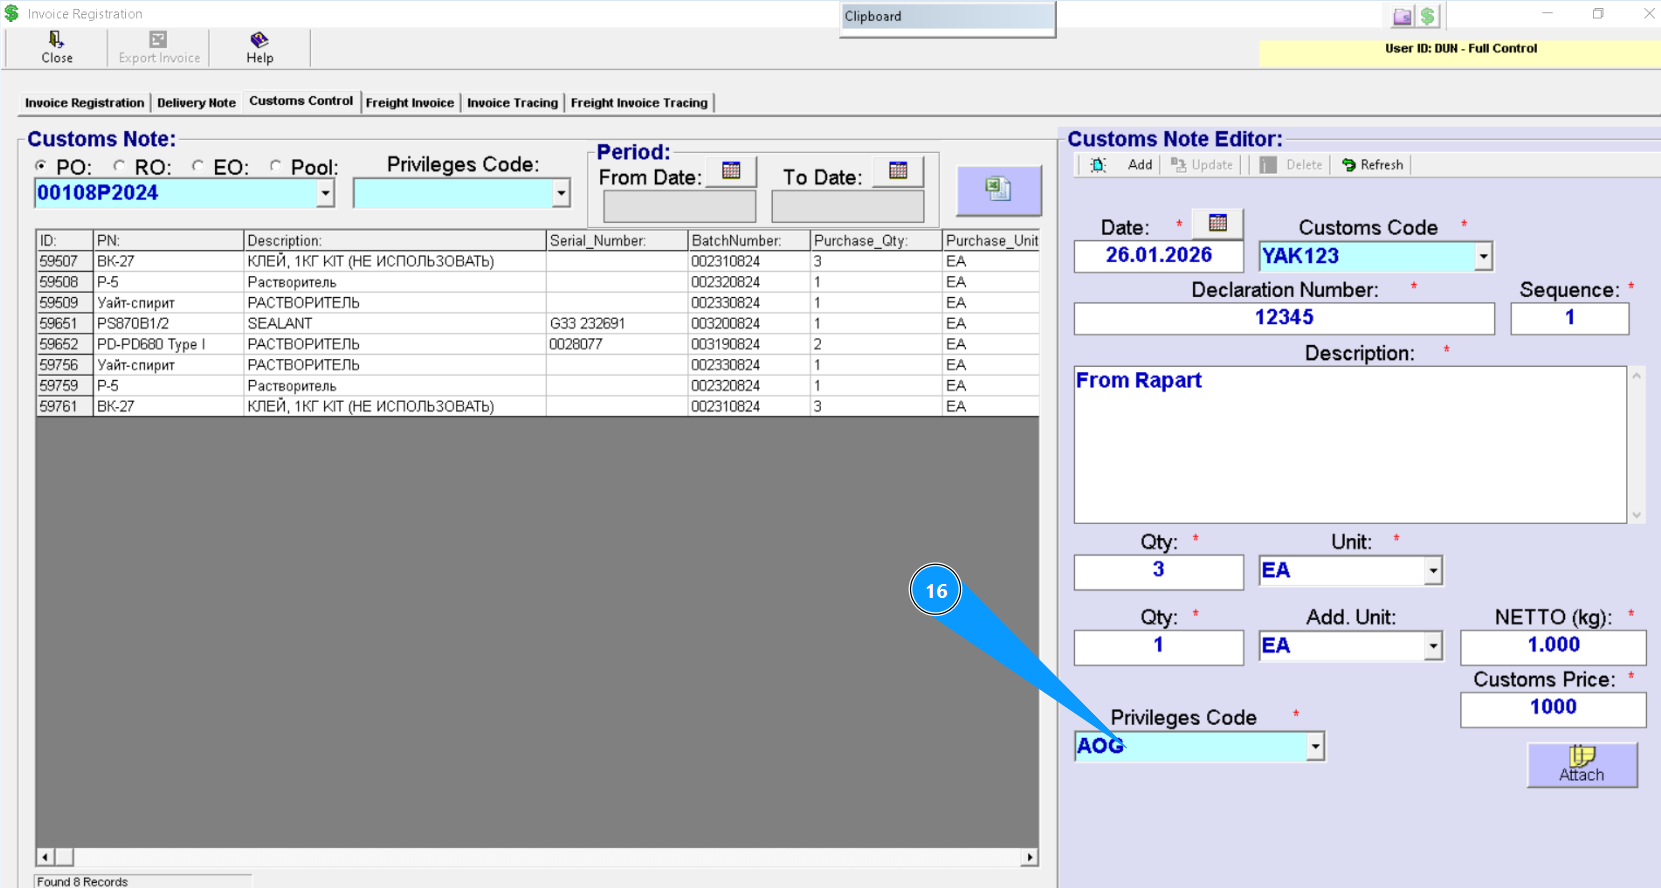
16. Enter the customs declaration processing priority or select from the dropdownlist in the field "Privileges Code".
Note: If necessary, attach documents to the customs declaration form. Click on the button "Attach" and follow the general instructions: "How to Attach a Document"
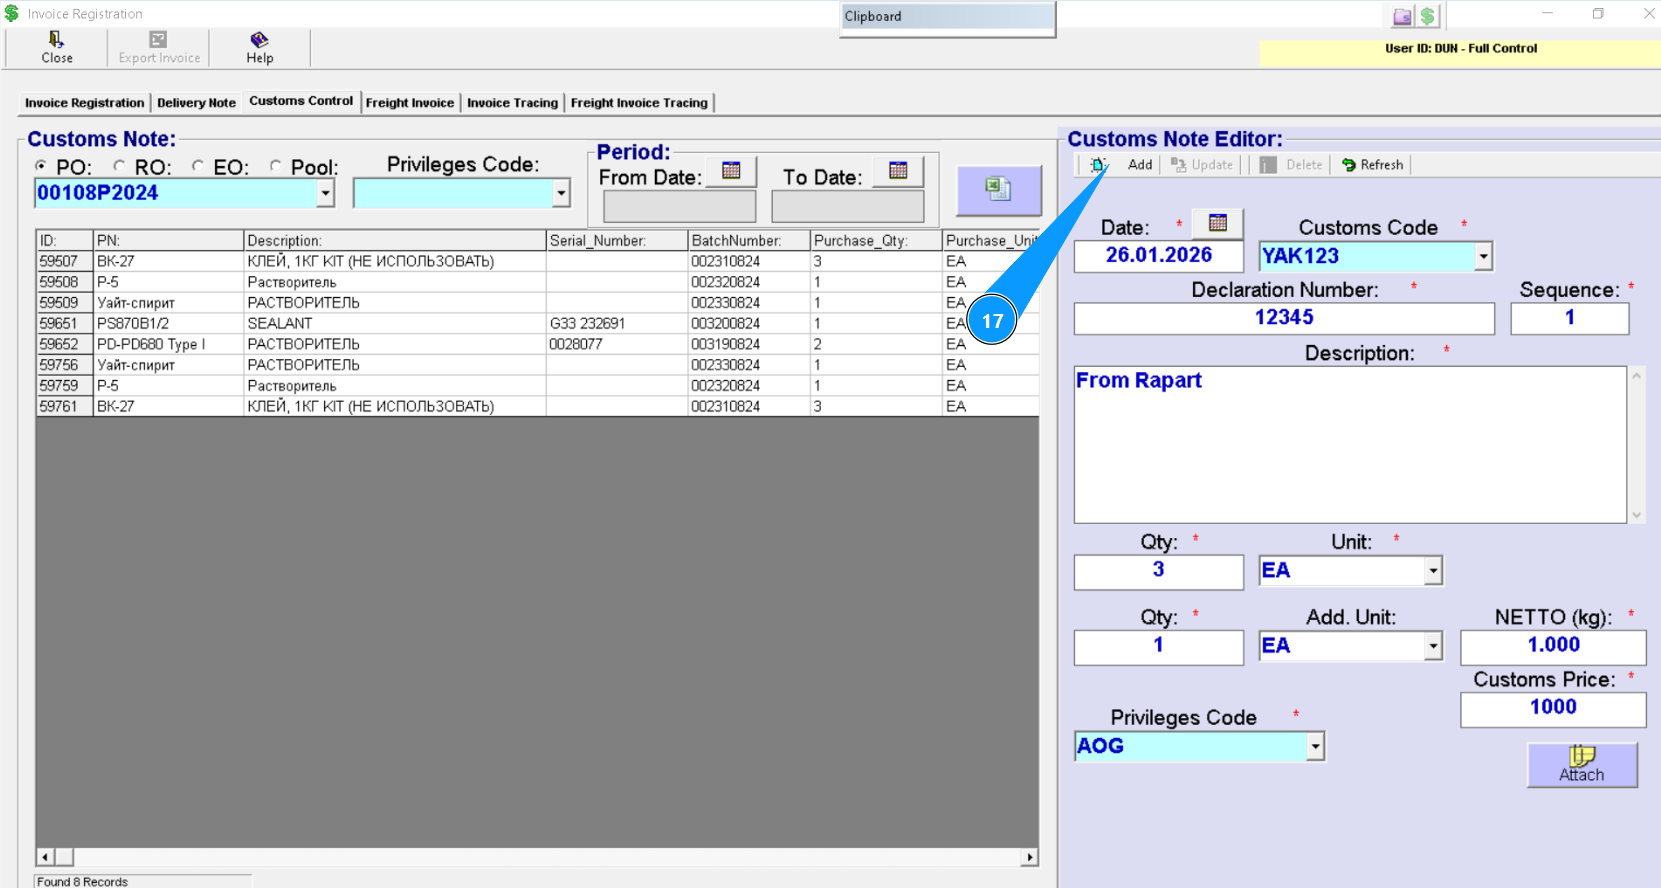
17. Click on the button "Add" to add the created customs declaration to the program.
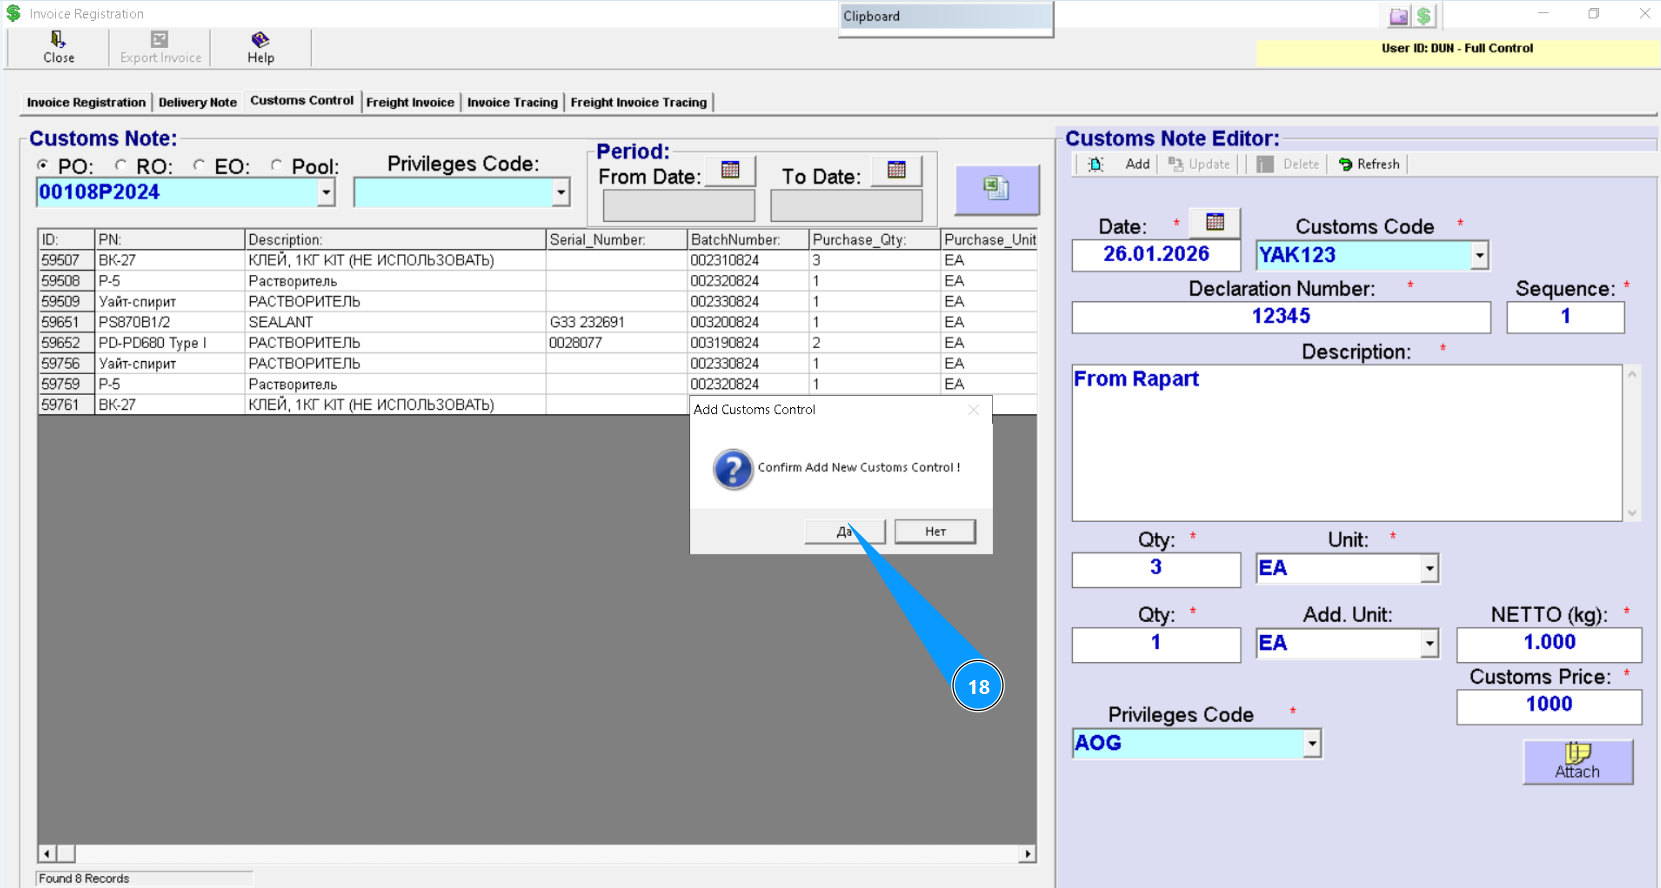
18. Click on the button "Yes" to confirm adding the customs declaration to the program.
19. Check that the line with the product to be declared is green in the window "Customs Note". The form has been created.