How to control components ordered by Exchange
1. For the starting process of controlling components that are planned to be received through exchange, go to submodule "Components".

Note: For identifying necessary searching field, move the cursor to empty fields, the field name is highlighted.
2. Check that "Exchange order" has been created, go to the tab "Exchange order". Use the searching filters to be sure that the applicable line exists.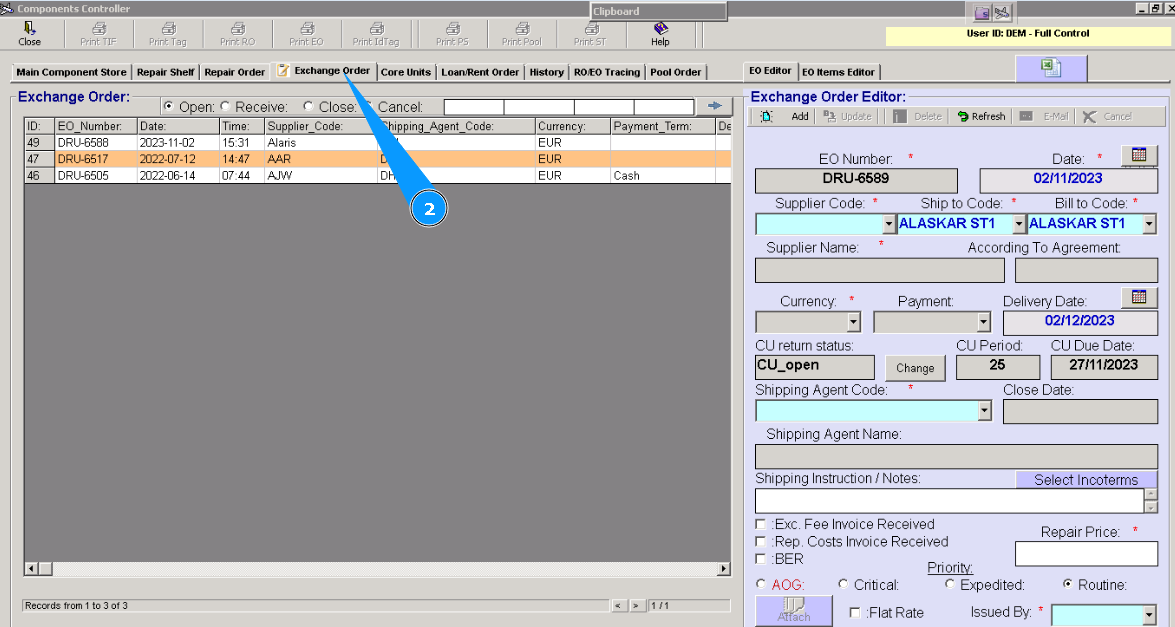
3. If EO was not created, please use the applicable instruction. Full instructions on how to create an Exchange order is available by links below:
"How to create an Exchange order"
4. Then go to the tab "Core Units". Use searching filters to be sure that an applicable line exists.
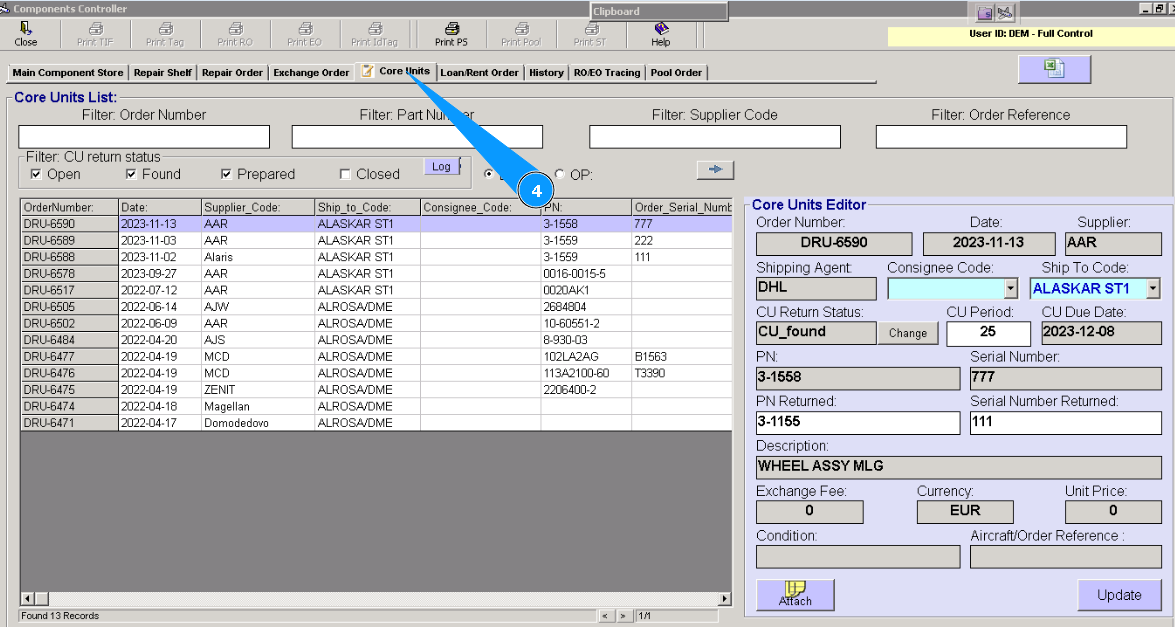
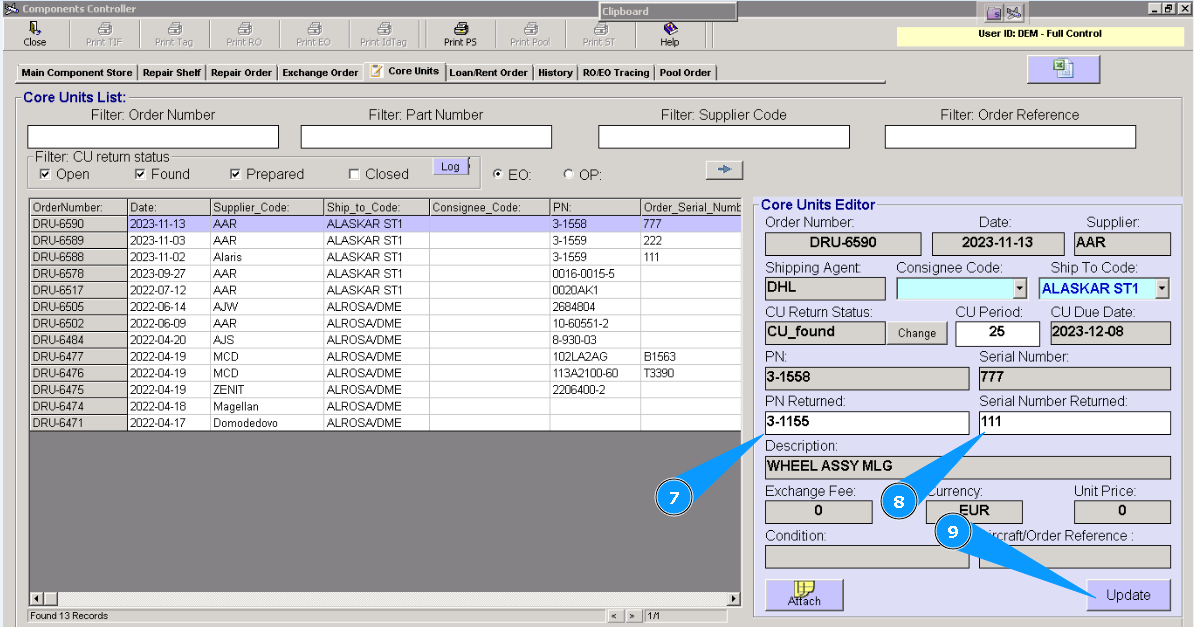
5. Select the necessary line and click on it with the line on the left knob of your mouse.
6. Visually, check exchanged component data is appeared in the window of editor "Core Units Editor".
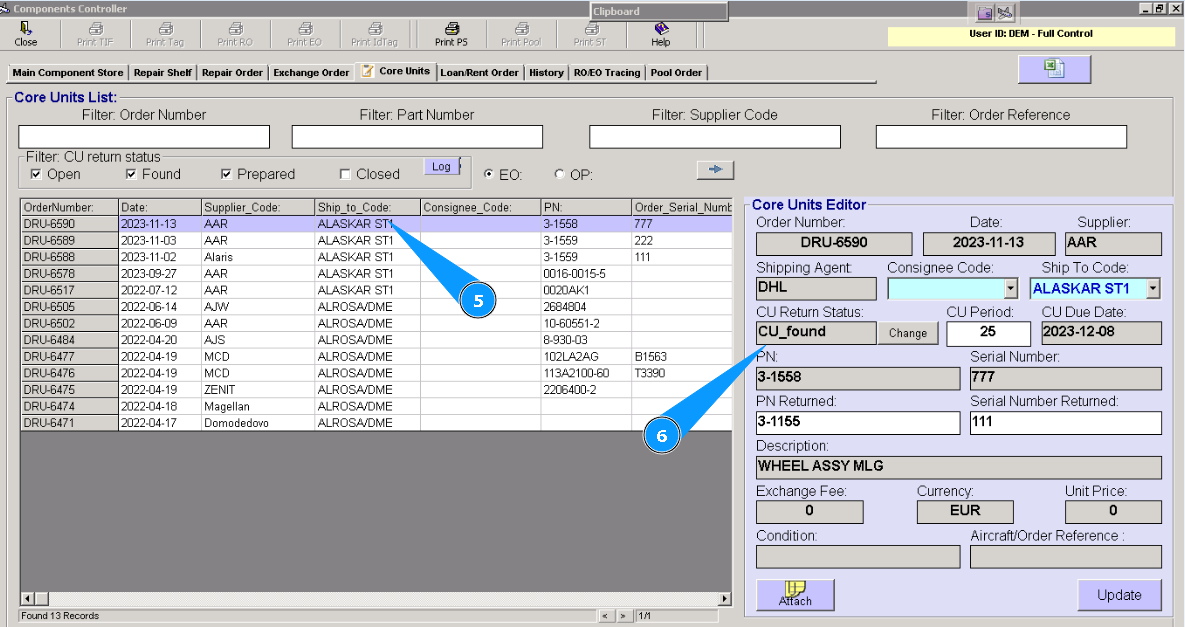
7. Enter the part number of the exchanged component in the field "PN Returned".
8. Enter the serial number of the exchanged component in the field "Serial Number Returned".
9. Click on the button "Update".
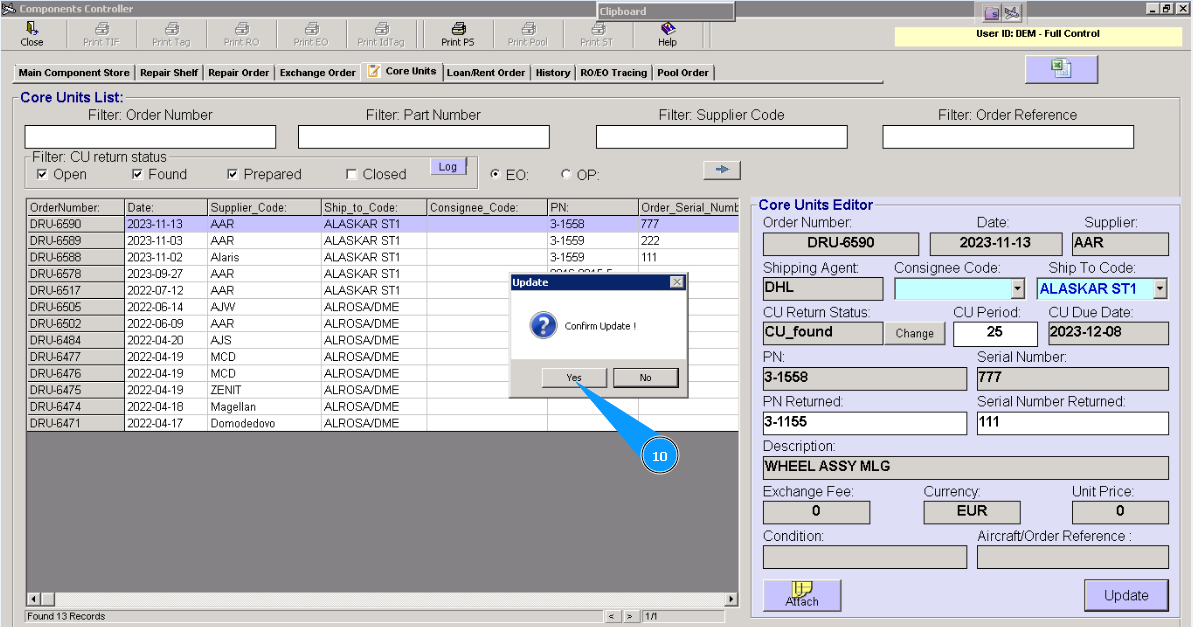
10. Click on the button "Yes", for confirmation, adding a component to "Core Units".
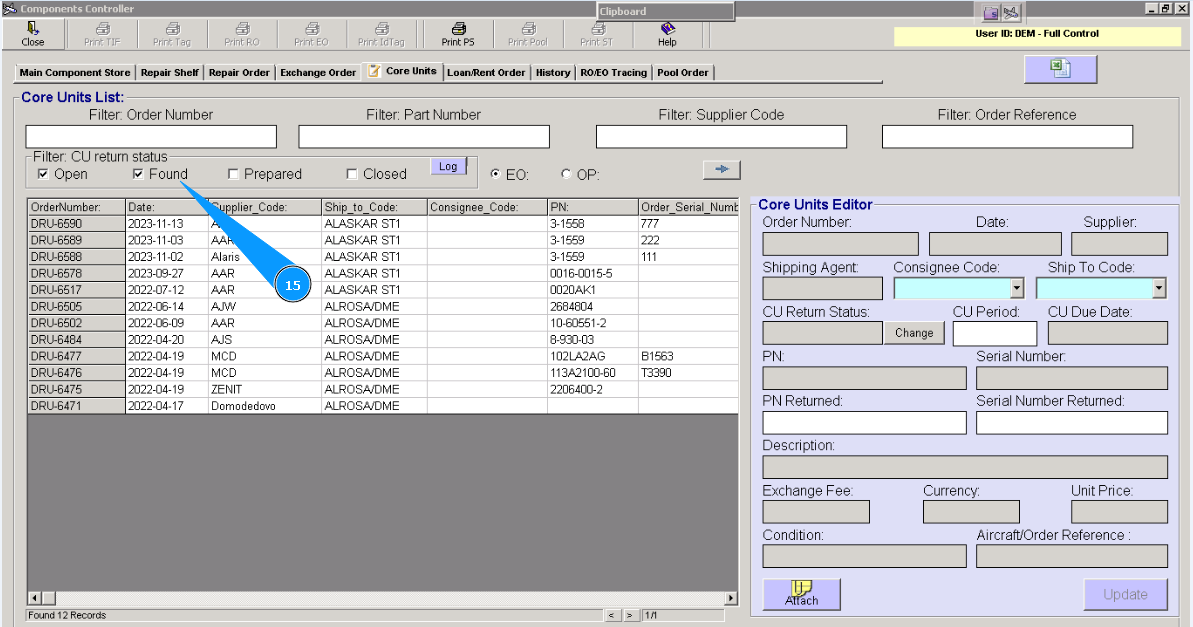
11. For changing the status of a component, click on the button "Change". Note: Using status filters, you can control the condition of components in the Exchange Order.
12. Enter your comments in the opened window.
13. Select the necessary status from dropdown list in the field "New Status".
14. Click on the button "Save", for saving status change.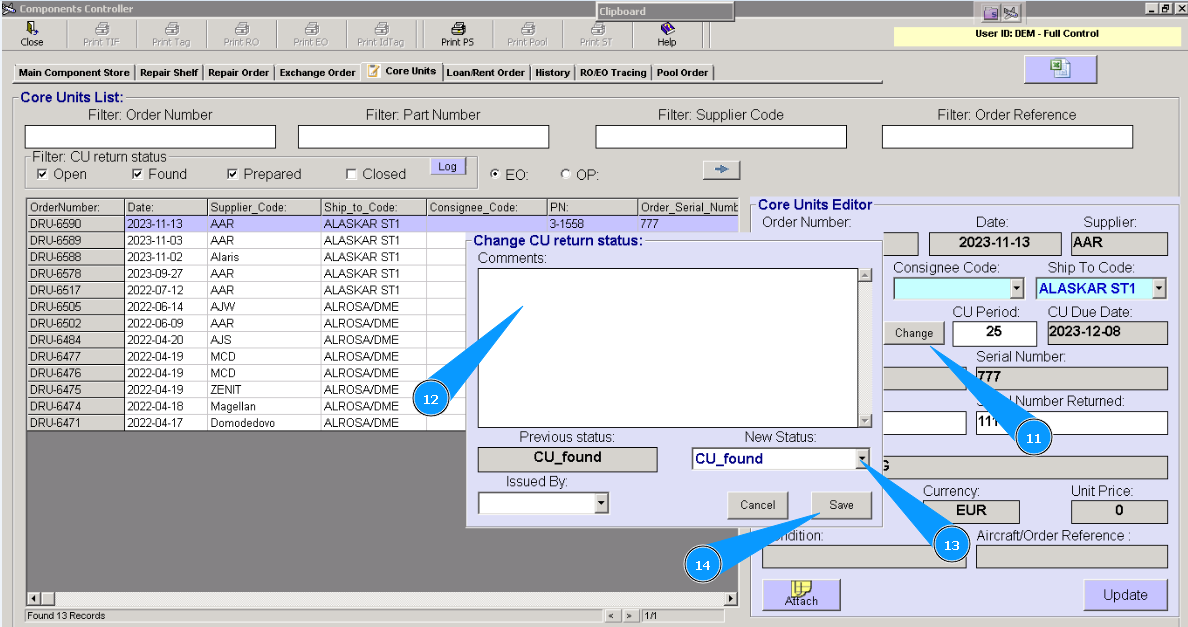
15. Visually check that the line with the component has changed its status in the window "Core Units List".