How to transfer task between WP
1. To transfer task between WP, go to the tab "Actual Structure".
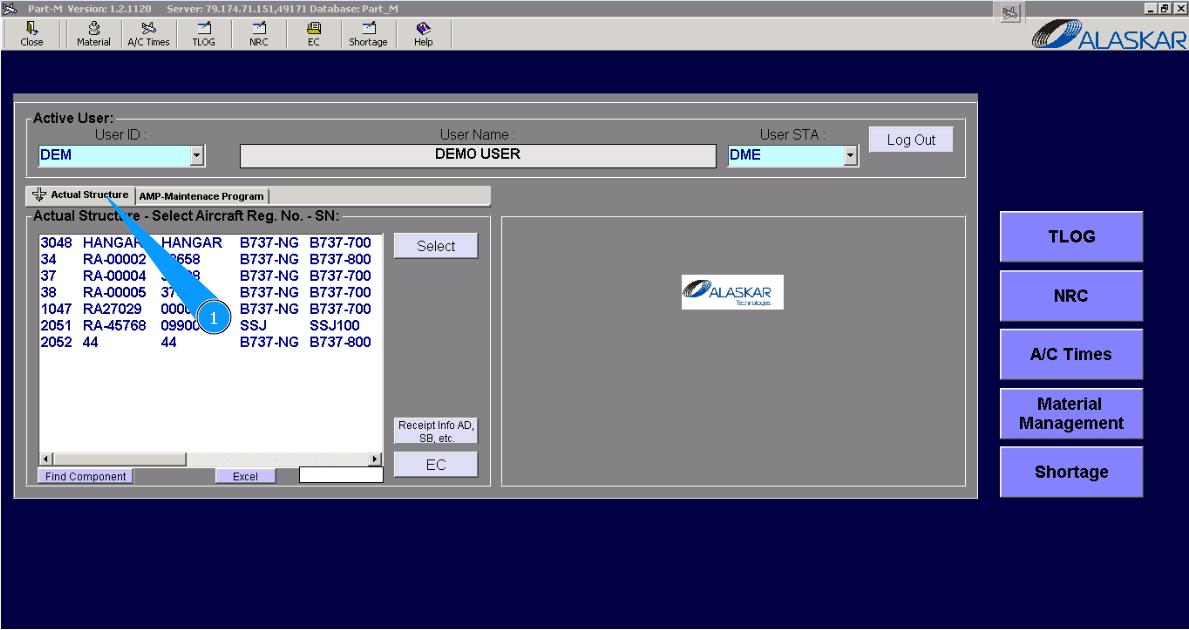
*2. Select aircraft registration in the list of window "Actual Structure-Select Aircraft Reg.-SN".
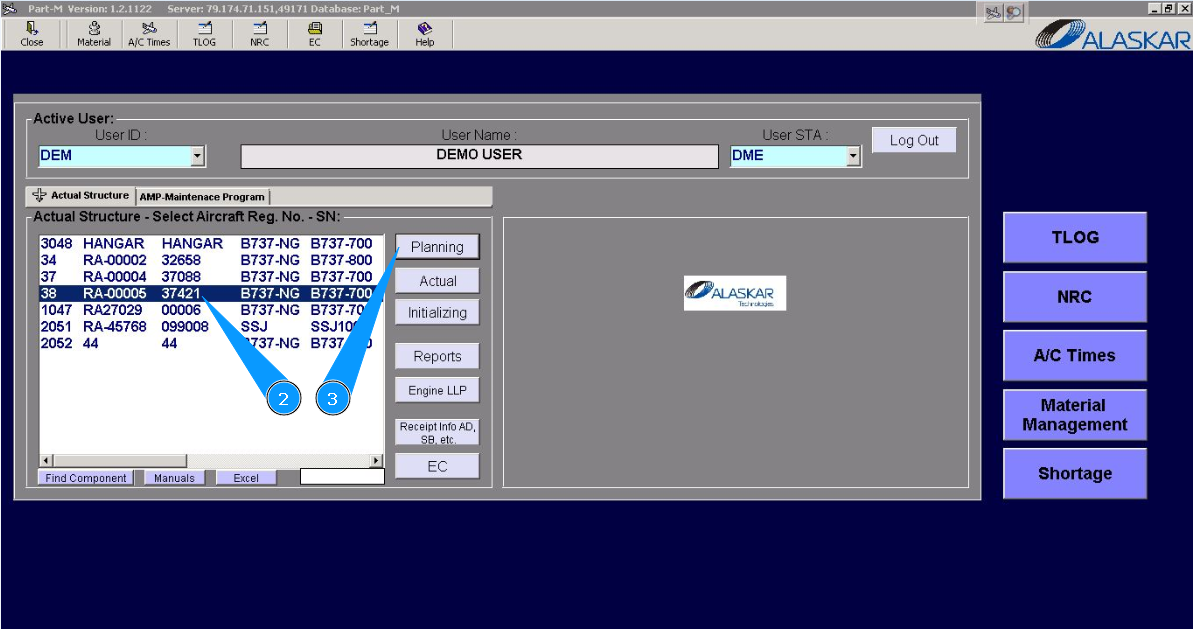
3. Click on the button "Planing", to open submodule planing.
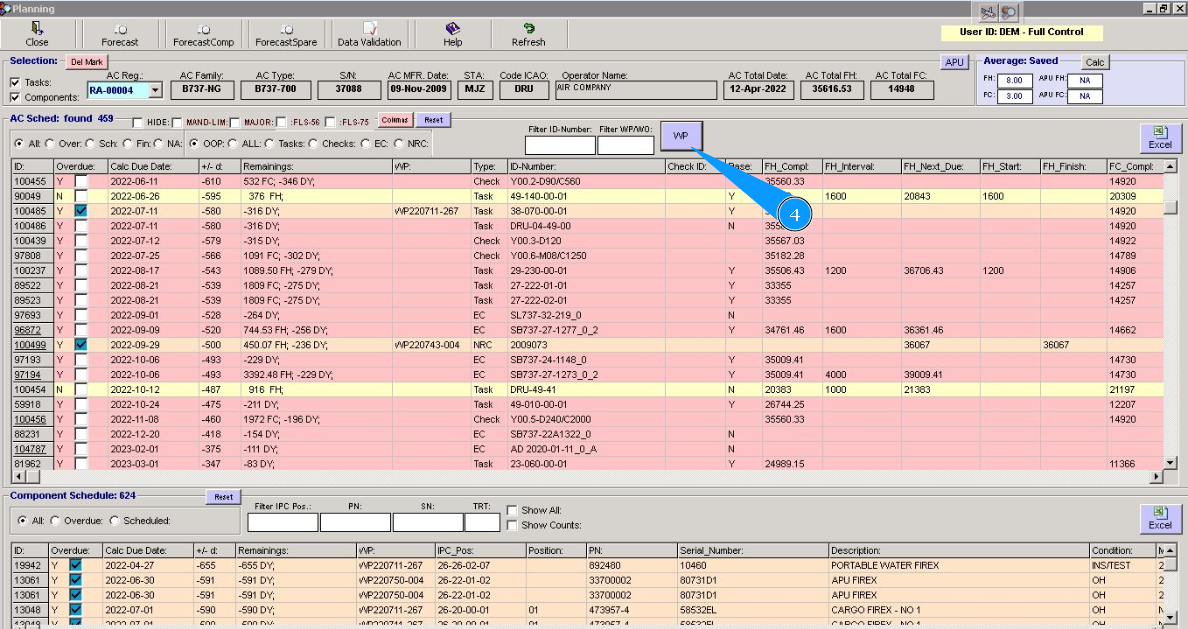
4. Click on the button "WP", to open WP editor.
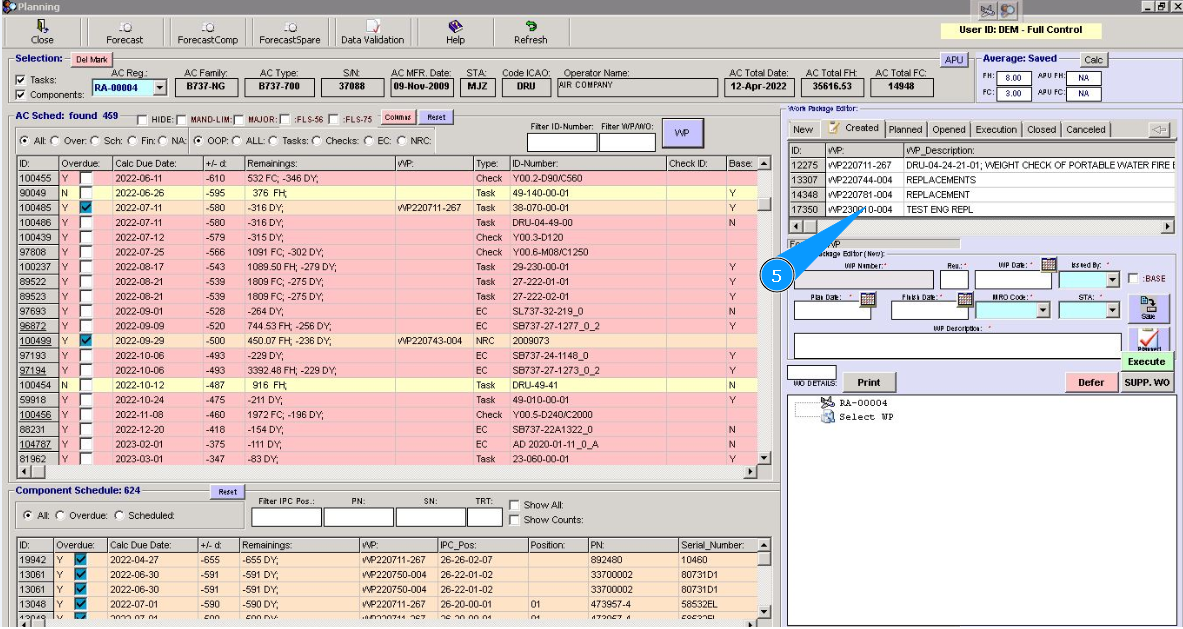
5. Select Work Package for transfering task from it to an other Work Package.
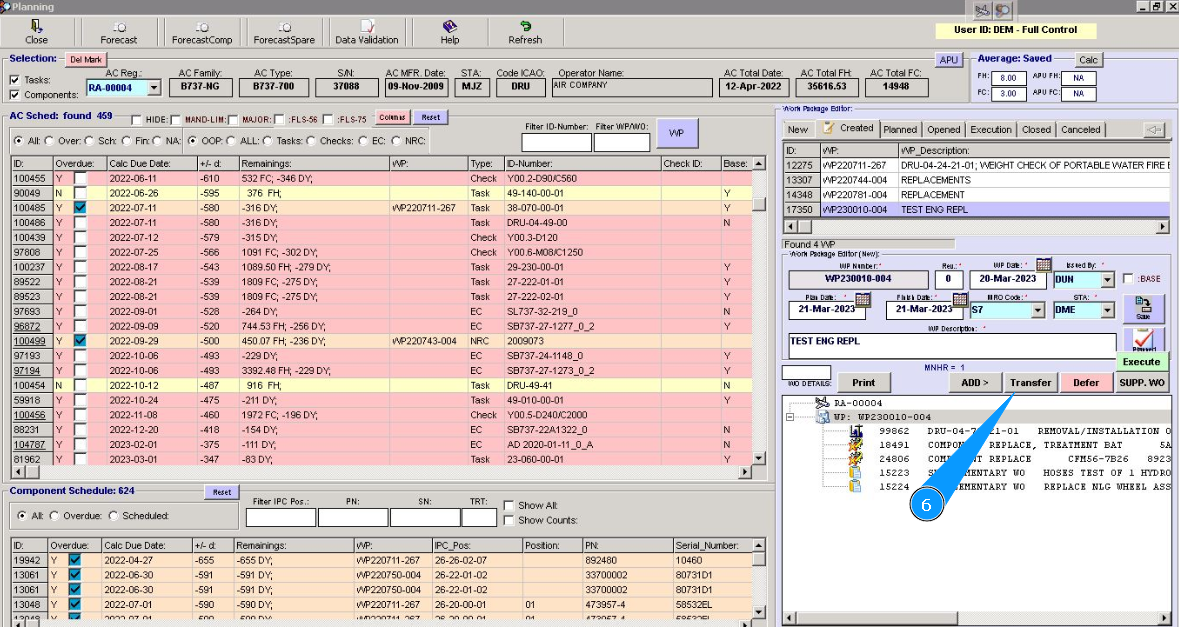
6. Click on the button "Transfer", to open transfer editor.
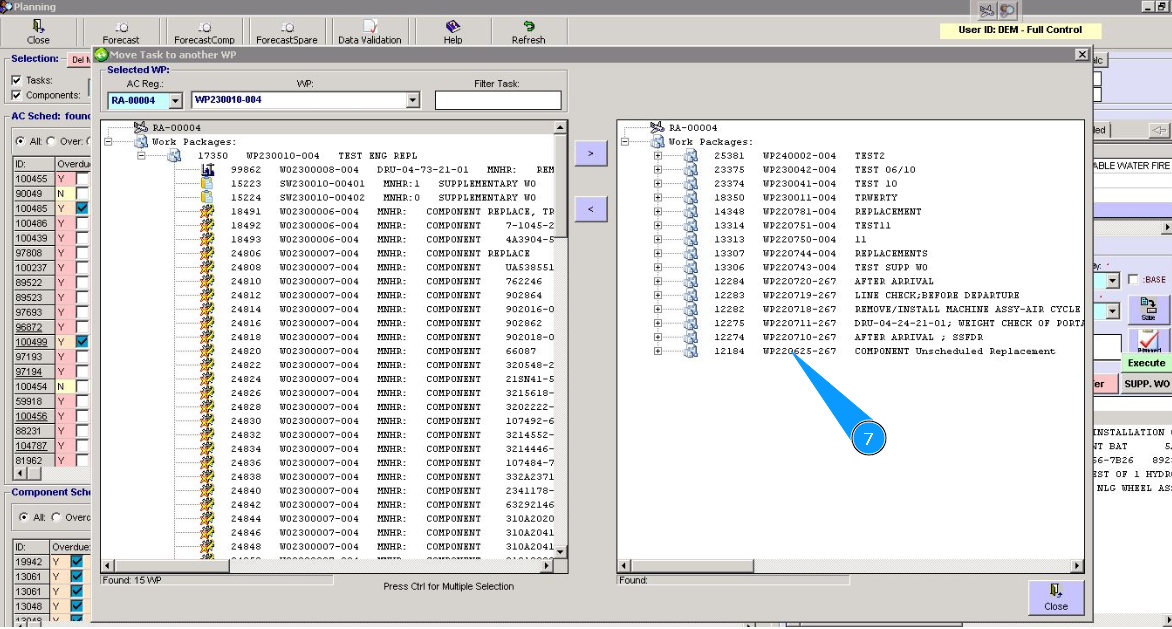
7. Select Work Package, where task will be transfered for and click on the line with corresponding WP.
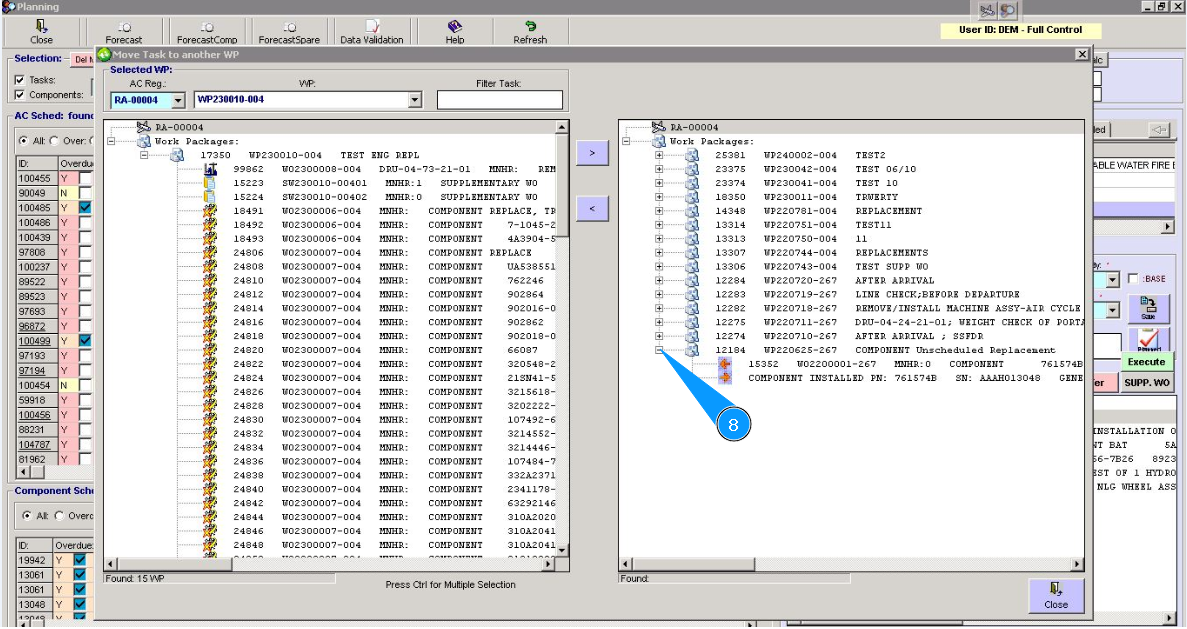
8. Click on the plus, to open WP details.
9. Select task for transfering, click on the line with task.

10. Click on the button with arrow, to transfer task.

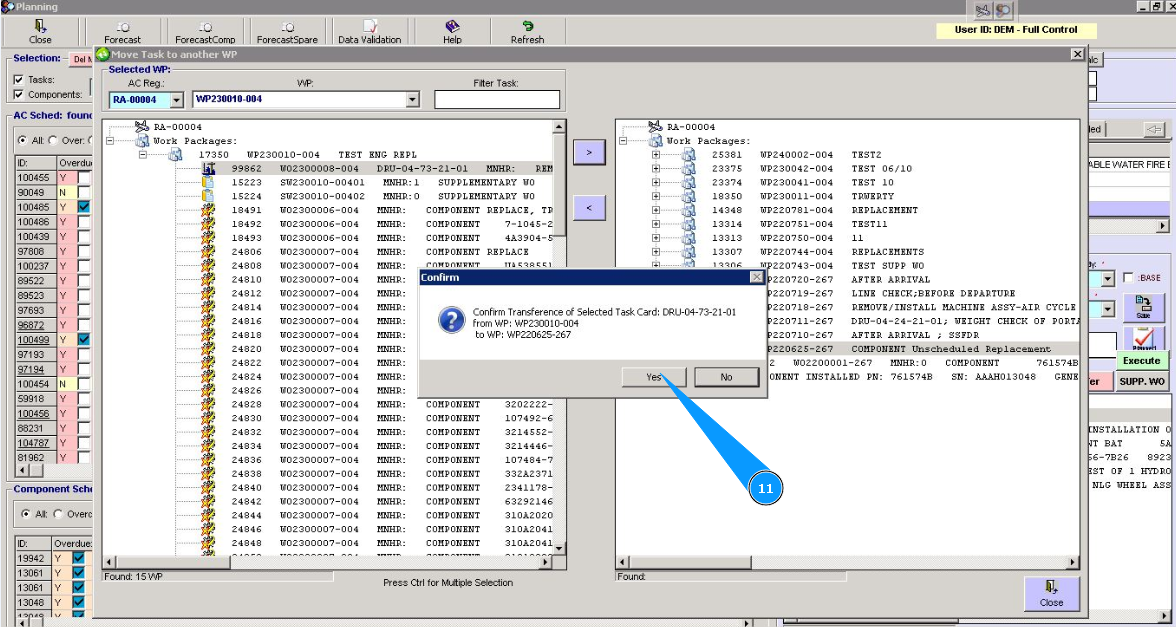
11. Click on the button "Yes", to confirm transfering task.
12. Enter your Alaskar password in the field "Password".
13. Click on the button "Ok", to confirm transfering task.

14. Check that task was succefully transfered to corresponding work package.
