How to enter tools into an AMP task
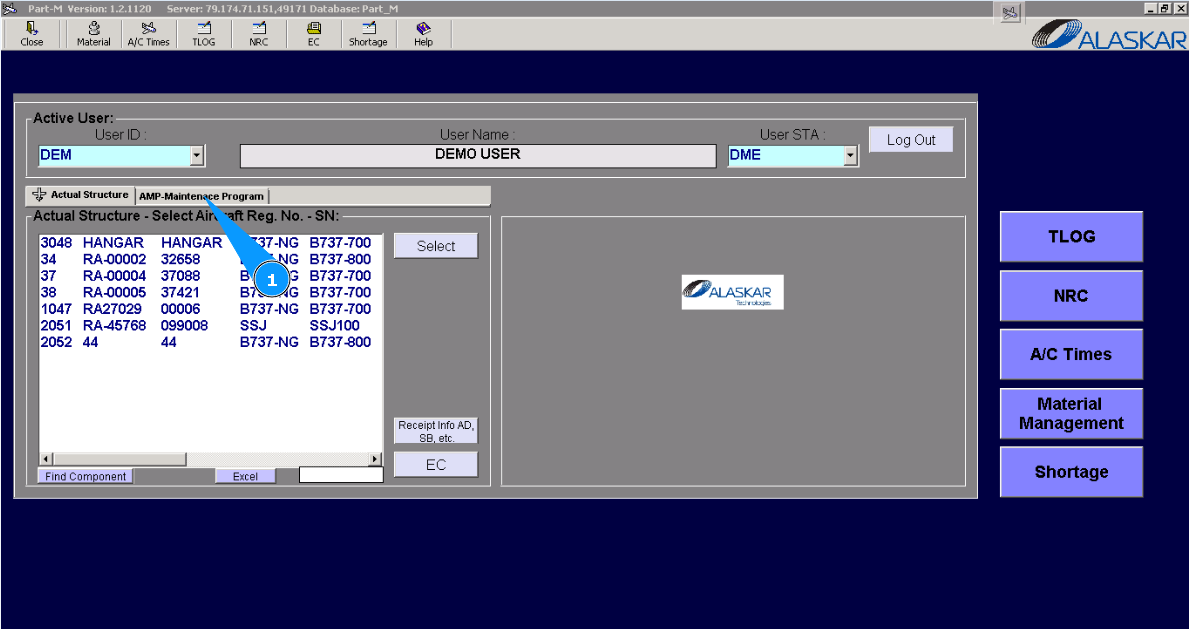
1. For adding tools or equipment to the AMP task, please go to submodule "AMP- Maintenance Program".
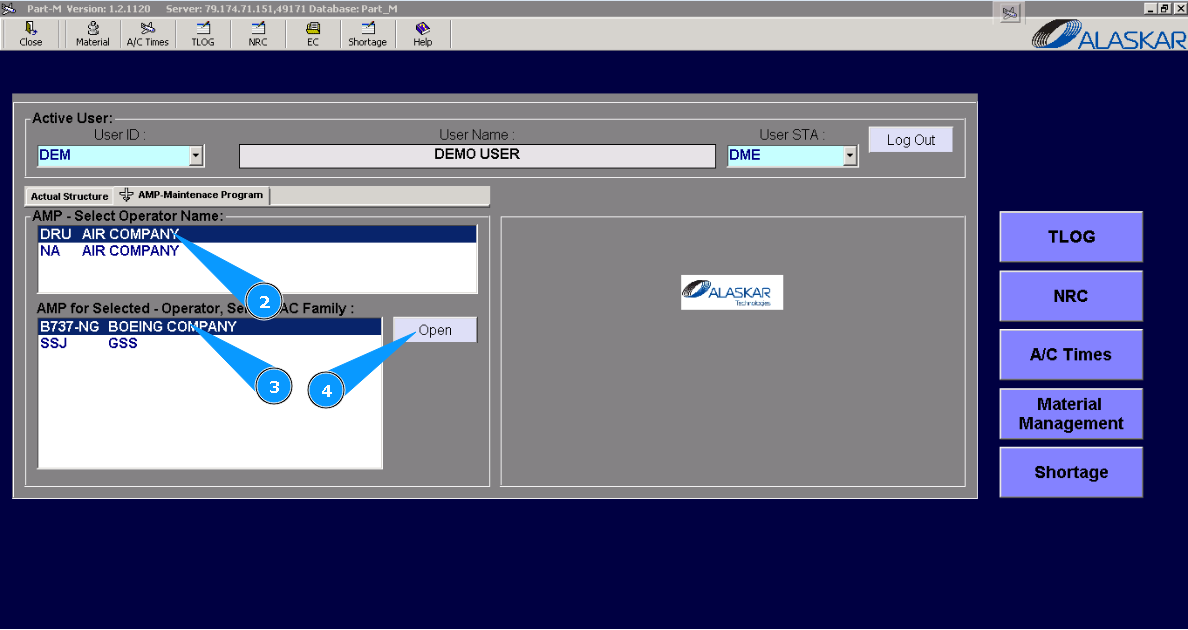
2. Select the company name in the list of window "AMP- Select Operator Name".
3. Select aircraft type in the list of window "AMP for Selected- Operator".
4. Click on the button "Open", for opening AMP menu.
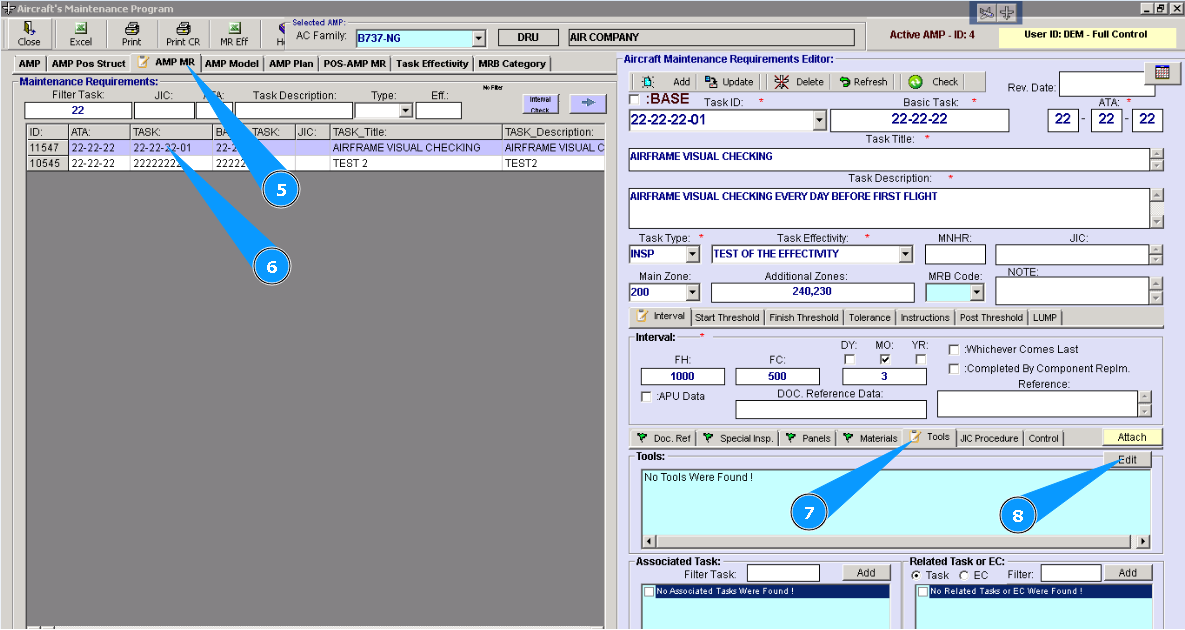
5. Then go to tab "AMP MR".
6. Find and highlight the necessary task in the list of AMP for adding tools.
7. Then go to tab "Tools" in the editor "Aircraft Maintenance Requirements Editor".
8. Click on the button "Edit".
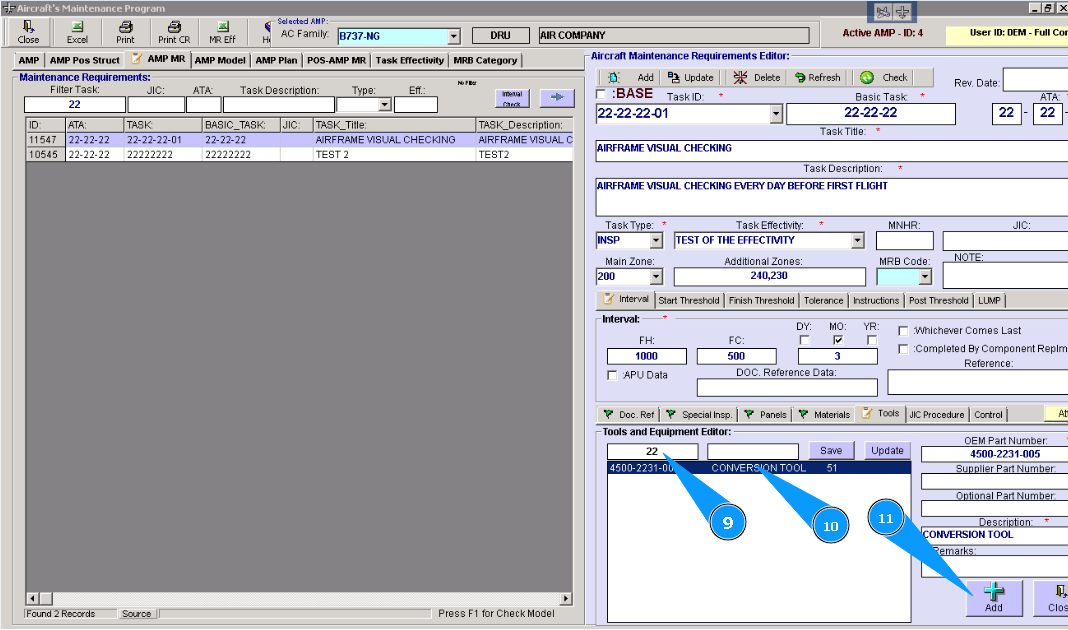
9. Enter the part number of tools in the searching field of the window "Tools and Equipment Editor" and press the button "Enter" on your keyboard.
10. Check that the necessary tool is found in the list. Click on the line with tools for adding.
11. Click on the button **"Add" to add data to the program.
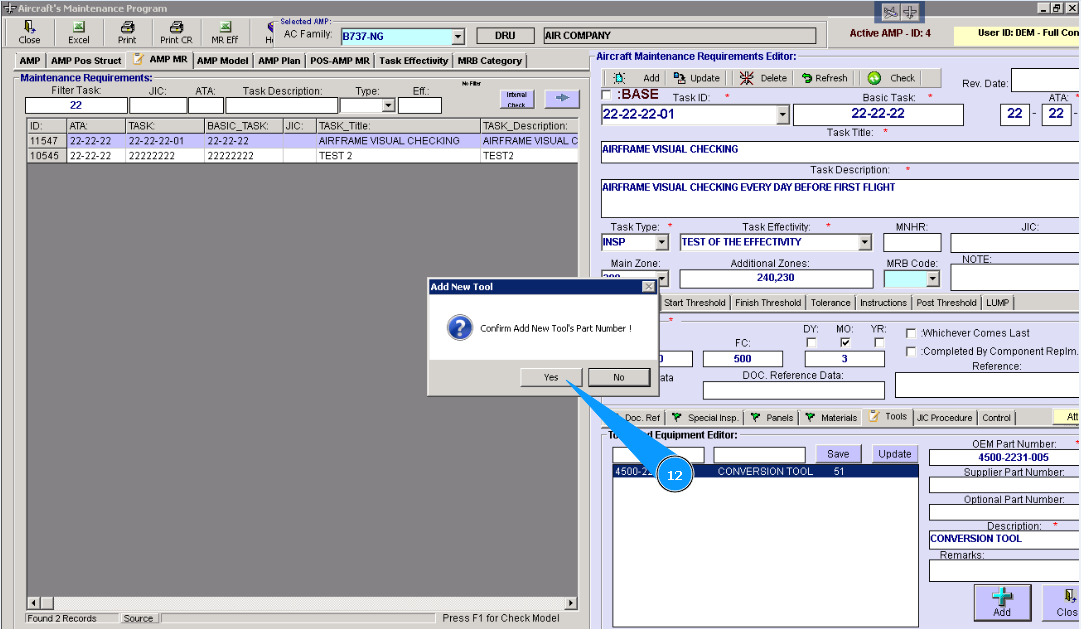
12. Click on the button "Yes", to confirm adding data to the program.
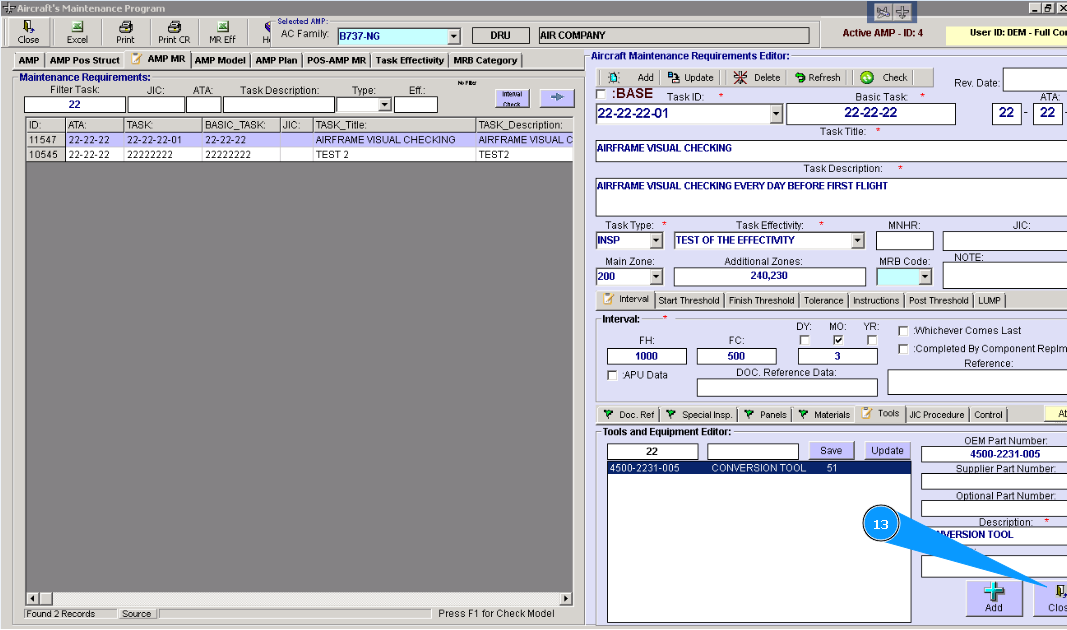
13. Click on the button "Close", to go out from edit mode.
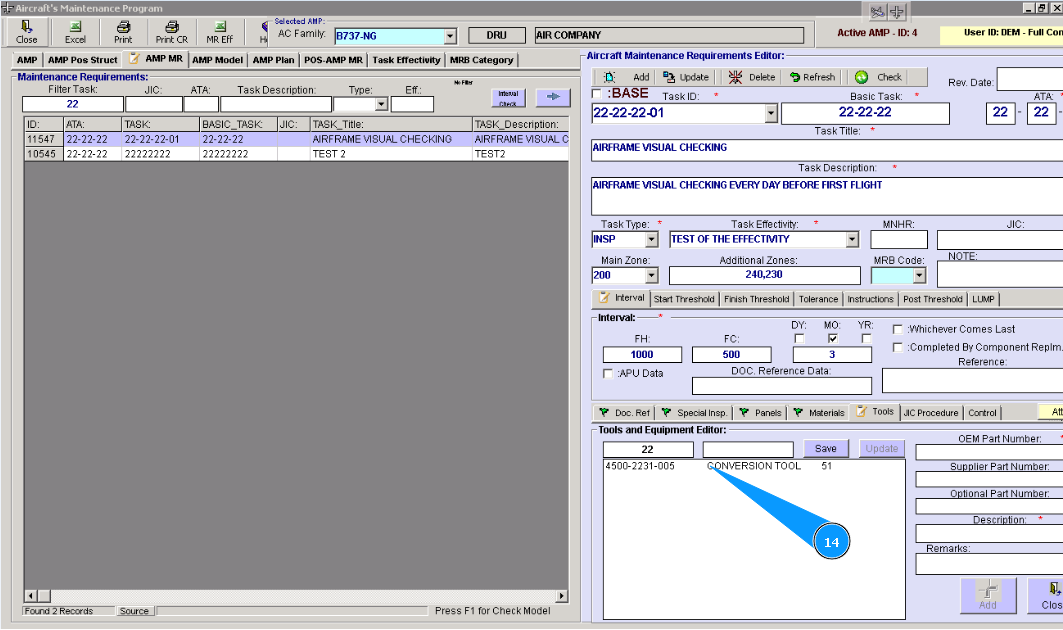
14. Check that a new line with a panel is created in the window "Tools".
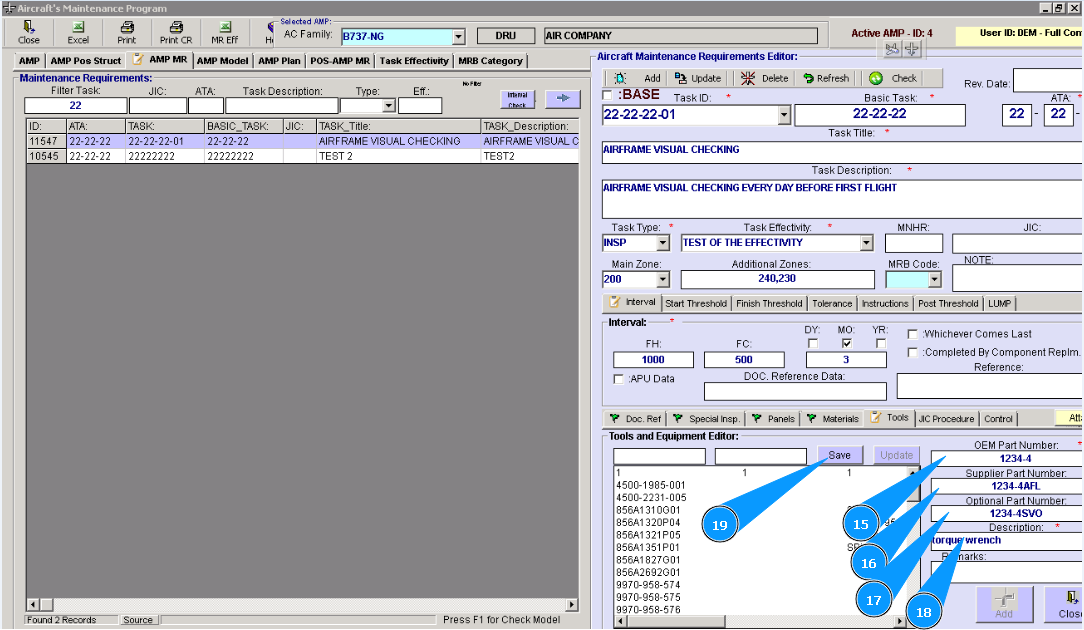
Note: If, during the search for tools, it was not found, it is necessary to add a new part number of tools to the program. Perform items 15–22 of this instruction.
15. Enter the manufacturer's part number in the field "OEM Part Number".
16. Enter the supplier part number in the field "Supplier Part Number".
17. Enter the optional part number of the tool in the field "Optional Part Number".
18. Enter a description of the tool in the field "Description".
19. Click on the button **"Save" to add data to the program.
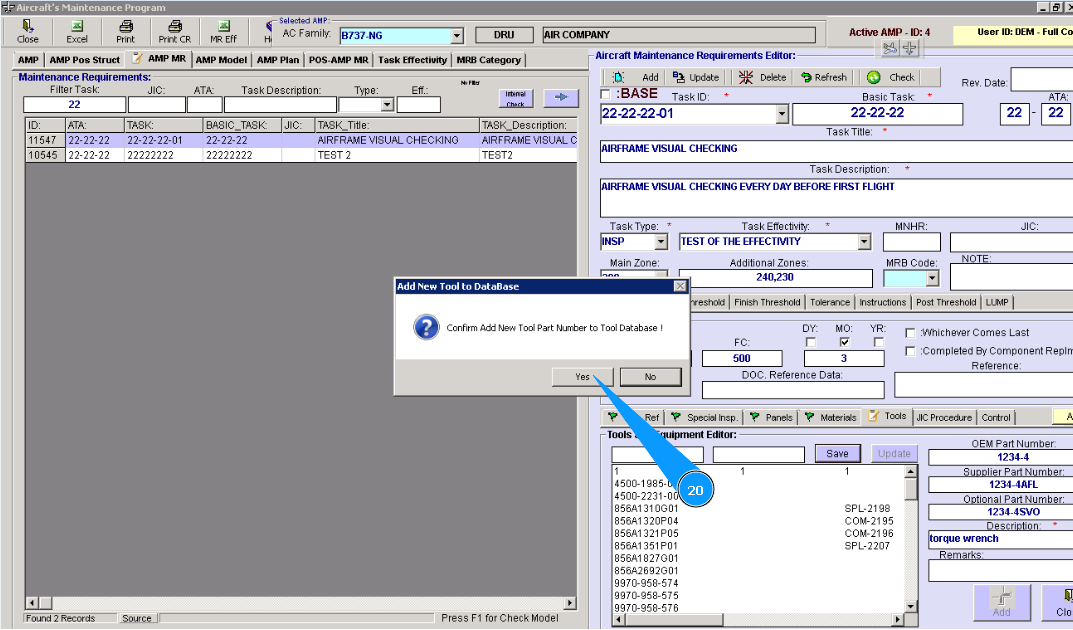
20. Click on the button "Yes", to confirm adding data to the program.
21. Click on the button "Close", to go out of edit mode.
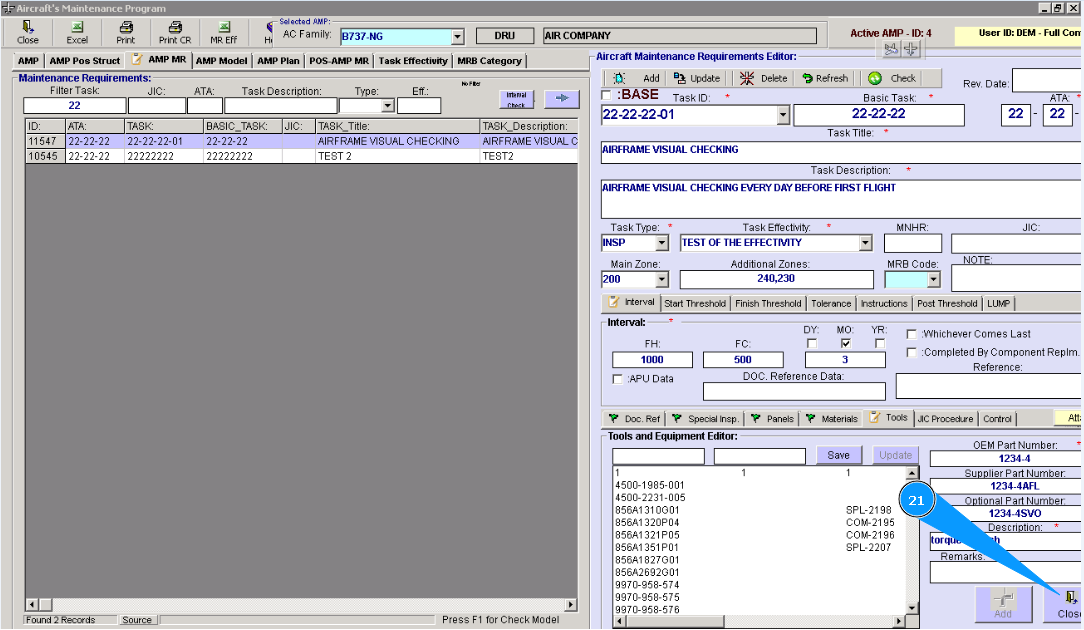
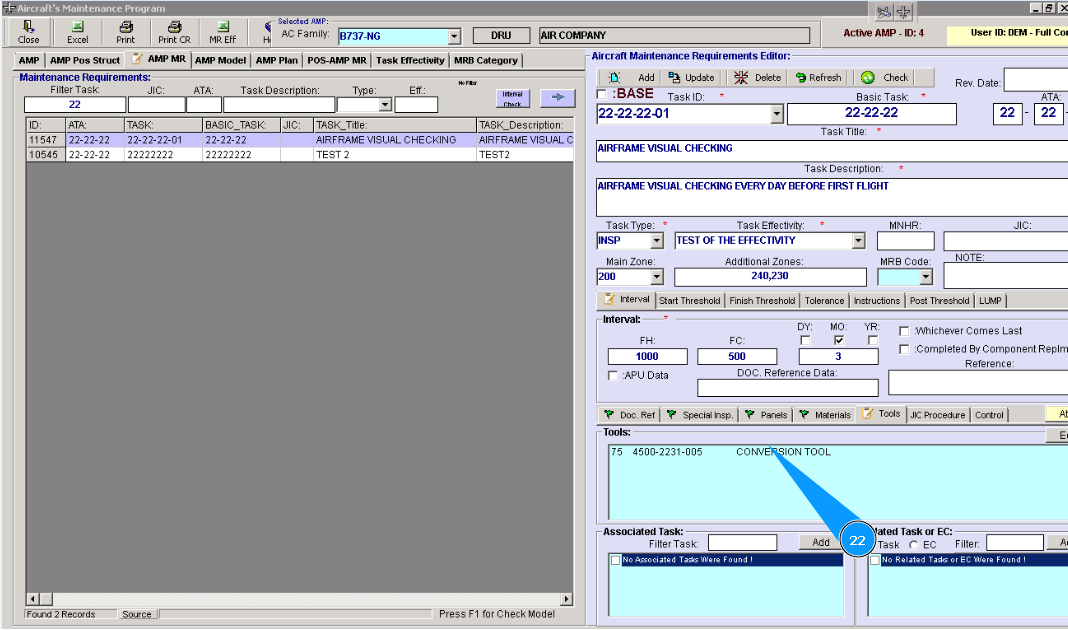
22. Check that a new line with a panel is created in the window "Tools".