How to create and print WP
1. For creating and printing WP, please go to submodule "Actual Structure".
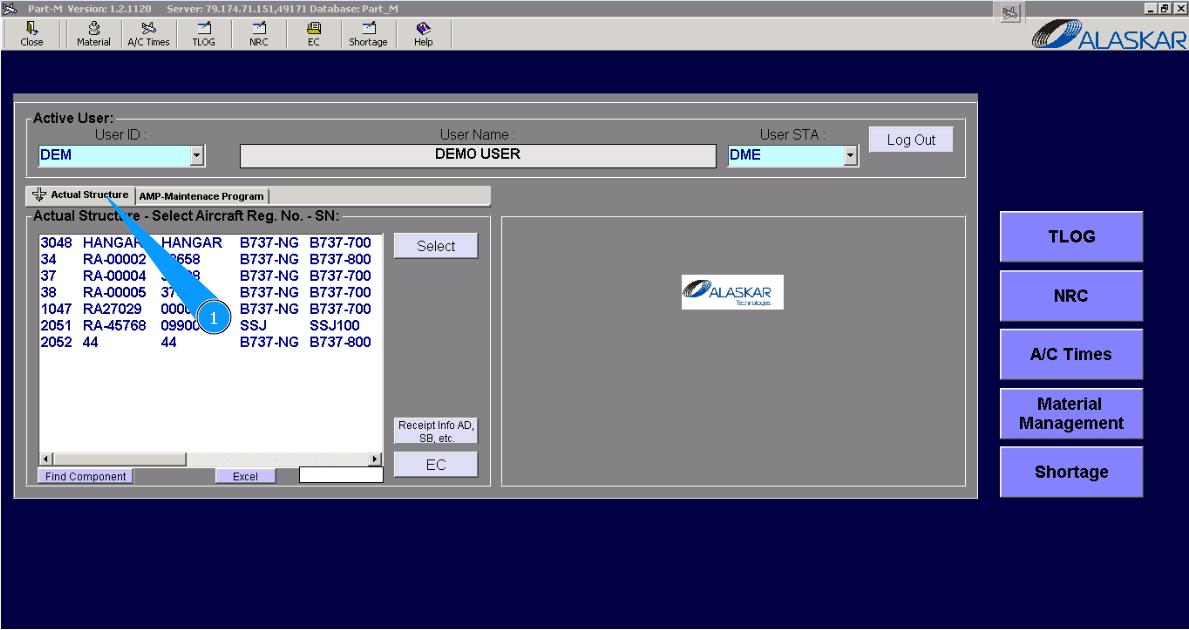
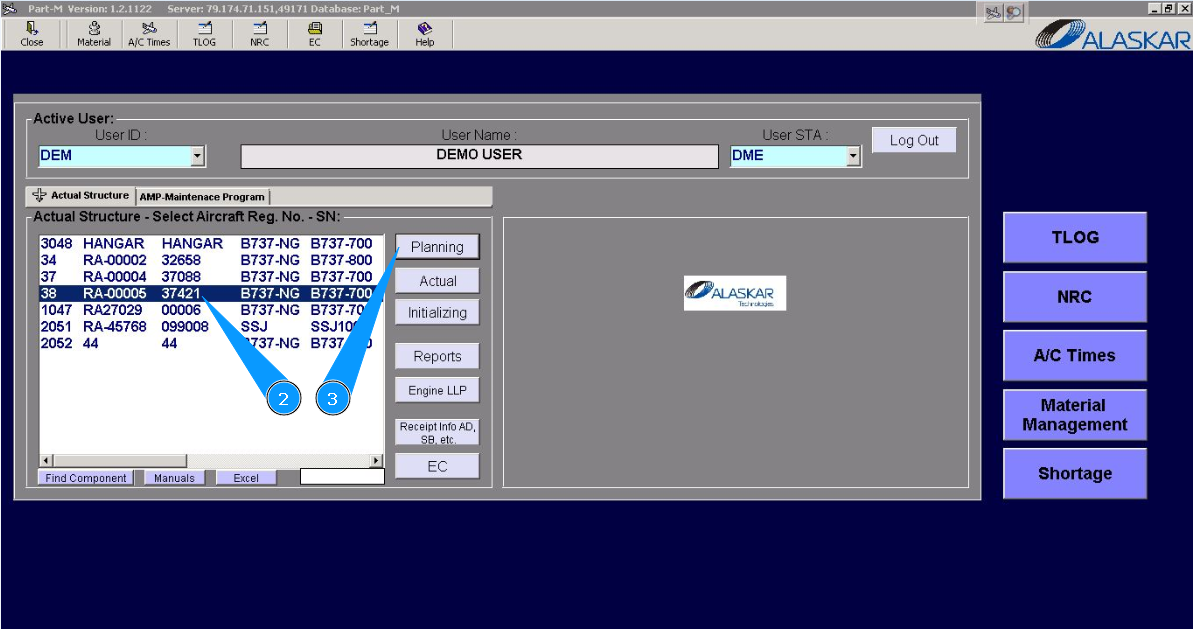
2. Select aircraft registration in the list of window "Actual Structure-Select Aircraft Reg.-SN".
3. Click on the button "Planing", to open submodule planing.
4. Select the corresponding tasks, or checks for adding them to WP, in the searching field. Note: Please use the available filters for comfortable searching of tasks or checks.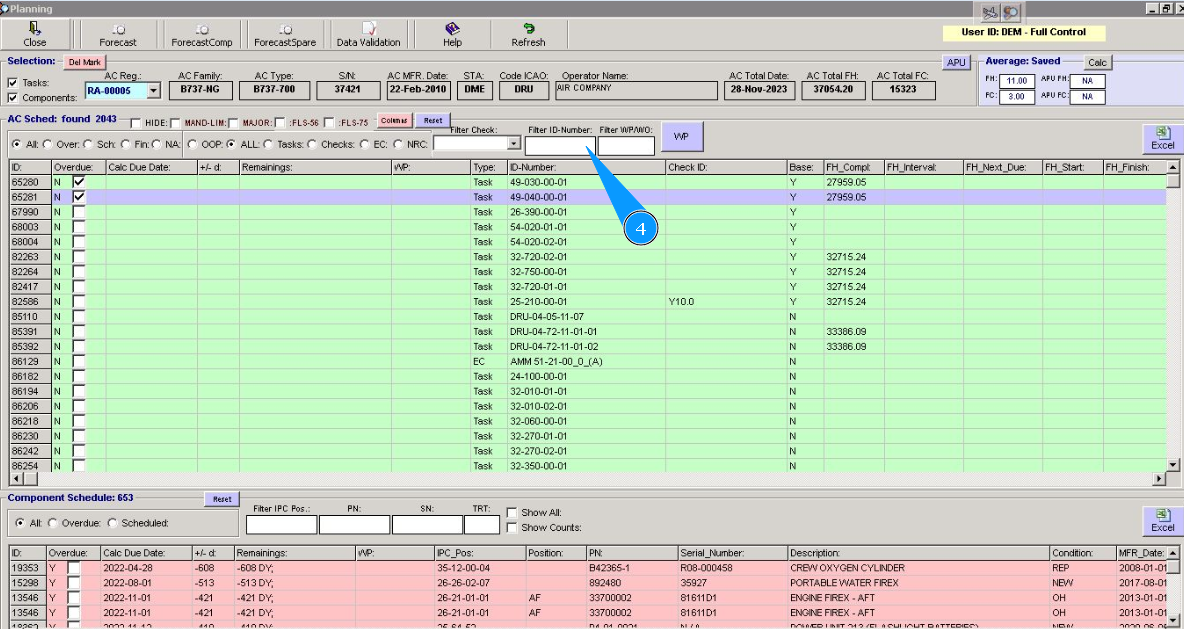
5. Select the corresponding task and click on the window for the corresponding line. Note: Repeat the selection of all necessary tasks or checks for adding to WP.
6. Click on the button "WP", to open the WP editor.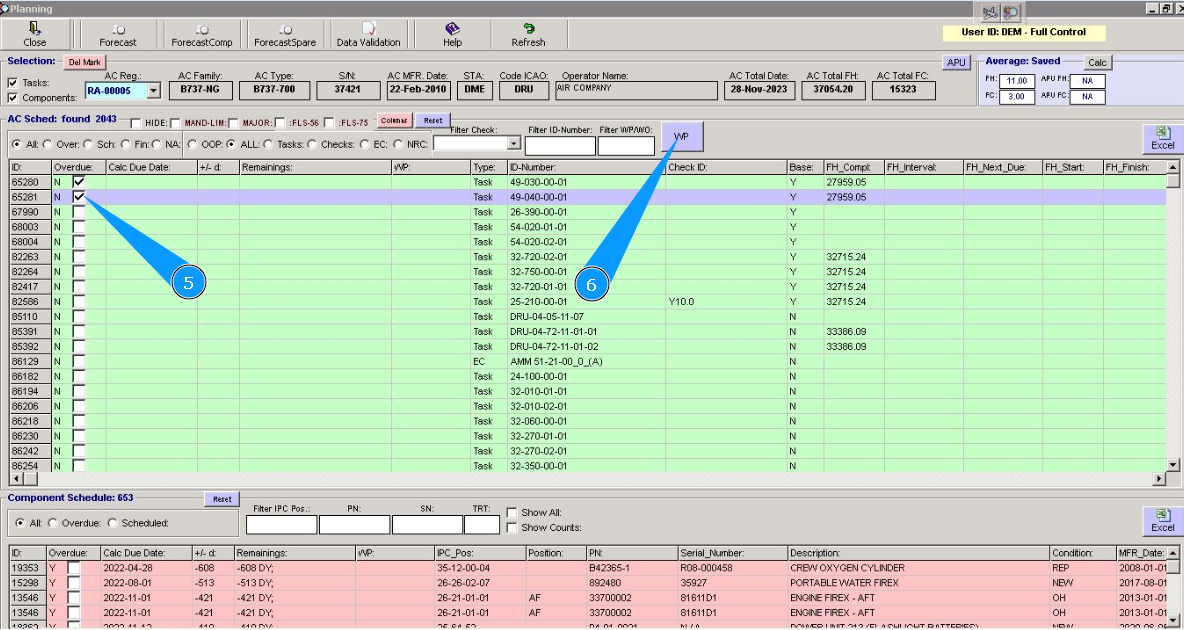
7. Check that all necessary tasks are in the WP in the window "WO Details". Note: Repeat the selection lines of tasks or checks for all necessary for adding to WP.
8. Enter the WP description in the field "WP Description".
9. Click on the button **"Save" to add data to the program.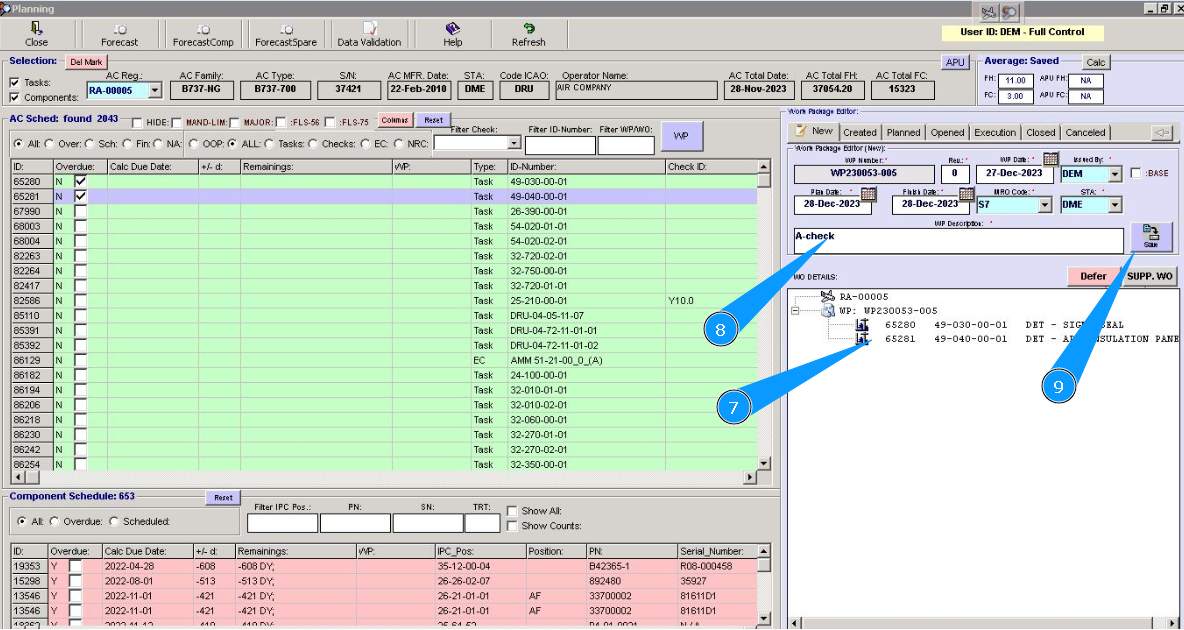
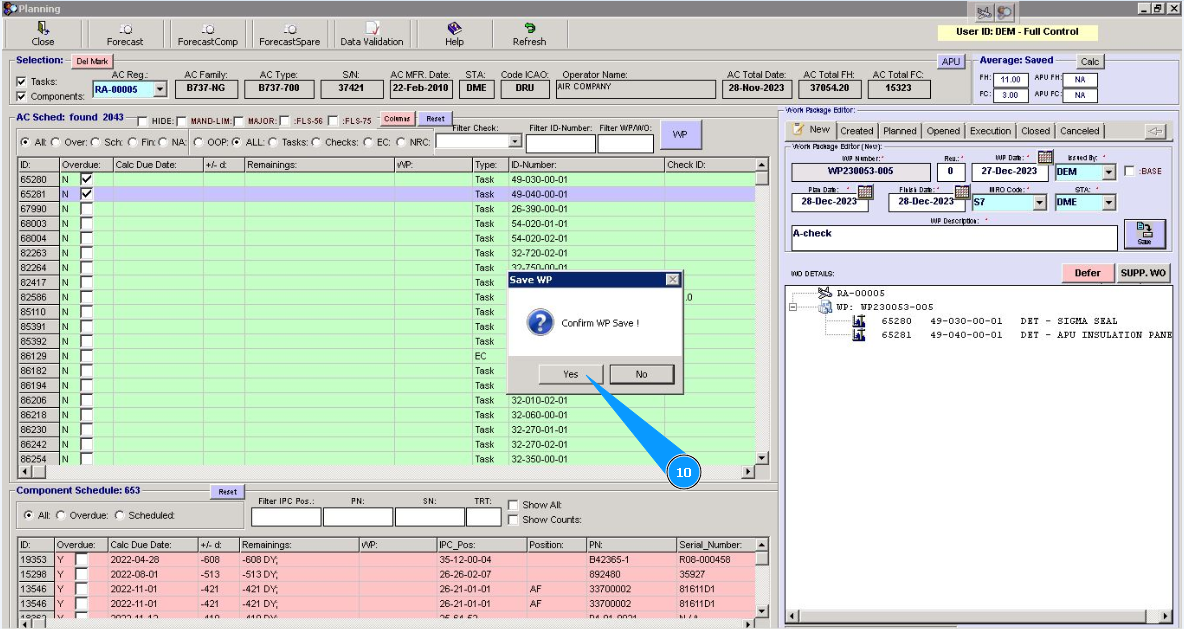
10. Click on the button "Yes", to confirm adding data to the program.
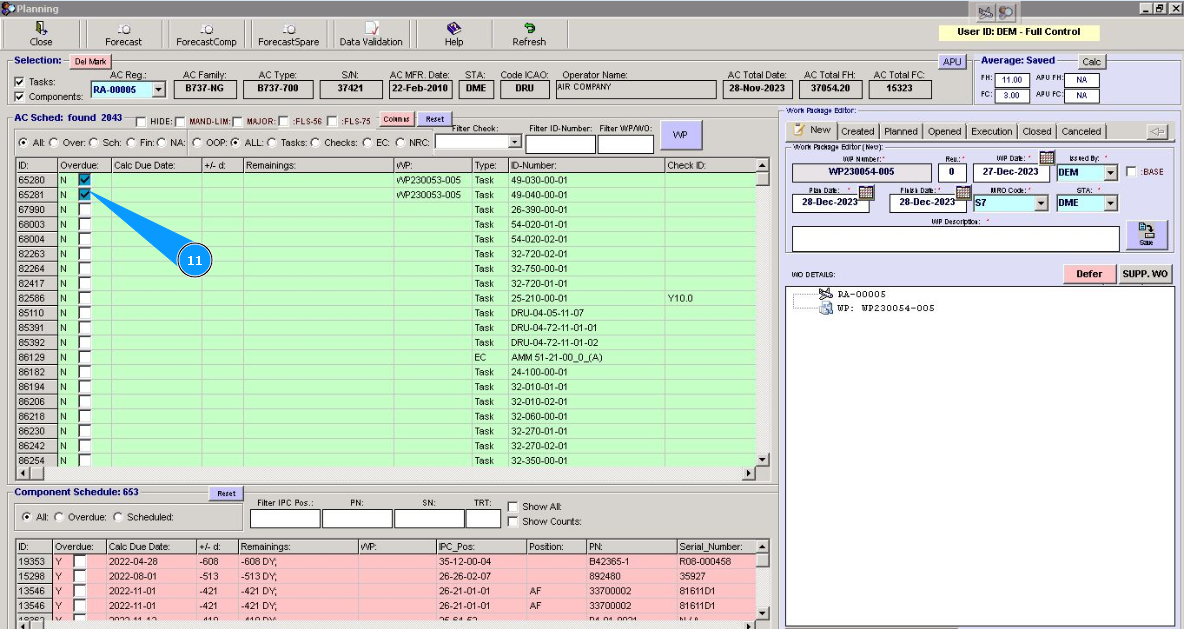
11. Check that all necessary tasks and checks are marked with ticks and the window color is changed.
12. For printing WP, go to the tab "Created".
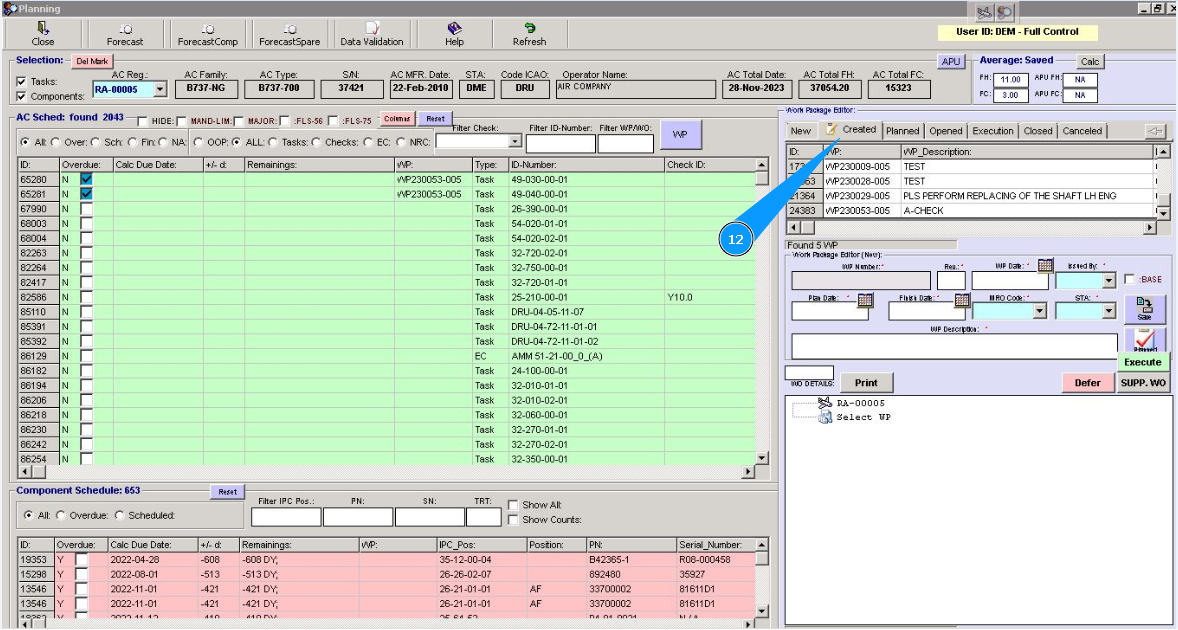
13. Find the created WP for printing by scrolling way in the window "Work package Editor".
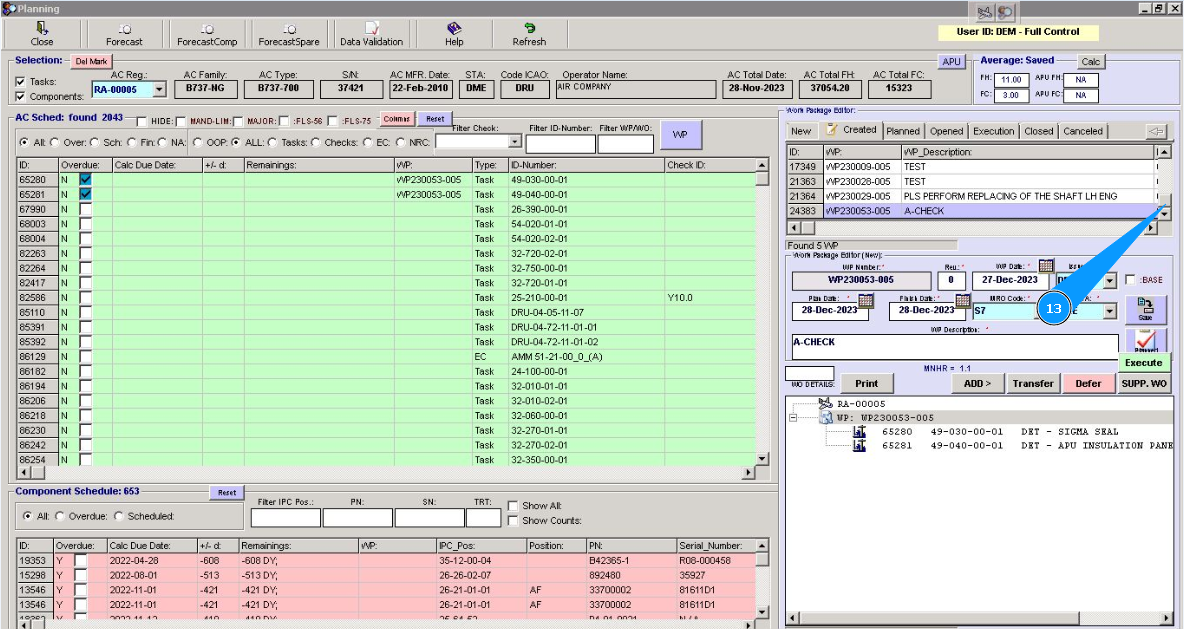
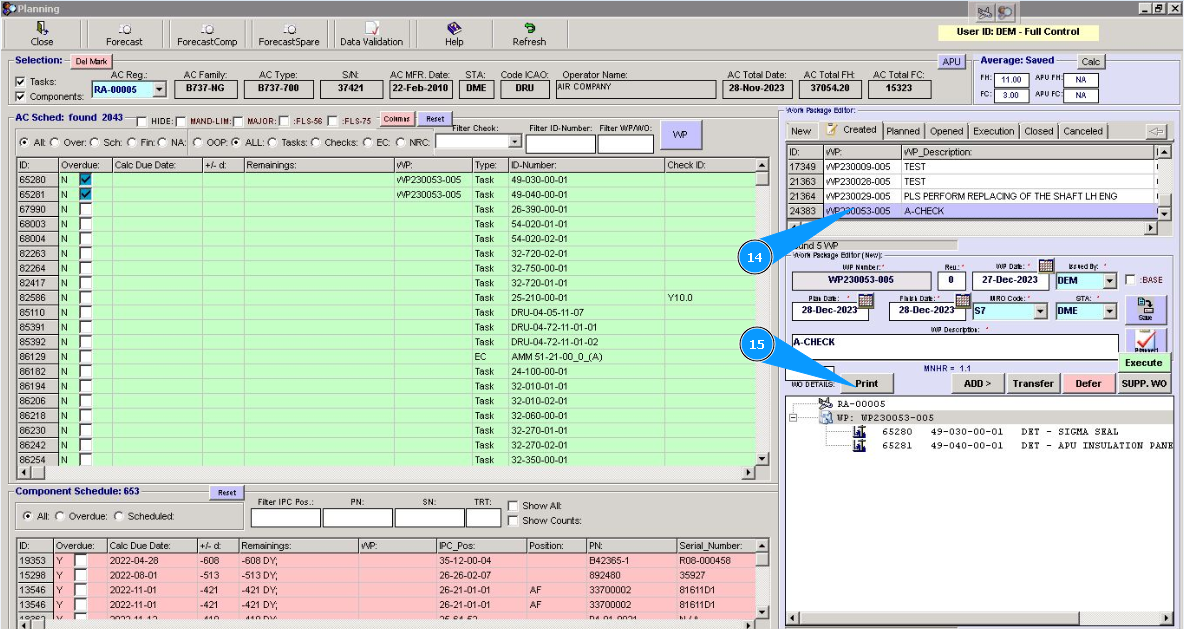
14. Select the necessary WP and click on the window in the corresponding line.
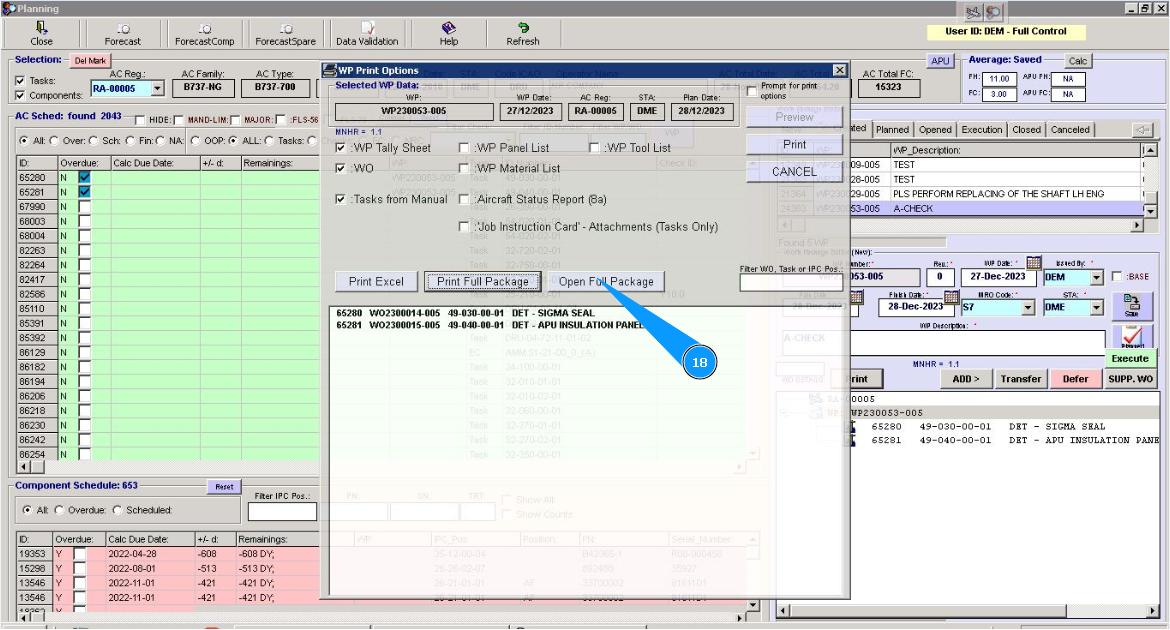
15. Click on the button "Print", чтобы распечатать пакет работ.
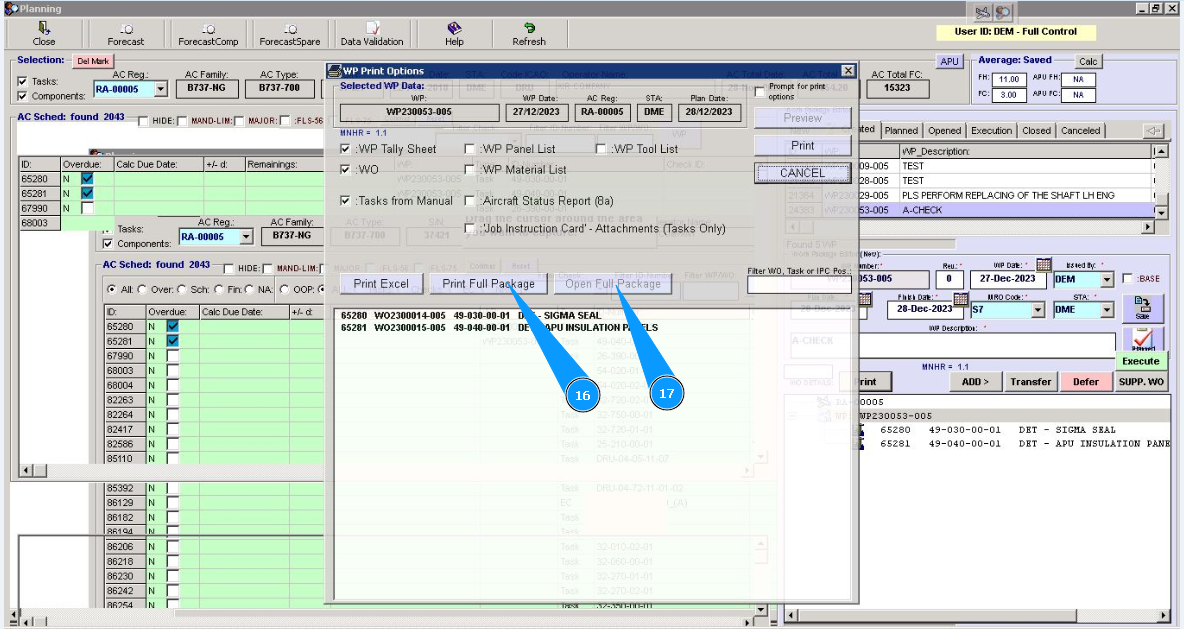
16. Click on the button "Print Full Package", for work package to be formed.
17. Waiting for the button "Open Full Package" to be available, WP is formed.
18. Click on the button "Open Full Package", to open the work package.
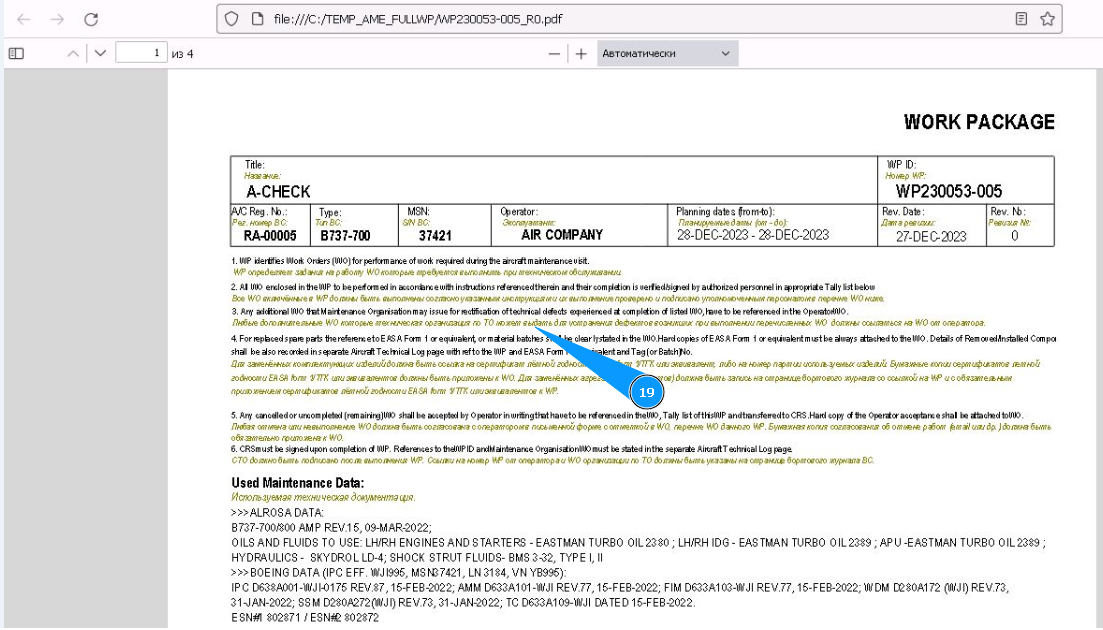
19 Check that the WP content is fully satisfactory. Save it or print hardcopy if necessary.