How to create an AMP position
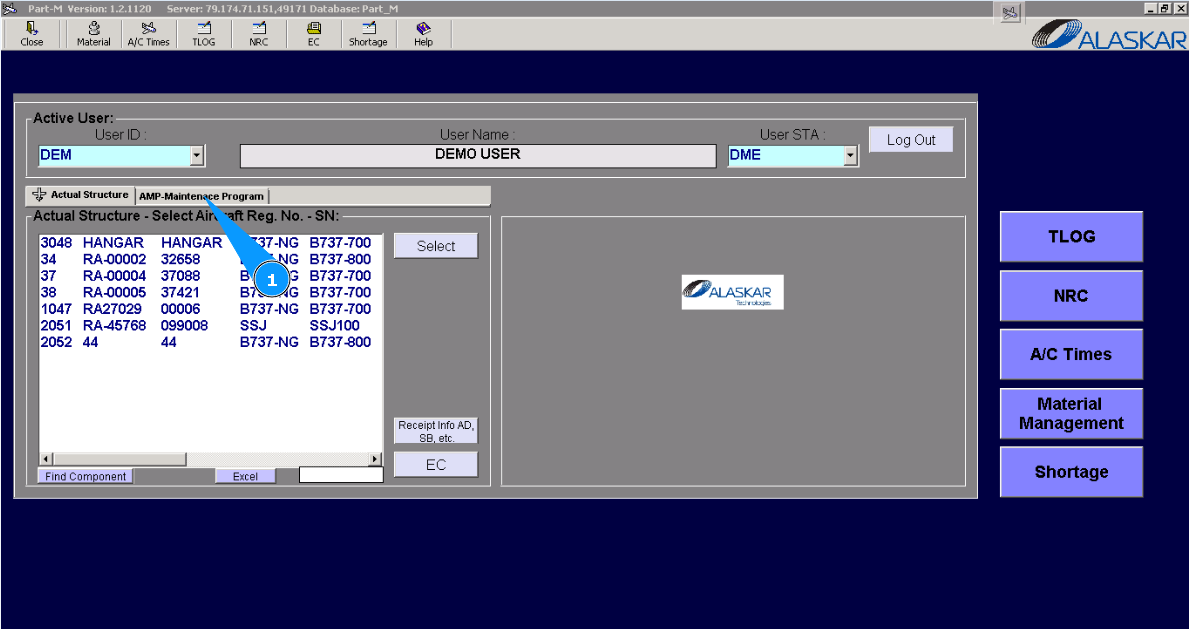
1. To add the AMP position of a component, please go to the tab "AMP- Maintenance Program".
2. Then, go to tab "AMP Pos Struct". Note: If necessary, you can use other searching criteria, in the fields: "Filter Description", "Filter AC Type " .
3. Enter the part number for which the AMP position should be implemented in the field "Filter PN" of the window "Position Editor" and click on the button "Enter" on your keyboard.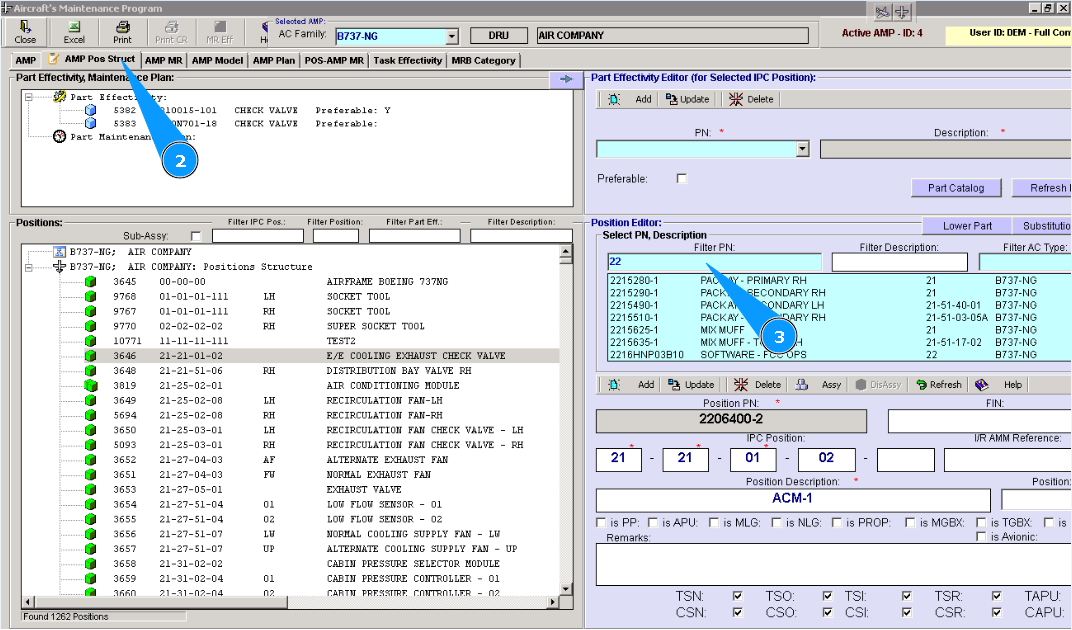
4. Select the necessary part number from the list and highlight the applicable line in the window "Select PN, Description". Note: Number of digits in the IPC position is subject to company policy or the policy of aircraft manufacture.
5. Enter the position number in the field "IPC Position".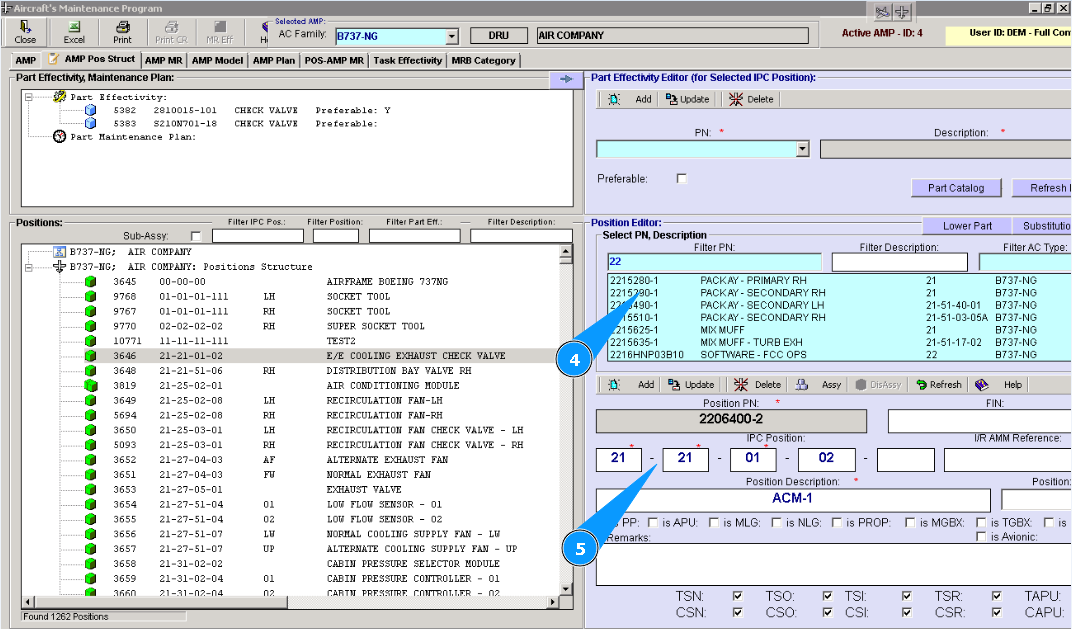
6. Click on the button **"Add" to add data to the program. Note: If necessary, fill in the non-mandatory fields of editor "Position Editor". For example: "TSN", "CSN", "TSO", "TSO" etc.
7. Check that a new line with part number is created in the window "Position".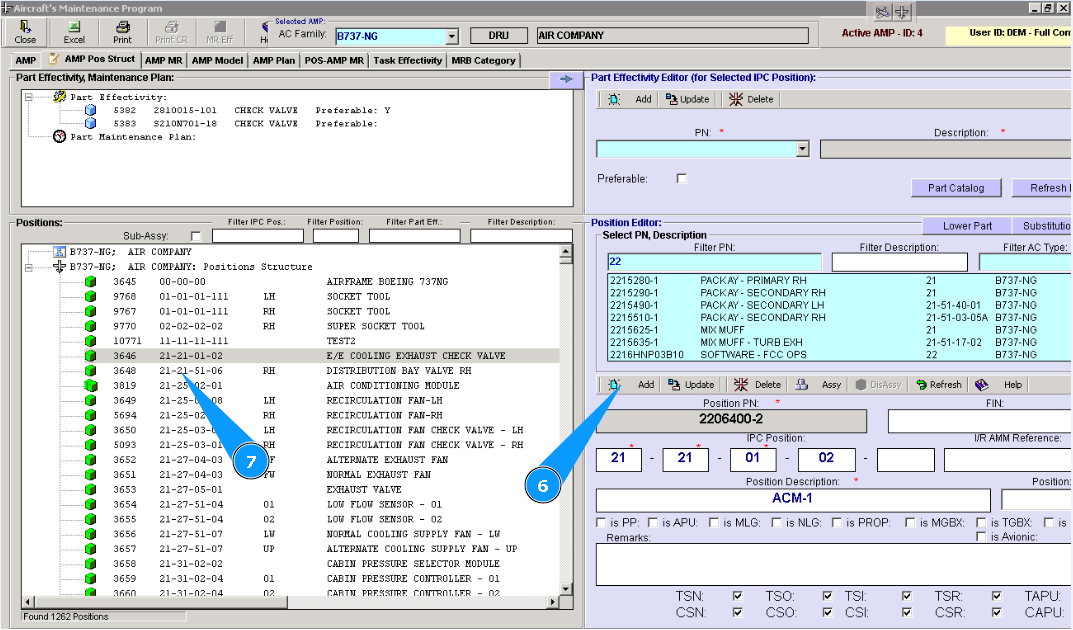
8. Enter the part number that should be implemented for position in the field "PN" and press the button "Enter" on your keyboard.
9. Or select from dropdown list.
10. Click on the button **"Add" to add data to the program.
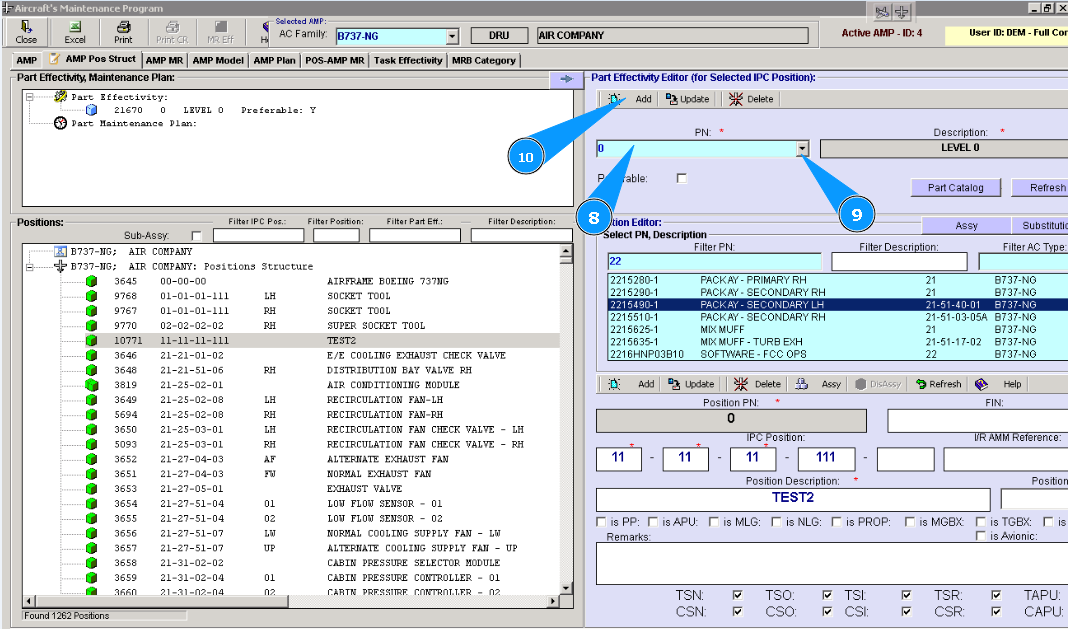
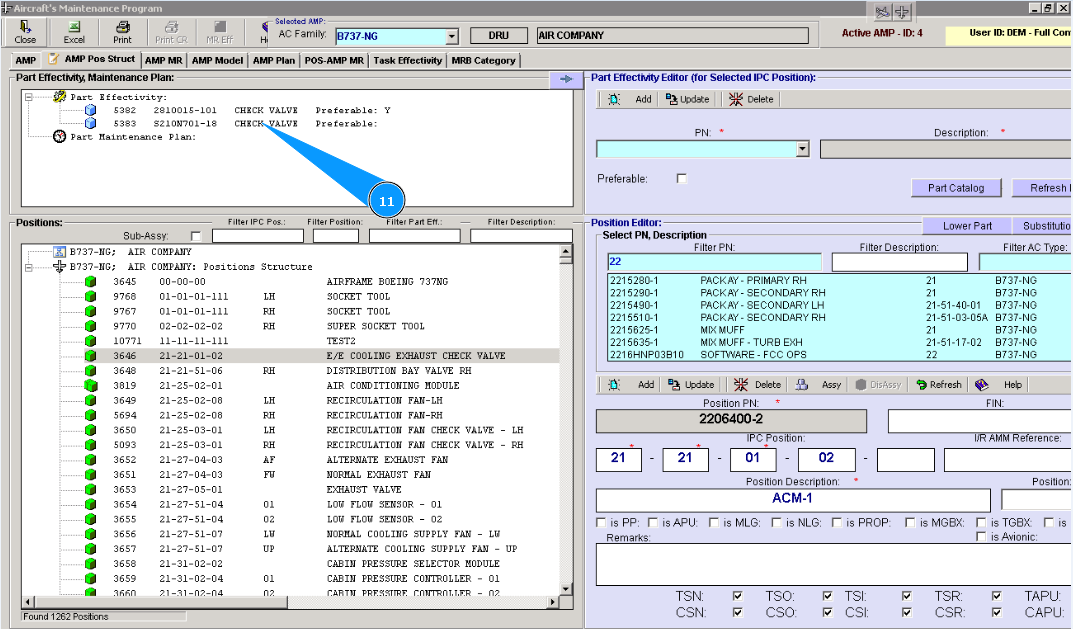
11. Check that a new line with the part number is created in the window "Part Effectivity, Maintenance Plan". Note: If necessary, enter all applicable part numbers to create the AMP position. For this reason, repeat items 8–11 of this instruction.