How to cancel component replacing
1. In order to cancel component replacing, please go to tab "Actual Structure".
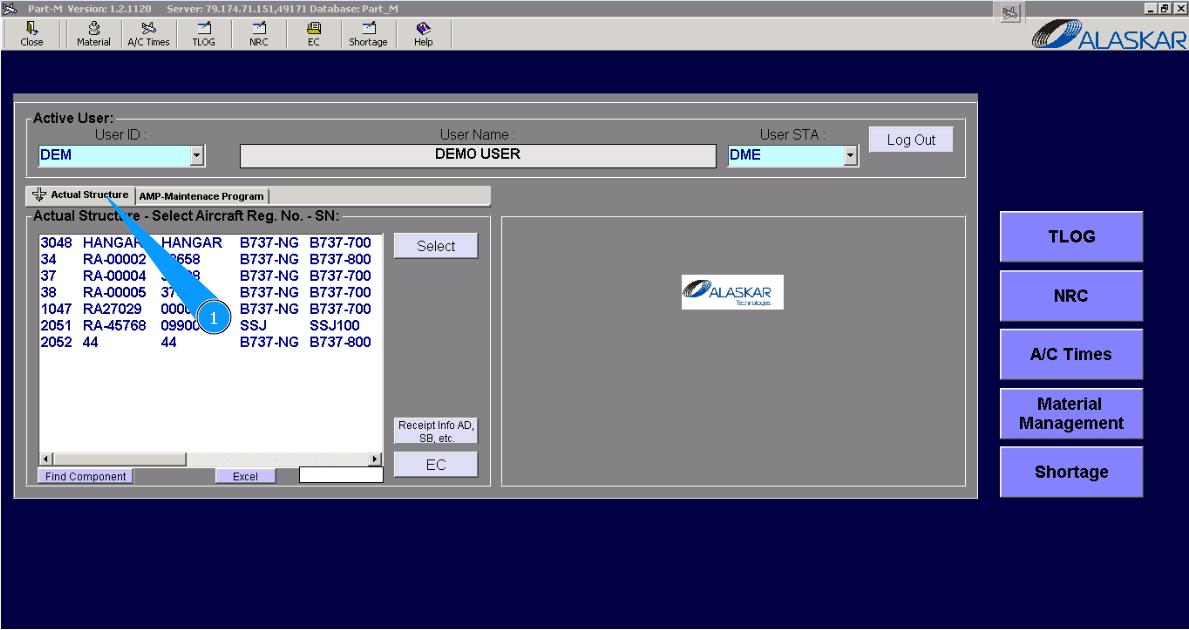
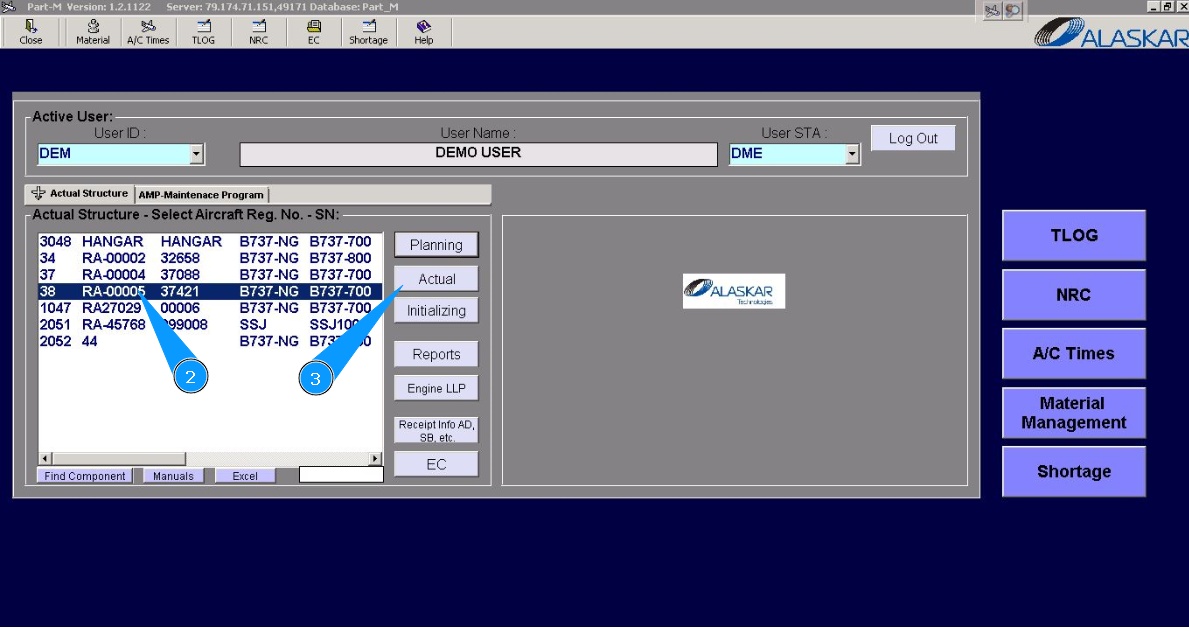
2. Select the aircraft registration number from the list in the window "Actual Structure-Select Aircraft Reg.-SN".
3. Click on the button "Actual", to open the submodule.
4. Then go to the tab "Components".
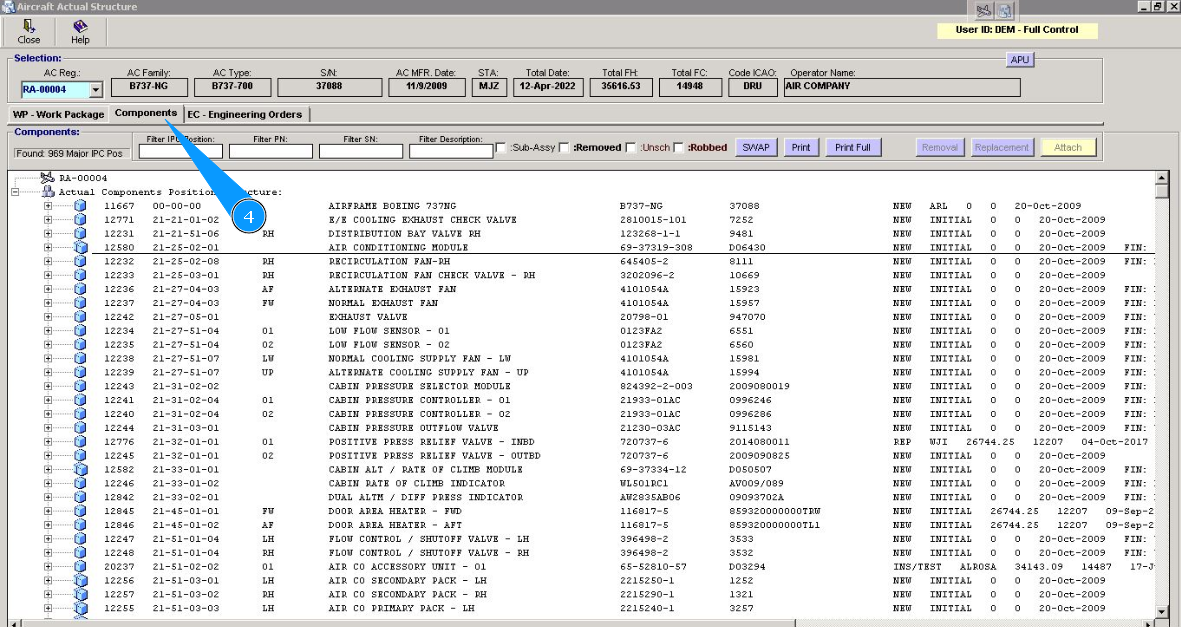
5. Select the line with the necessary component. Click on the plus to open all information. Note: If necessary, you can use the available searching filters: "Filter IPC Position", "Filter PN" etc.
6. Click on the corresponding line.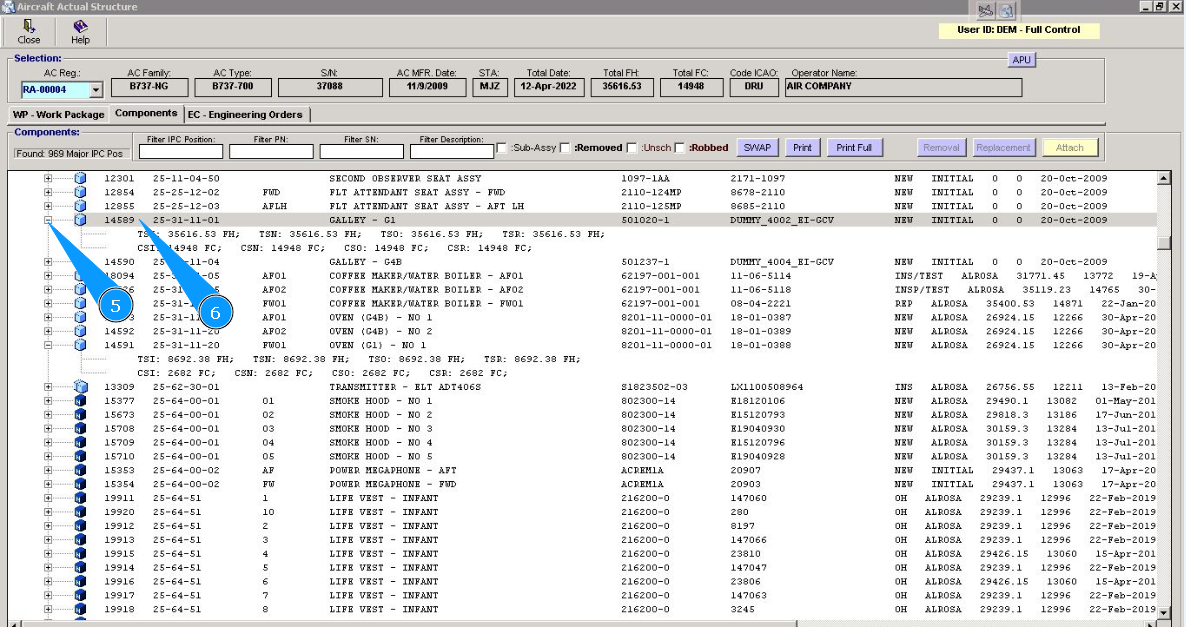
Note: Even if you did not include work to replace the component in the work package, the Alaskar creates the work package automatically. All replacements are made in the program with the creation of virtual WP object.
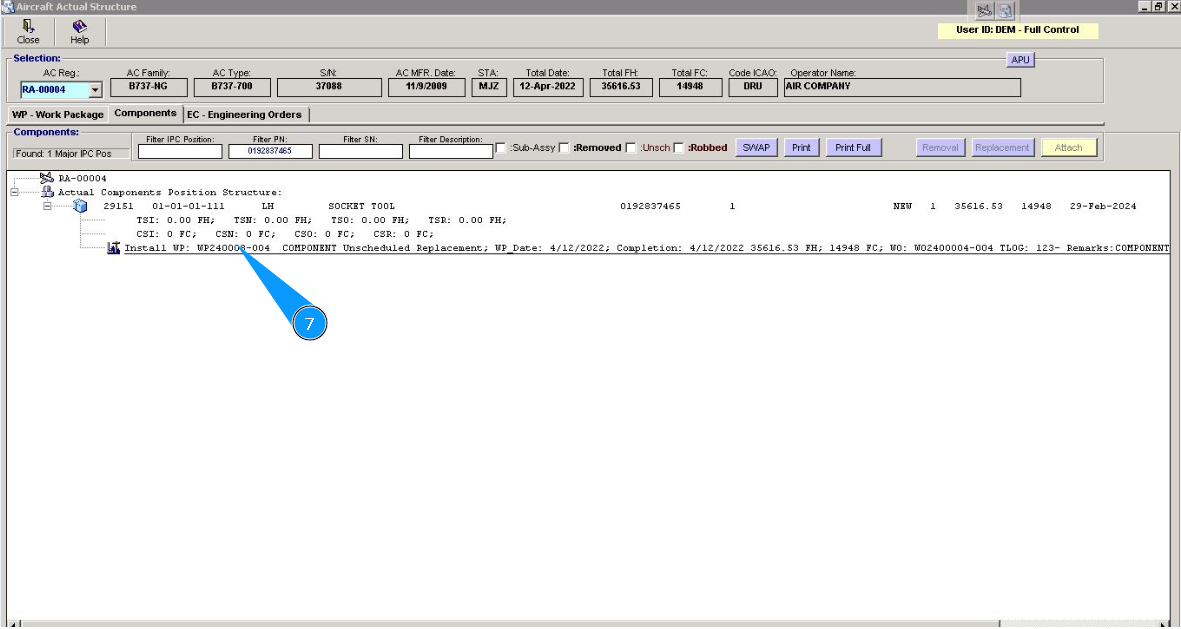
7. Note or write down the number of the work package from the line "Install WP".
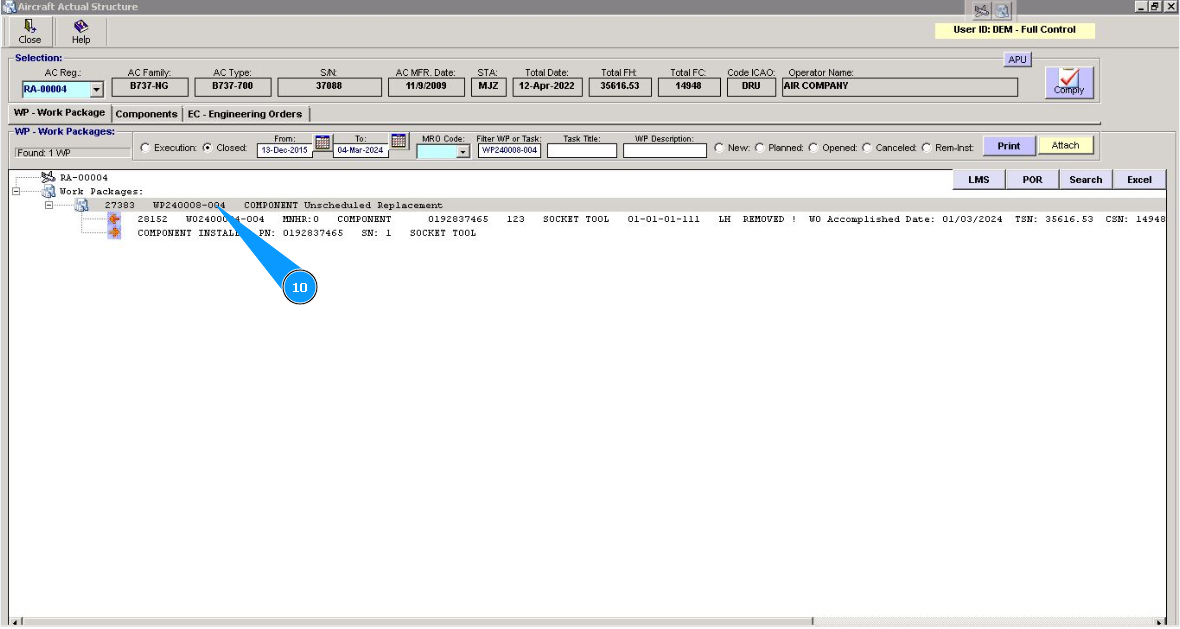
8. Go to the tab "WP -Work Package".
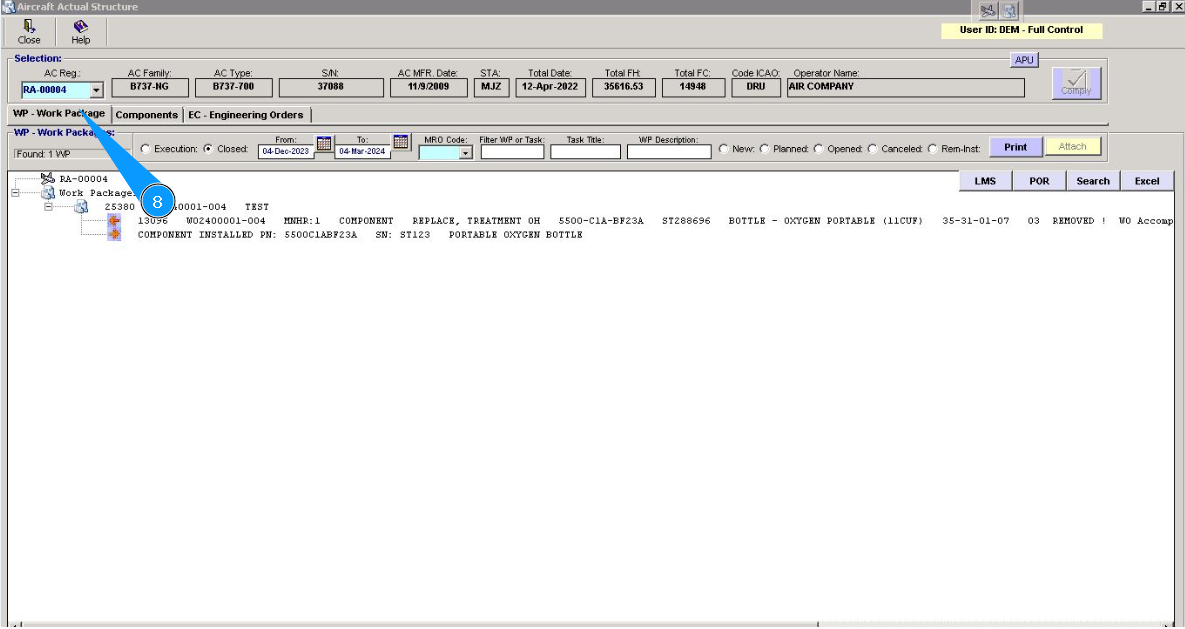
9. Enter the noted WP number in the line "Filter WP or task" and press on the knob "Enter" on your keyboard.
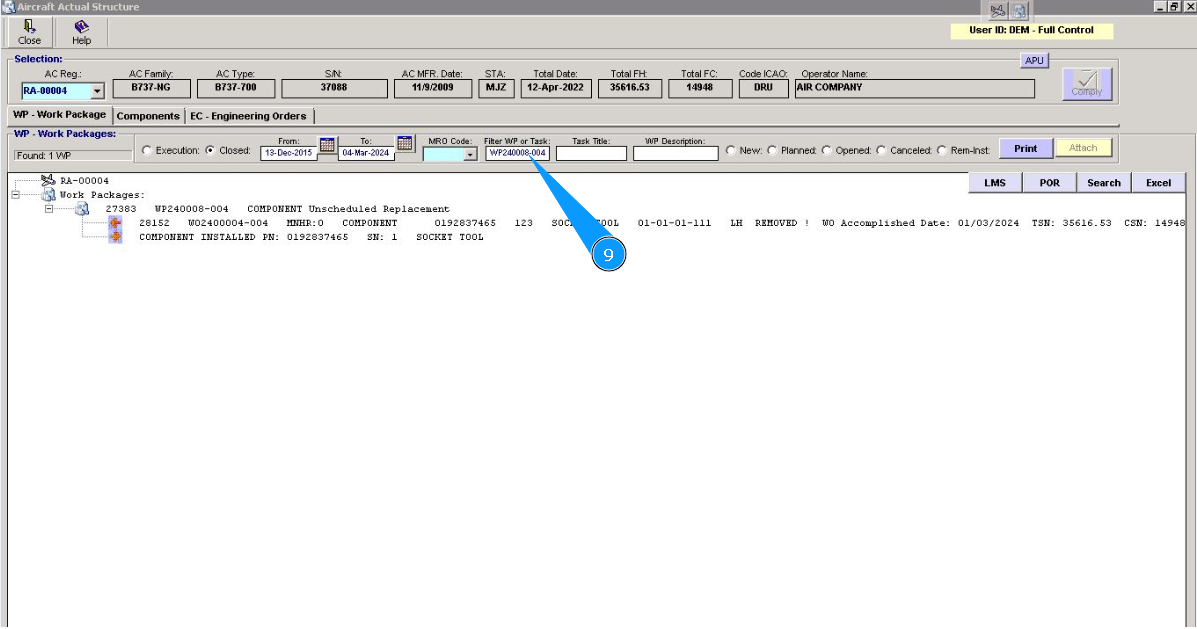
10. Click on the line with the selected WP in the window "WP- Work Packages:".
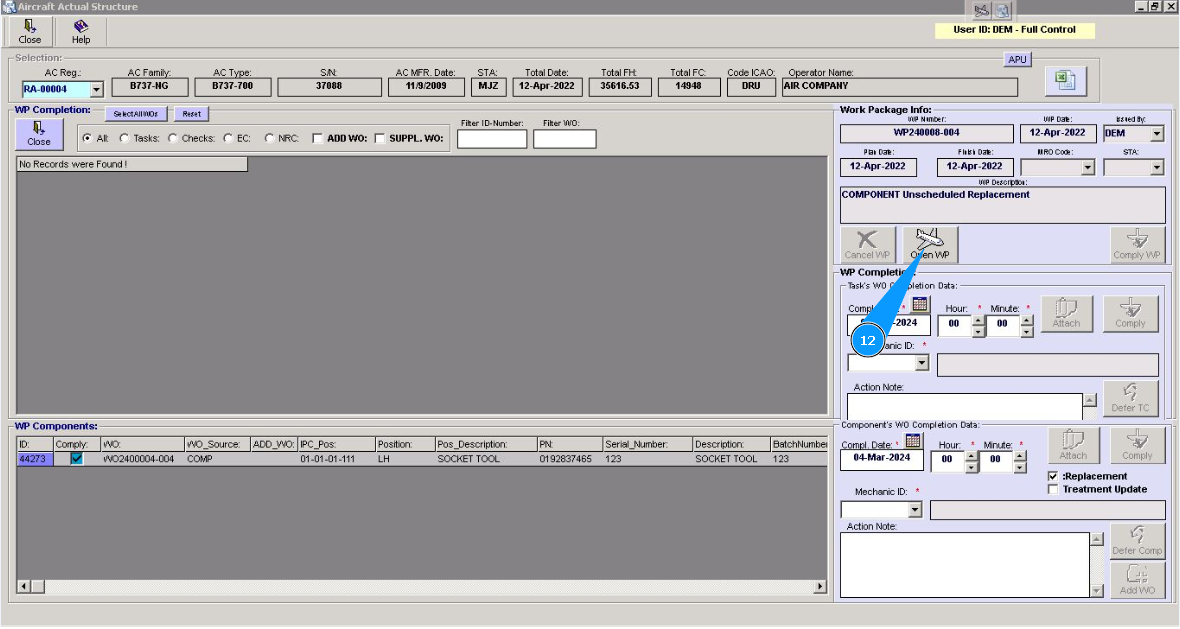
11. Click on the button "Comply".

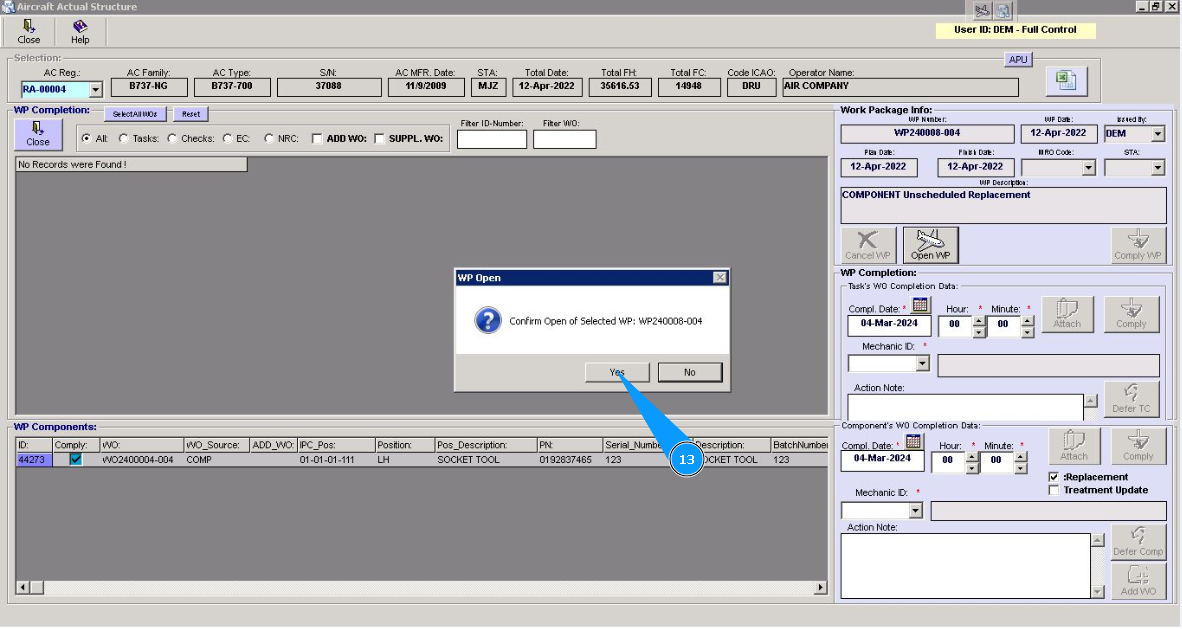
12. Click on the button "Open WP", to open work package.
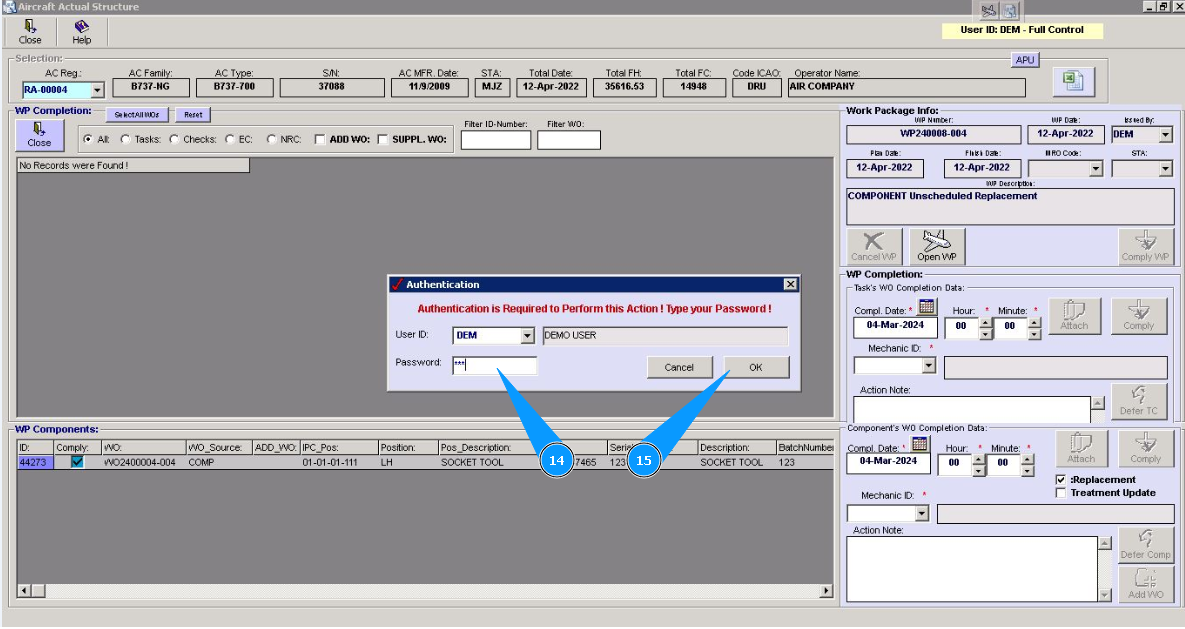
13. Click on the button "Yes", to confirm WP opening.
14. Enter Alaskar password in the field "Password".
15. Click on the button "Ok", to save opening WP in the program.
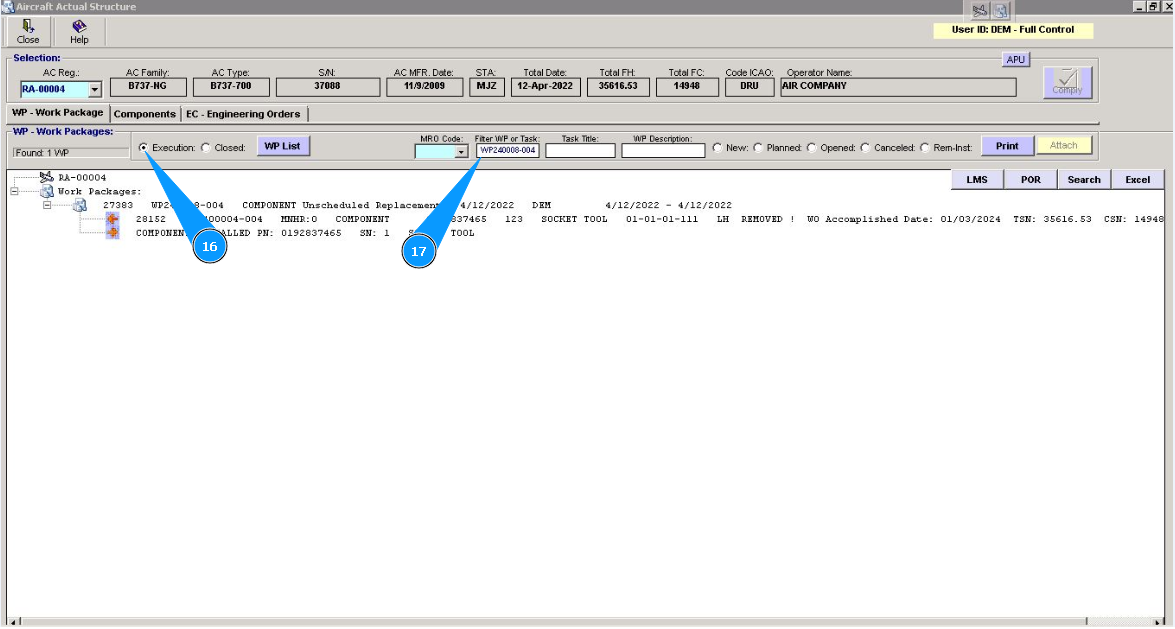
16. WP is transferred to "Execution" condition and ready to be revised. For further working, set the corresponding filter, click in the window "Execution".
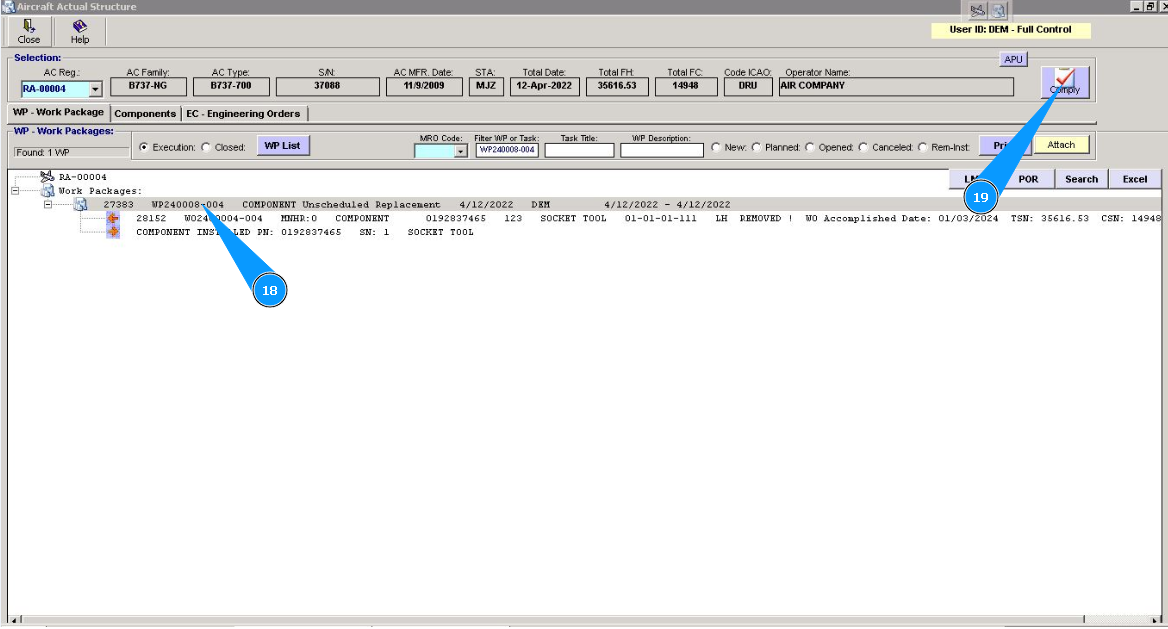
17. Make sure that the WP number remains in the search field "Filter WP or task". Enter it in this field if it has disappeared.
18. Click on the line with the selected WP in the window "WP -Work Packages:".
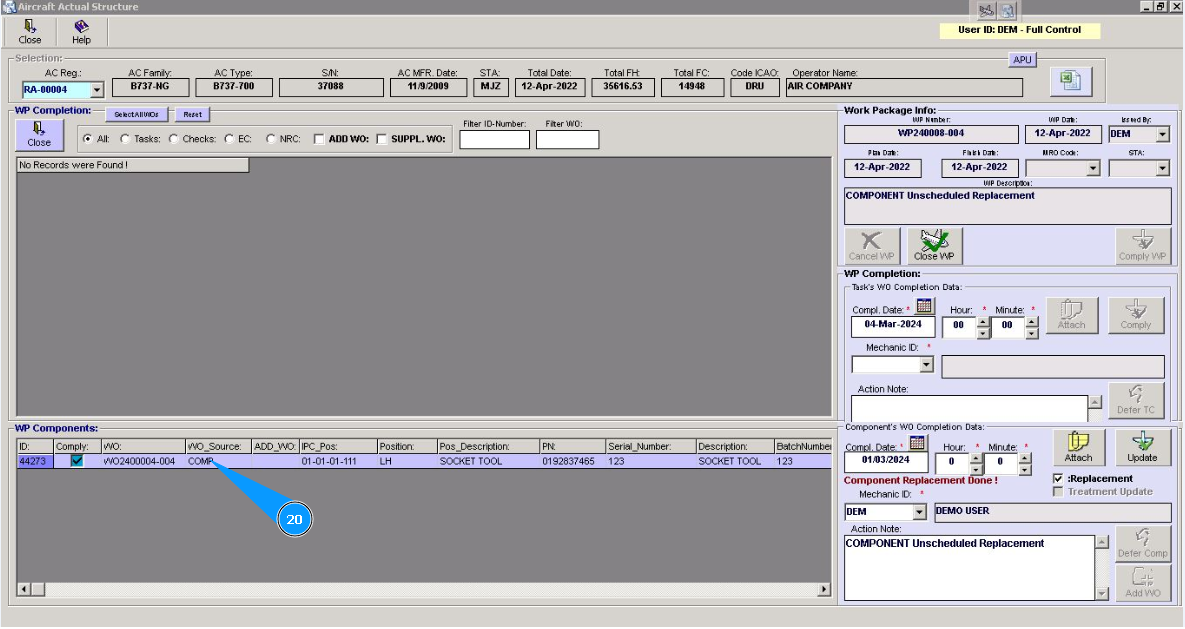
19. Click on the button "Comply".
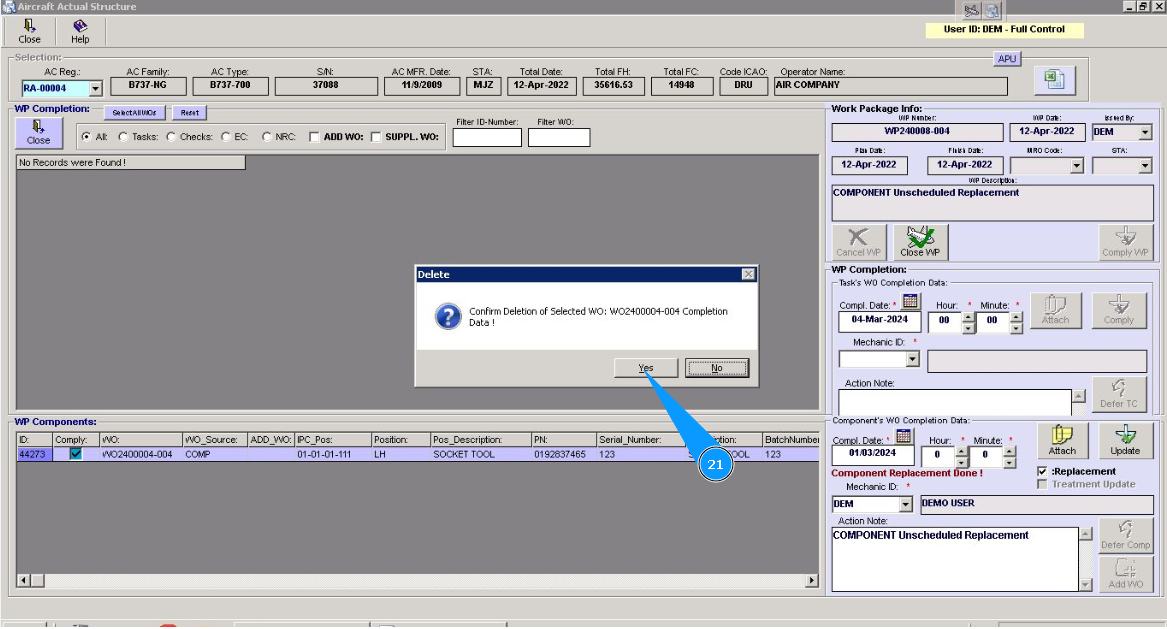
20. Select the line with WO and component, click on it in the window "WP Components" press on the knob "Delete" on your keyboard.
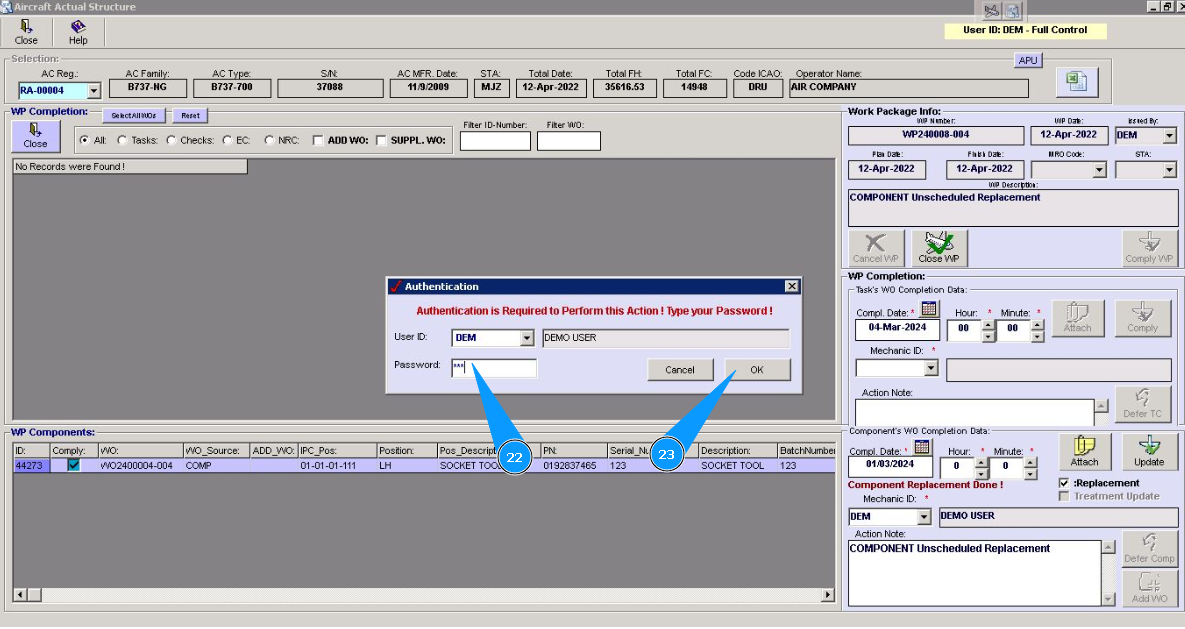
21. Click on the button "Yes", to confirm WO deletion.
22. Enter Alaskar password in the field "Password".
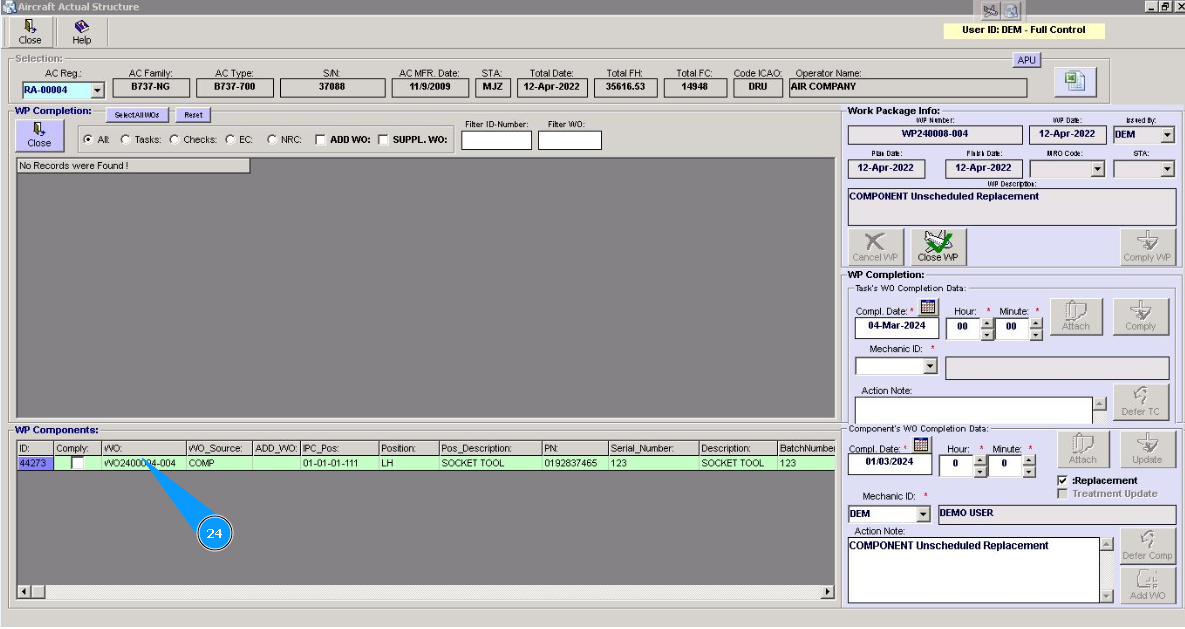
23. Click on the button "Ok", to save deletion of WO.
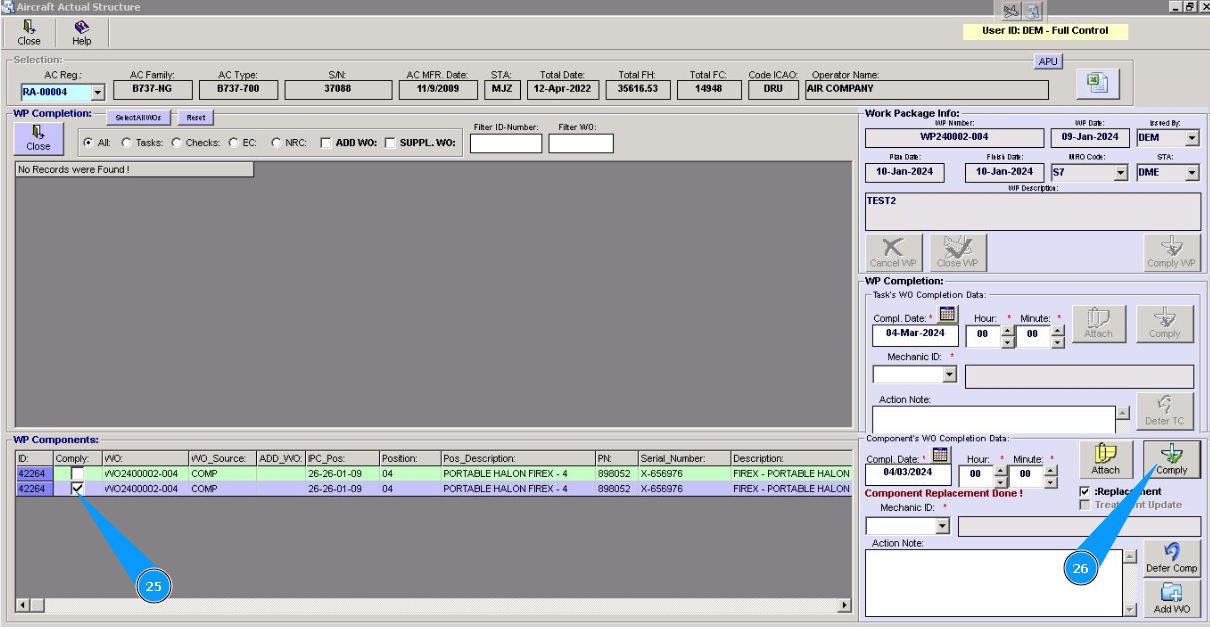
24. Visually check that WO line has changed color to green.
25. Highlight the line with corresponding WO and component and click on the window.
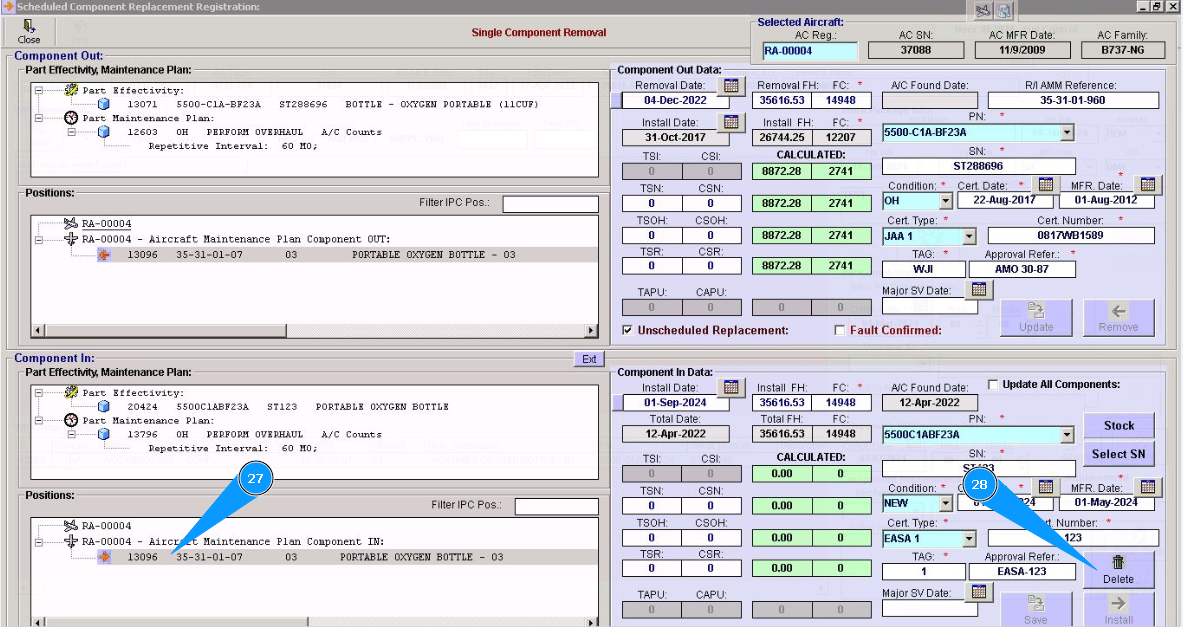
26. Click on the button "Comply".
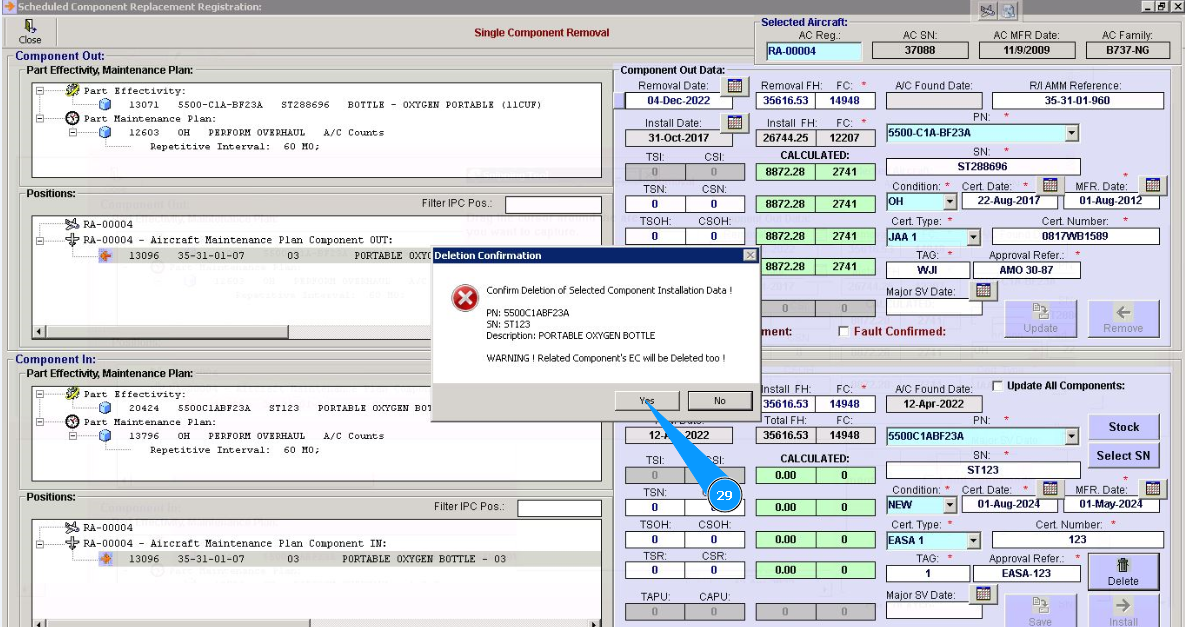
27. Select the line with the component position, click on the window.
28. Press on the knob "Delete" on your keyboard to delete a previously installed component from the program.
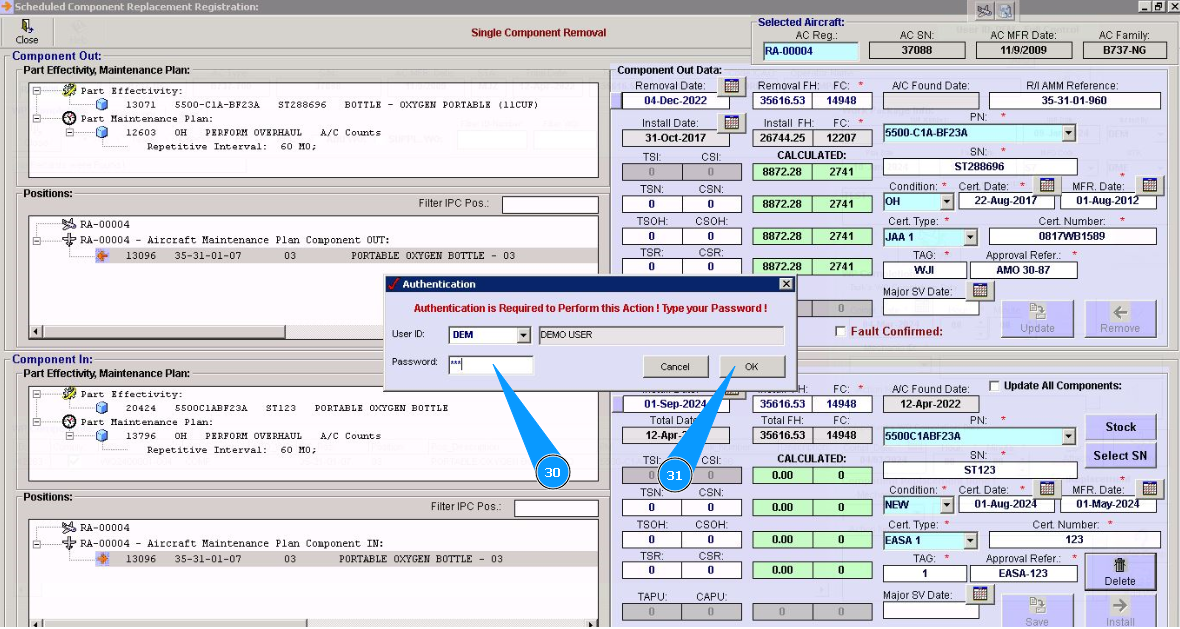
29. Click on the button "Yes", to confirm deletion of data of installed component.
30. Enter Alaskar password in the field "Password".
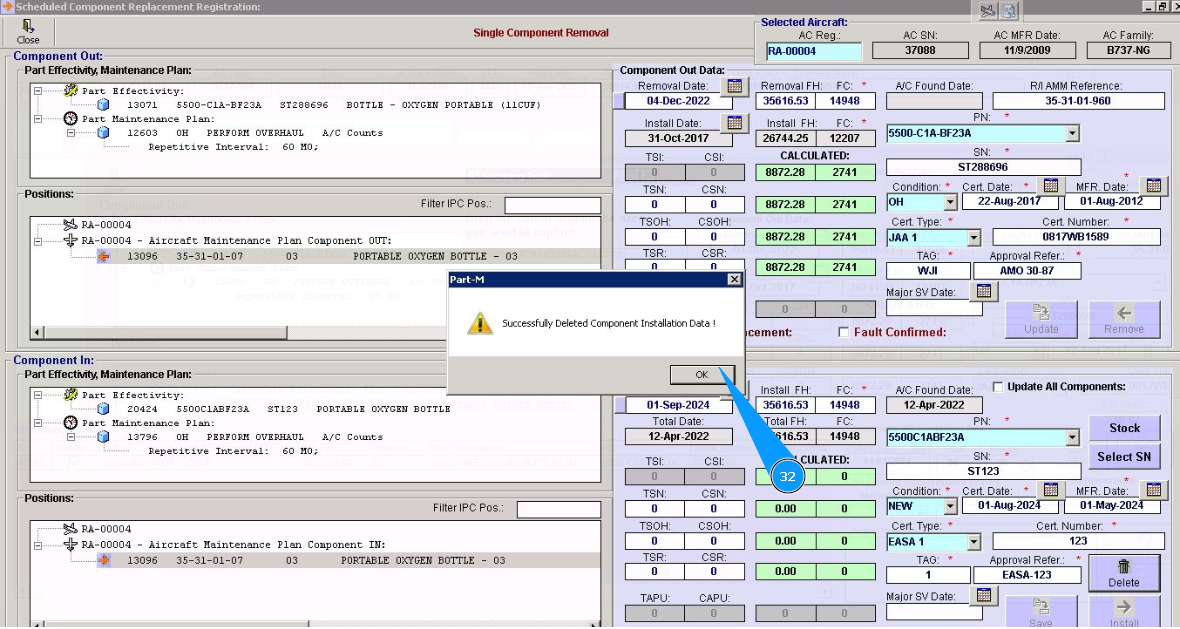
31. Click on the button "Ok", to save deletion component data.
32. Click on the button "Ok", the previously installed component has been removed from the program.
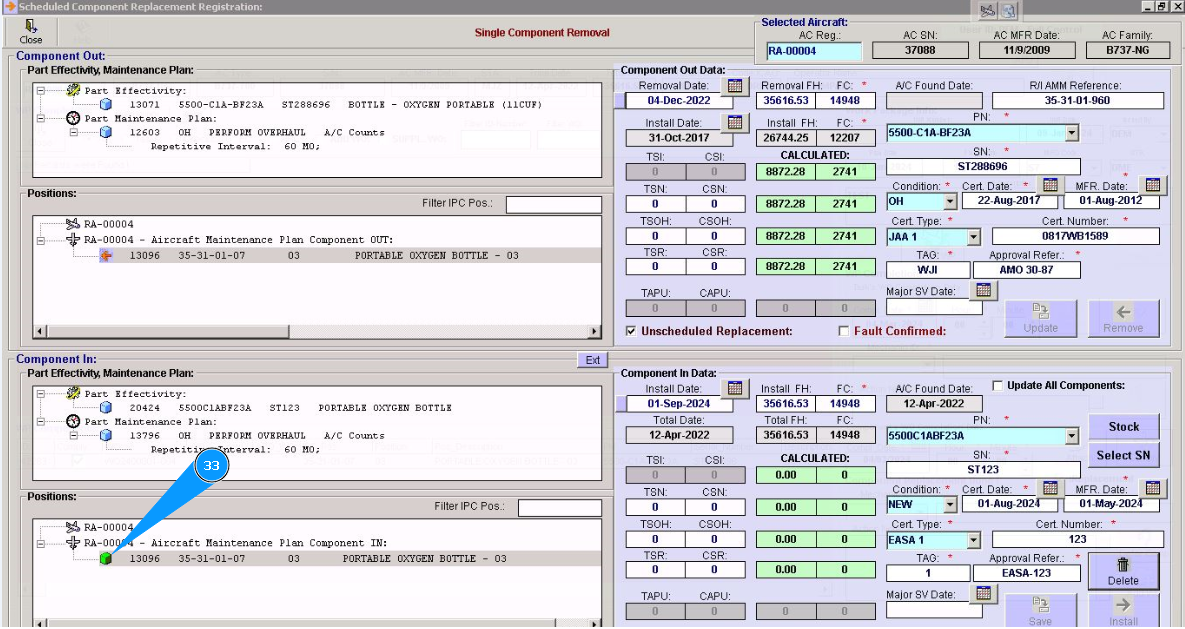
33. Make sure that the symbol of component line changes from red arrow to green cube.
Note: If you are installing another component, use the appropriate installation instructions. If the replacement is erroneous and is not required, the created work package should be deleted.
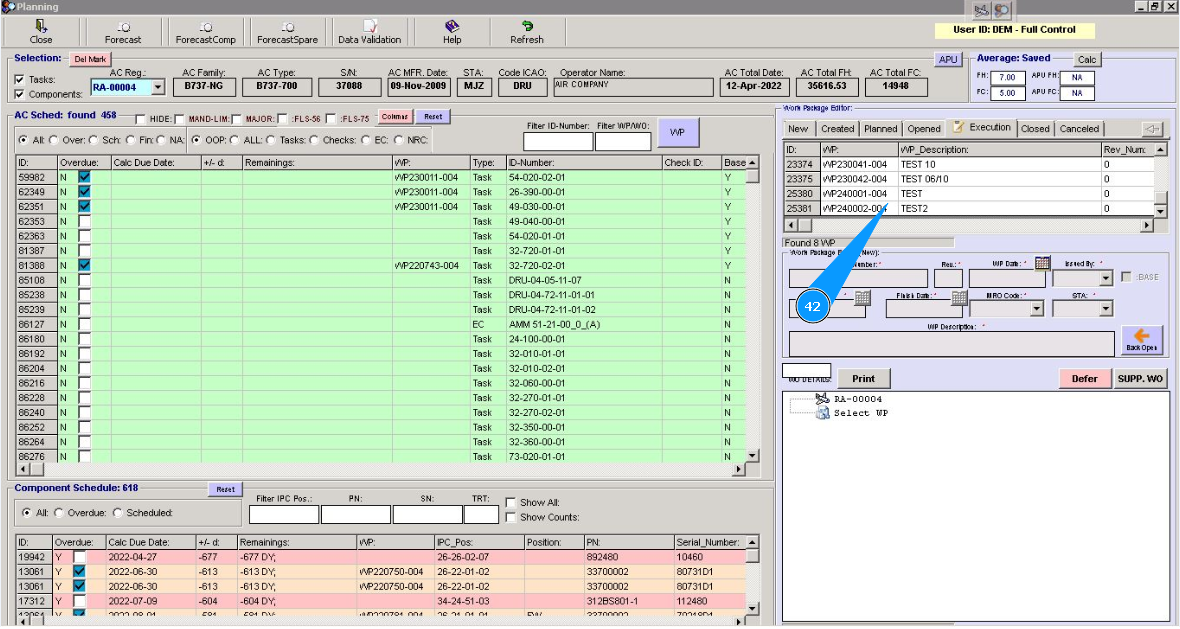
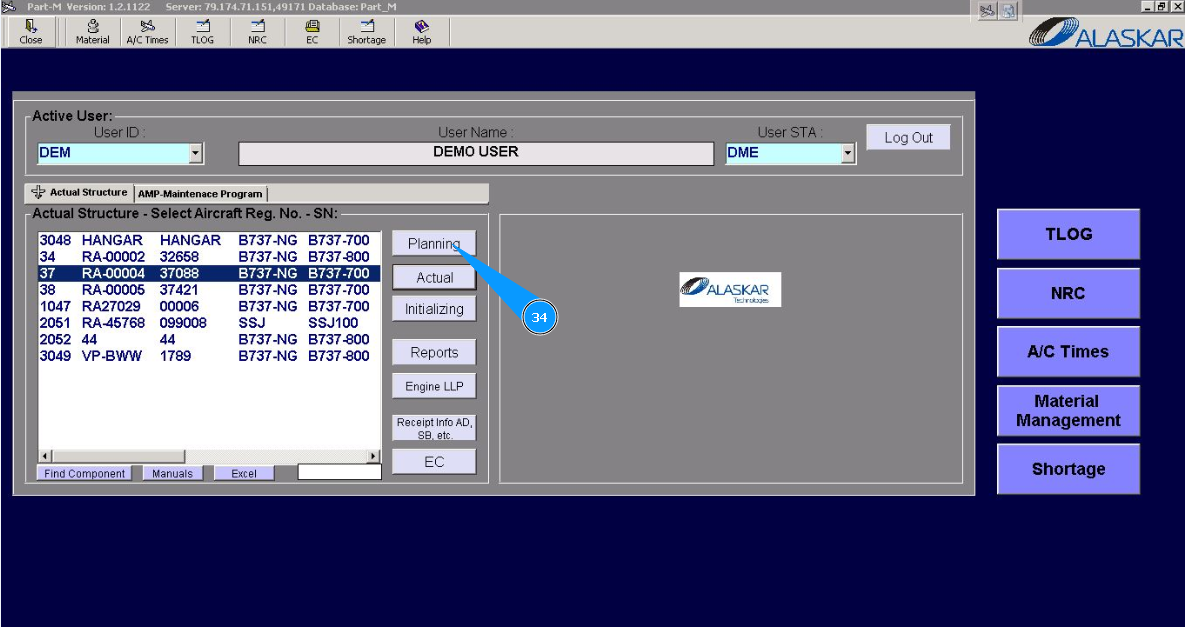
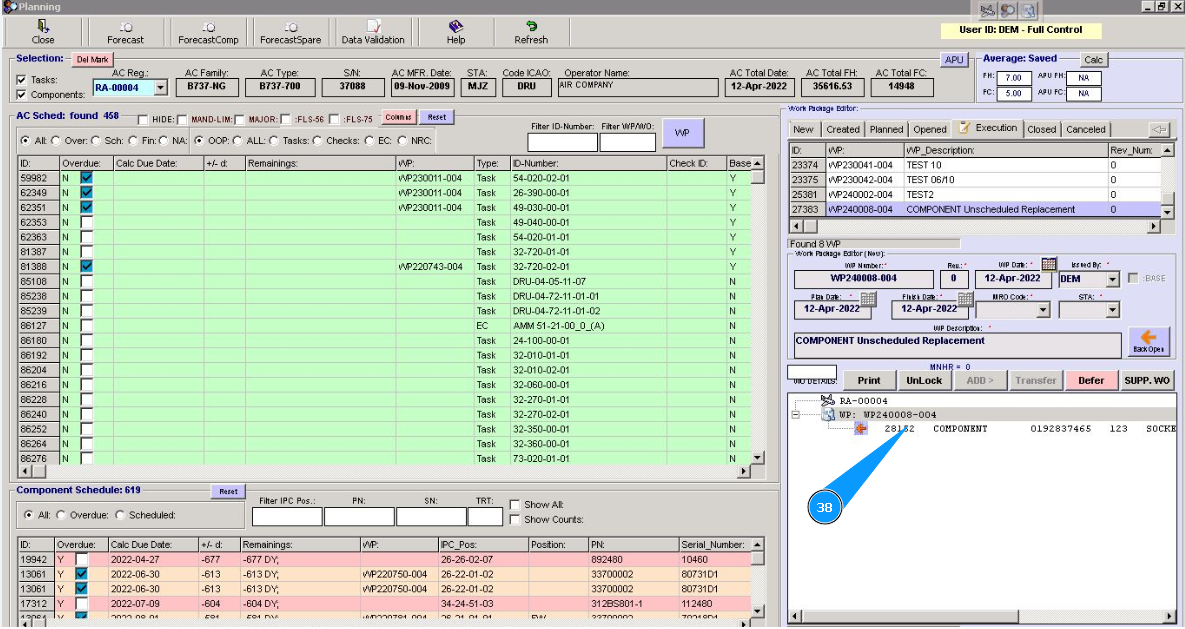
34. In order to delete WP, please go to the submodule "Planing".
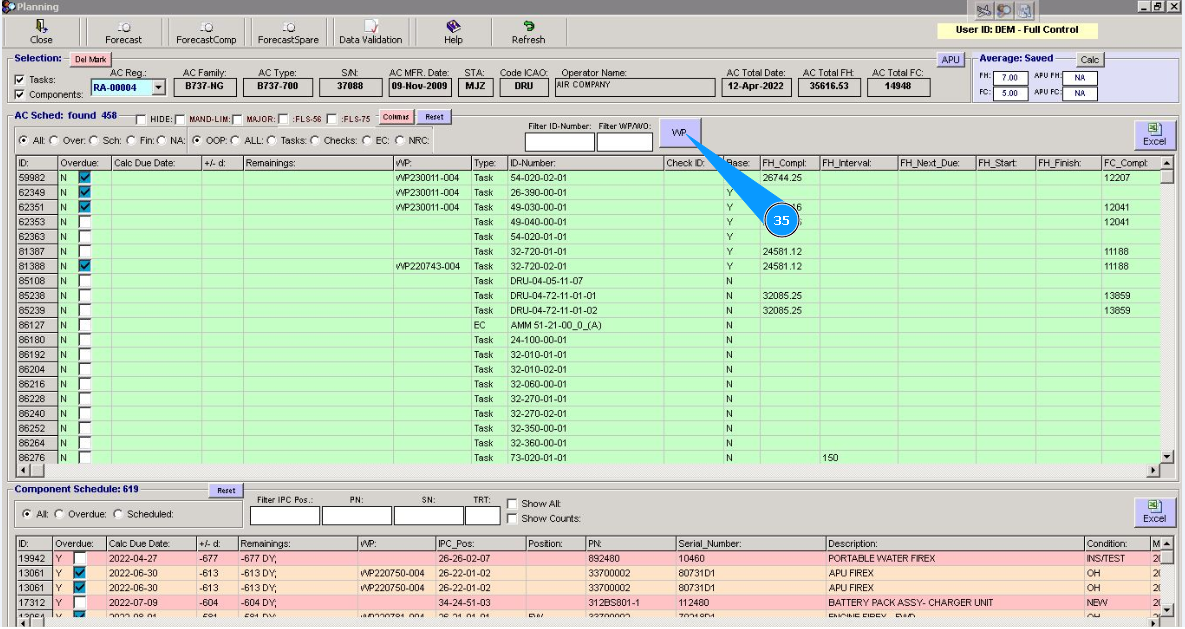
35. Click on the button "WP", to open WP editor.
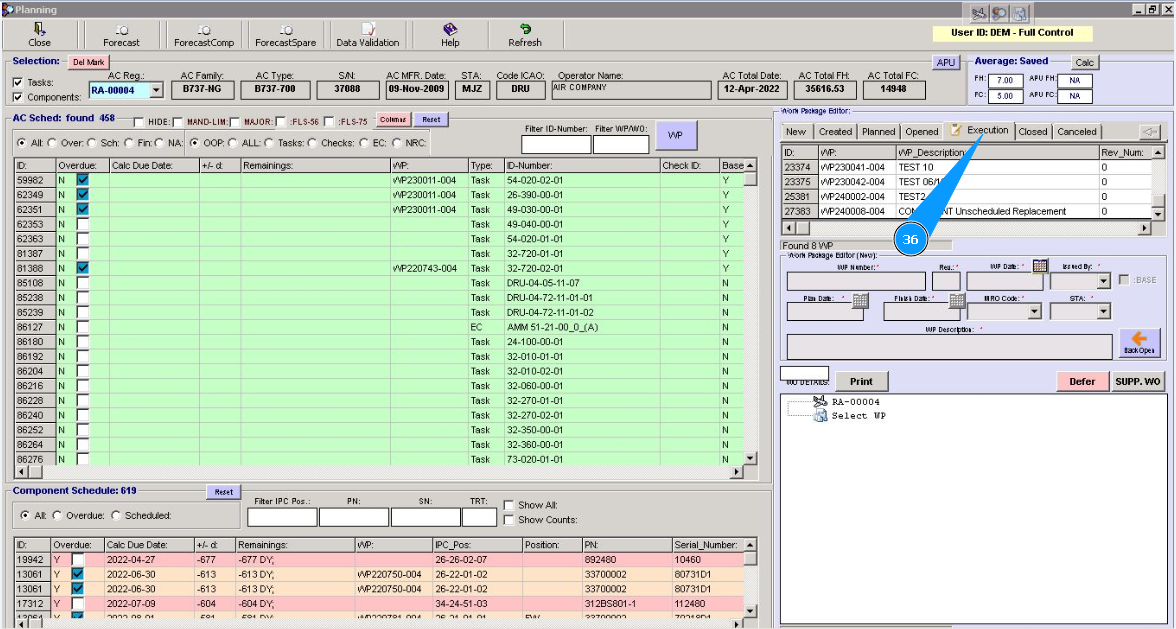
36. Go to the tab "Execution".
37. Using the scroll method, find the required WP and click on the line with the corresponding WP.
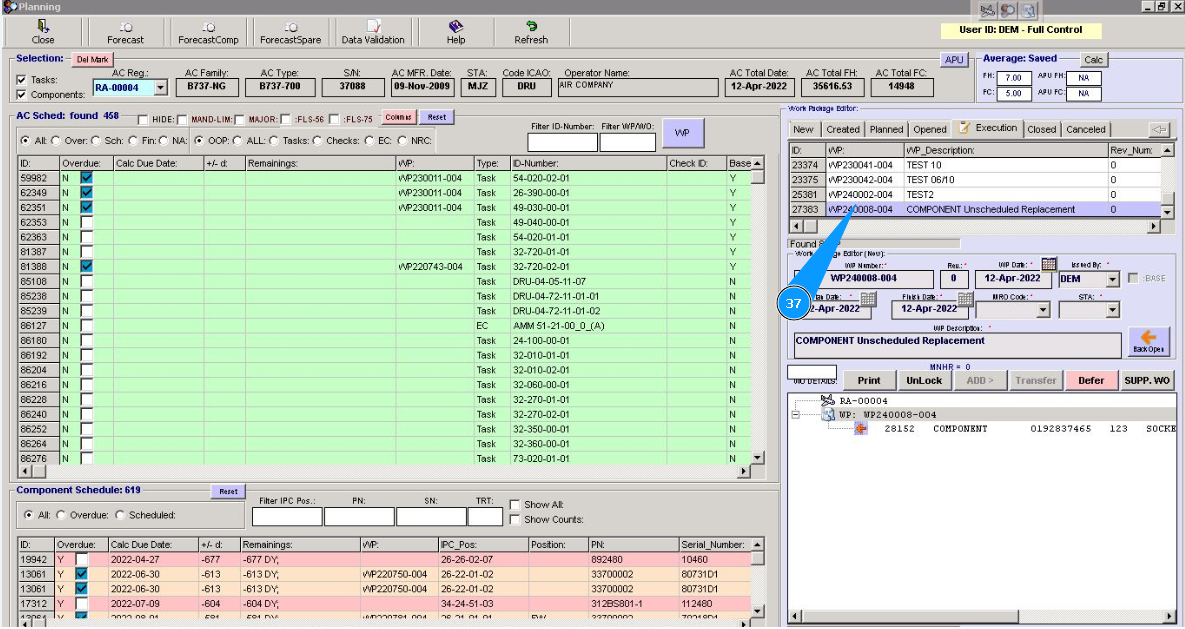
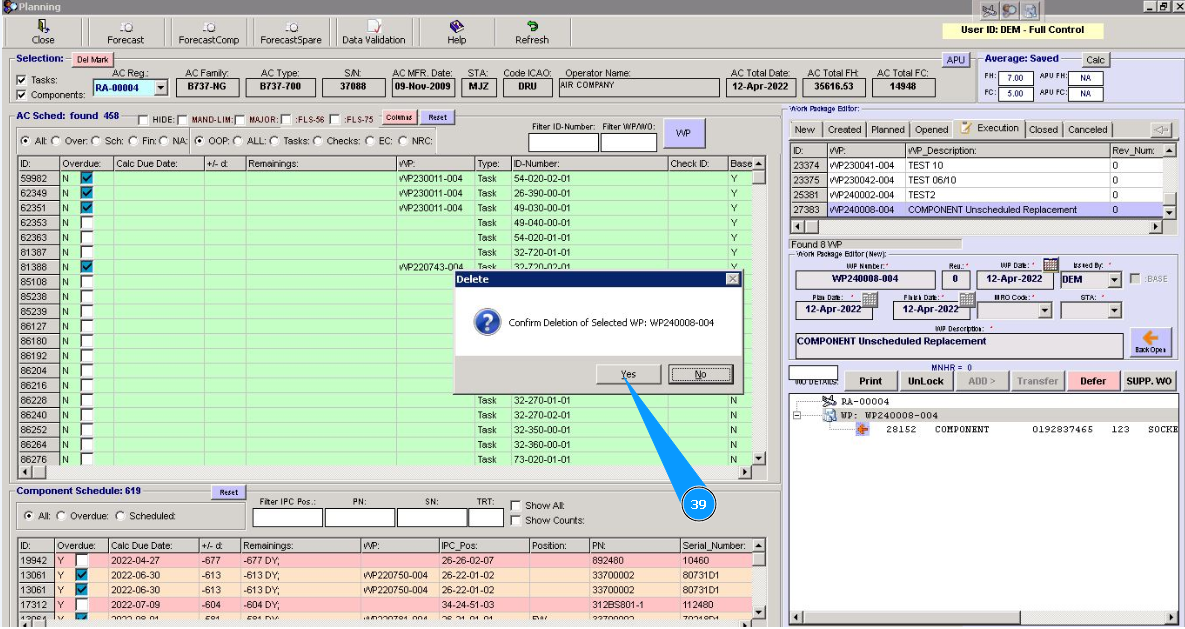
38. Make sure that the WP and its tasks are displayed in the window "Work package Editor". Press on the knob "Del (Delete)" on your keyboard.
39. Click on the button "Yes", to confirm WP deletion from WP list.
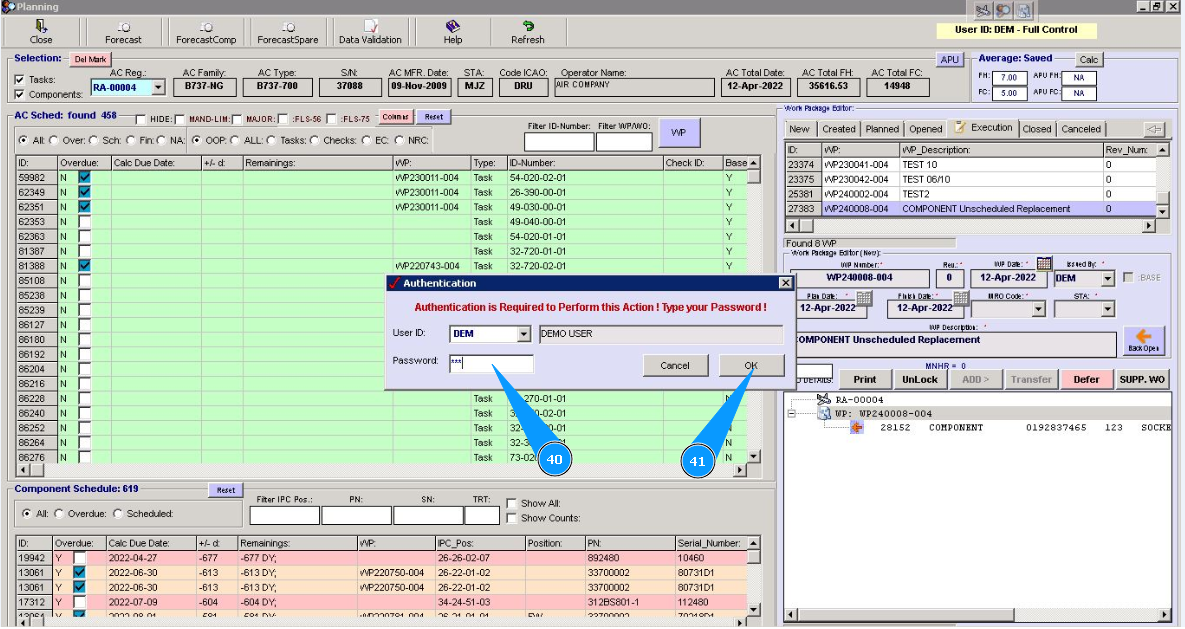
40. Enter Alaskar password in the field "Password".
41. Click on the button "Ok", to confirm WP deletion.
42. Visually check that the work package is removed from the list.