How to create a WP task card for distribution
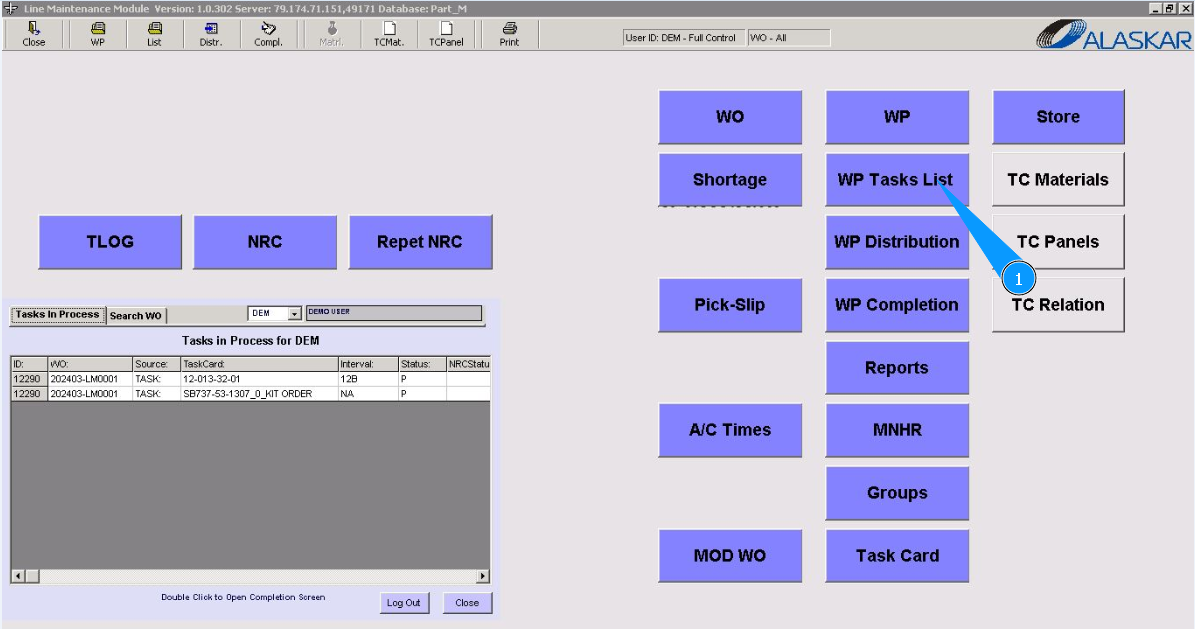
1. To create a WP task card for distribution, go to the submodule "WP Task List".
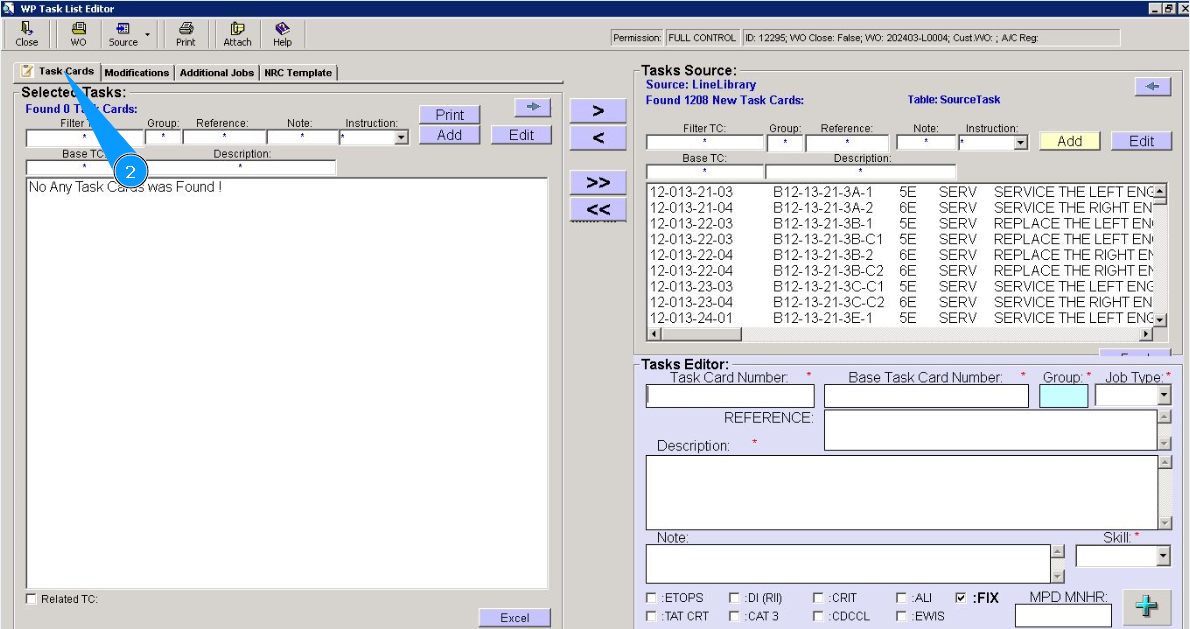
2. Then go to the tab "Task Card".
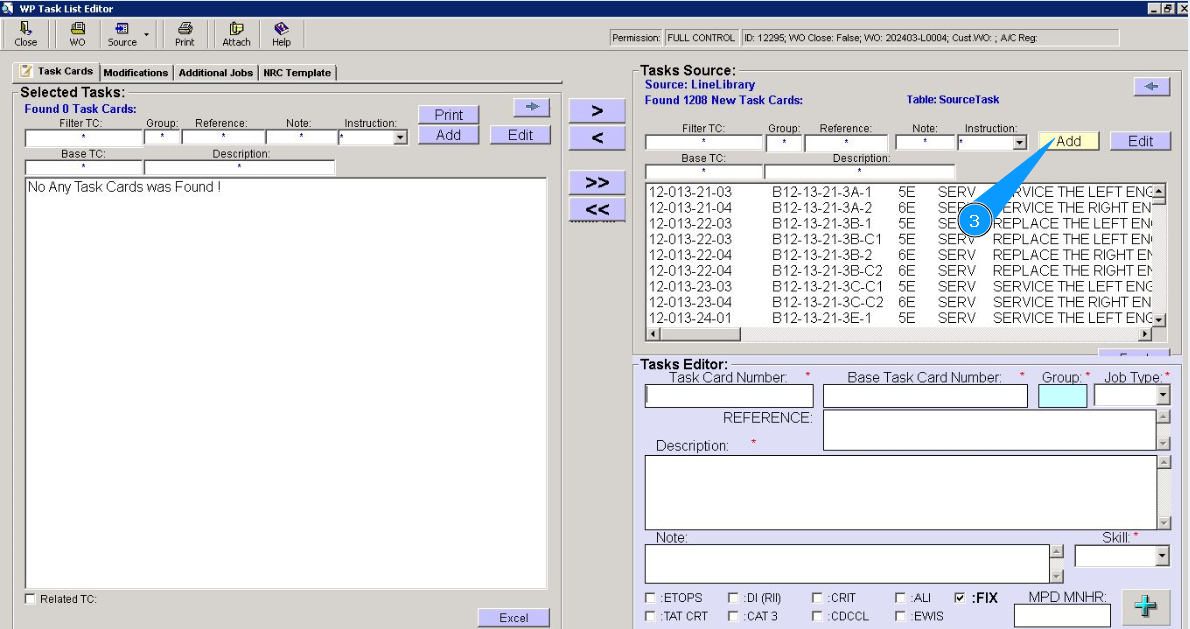
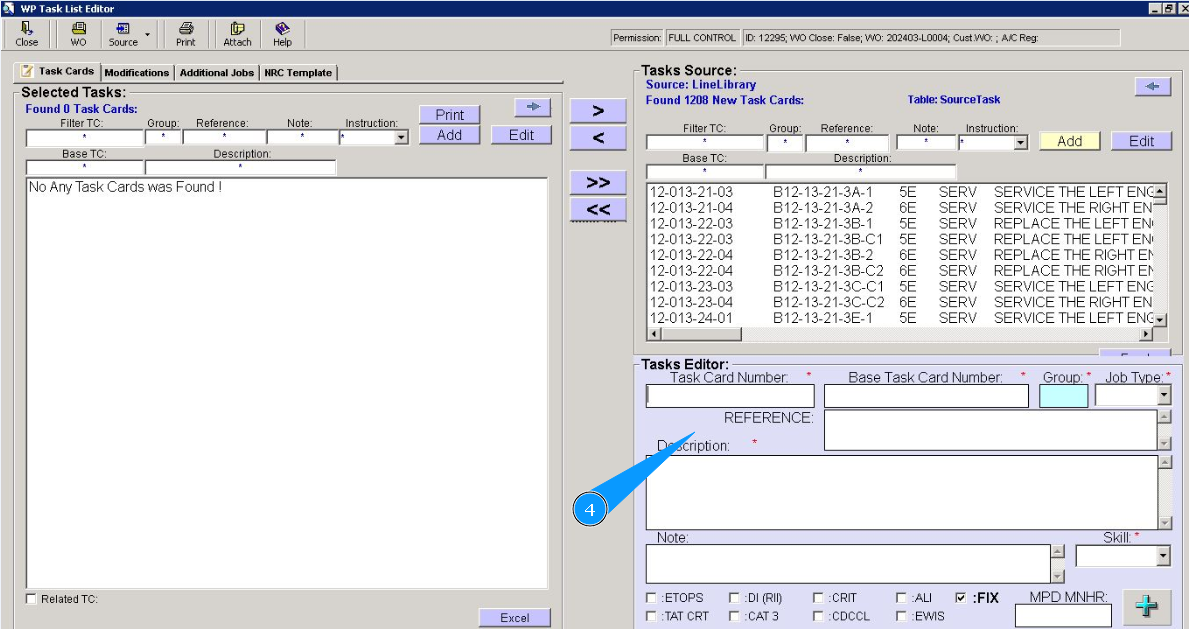
3. Click on the button "Add", to add a new task card.
4. Check that the task card editor is open and available in the window "Task Editor".
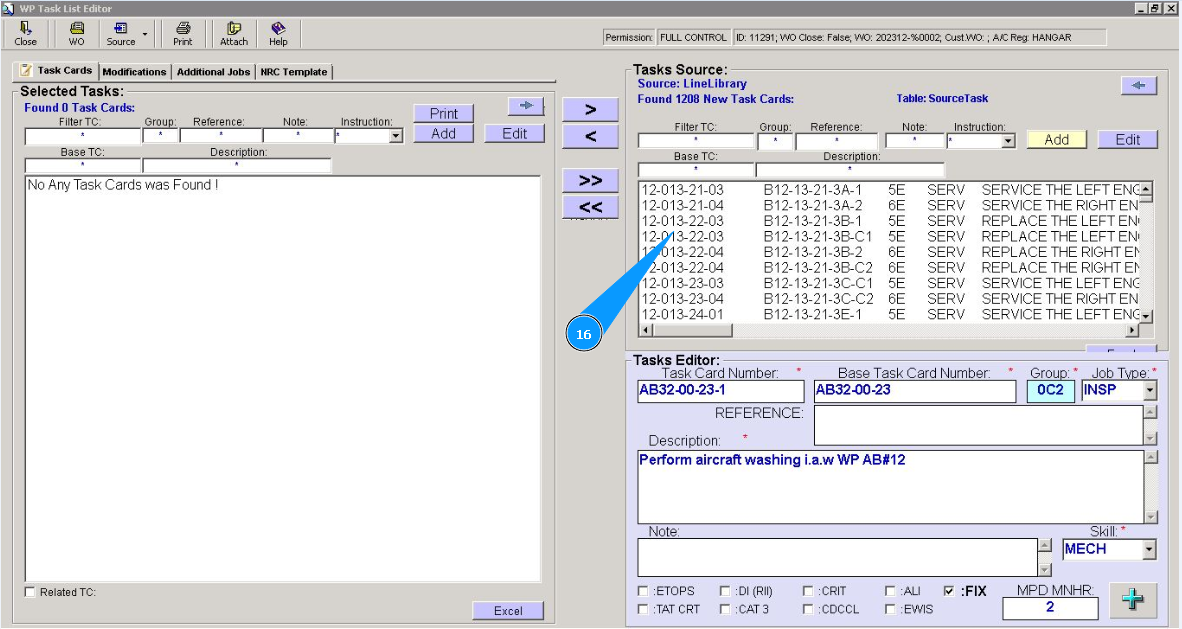
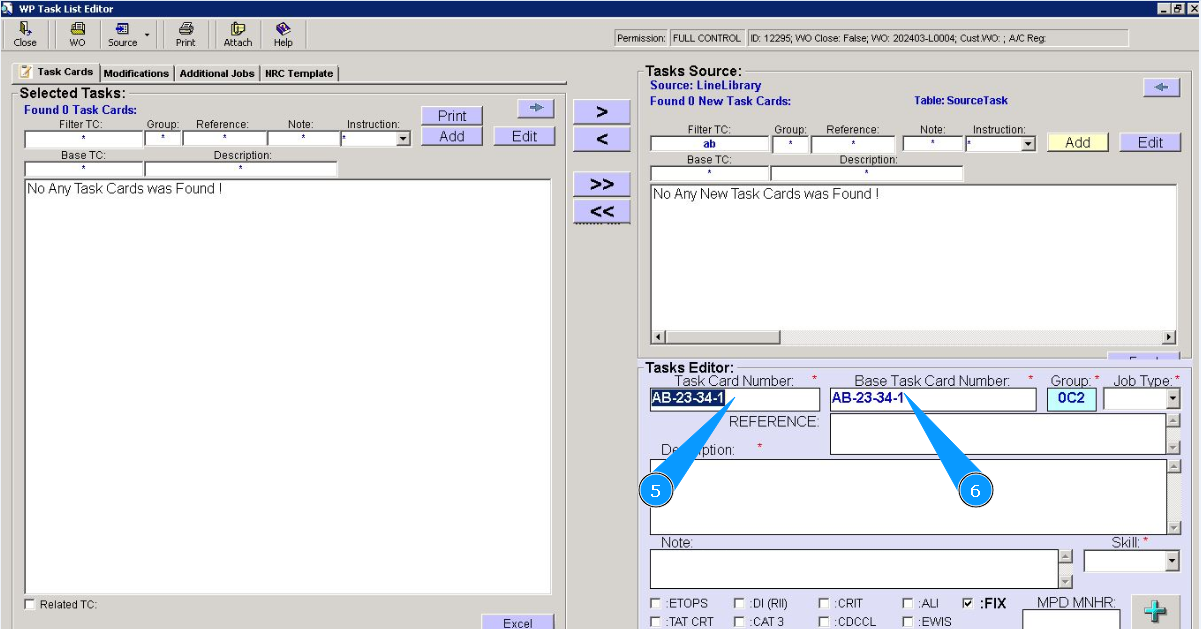
5. Enter the task card number in the field "Task Card Number".
6. Enter the base task card number in the field "Base Task Card Number".
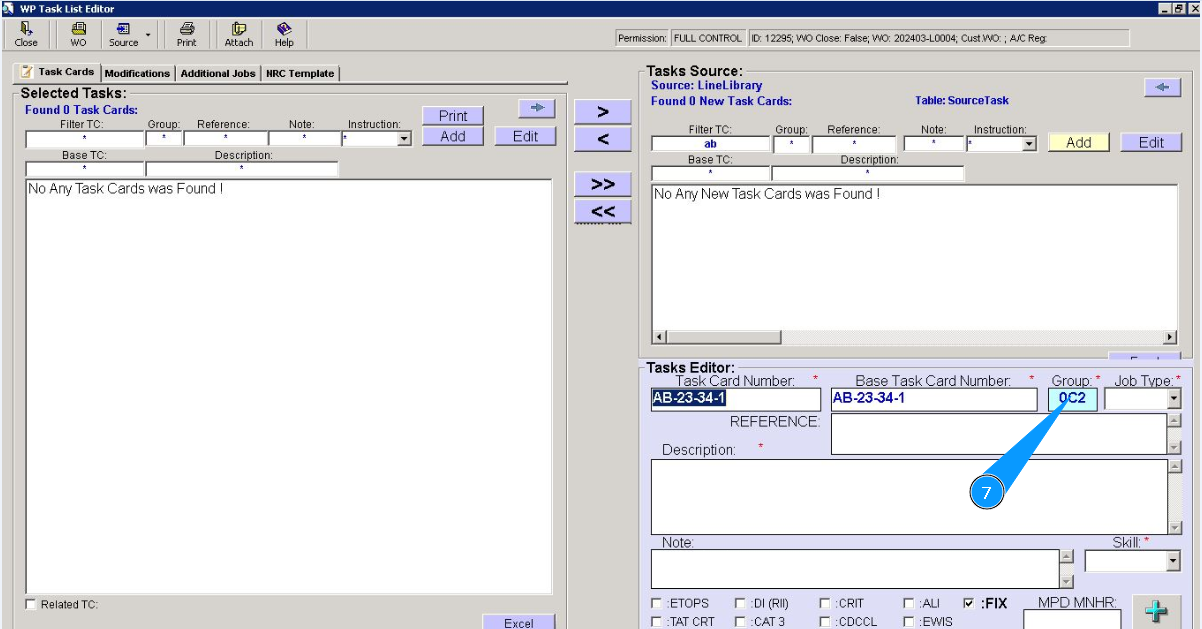
7. To select a work-type group, click in the field "Group".
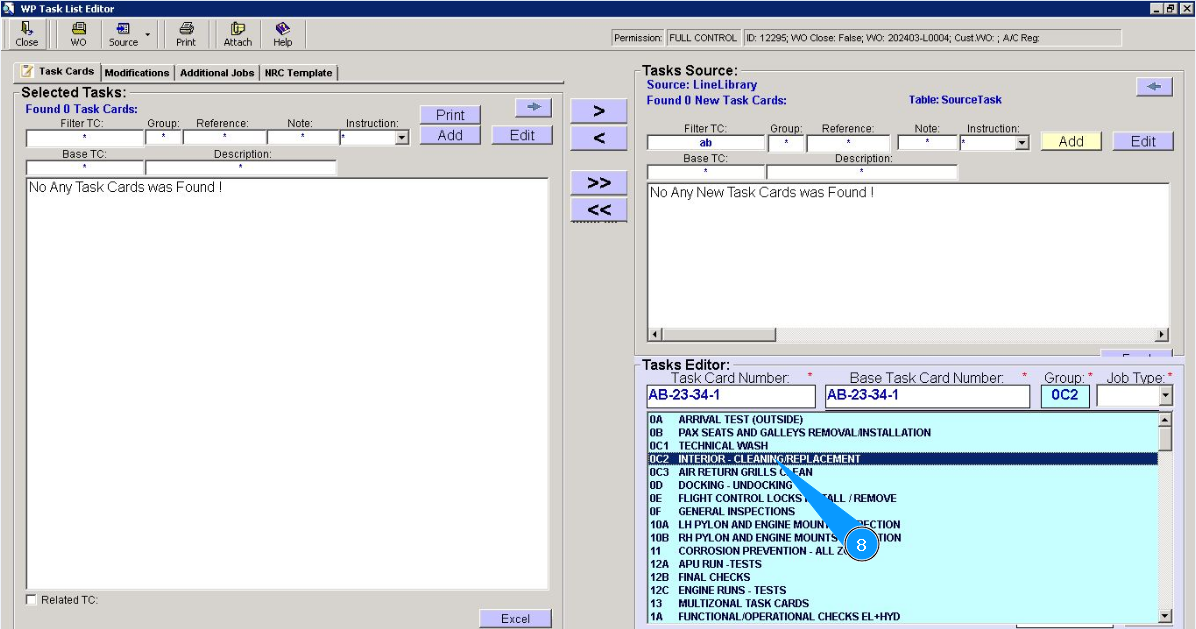
8. From the dropdown list, select the required task type group and click on the corresponding line.
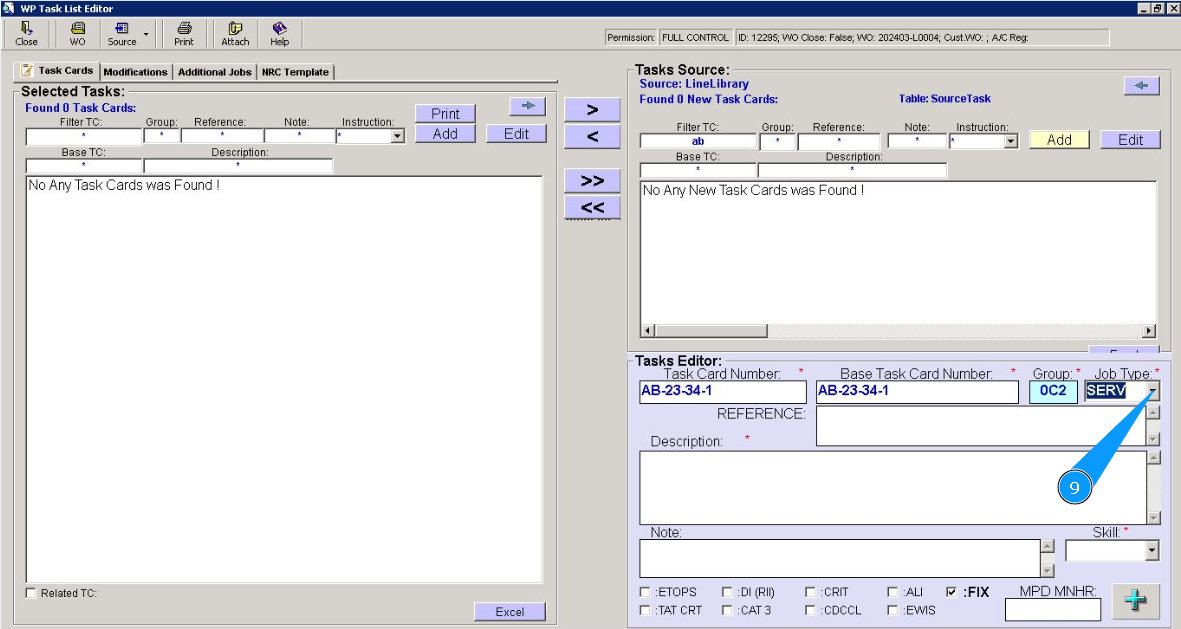
9. Select a task type from the dropdown list in the field "Job Type".
10. If necessary, enter a reference to the document in the field "Reference".

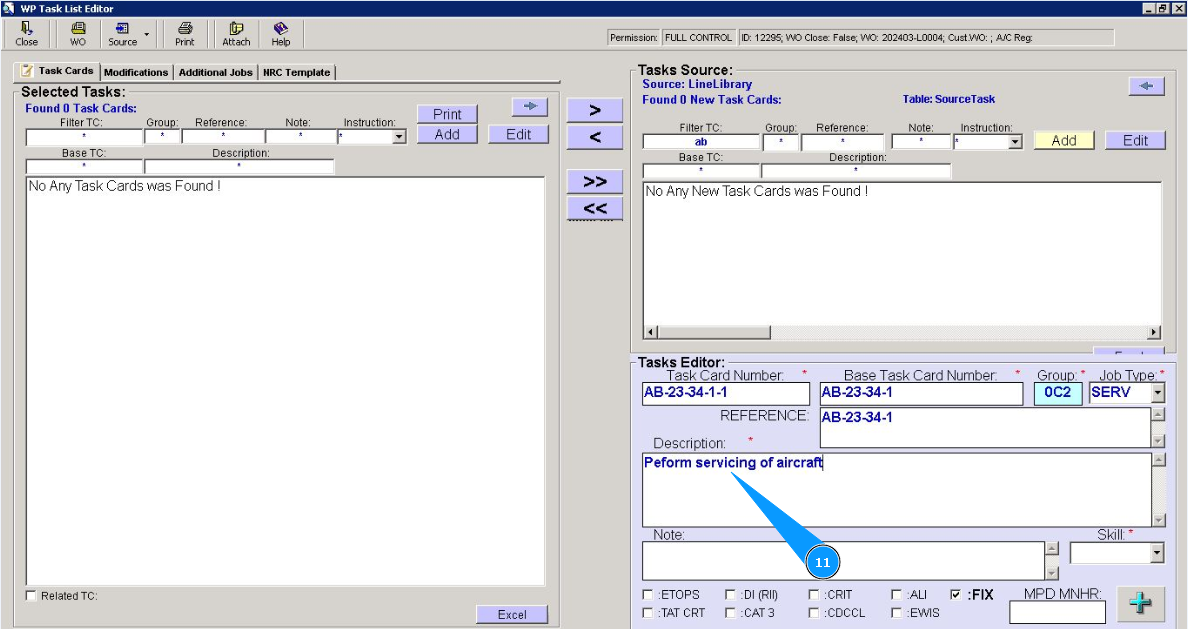
11. Enter a description of the task to be performed in the field "Description".
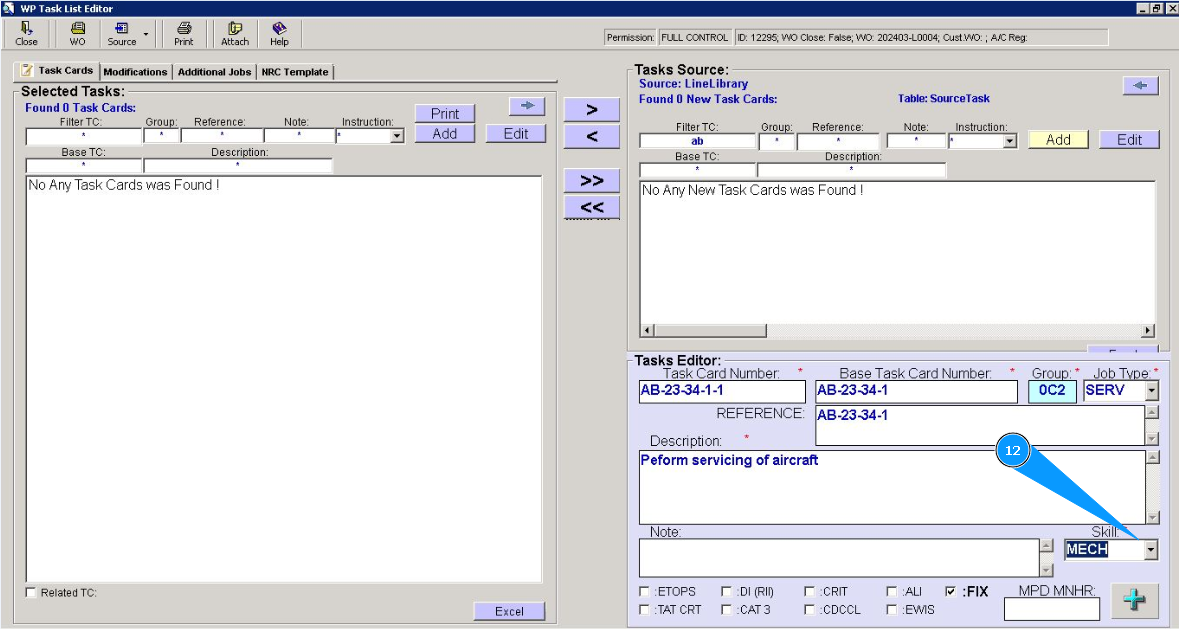
12. From the dropdown list, select the required competence of the specialist in the field "Skill".
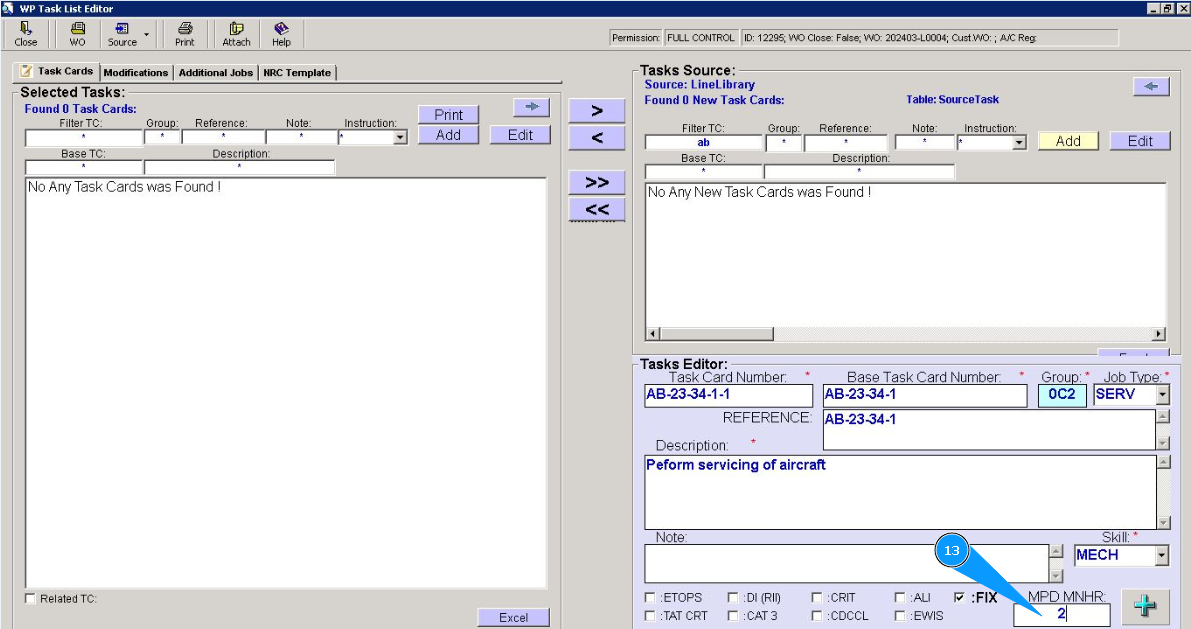
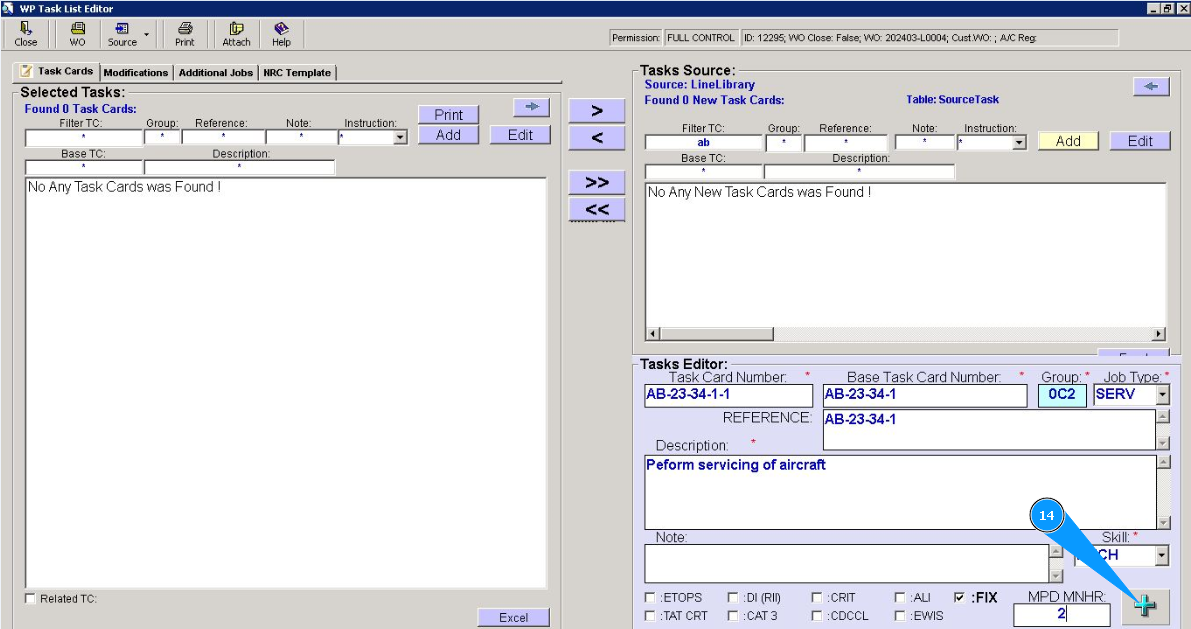
13. Enter the required number of man-hours in the field "MPD MNHR".
14. Click on the button with plus to add a newly created task.
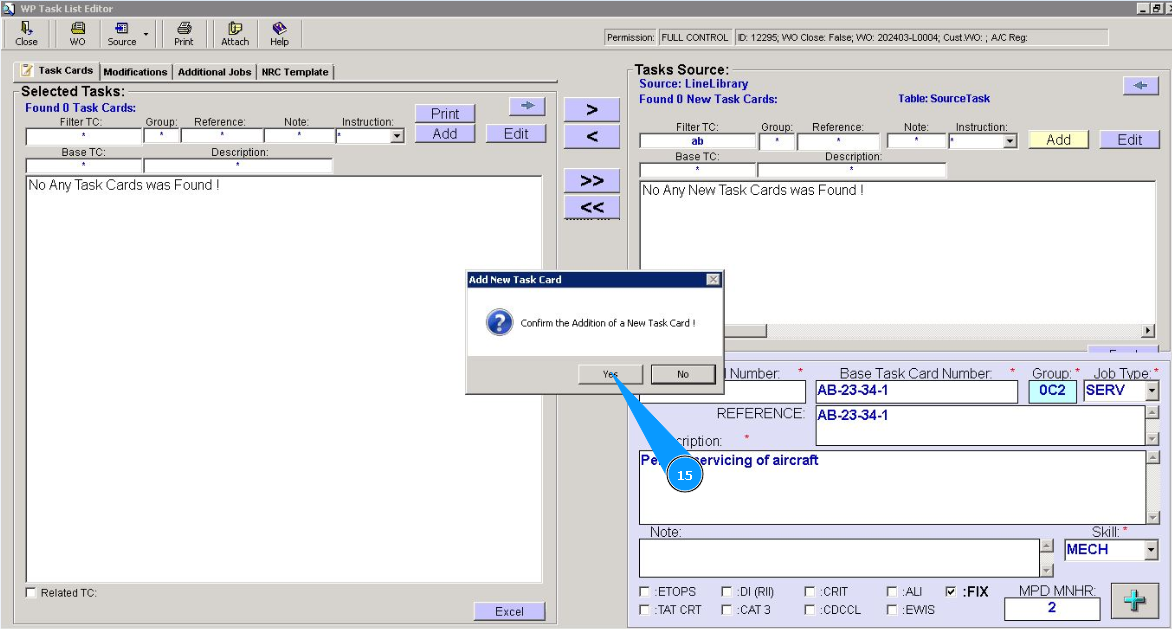
15. Click on the button "Yes", to confirm adding a newly created task to the program.
16. Check that a new record with a new task is displayed in the window "Tasks Source". Note: If necessary, use the available filters to quickly find your task card in the list in the fields: "Filter TC", "Base TC", "Group" etc.