How to create NRC based on Work Package
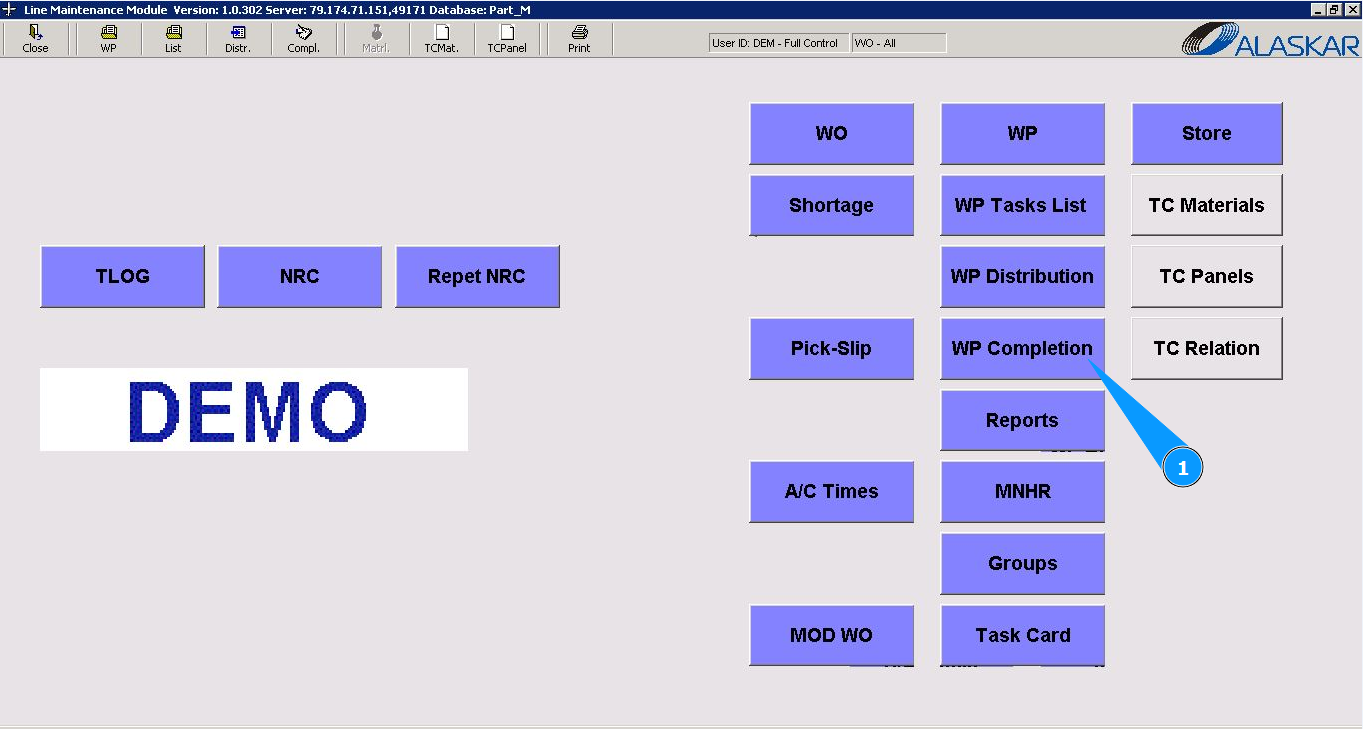
1. In order to create NRC based on Work Package, go to the submodule "WP Completion".
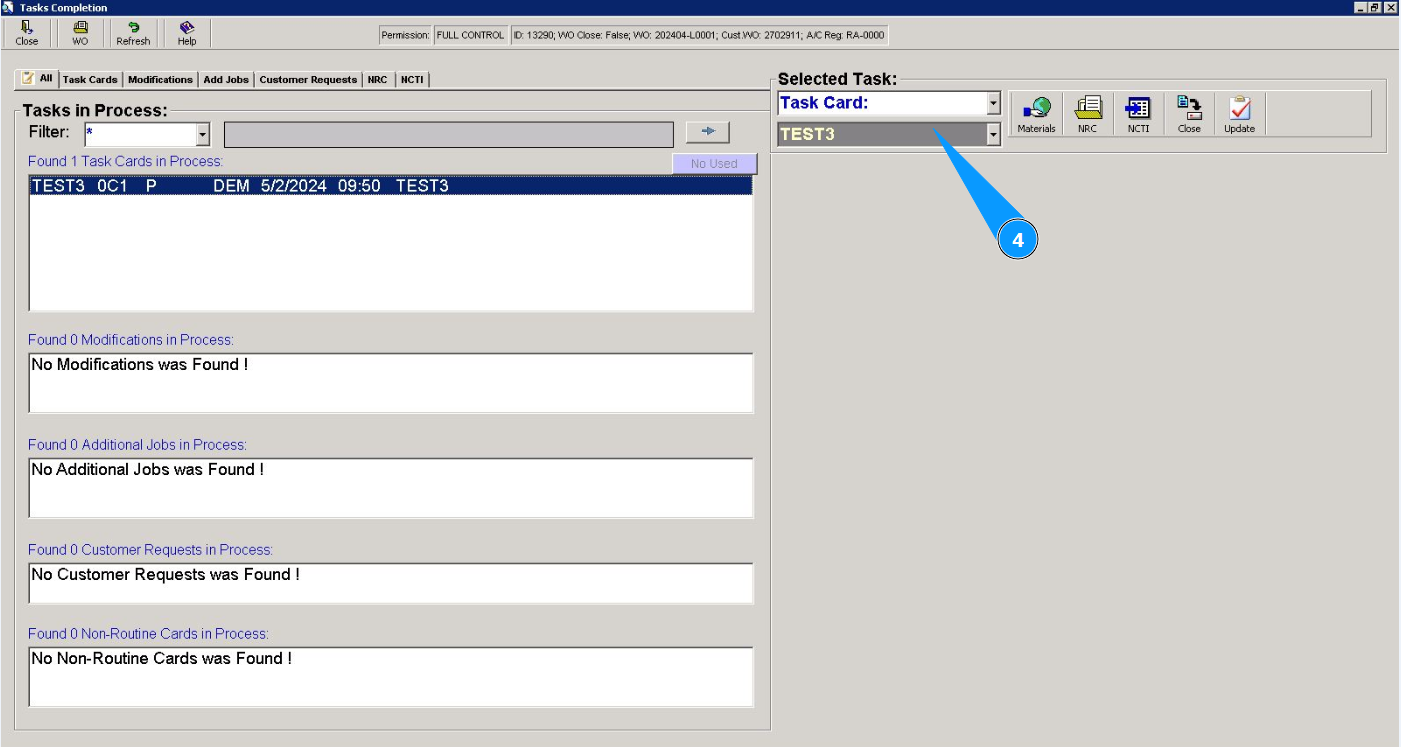
2. Then go to the tab "All".
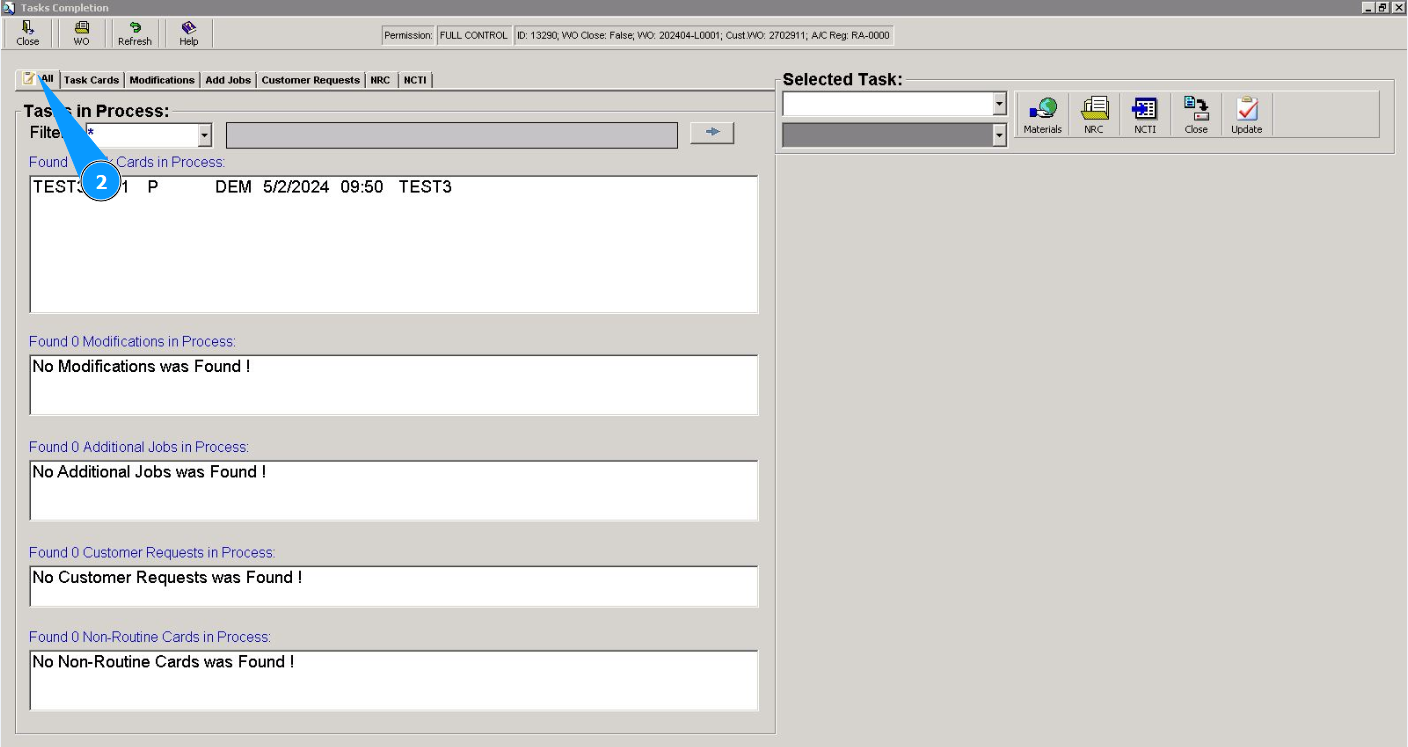
3. Select the required task card from the list and click on the corresponding line in the window "Tasks in Process".
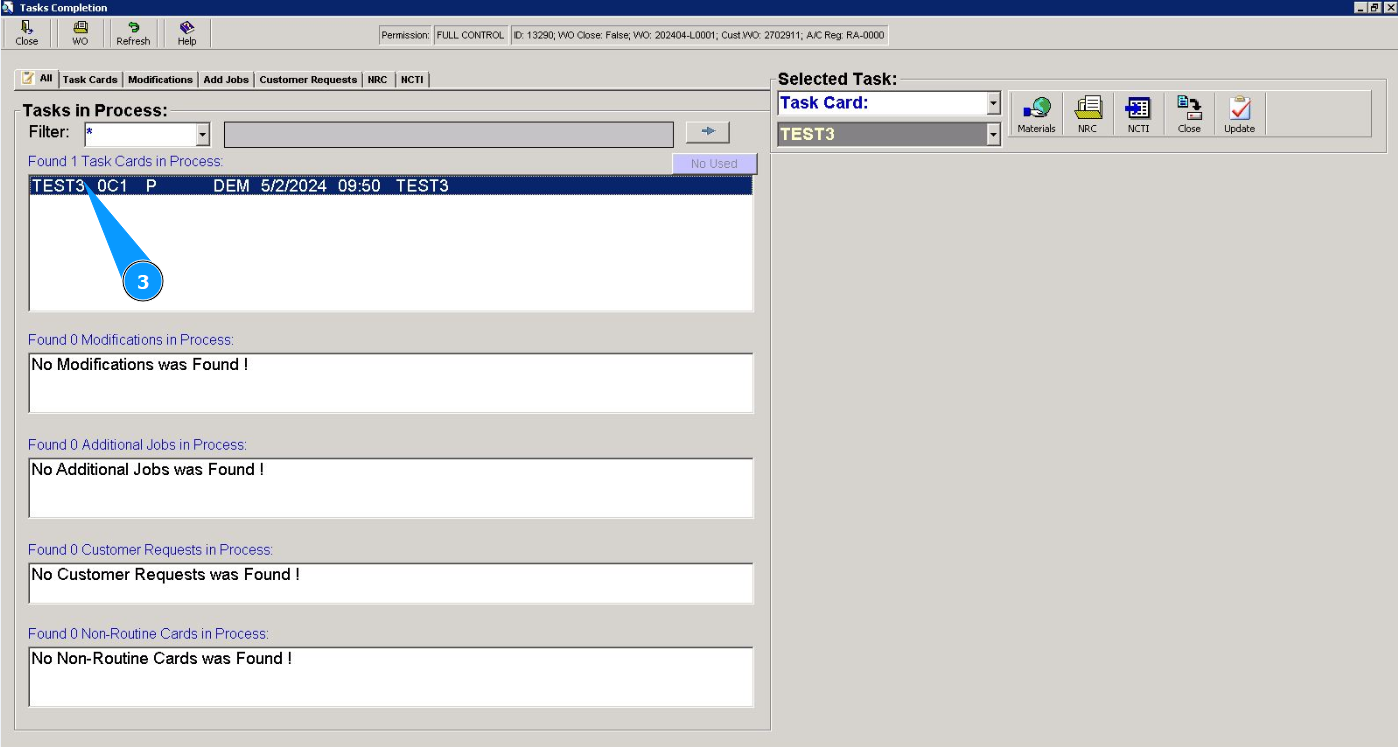
4. Make sure that the number of required task is displayed in the field "Selected Task".
5. Click on the button "NRC", to open NRC editor.

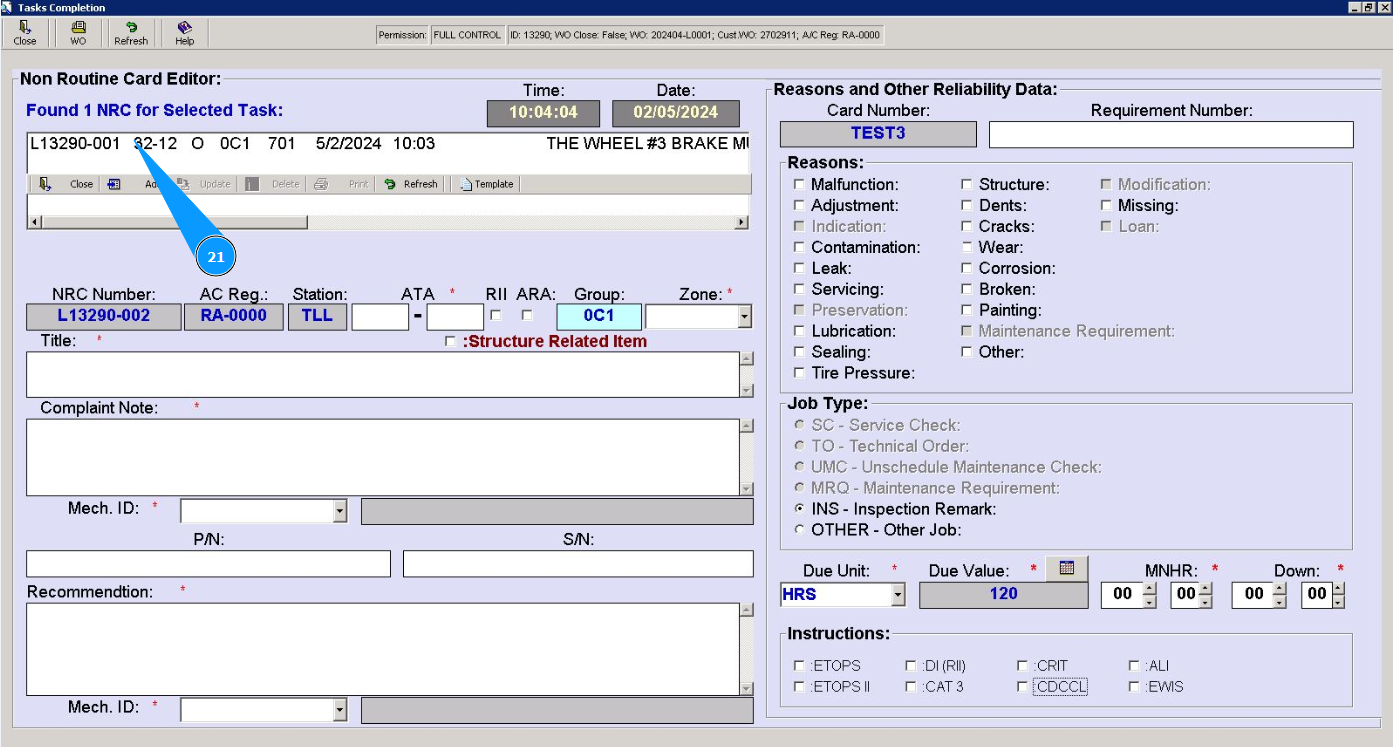
6. Enter number of ATA chapter in the field "ATA". Note: Fields are :"NRC Number", "AC Reg.", "Station" automatically filled in from the selected task.
7. Enter number of ATA section in the field "ATA".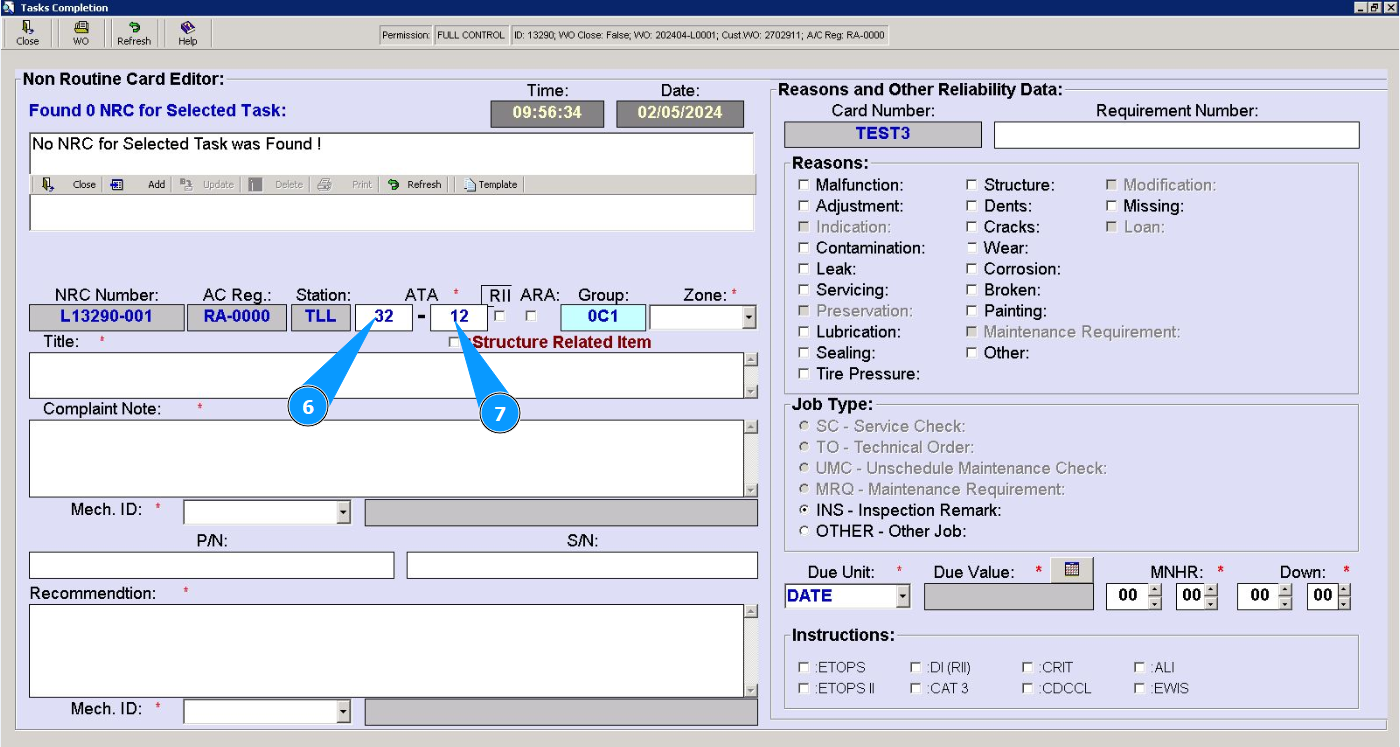
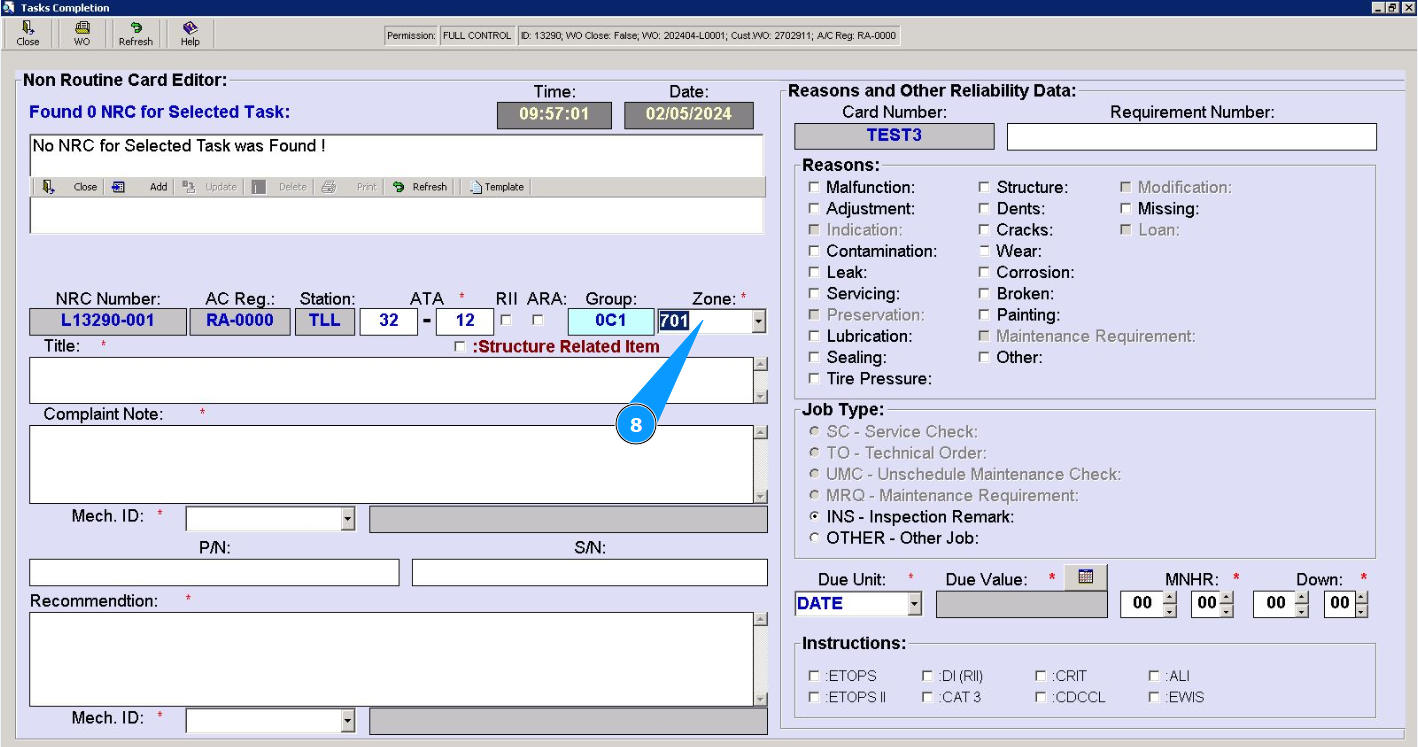
8. Enter number of zone in the field "Zone" or select from dropdown list.
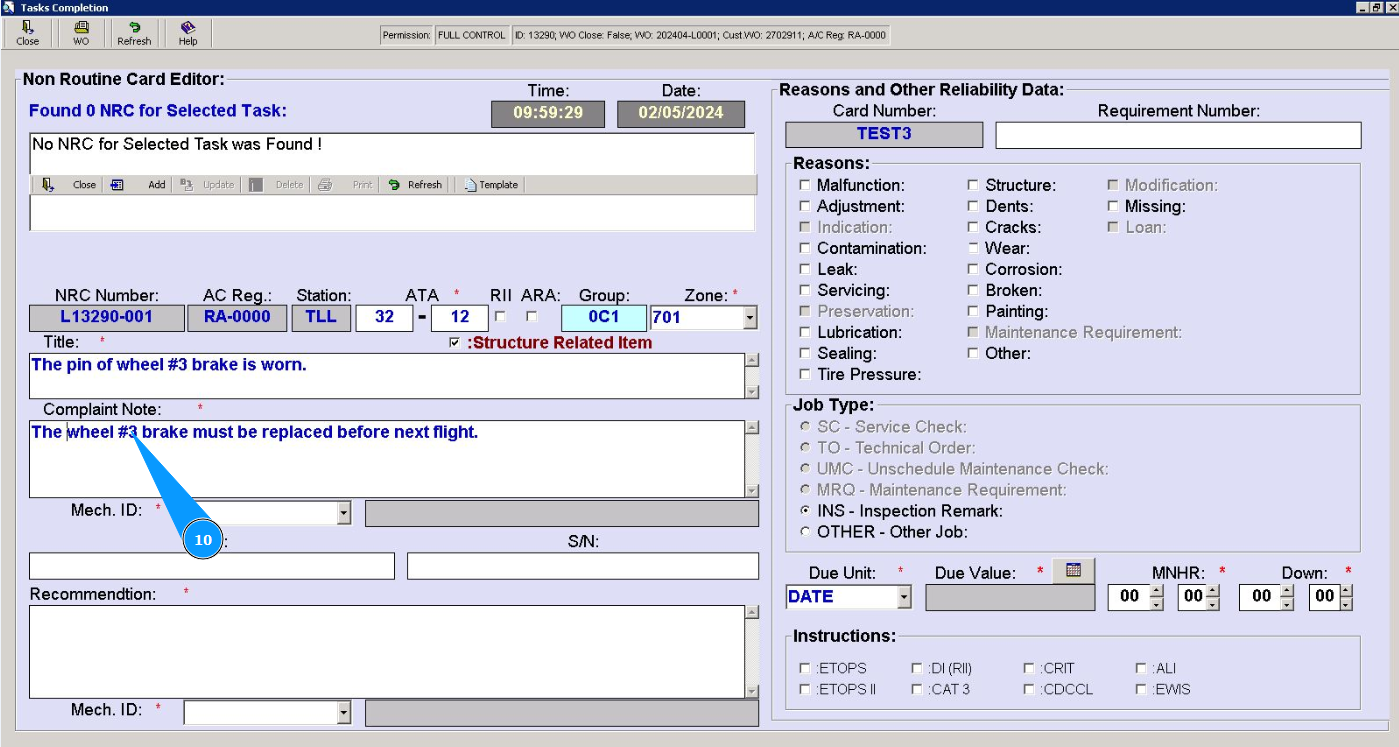
9. Enter NRC name in the field "Title".

10. Enter note for NRC completion in the field "Complaint Note".
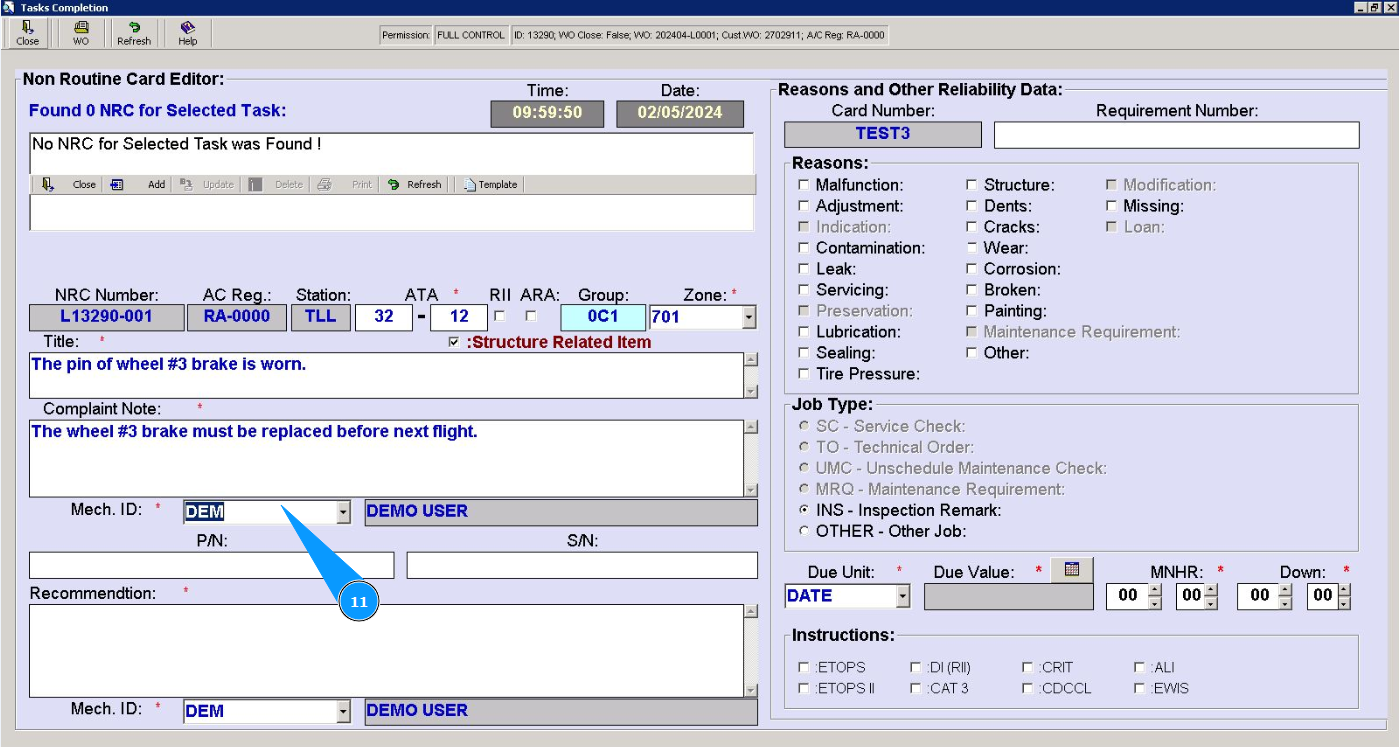
11. Enter your Alaskar login in the field "Mech.ID" or select from dropdown list.
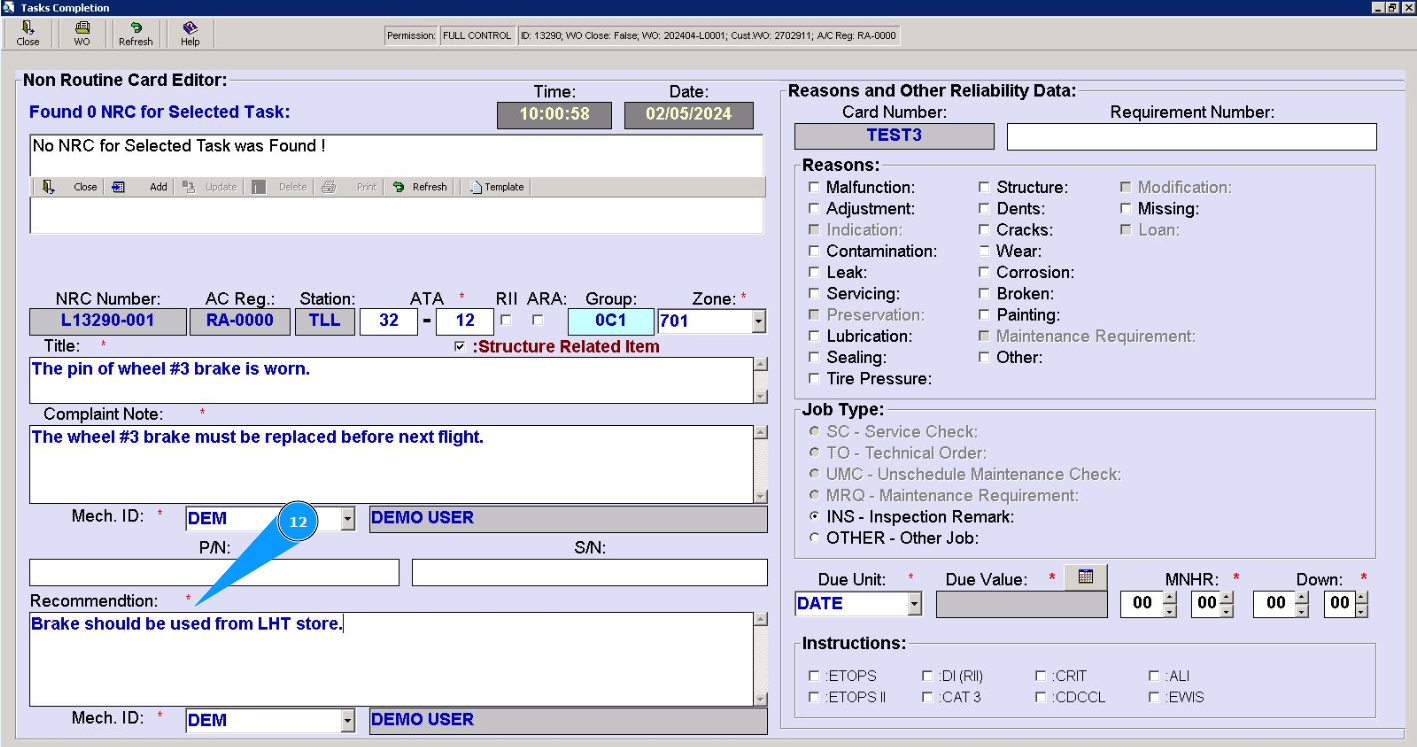
12. Enter recomendation for NRC completion in the field "Recommendation".
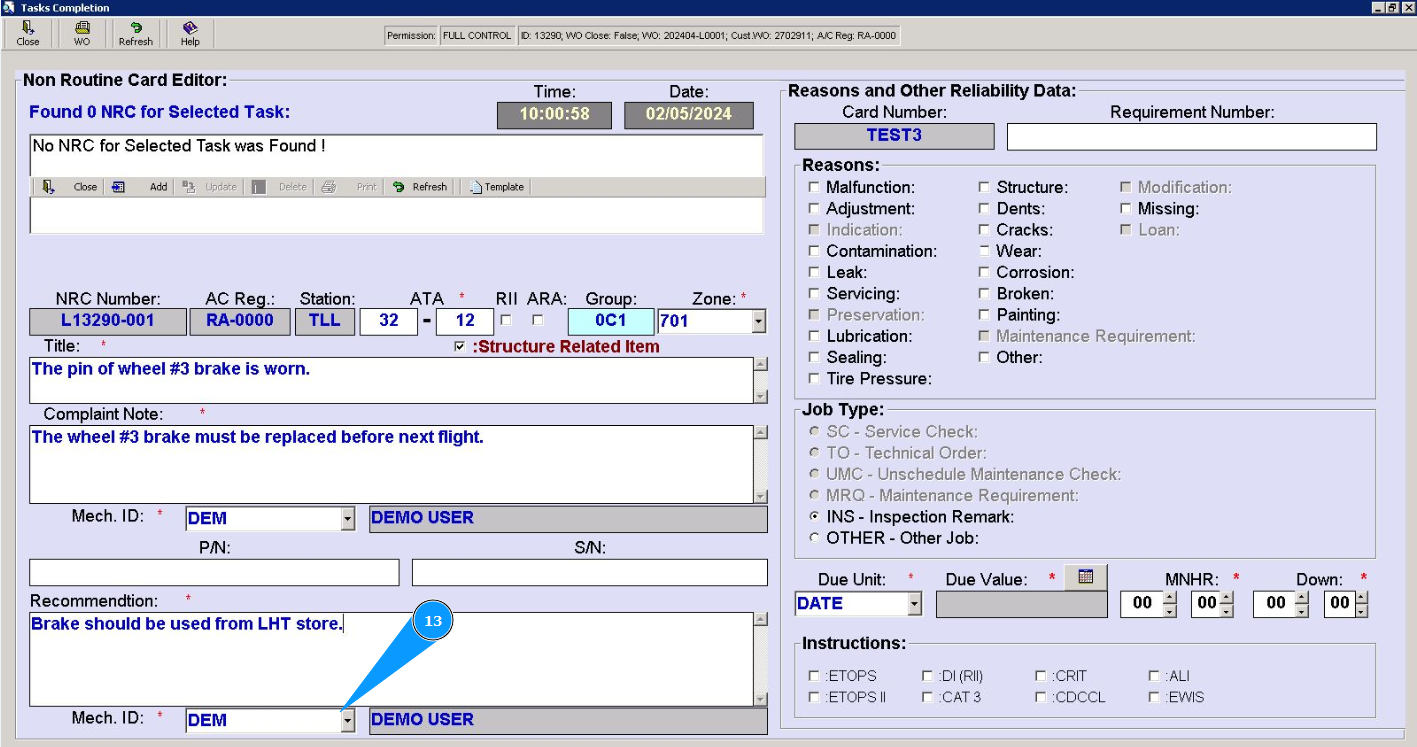
13. Enter your Alaskar login in the field "Mech.ID" or select from dropdown list.
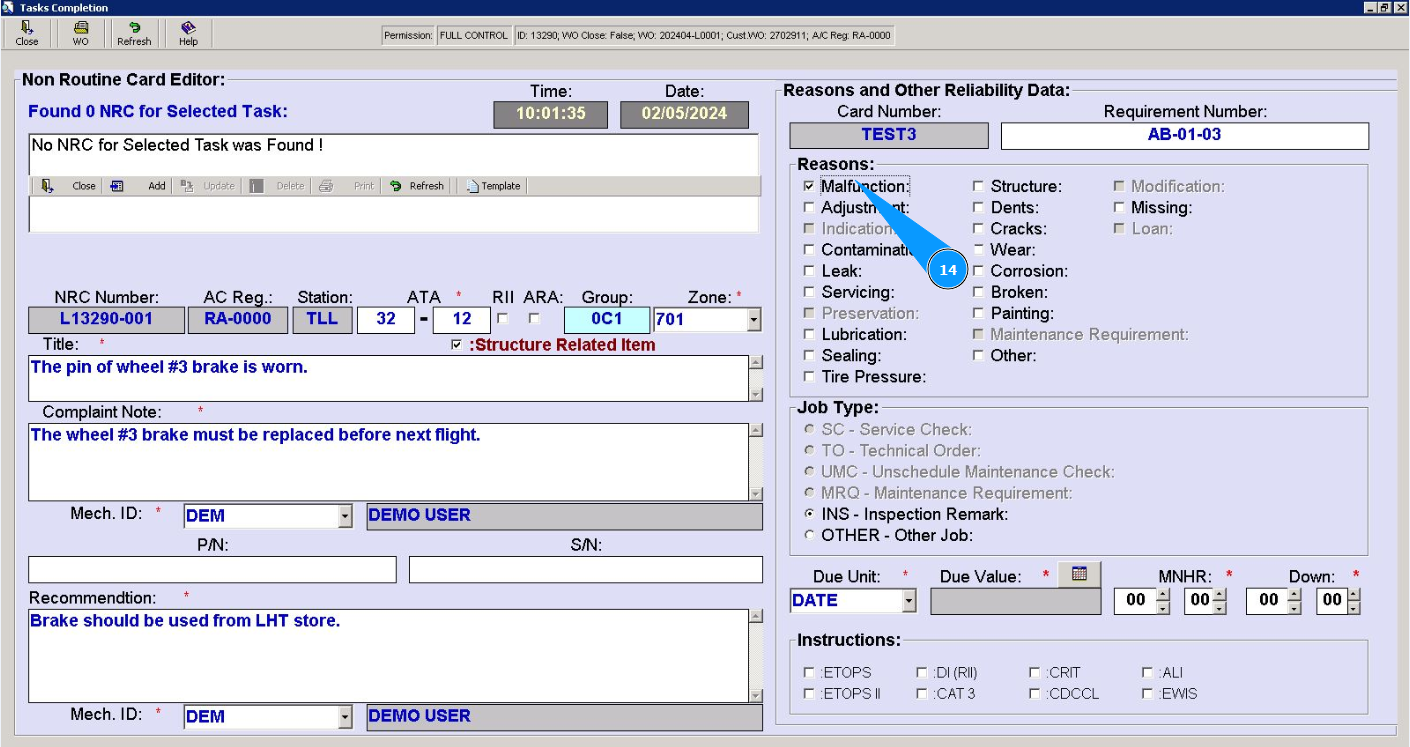
14. Select the reason for the NRC from the list in the field "Reasons".
15. Select from the dropdown list the units of time when you want to perform NRC (date, hours or cycles) in the field "Due Unit".

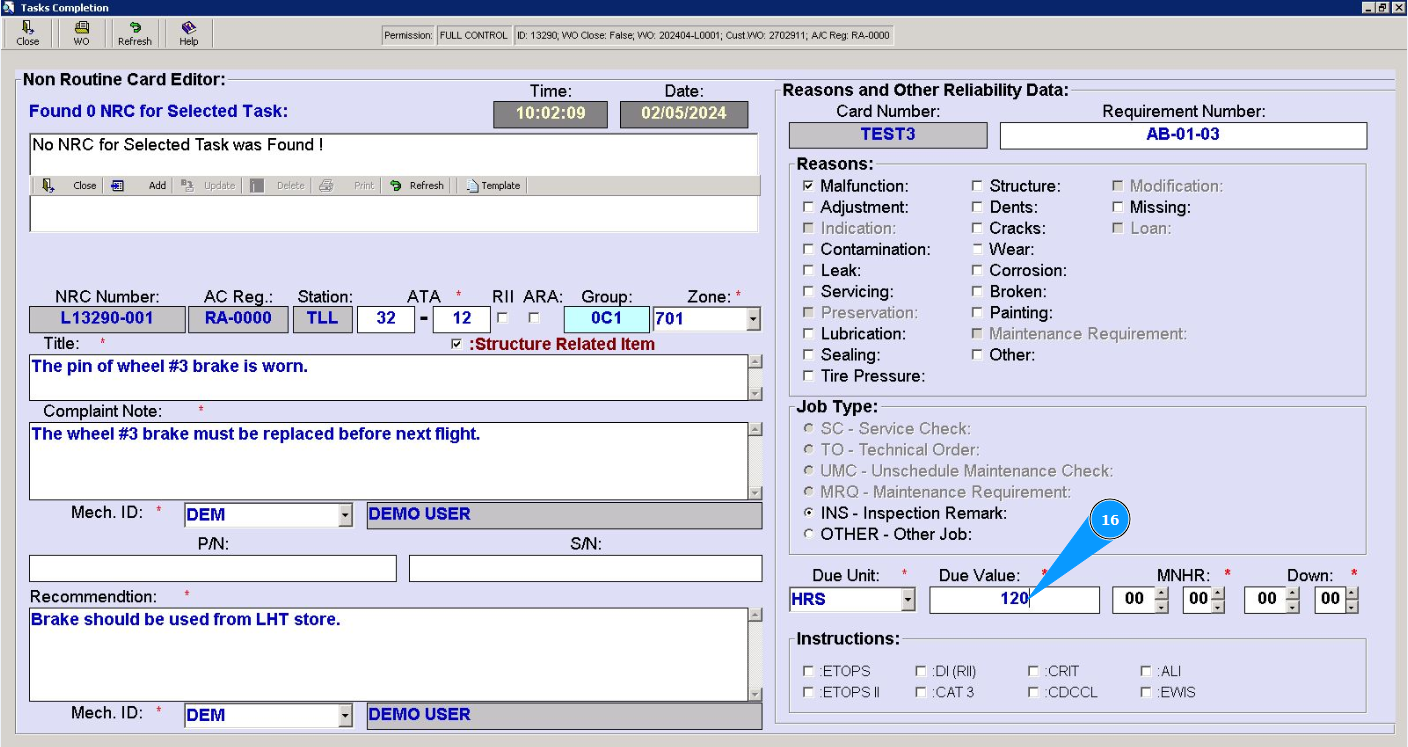
16. Select deadline for NRC completion in the field "Due Value".
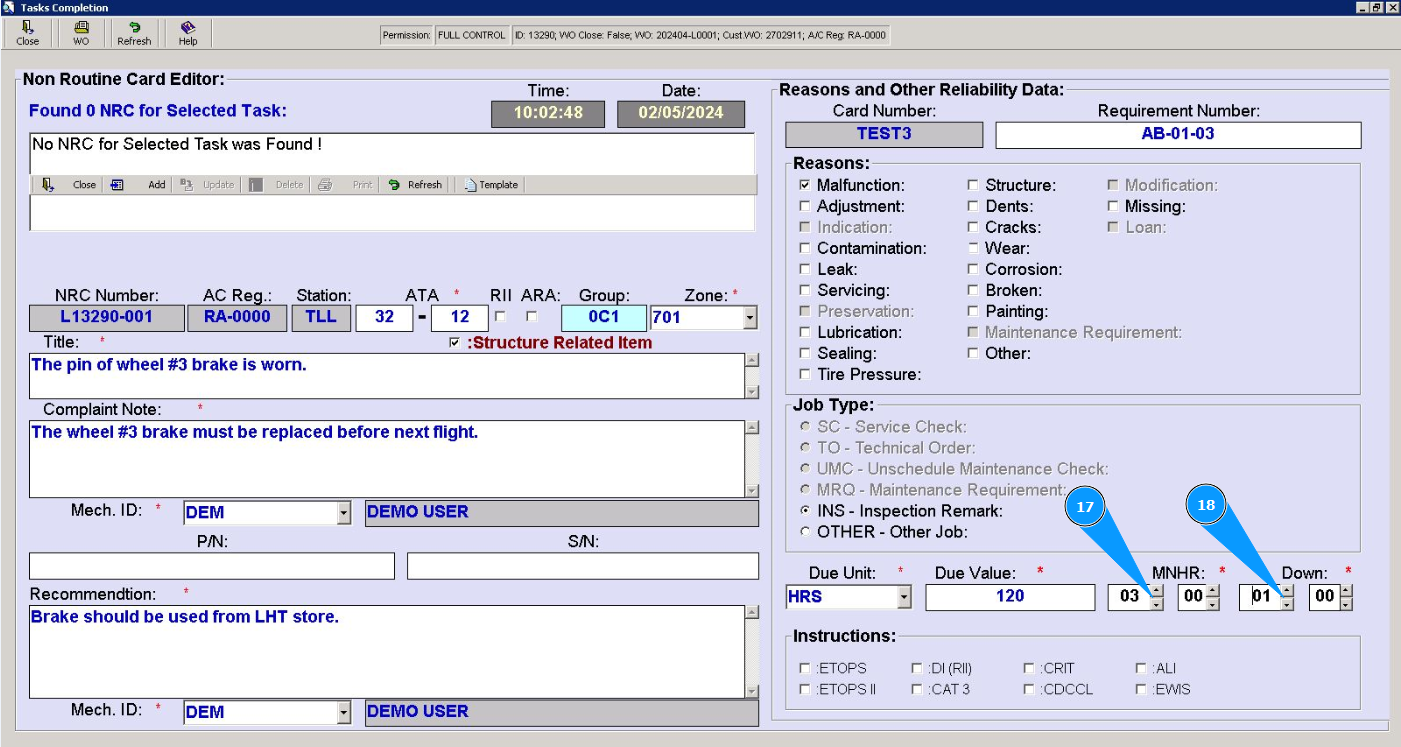
17. Enter required quantity man hours in the field "MHR".
18. Enter required quantity of down time hours in the field "Down".
Note: If necessary enter additional information about NRC in the non-mandatory fields.
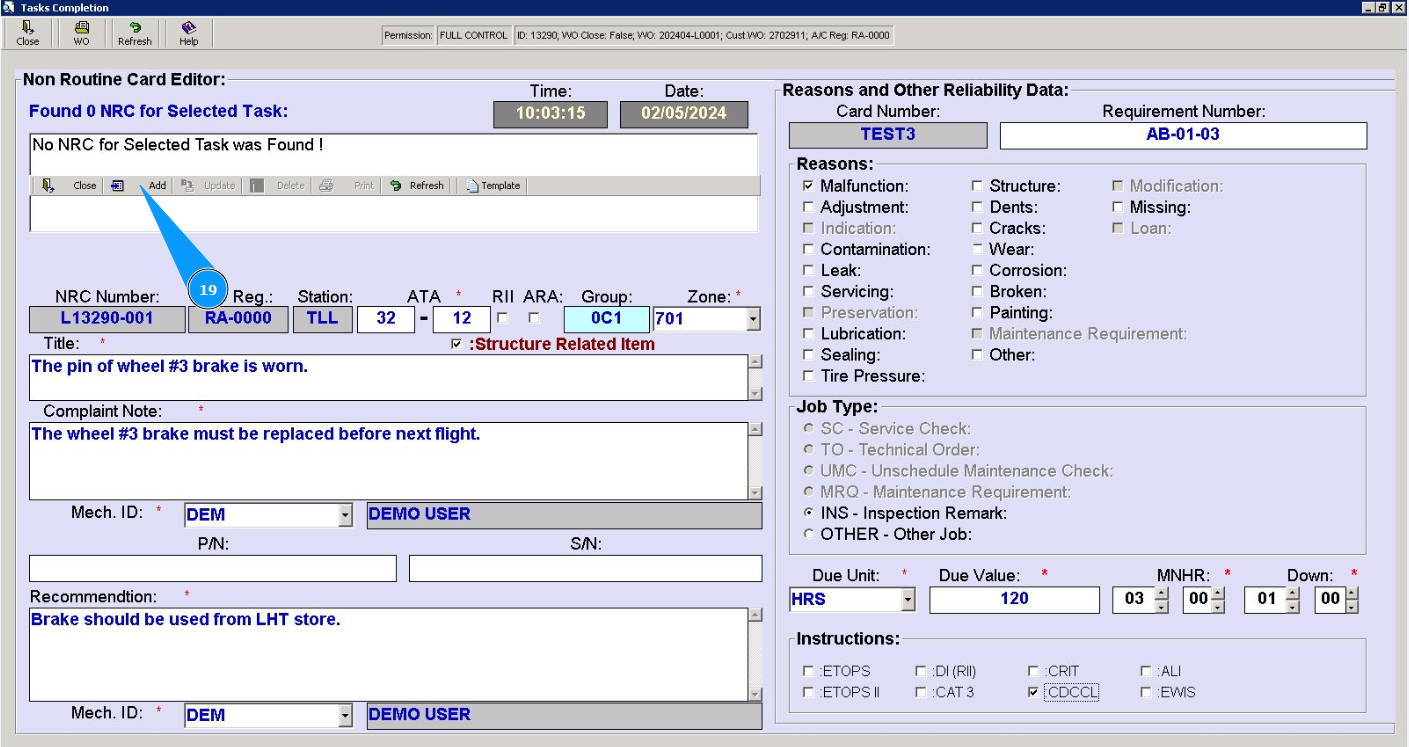
19. Click on the button "Add", to add NRC to the program.
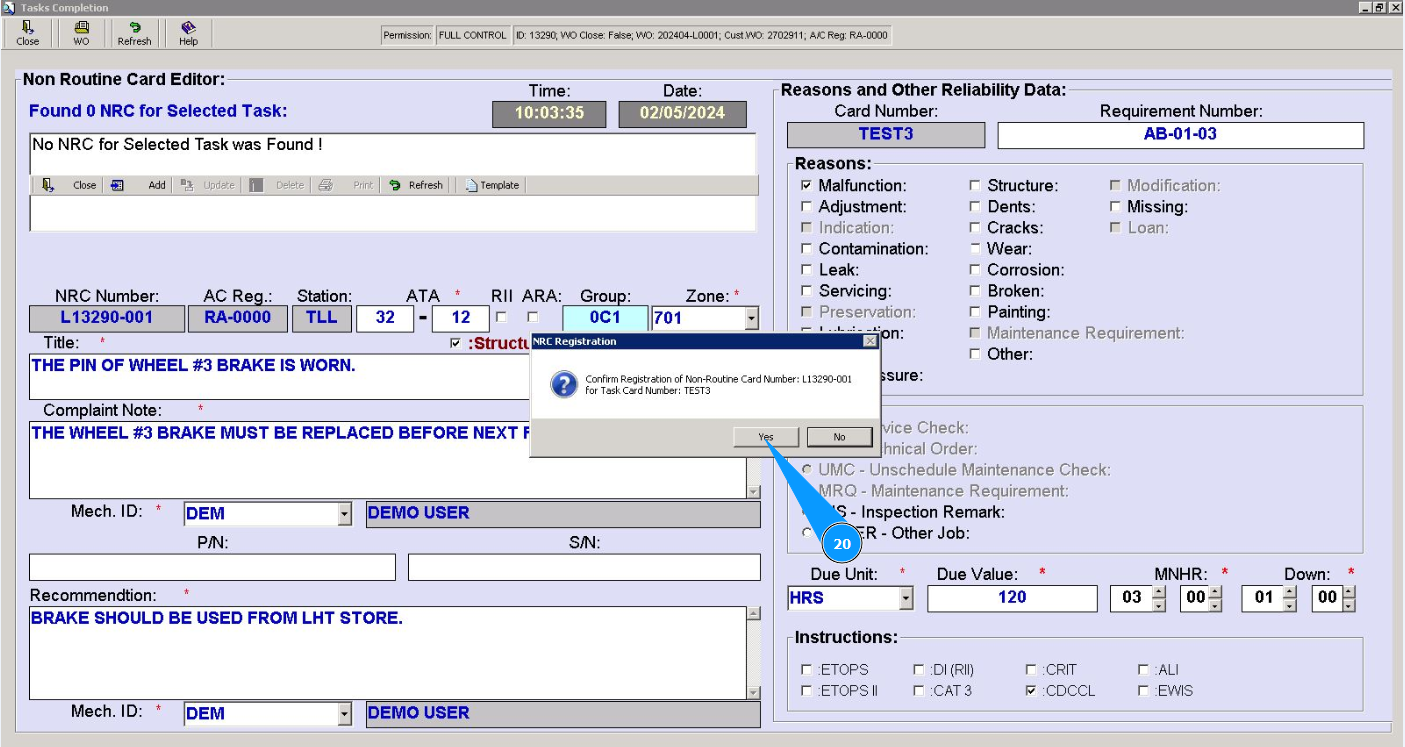
20. Click on the button "Yes", to confirm adding new NRC to program.
21. Check that new NRC record is displayed in the window "NRC for Selected Task".