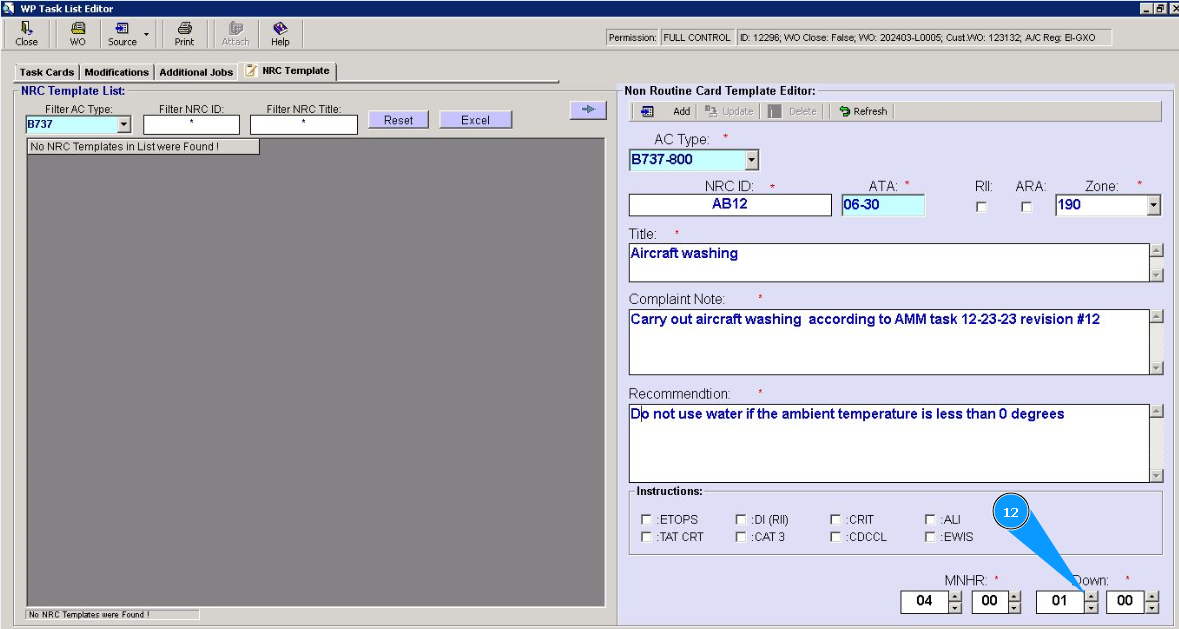
How to create NRC template
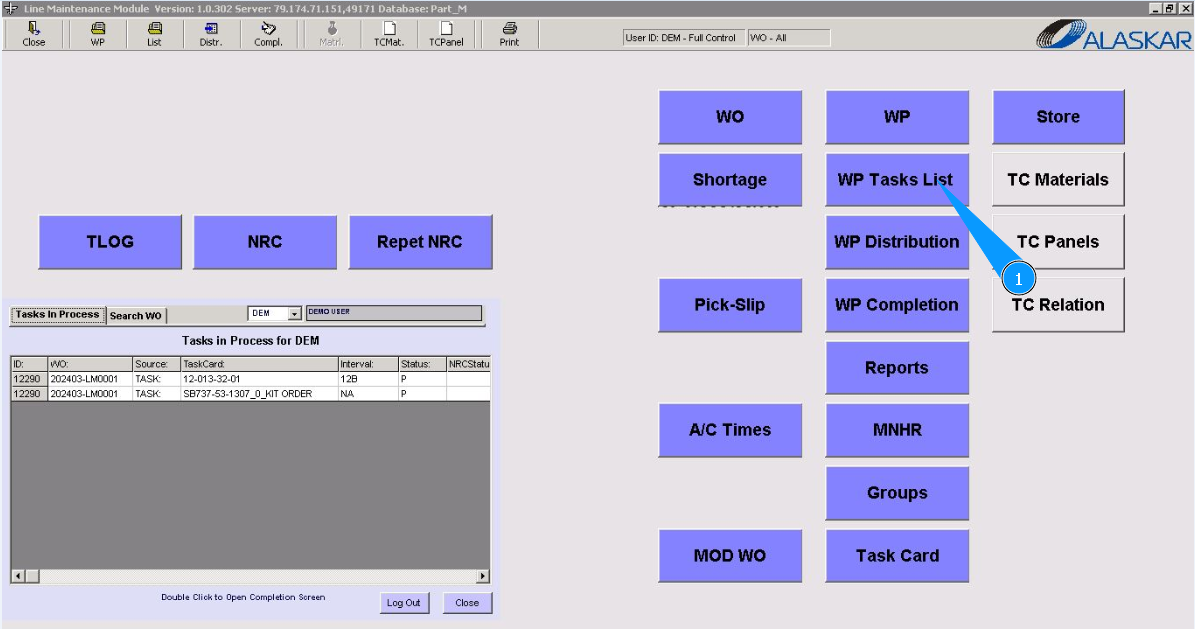
1. To create a NRC template, go to the submodule "WP Task List".
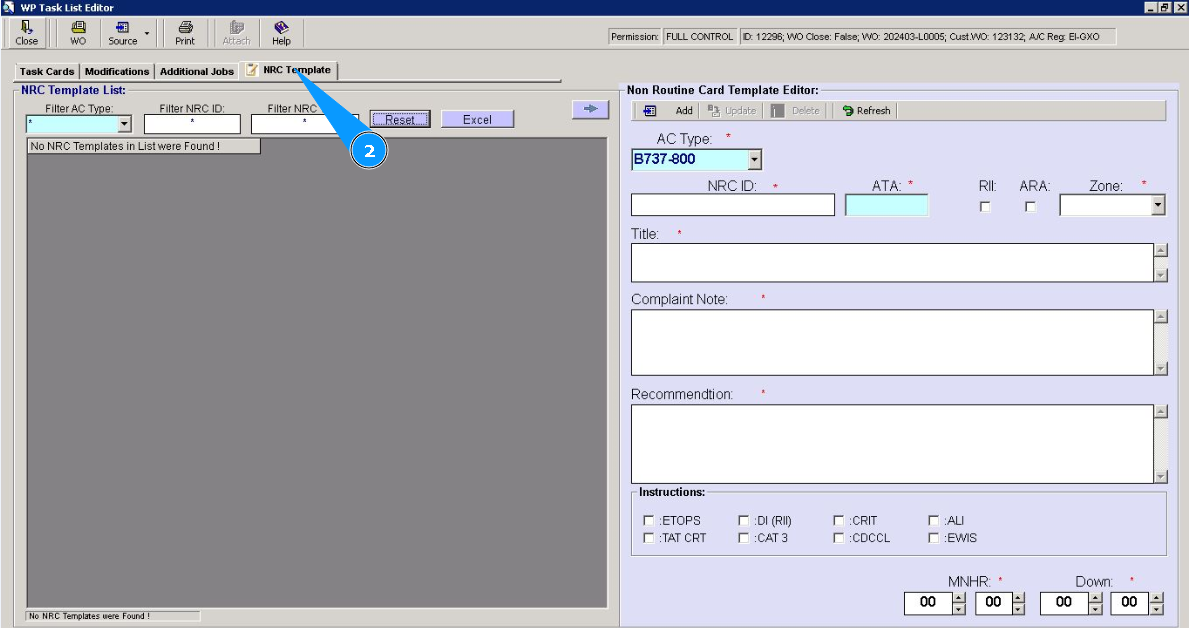
2. Then go to the tab "NRC Template".
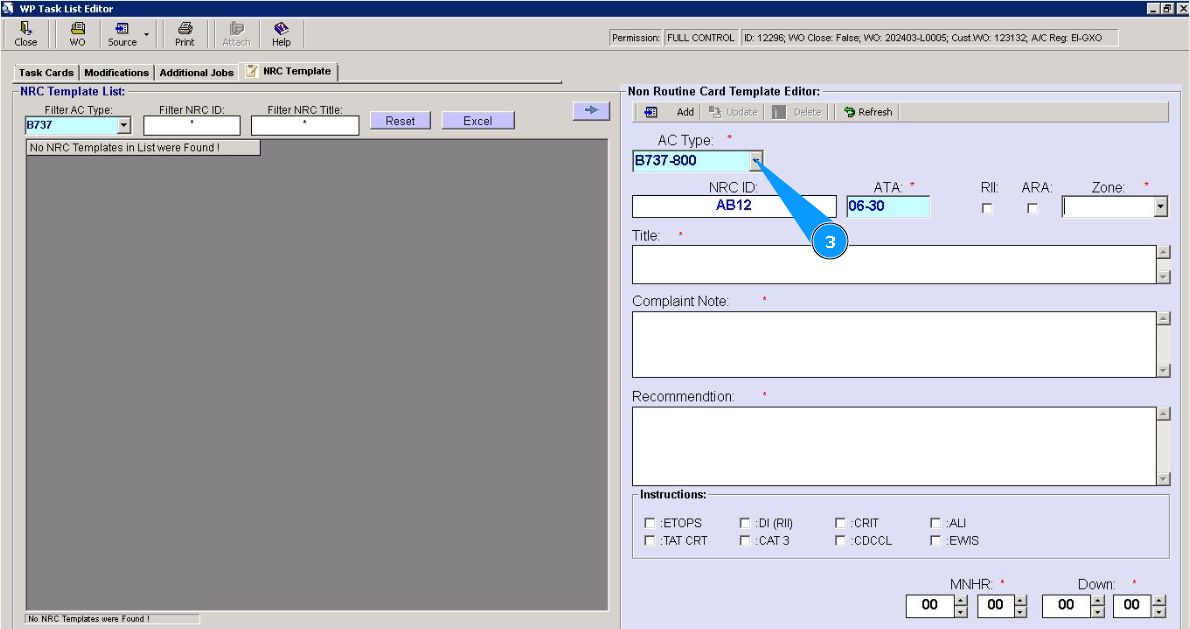
3. Select an aircraft type from the dropdown list in the field "AC Type".
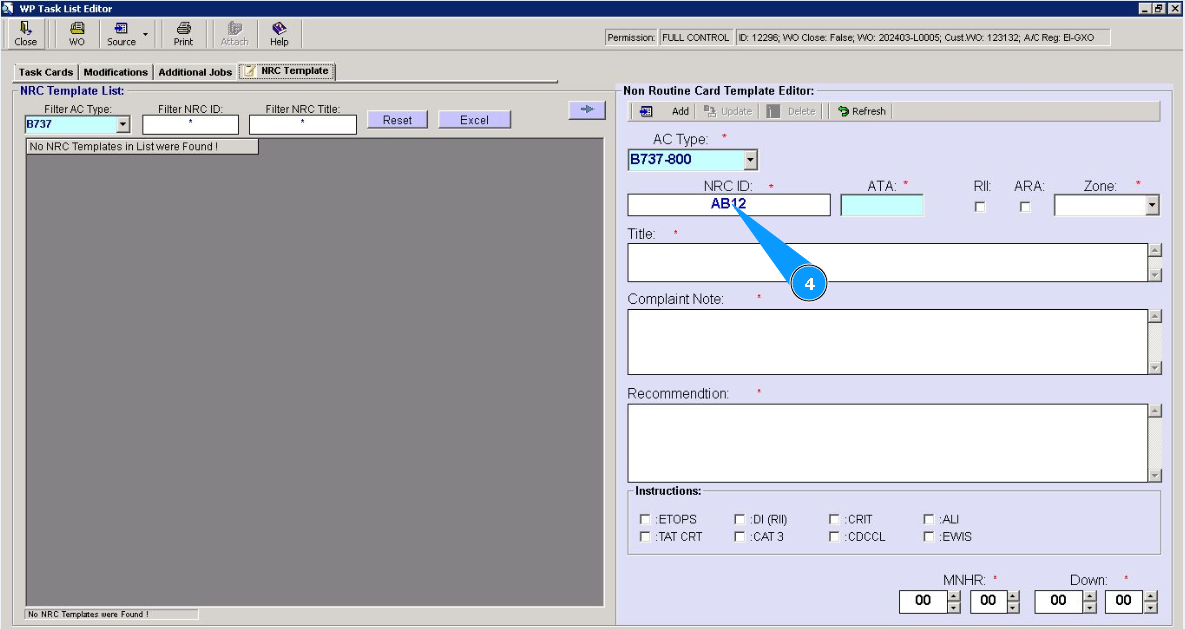
4. Enter the NRC number in the field "NRC ID".
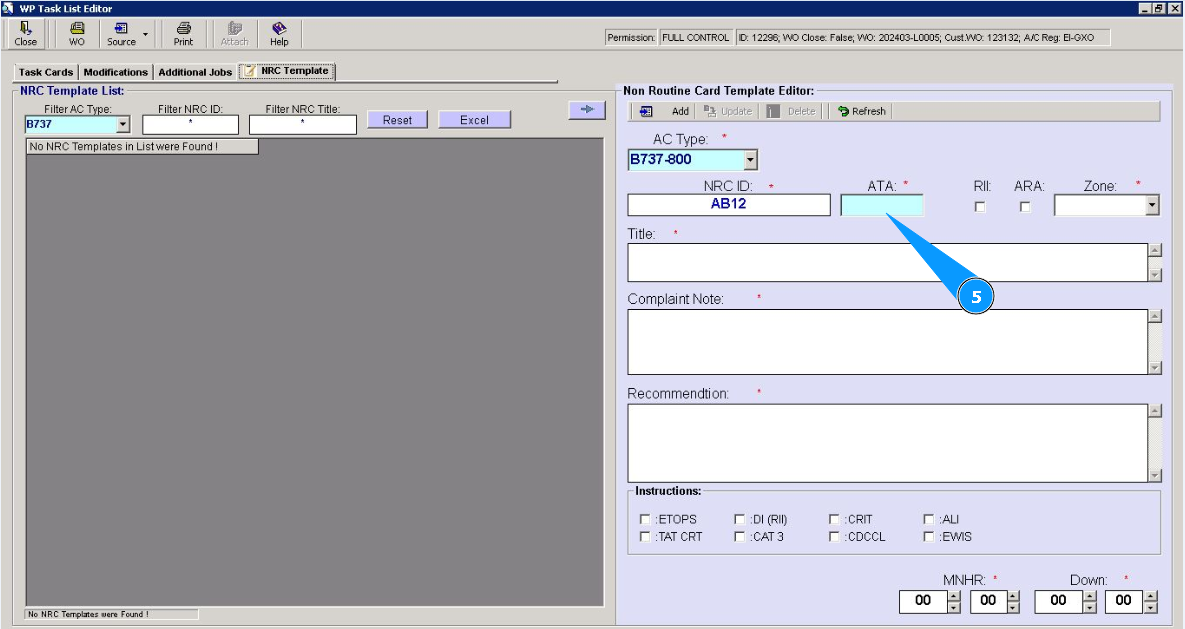
5. Enter an ATA number and click in the field "ATA".
6. From the dropdown list, select required ATA number, and click on the corresponding line. Note: If necessary, enter additional criteria for NRC, click on the windows of fields: "Required Inspection Item", "ARA".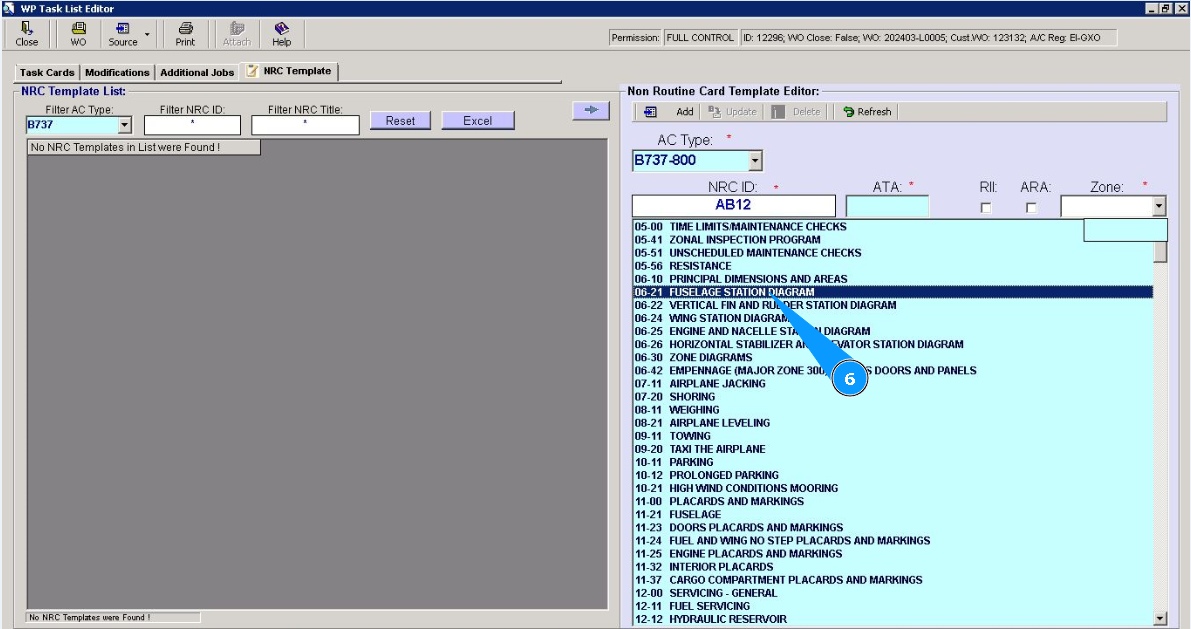
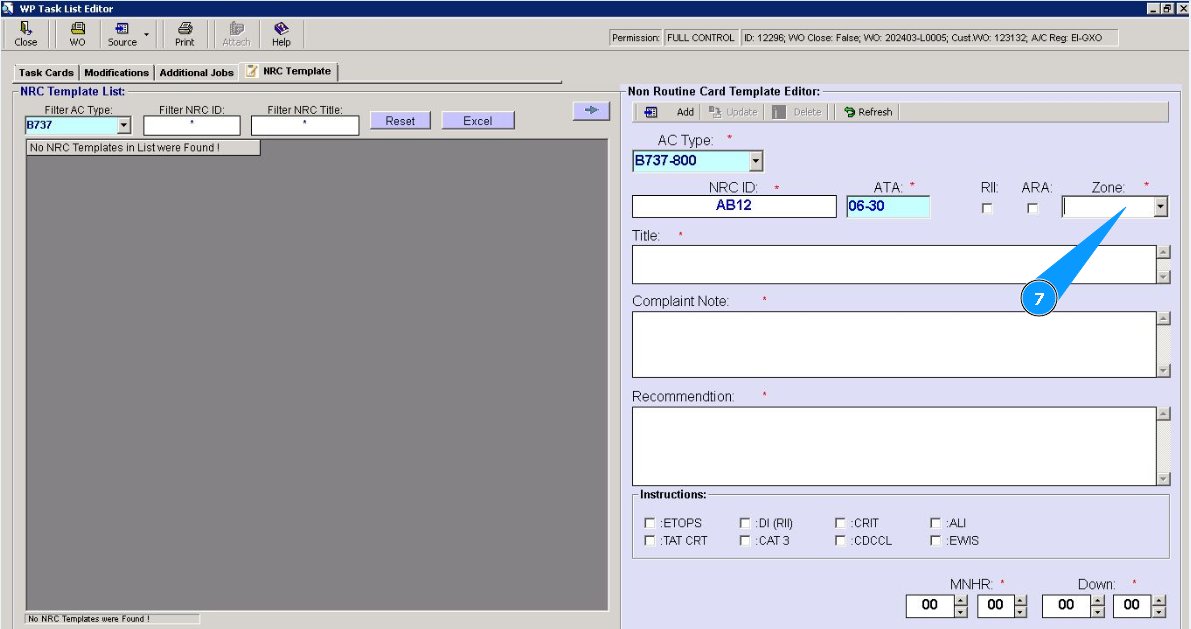
7. Enter the number of zones, or select from the dropdown list in the field "Zone".
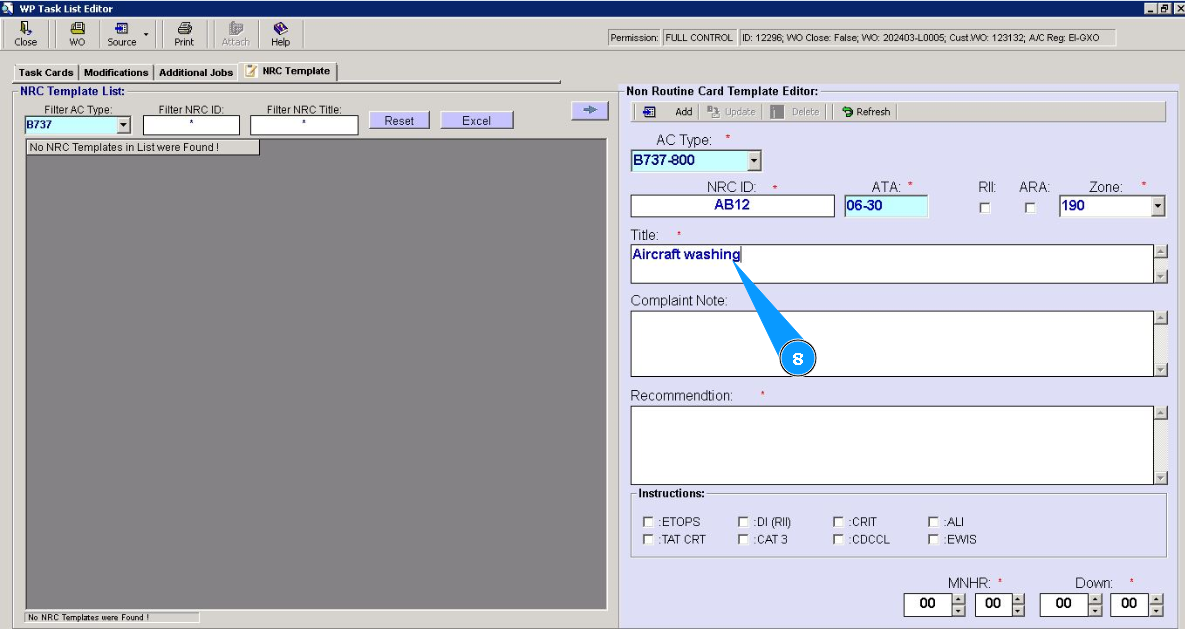
8. Enter the name of the NRC template in the field "Title".
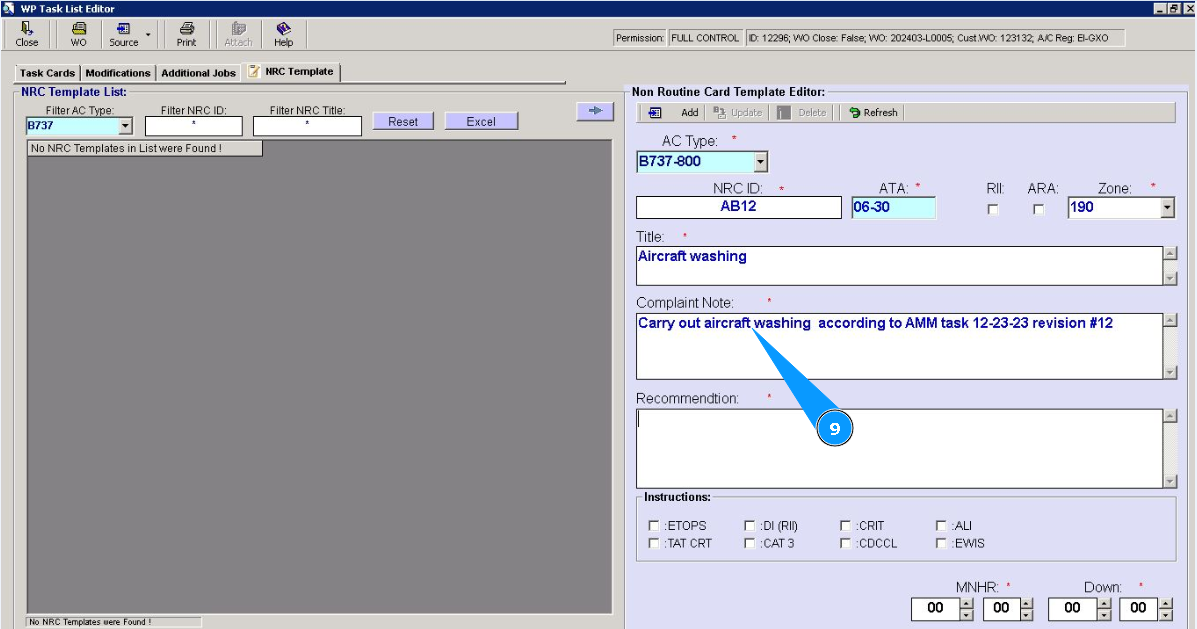
9. Enter the description of the NRC template in the field "Complaint Note".
10. Enter the required recommendations for the NRC template in the field "Recommendation". Note: If necessary, enter additional criteria for the NRC template and use the following fields: "ETOPS", "TAT CRT", "DI(RI)", "CAT 3" etc.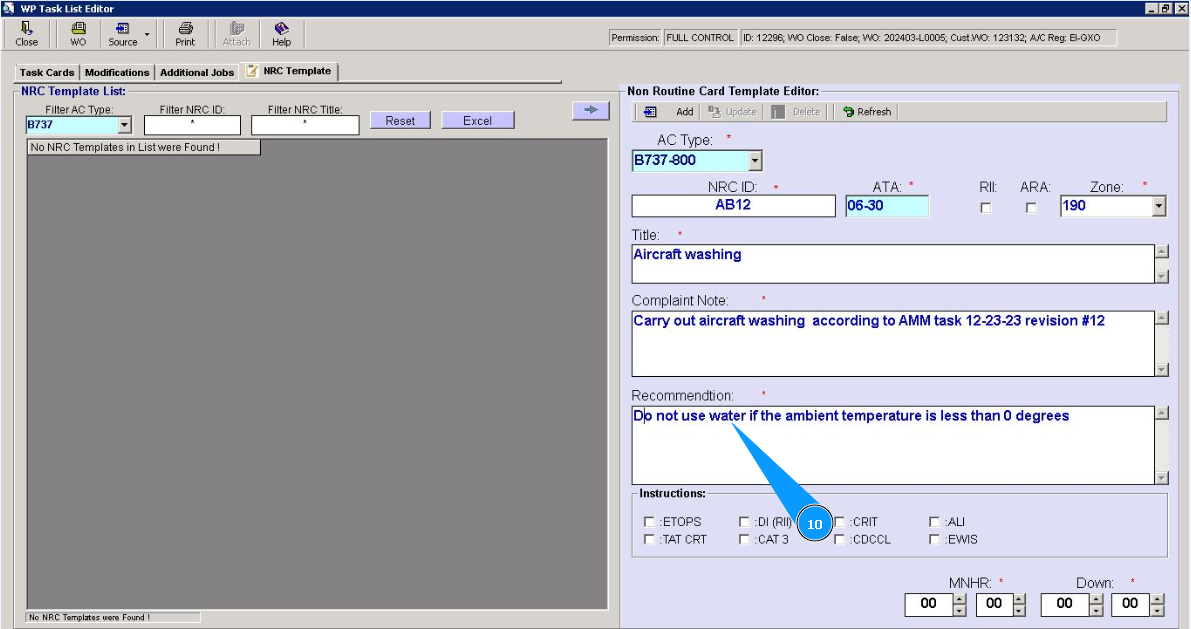
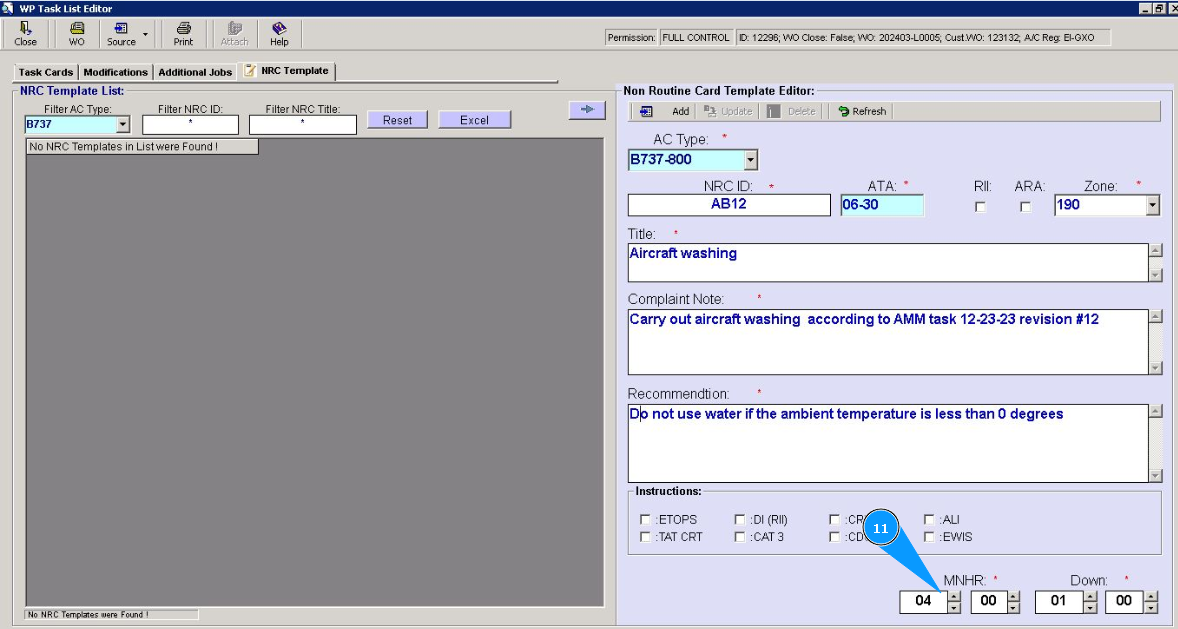
11. Enter the required man-hours quantity in the field "MNHR".
12. Enter the required quantity of aircraft downtime in the field "Down".
13. Click on the button "Add", to add new NRC template.

14. Click on the button "Yes", to confirm adding the new NRC template to the program.

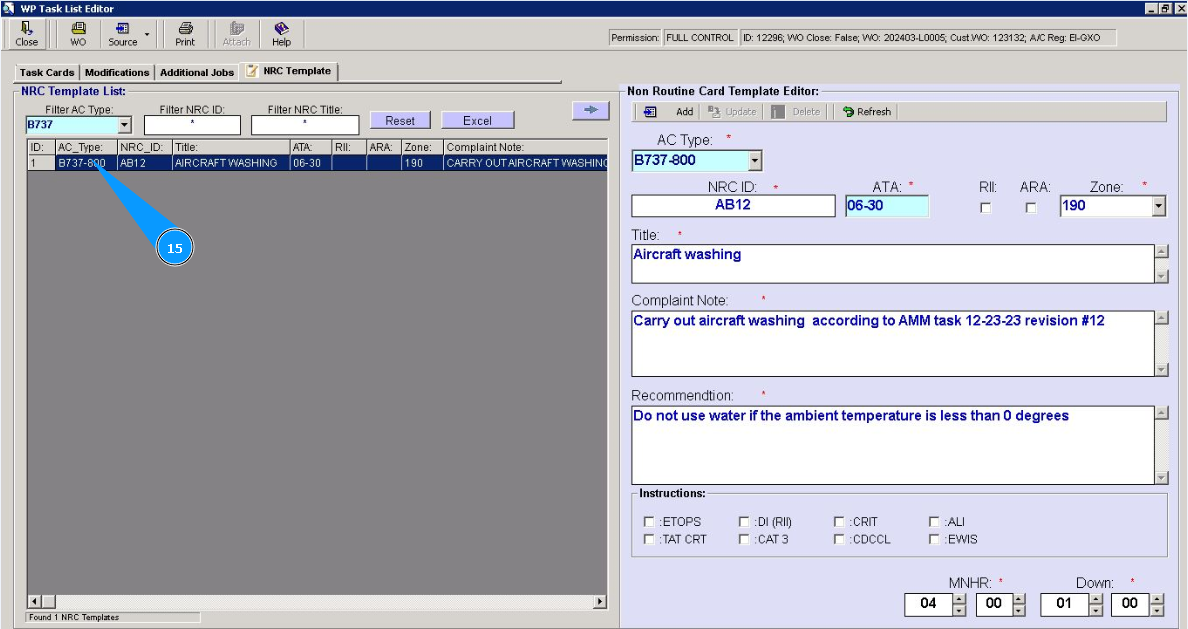
15. Check that a new record with a new template is displayed in the window "NRC Template List". Note: If necessary, use the available filters to quickly find your template in the list. There are fields: "Filter AC Type", "Filter NRC ID", "Filter NRC Title".