How to issue an EASA Form one certificate
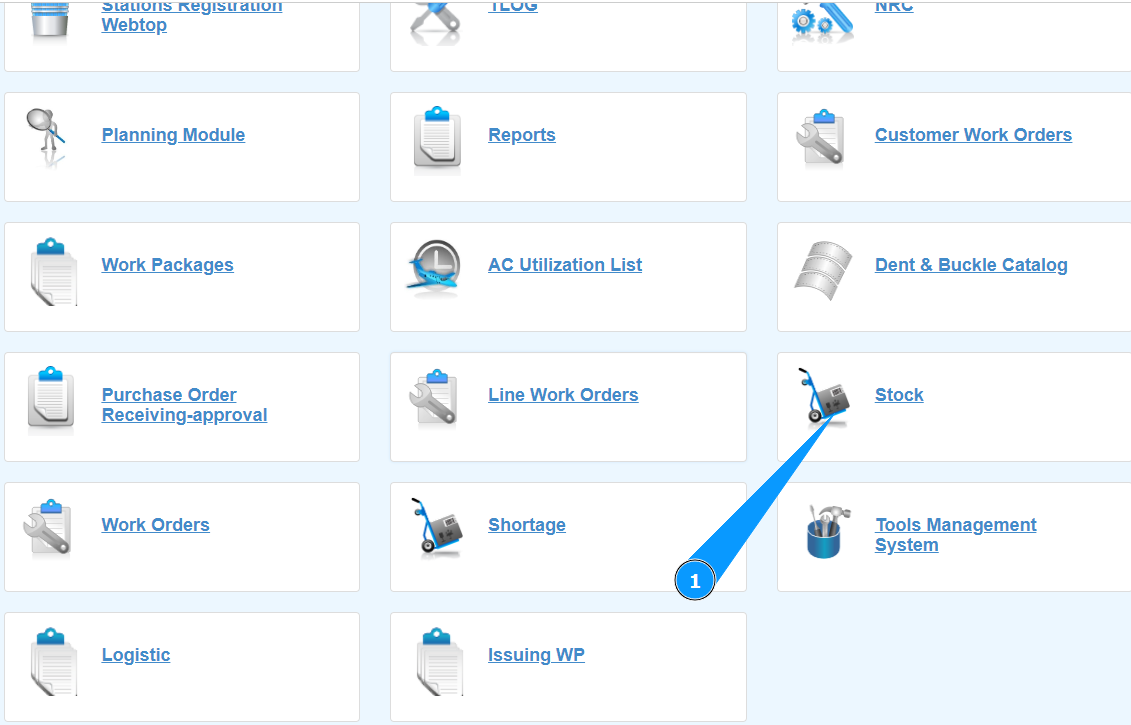
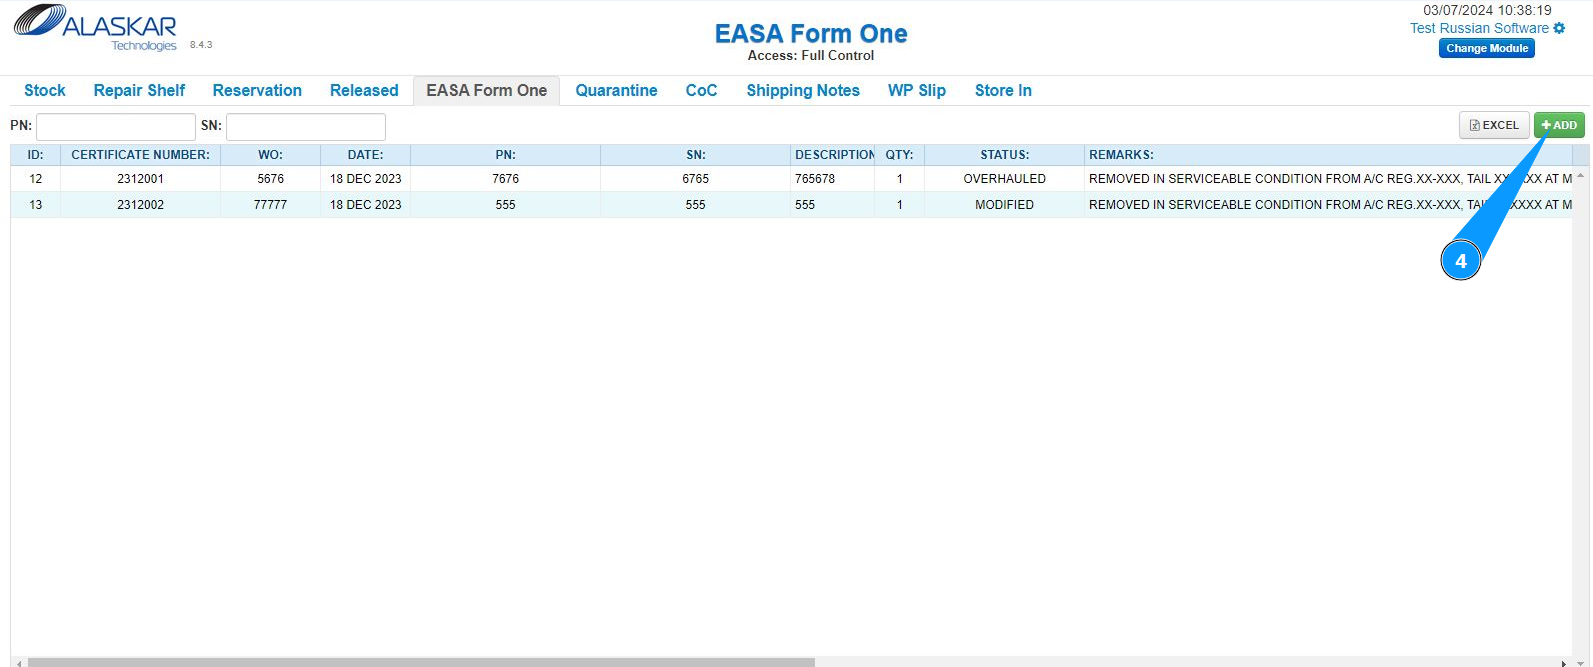
1. In order to issue an EASA Form one certificate, go to the submodule "Stock".
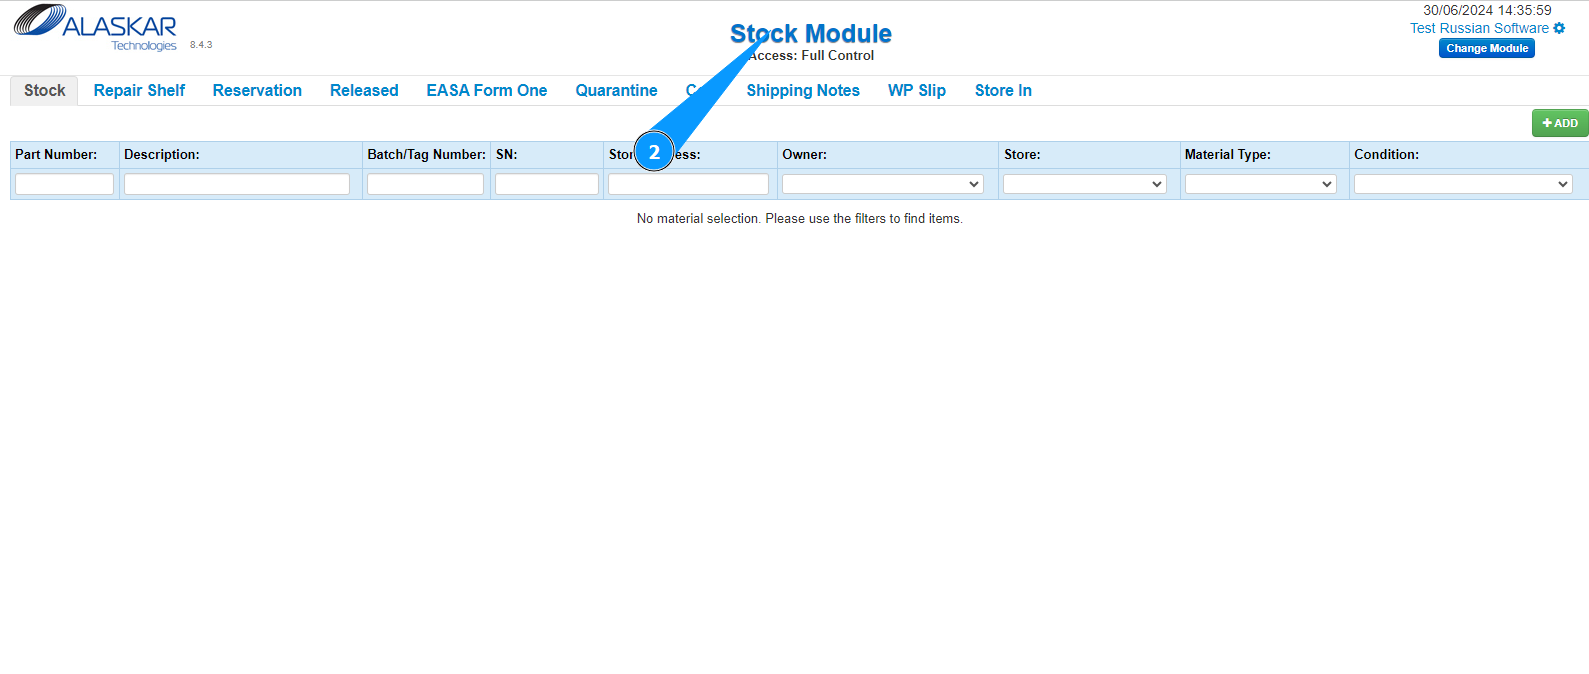
2. Make sure that the window for working with the warehouse has opened and is available in the window "Stock Module".
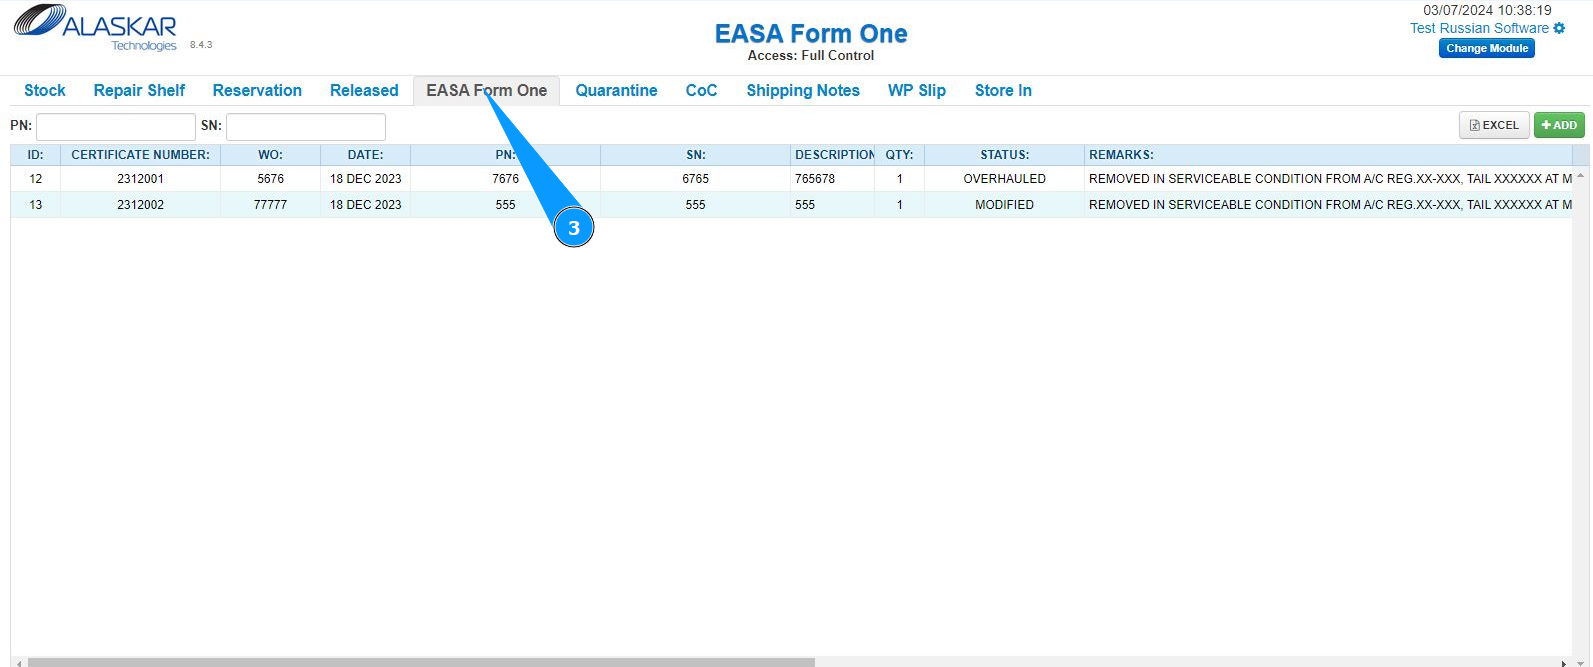
3. Then go to the tab "EASA Form one".
4. Click on the button "Add" to open the certificate creation editor.
5. Make sure that the editor for creating EASA Form one has opened and is available in the window "Add new record".
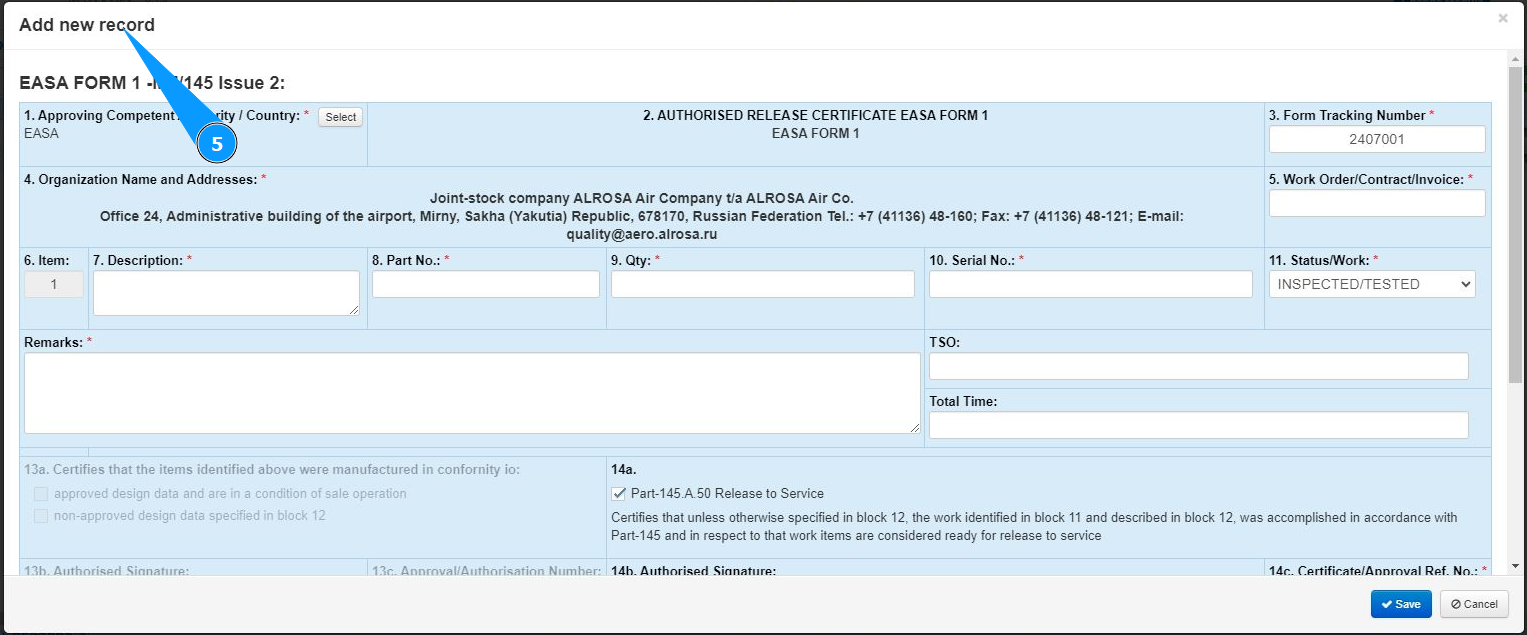
6. Select the aviation authorities and click on the button "Select". Note: The certificate number will be entered automatically in the field "Form Tracking Number".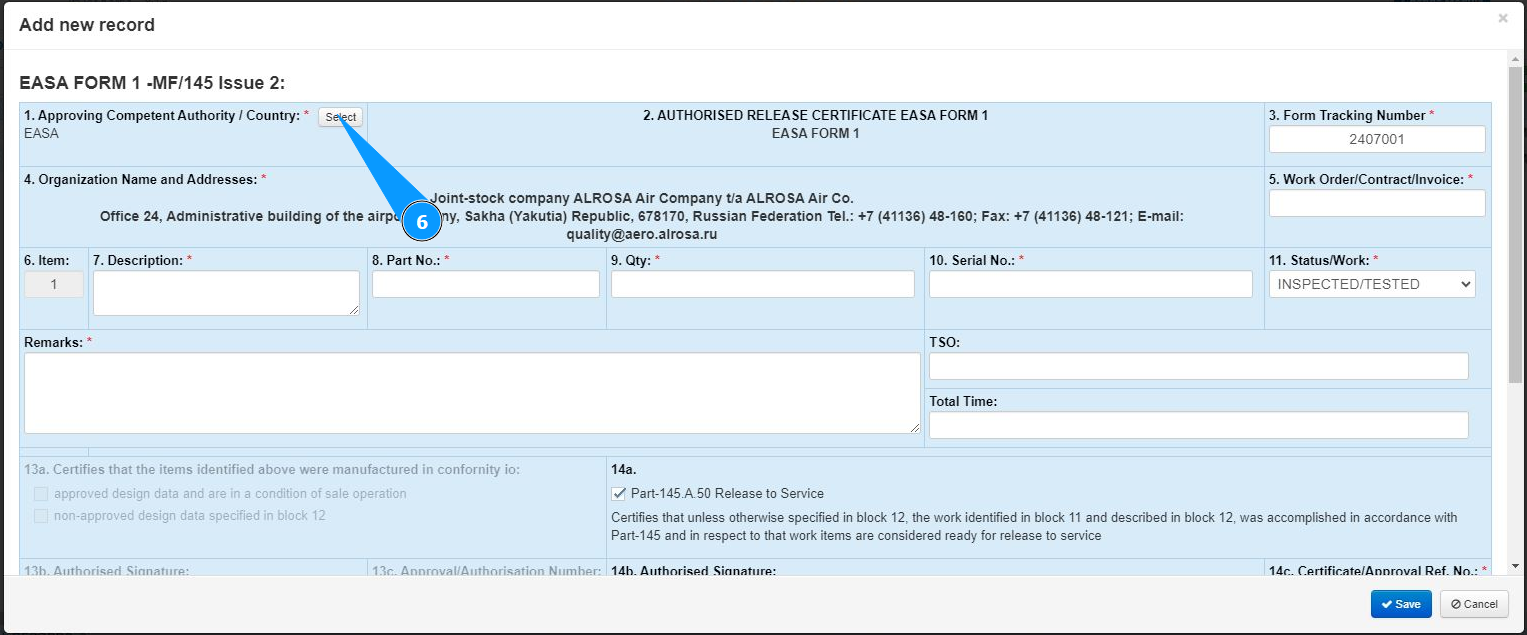
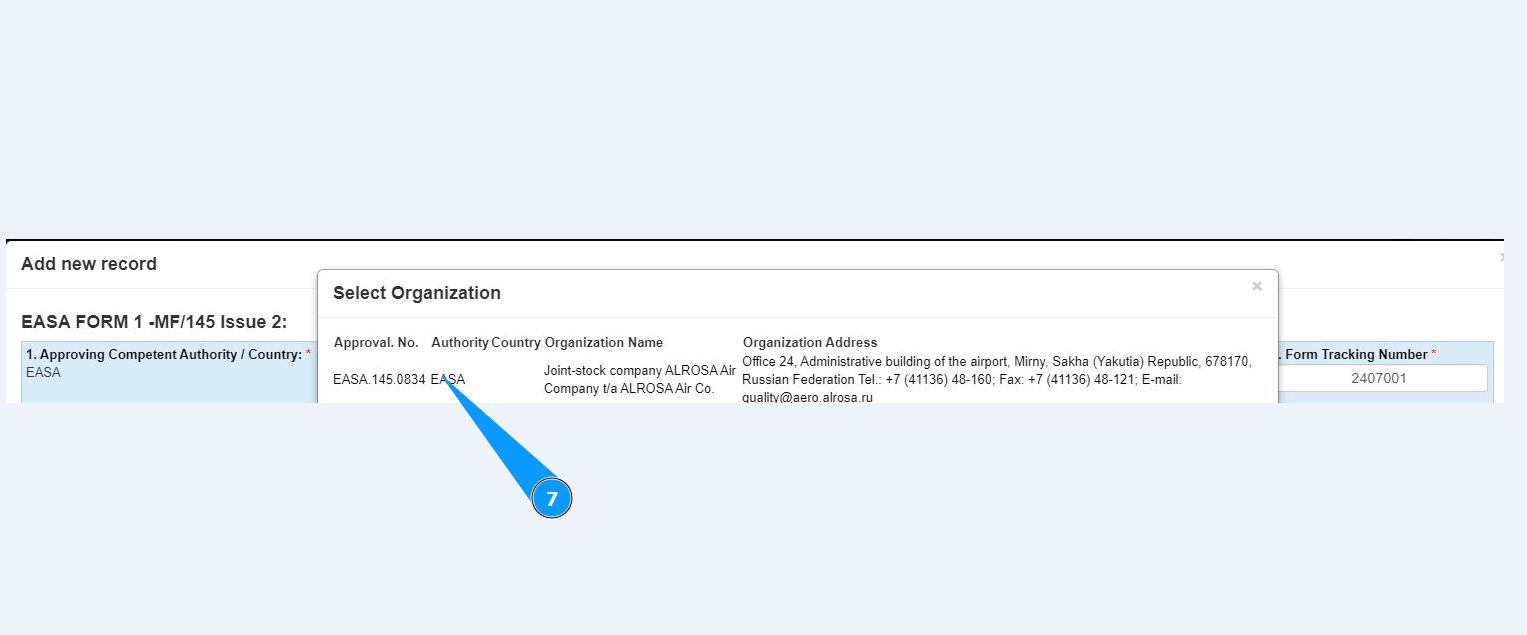
7. Select from the list of the aviation authorities required to be included in the certificate and click on the appropriate line.
8. Enter the part number of the component in the field "PN No.". Note: The certificate number will be entered automatically in the field "Form Tracking Number".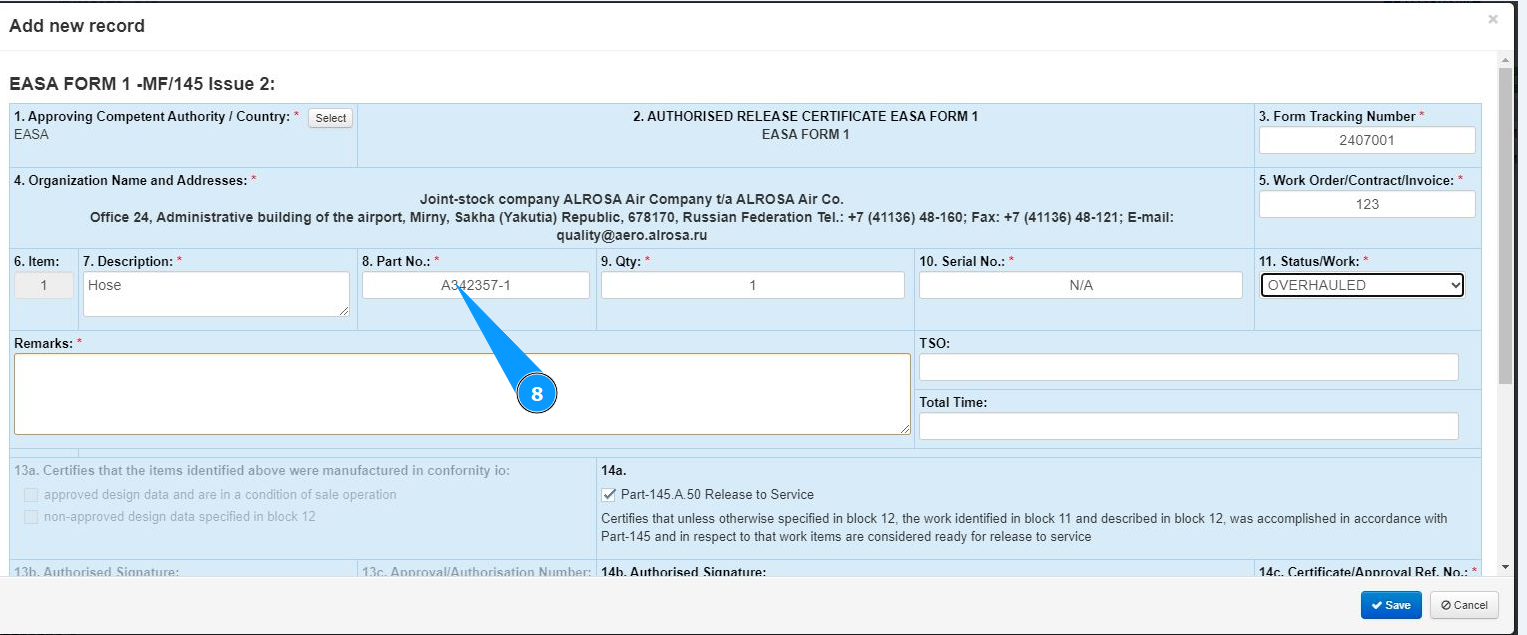
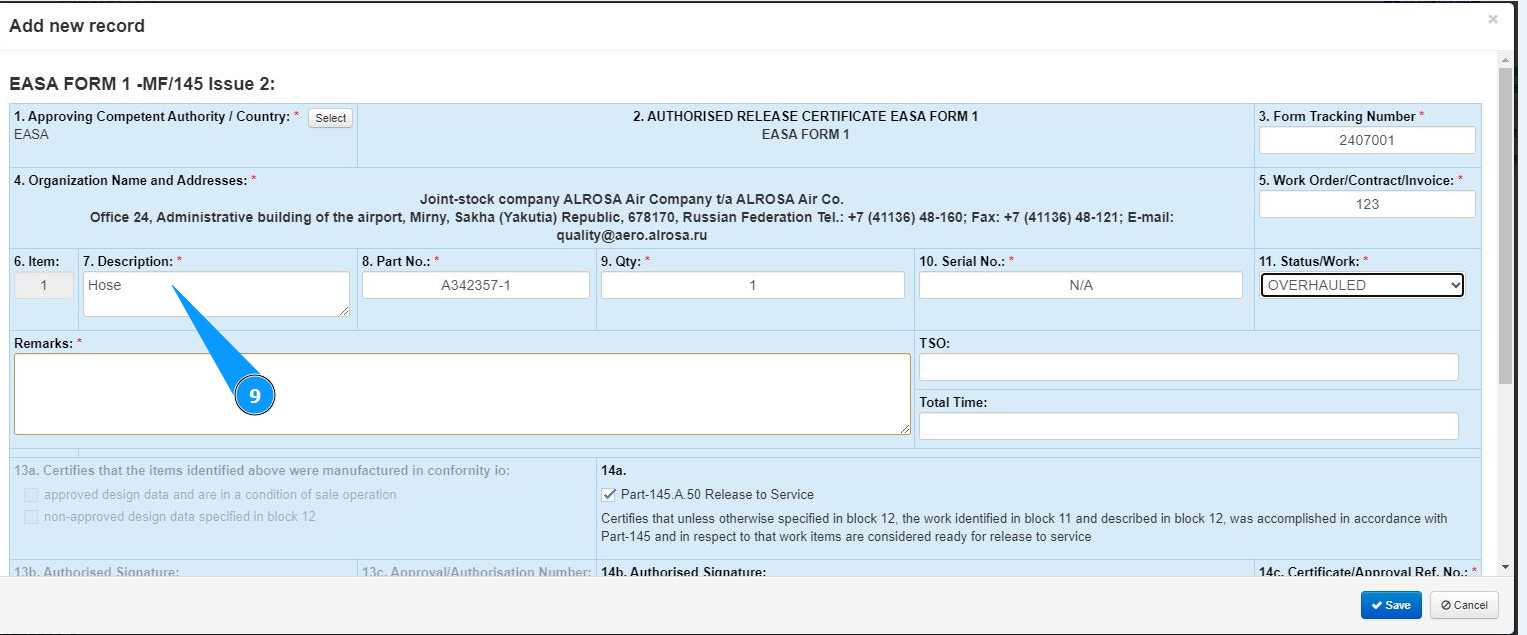
9. Enter a description of the component in the field "Description".
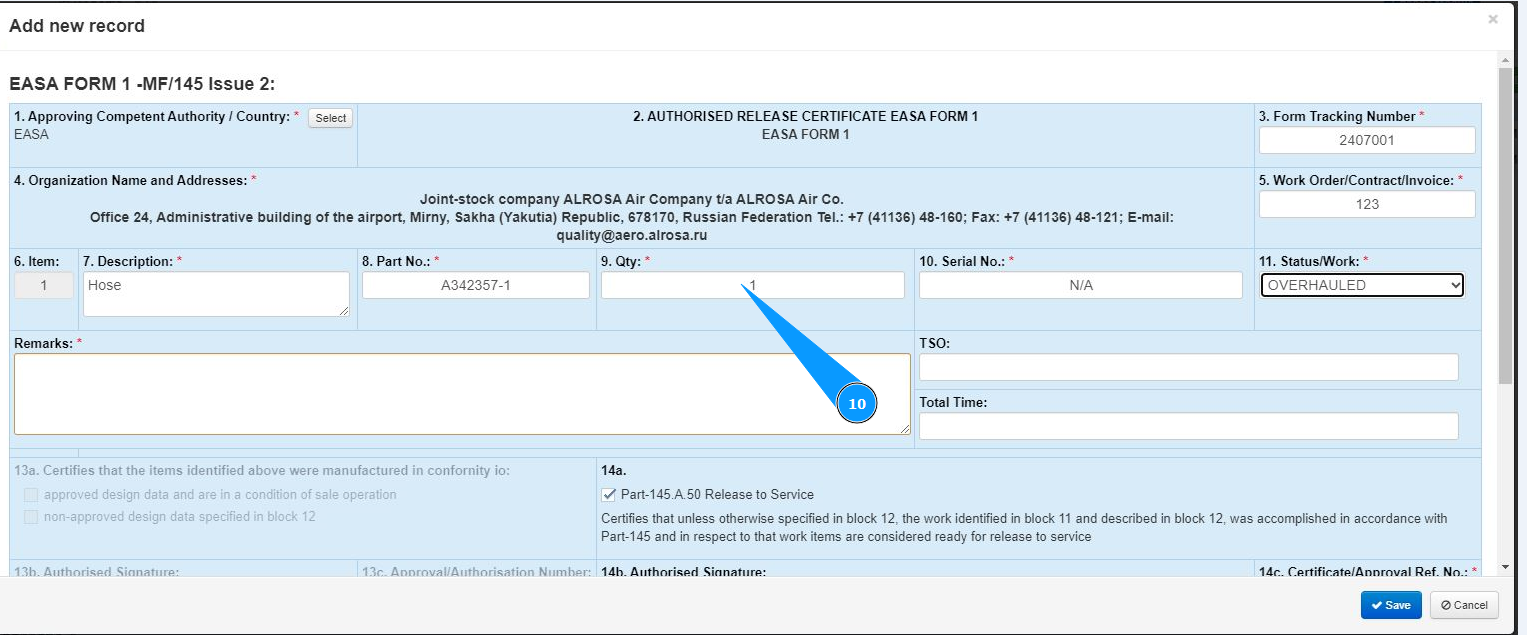
10. Enter the quantity of components in the field "Qty".
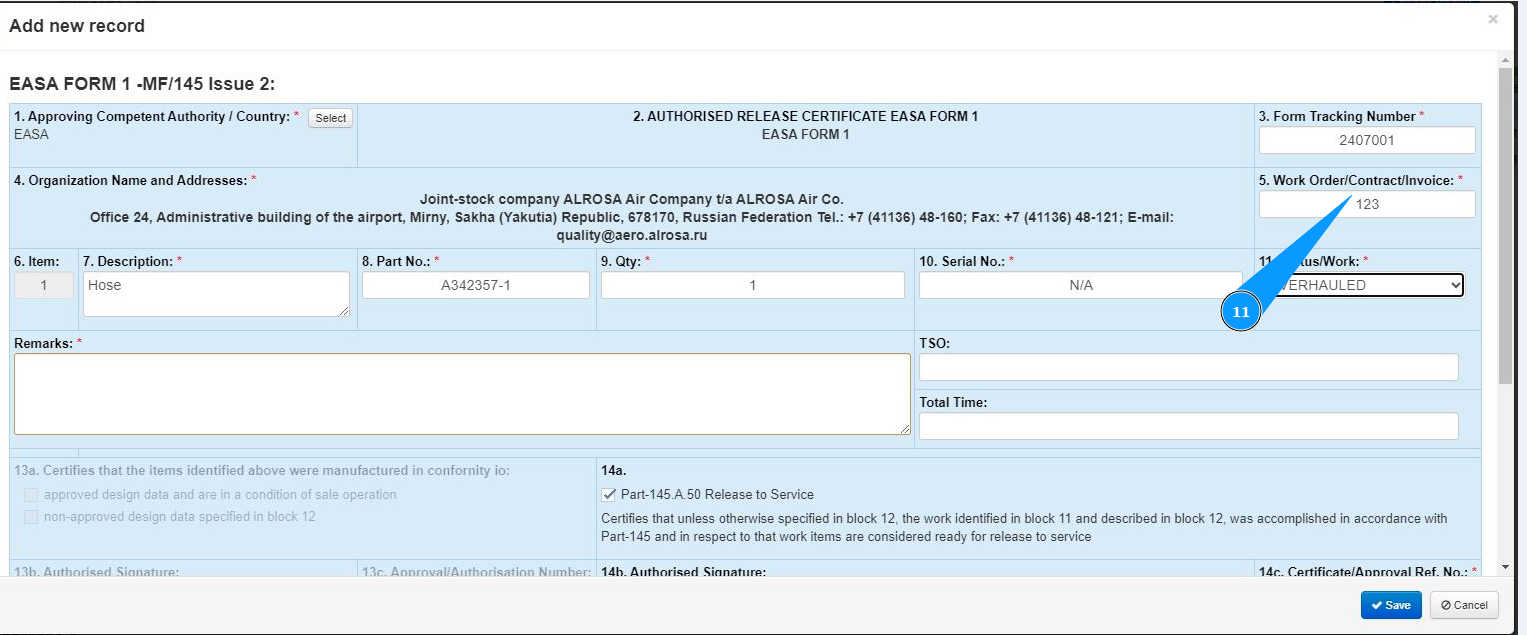
11. Enter the contract number, work card number or invoice number in the field "Work Order/Contract/Invoice".
12. Enter the component serial number in the field "Serial No.".
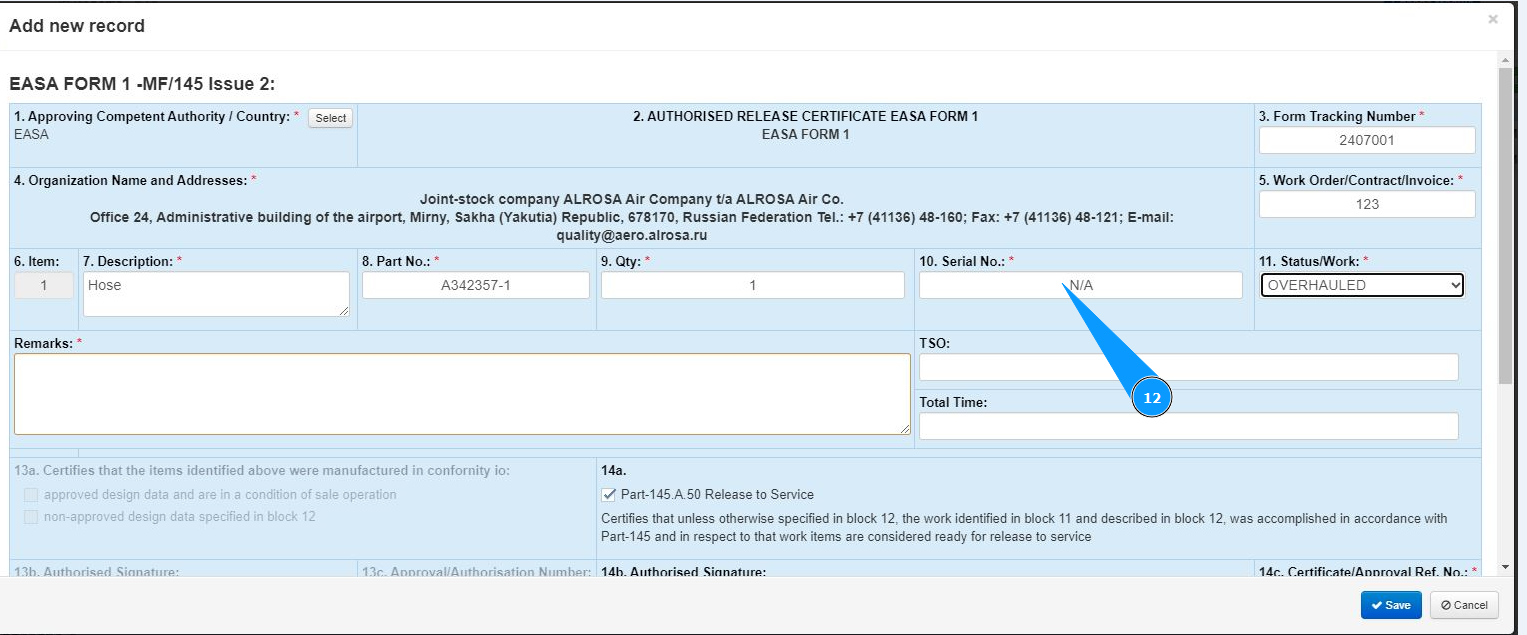
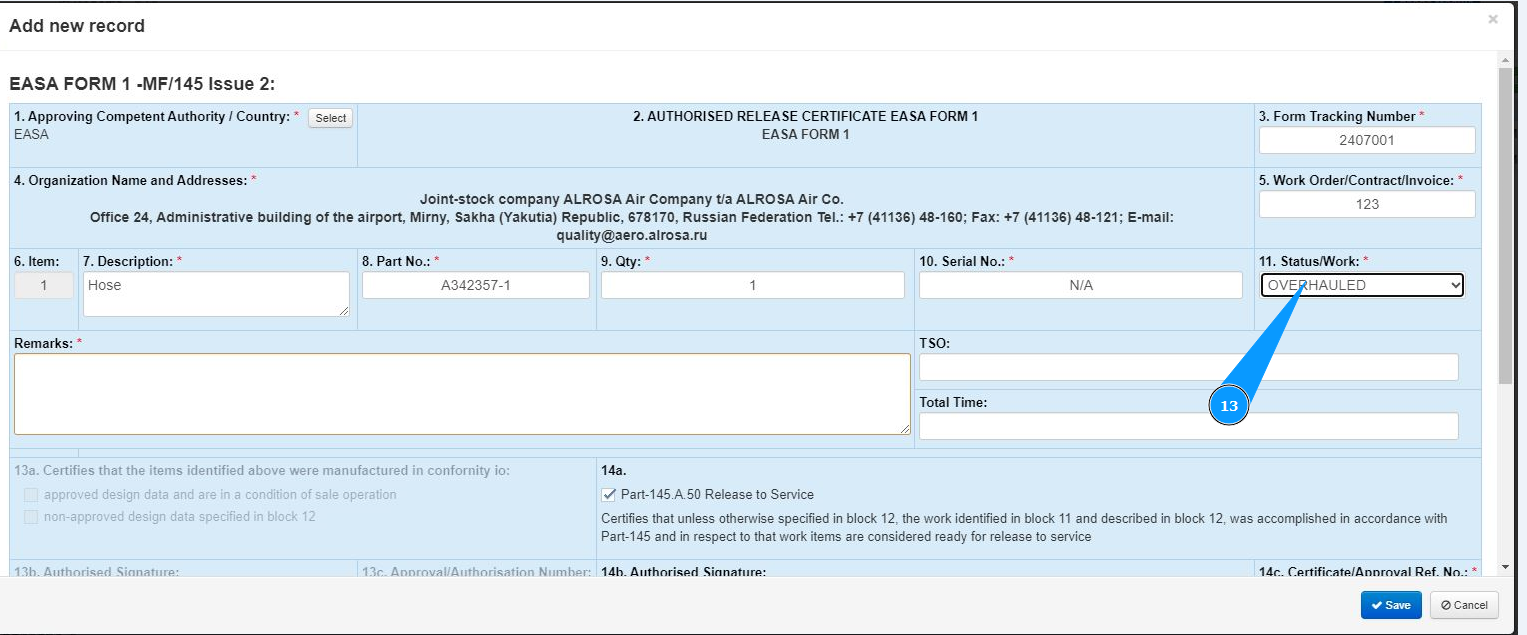
13. Enter the status of the component after completing work in the field "Status/Work".
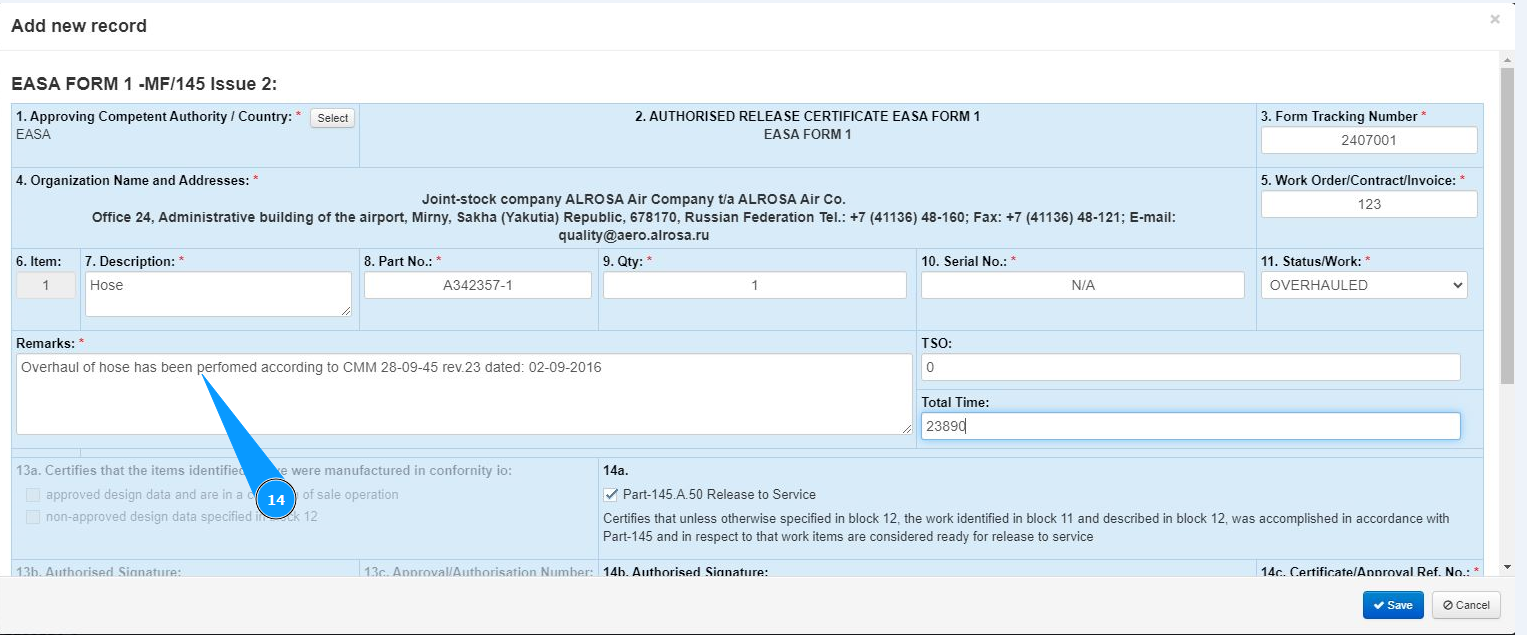
14. Enter performed works or other comments in the field "Remarks".
15. If necessary, enter the operating time of the component since the date of the last overhaul in the field "TSO".
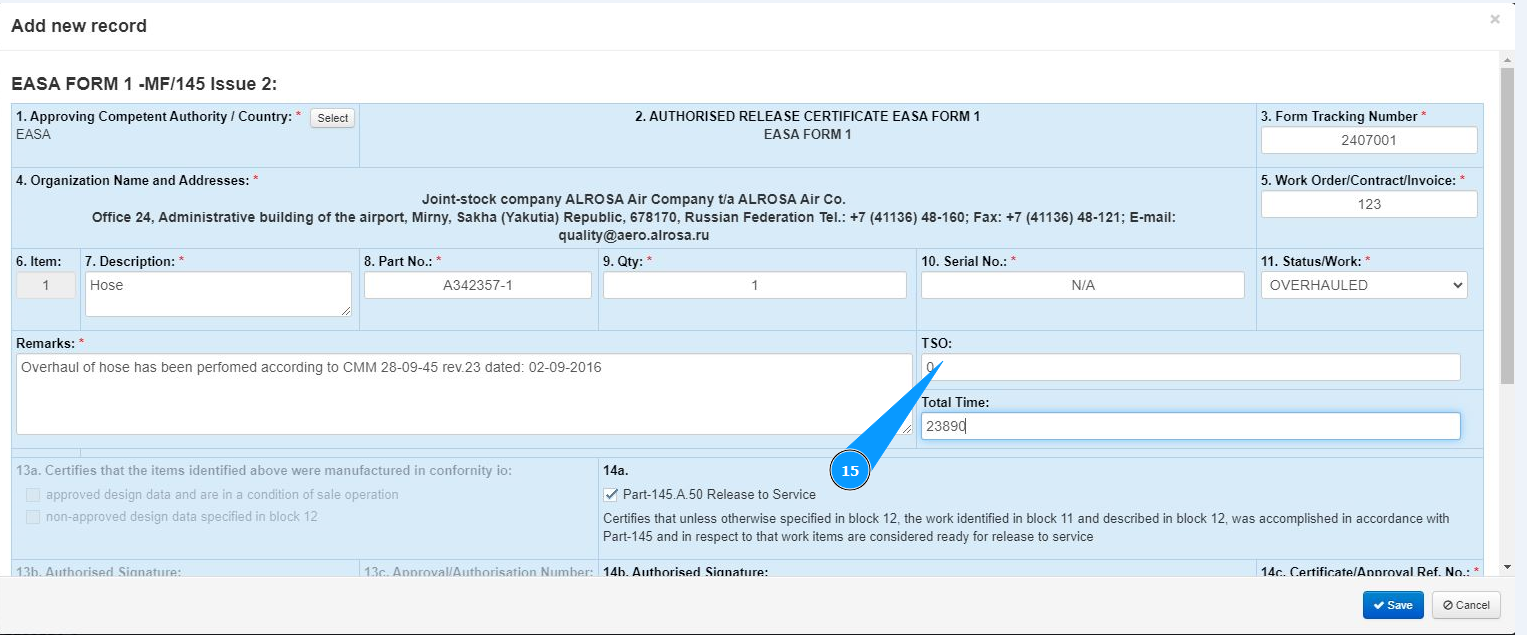
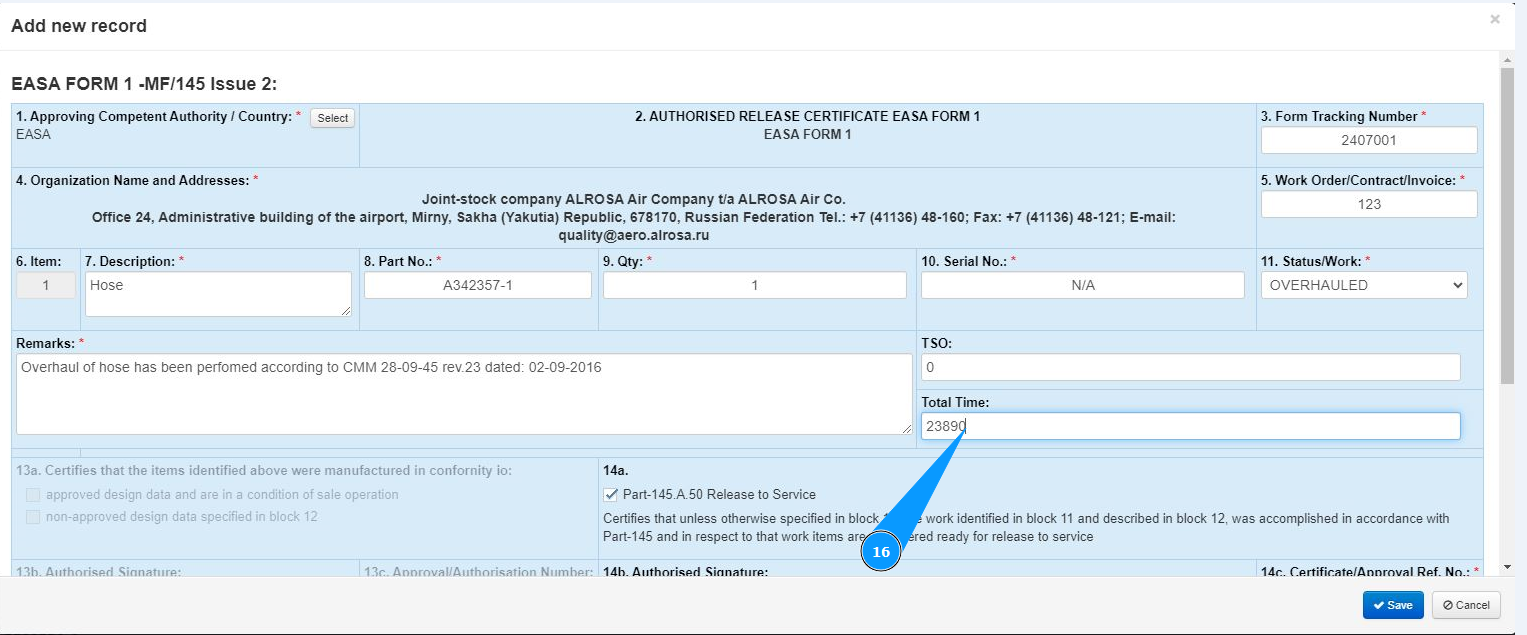
16. If necessary, enter the operating time of the component from the date of manufacture in the field "Total Time".
17. Select the personnel who certified the product and issued the certificate from the dropdown list in the field "Name". Note: The approval number of the certificate will be entered automatically in the field "Certificate/Approval Ref. No.".
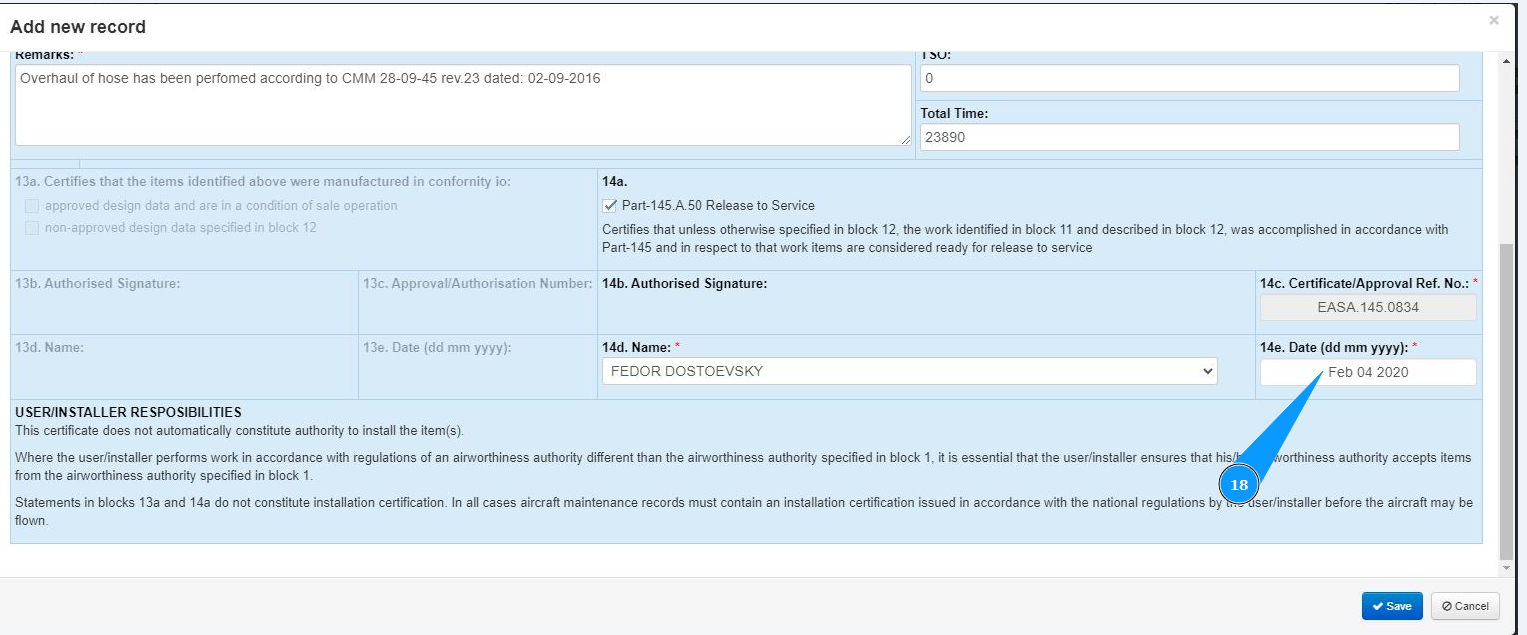
18. Enter the component certificate issue date in the field "Date" or select from the calendar.
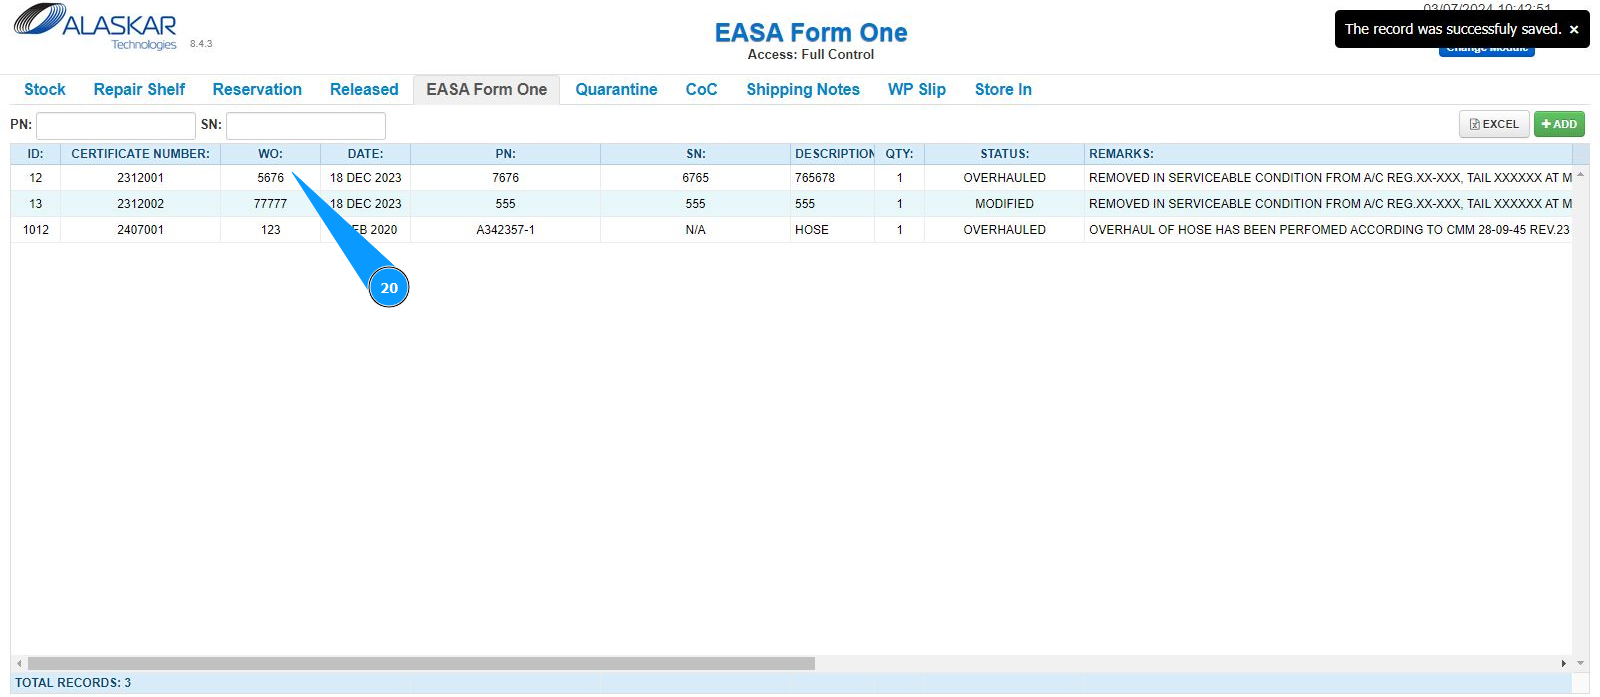
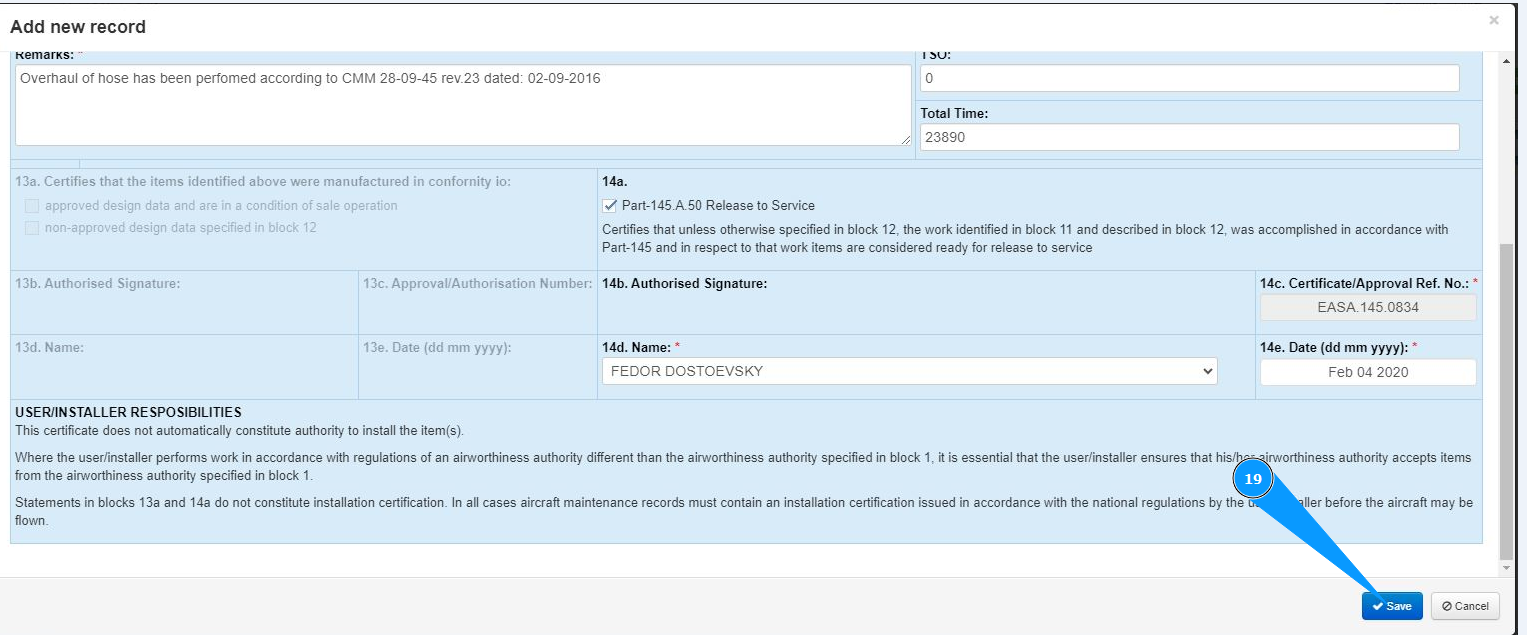
19. Click on the button "Save" to add the component certificate data to the program.
20. Check that the record with the component and its certificate is displayed in the list in the window "EASA Form One".