How to enter data into the aircraft technical logbook
1. In order to enter data into aircraft technical logbook, go to the submodule "TLOG".
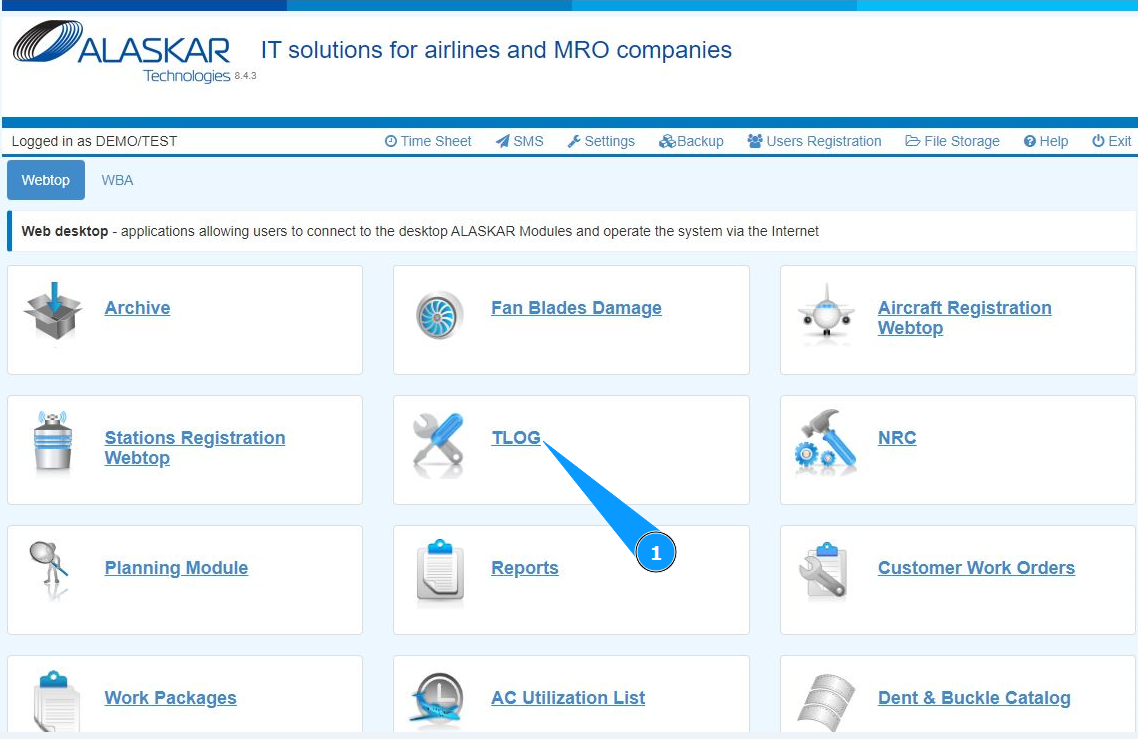
2. Click on the button "New", to begin entering data into the logbook.

3. Make sure that the editor is creating a new Tech.Log is open and accessible in the window "Technical Log".

4. From the dropdown list, select the name of station in the field "Station".
5. From the dropdown list, select aircraft registration in the field "A/C Reg.".
6. Enter the aircraft type in the field "A/C Type".

7. Enter the date the logbook was issued in the field "Date/Time". Note: If necessary, enter the flight number in the field "Flight №".
8. Enter the aircraft's flight hours in the field "FH".
9. Enter the aircraft's flight cycles in the field "FC".
10. Enter the logbook number in the field "T/Log Number". Note: If necessary, enter the departure and landing times in the fields: "Take off", "Landing".
11. Enter the logbook page in the field "Seq.".
12. From the dropdown list, select who issued the logbook in the field "Raised by".
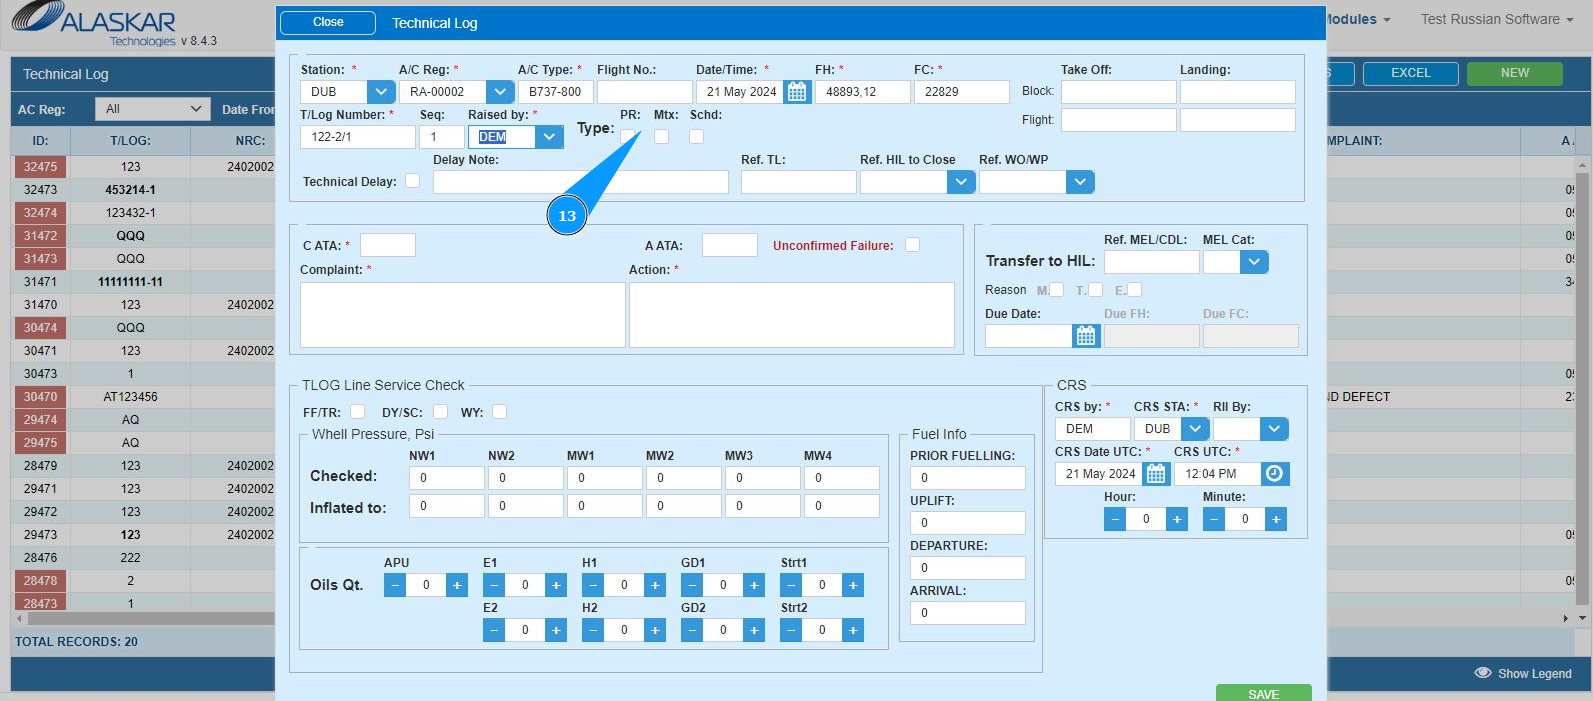
13. If necessary, enter markers in the logbook in the fields: "Pr.", "Mtx", "Schd".
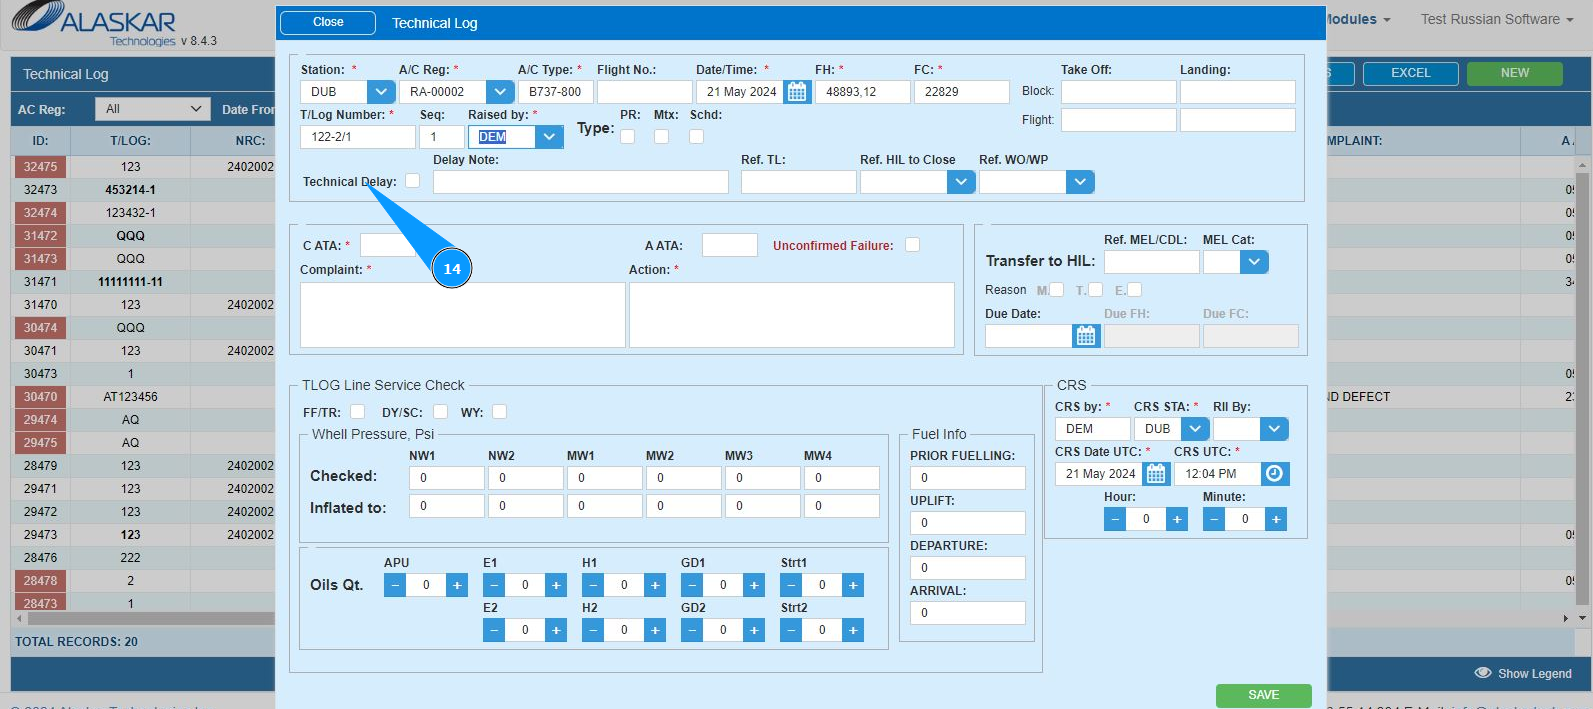
14. If you need to register a flight delay, enter data in the fields: "Delay Note", "Ref.TL", "Ref.HIL to Close", "Ref.WO/WP" of window "Technial Delay" and tick.
15. Enter the ATA number, click in the field "C ATA".
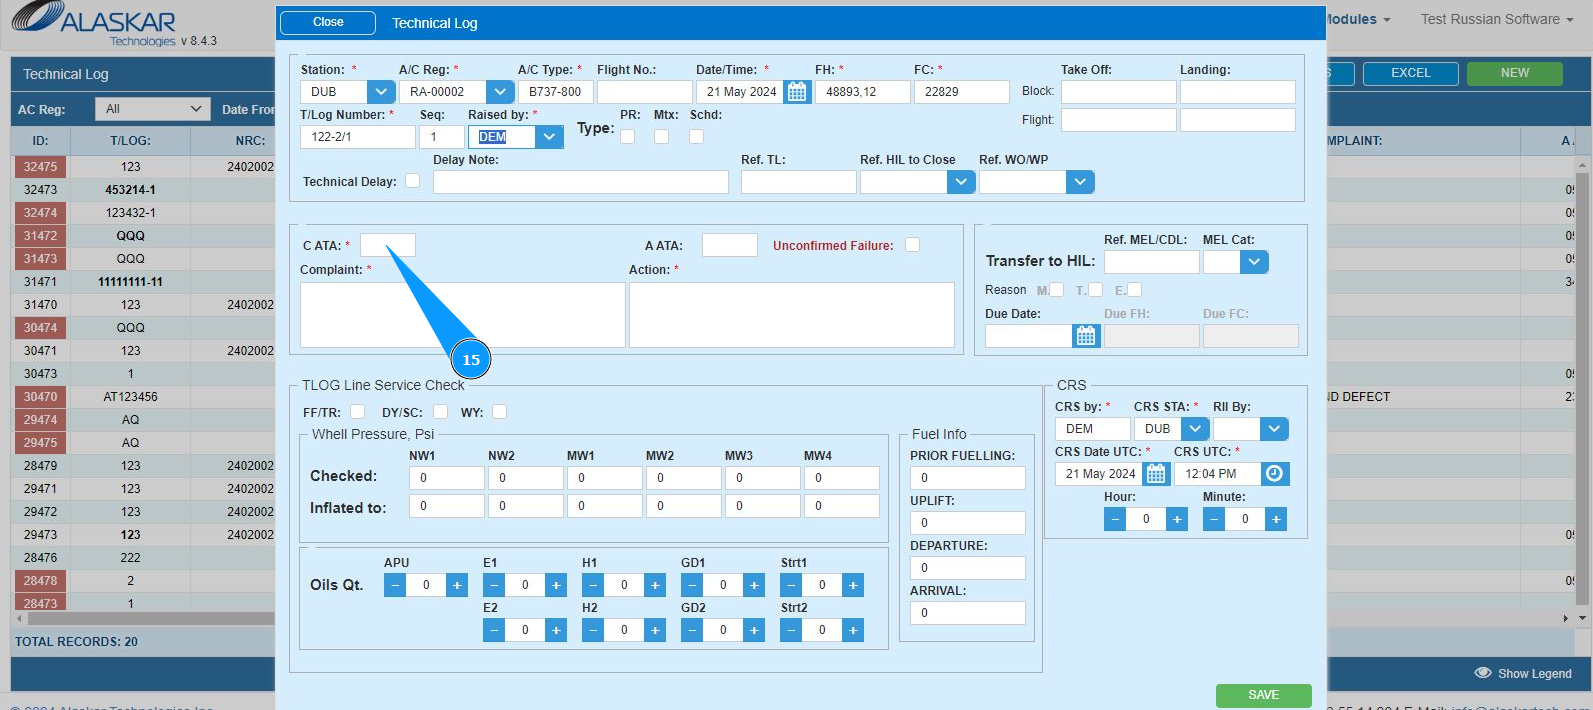
16. Select the required ATA, click on the corresponding line in the window "ATA List". Note: If necessary, use a filter in the field "ATA".
17. Enter information about the malfunction in the window "Complaint". Note: If necessary, enter the ATA number for "Action" window in the field "A ATA".
18. Enter information about the required actions in the window "Action".
19. If you need to register a deferred defect, enter data in the fields: "Due Date", "Ref.MEL/CDL", "MEL Cat.", "Reason" of window "Transfer to HIL".

20. Enter who issued the CRS in the field "CRS by". Note: If necessary, enter who performed the control inspection in the field "RII by".
21. From the dropdown list, select the station where the maintenance was performed in the field "CRS STA".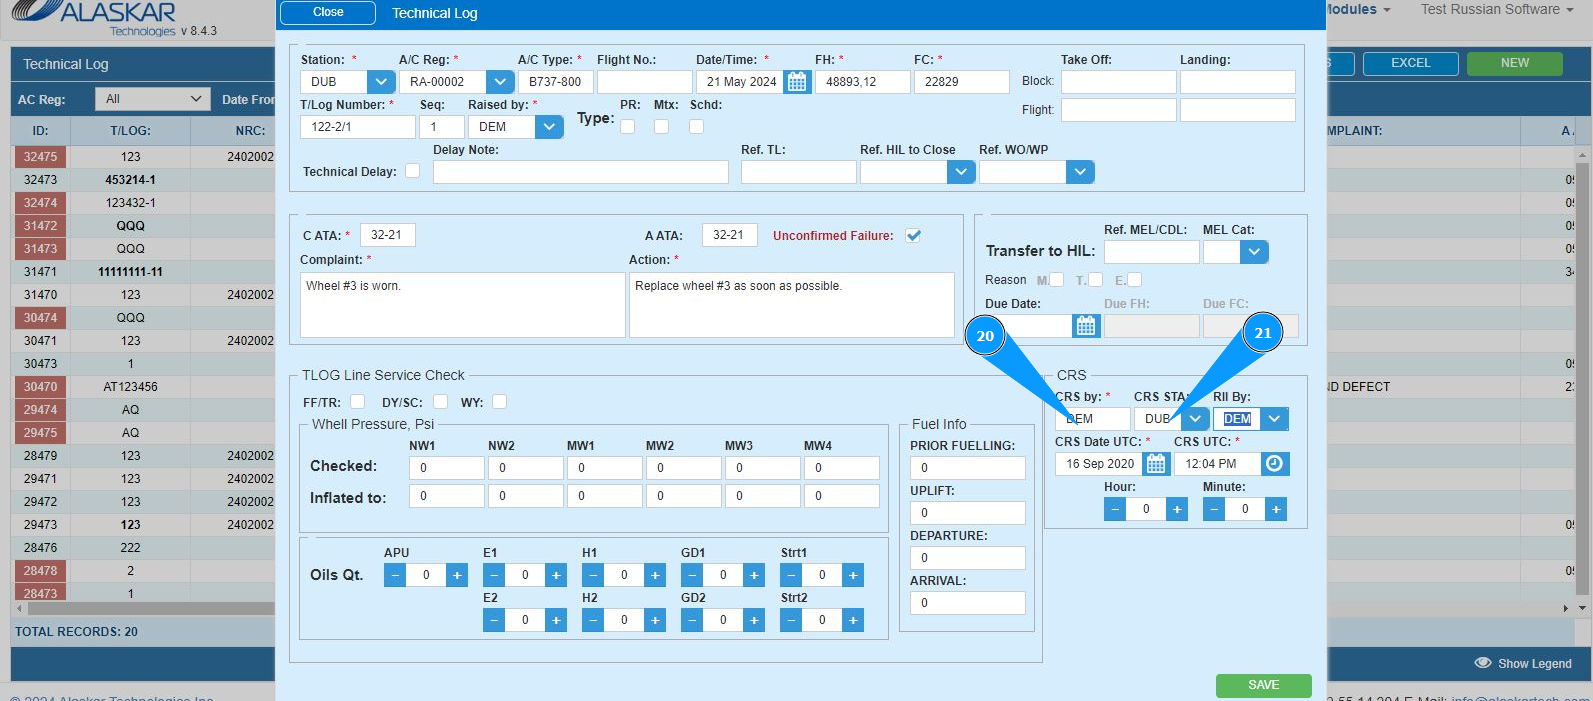
22. Enter the date when the CRS was issued in the field "CRS Date UTC". Note: If necessary, enter information about man-hours in the fields: "Hour", "Minute".
23. Enter the time in UTC when the CRS was issued in the field "CRS UTC".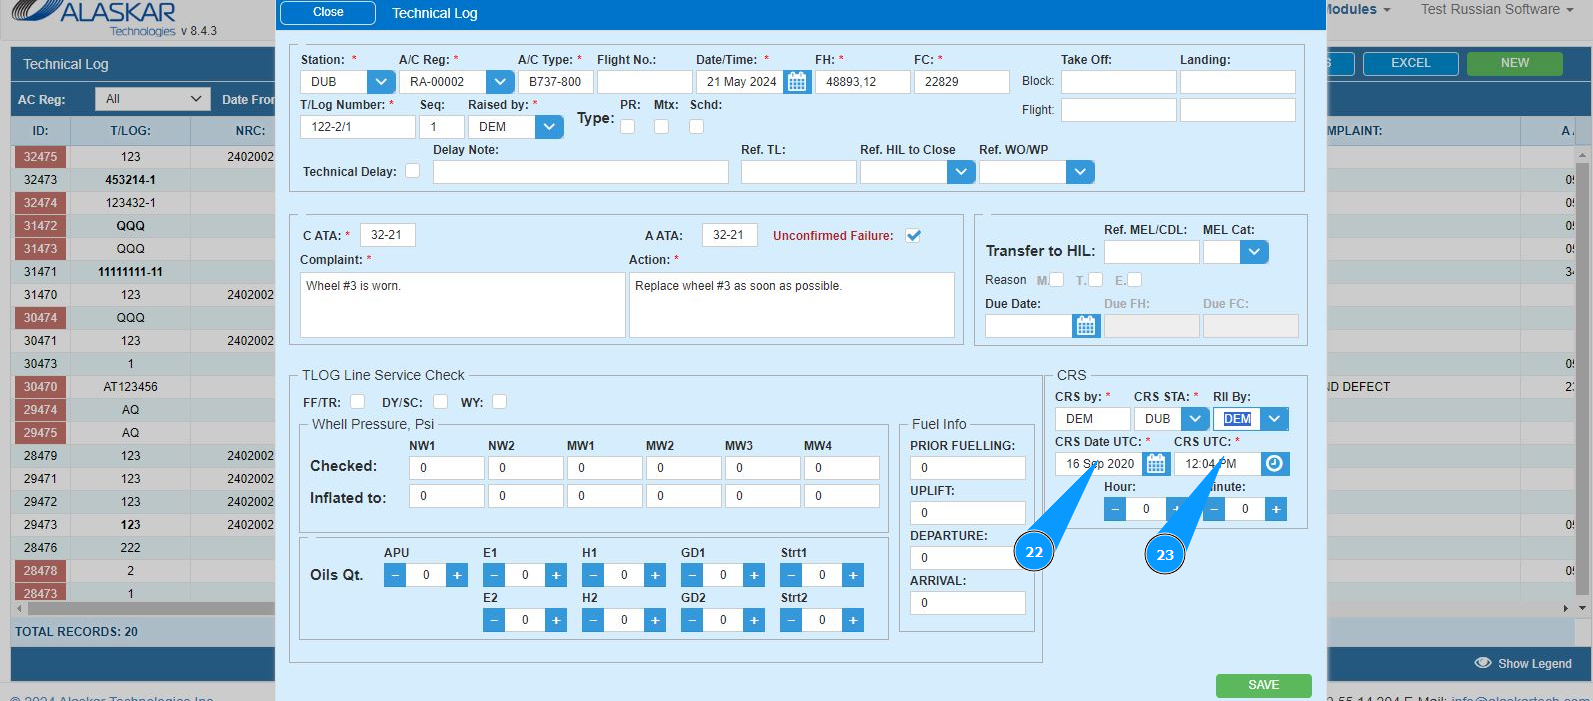
24. Click on the button "Save", to save the logbook data into the program. Note: If necessary, enter additional information of service maintenance in the window "TLOG Line Service Check".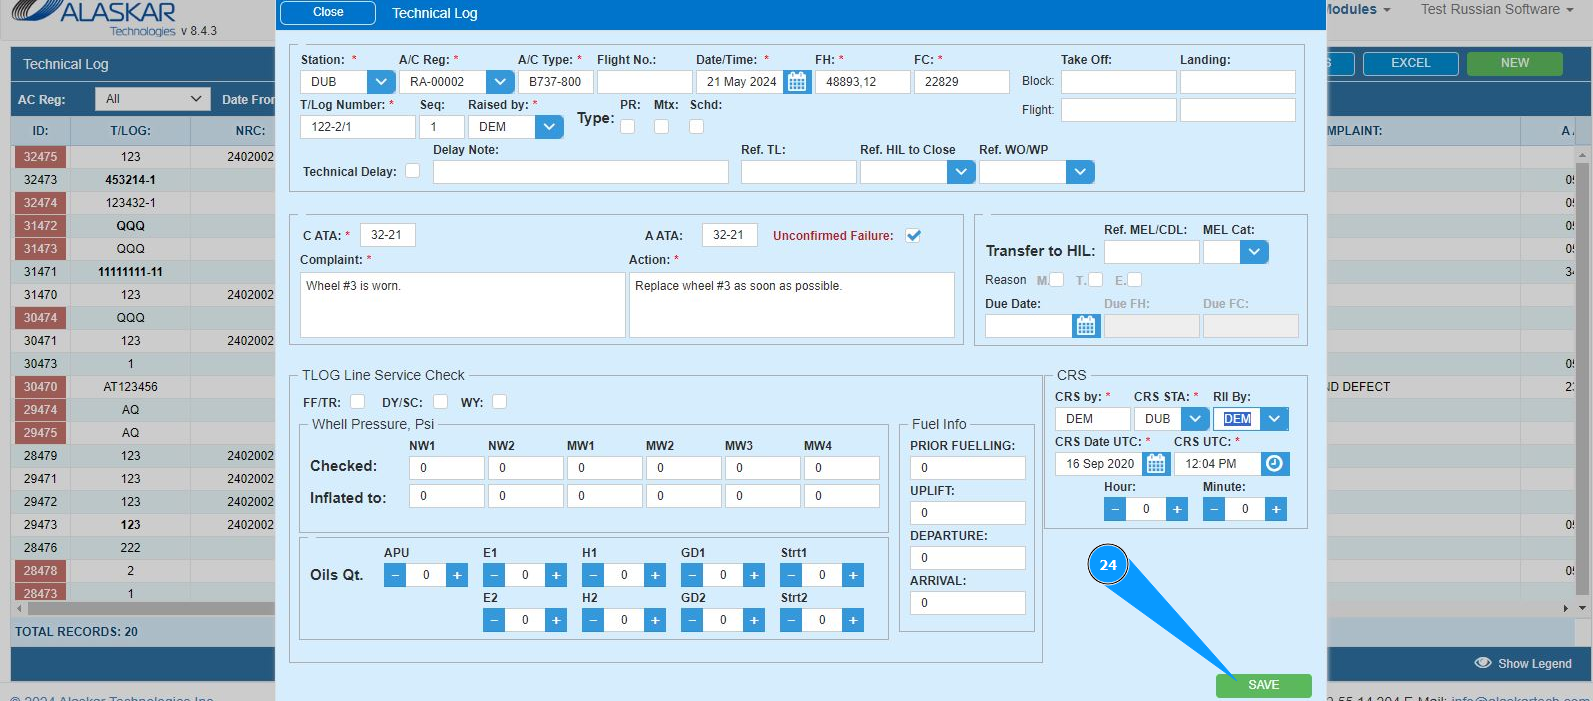
25. Check that a record appears with the entered data in the window "Technical Log".
