How to create a Work Package
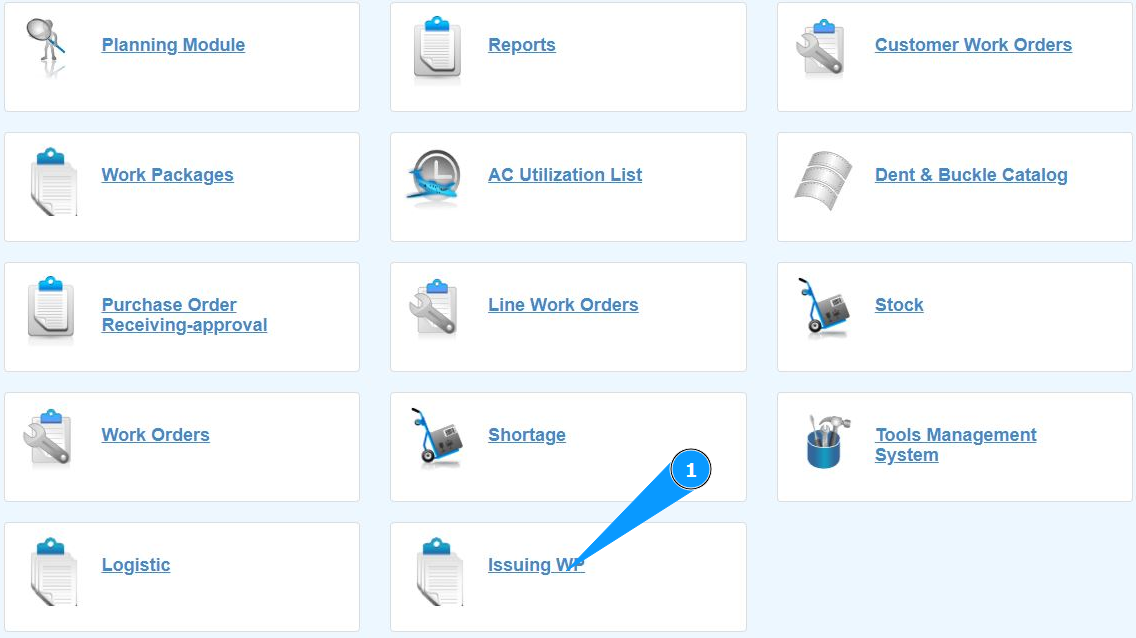
1. In order to create a Work Package, go to the submodule "Issuing WP".
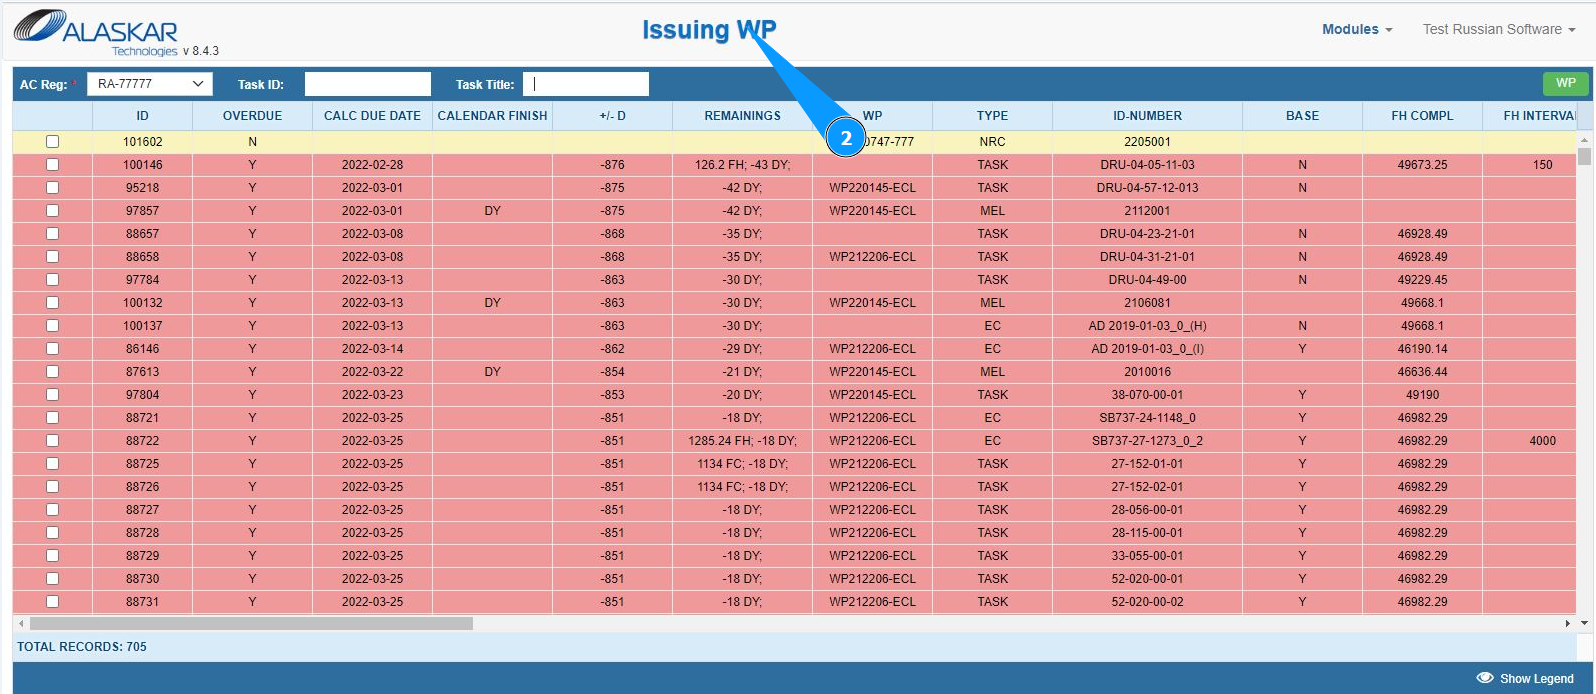
2. Make sure that the window for working with packages is open and accessible in the window "Issuing WP".
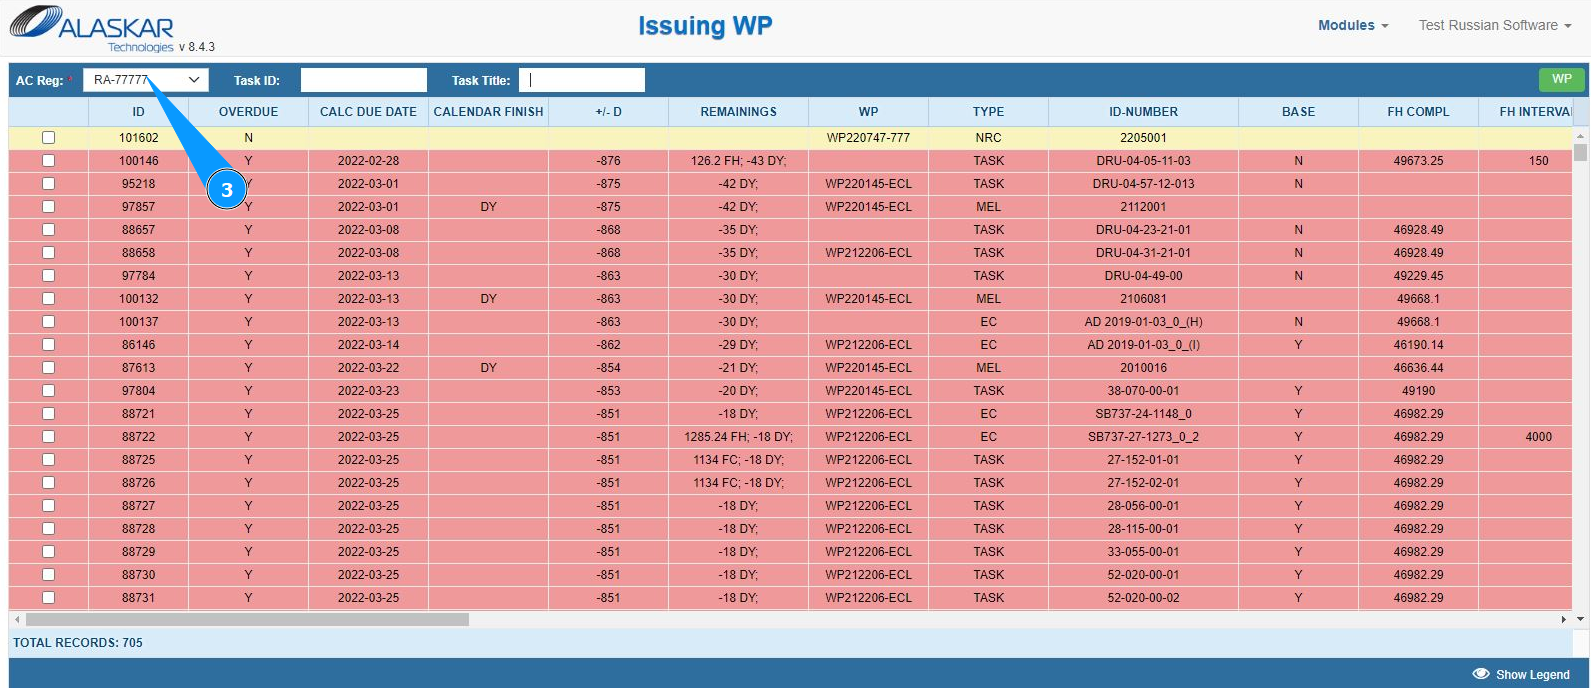
3. Select the aircraft registration number from the dropdown list in the field "AC Reg:".
4. Select the required tasks to include in the work package in the search fields. Note: Use the available filters for a more comfortable search for tasks or EC.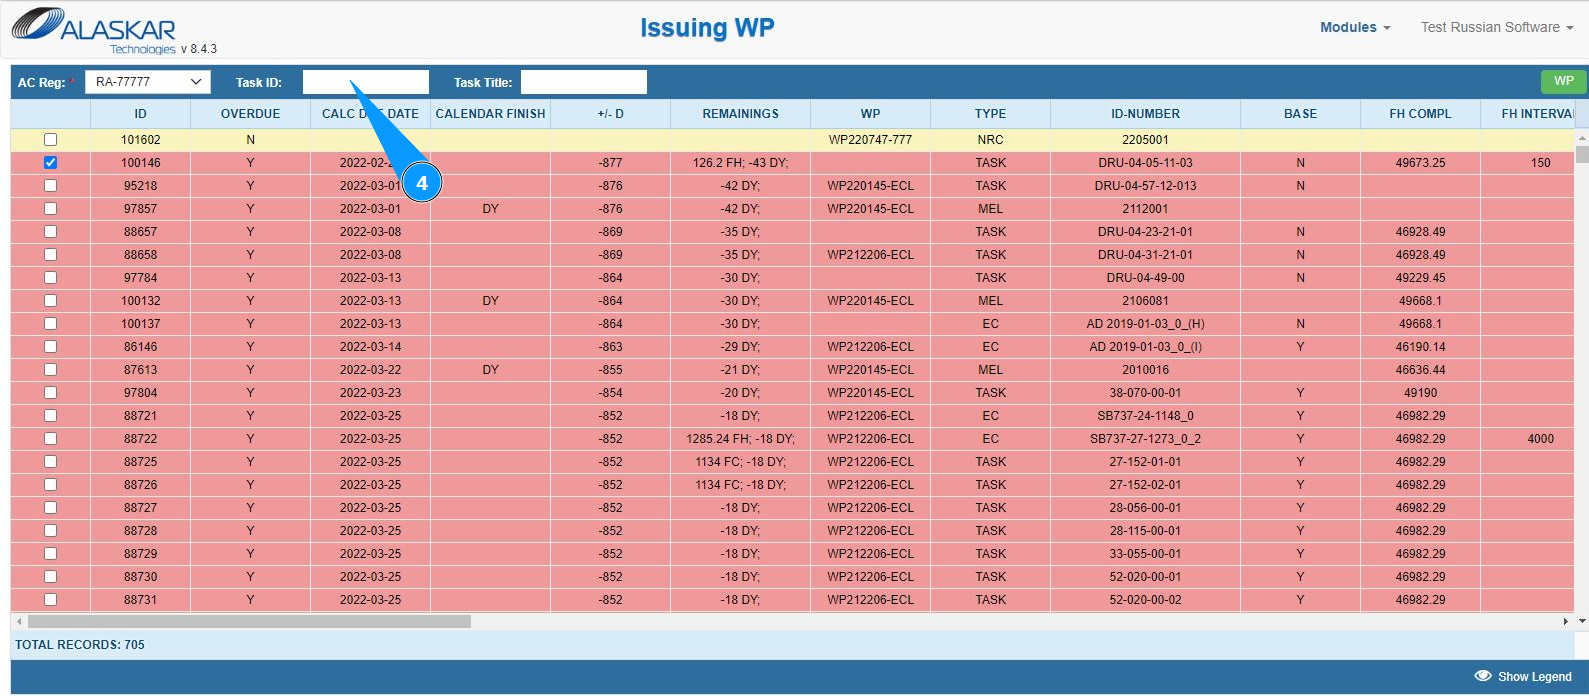
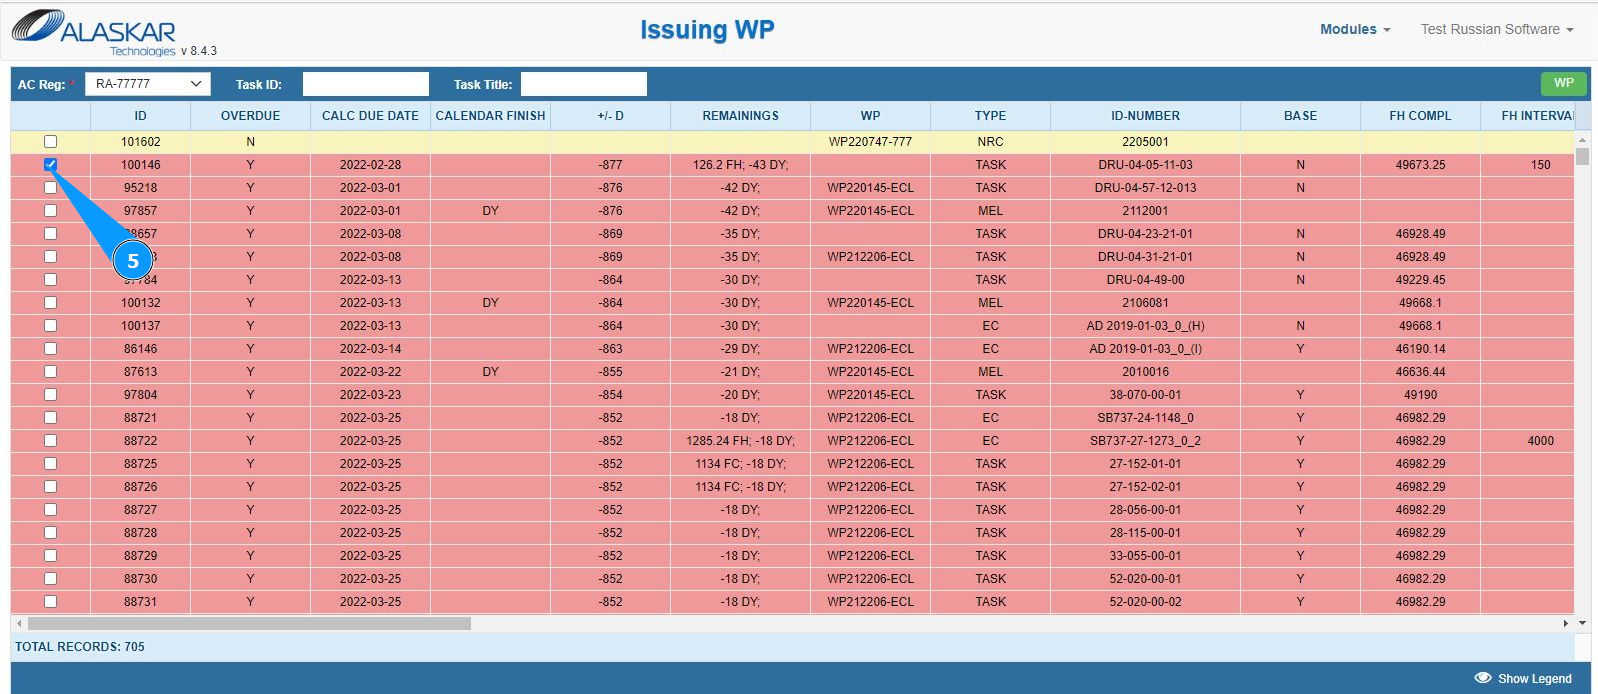
5. Select the required line with a task or Engineering Control, tick on the window in it.
6. Click on the button "WP" to enter the Work package editor. Note: Select the line of tasks for all those that need to be added.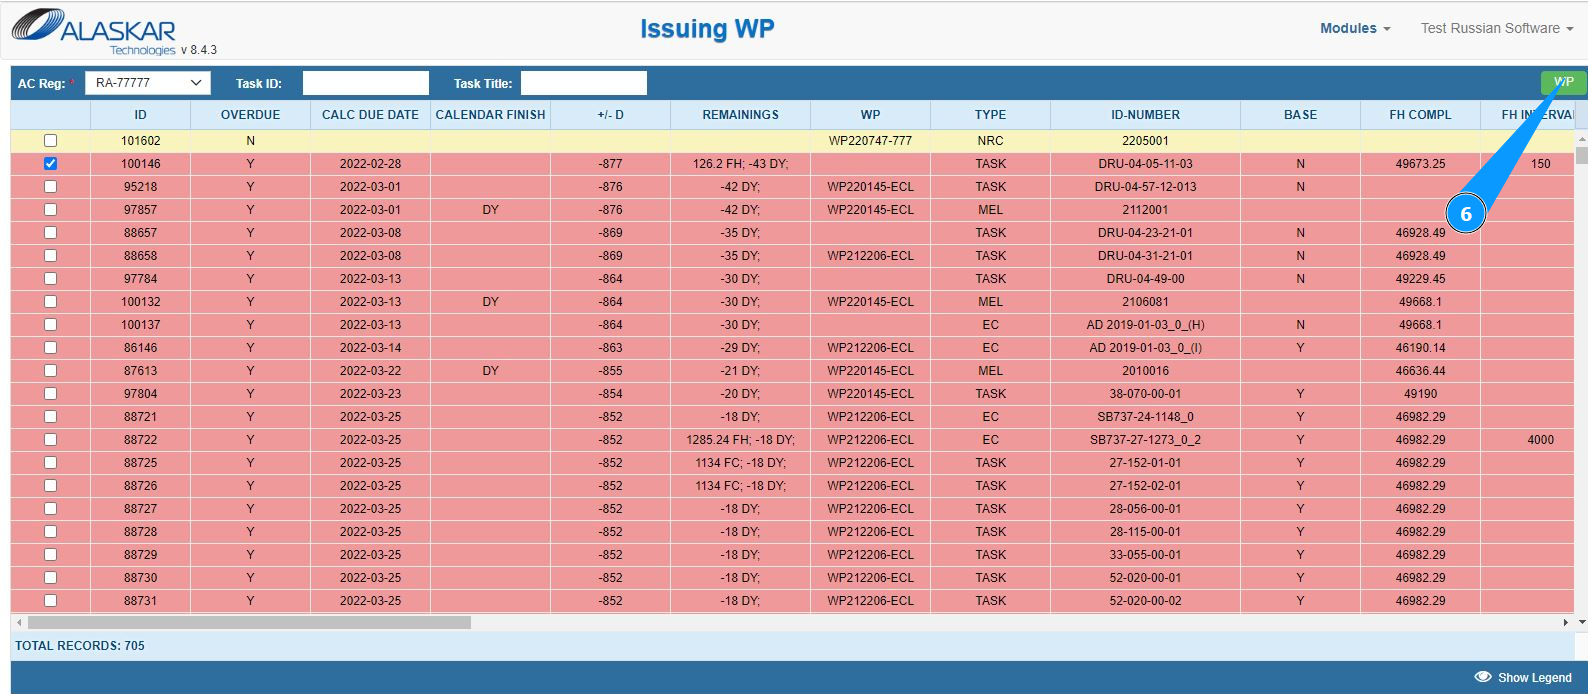
7. Make sure that the package editor is open and accessible in the window "Work Package Editor".
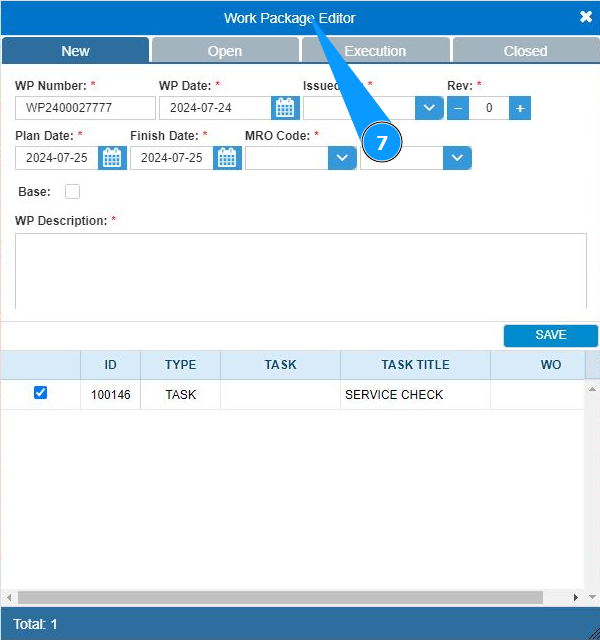
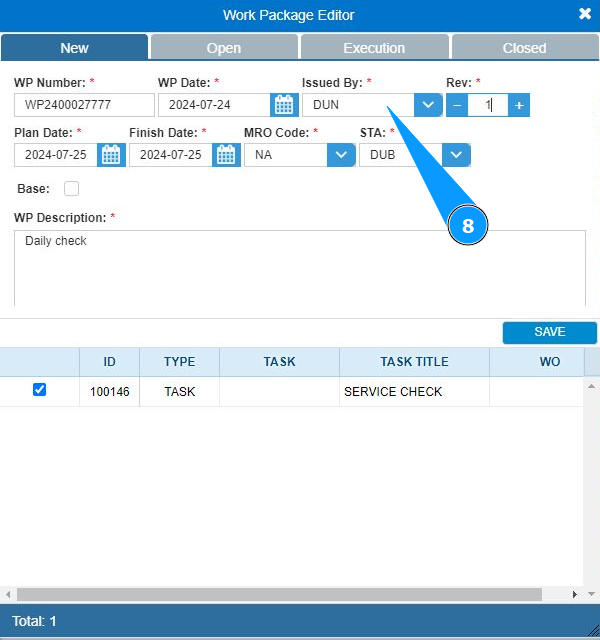
8. Select the login of the personnel creating the WP from the dropdown list in the field "Issued by".
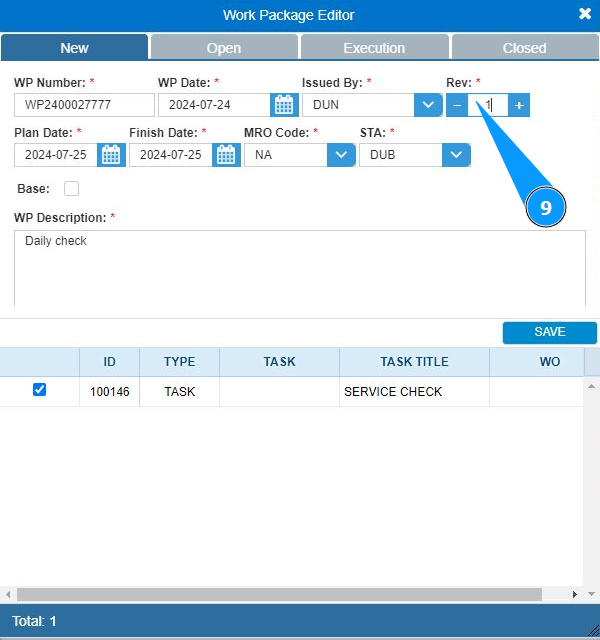
9. Enter the work package revision in the field "Rev.".
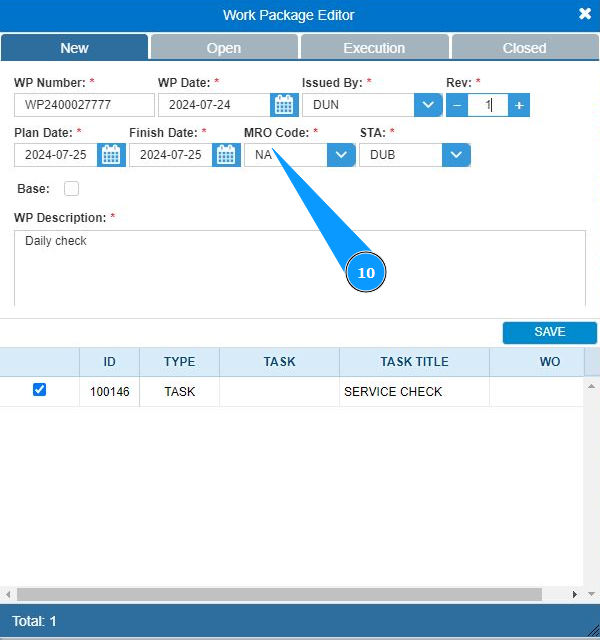
10. Select the maintenance organization code from the dropdown list in the field "MRO Code".
11. Select the location of work from the dropdown list in the field "STA".

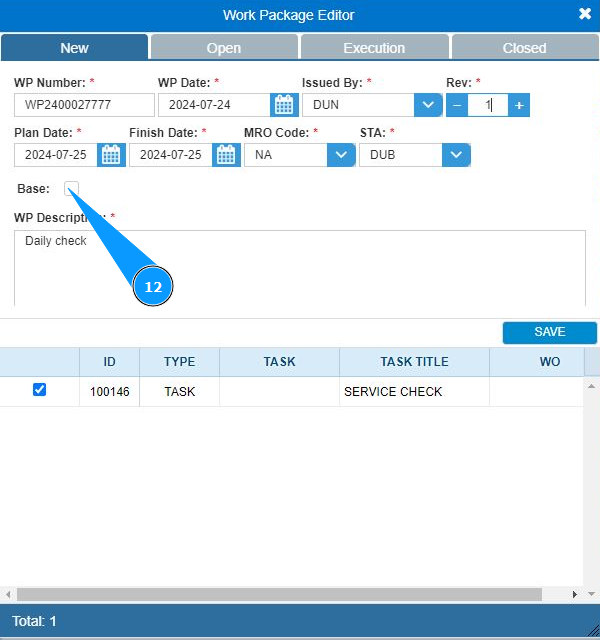
12. If necessary, assign the WP the criterion of basic maintenance and tick in the field "Base".
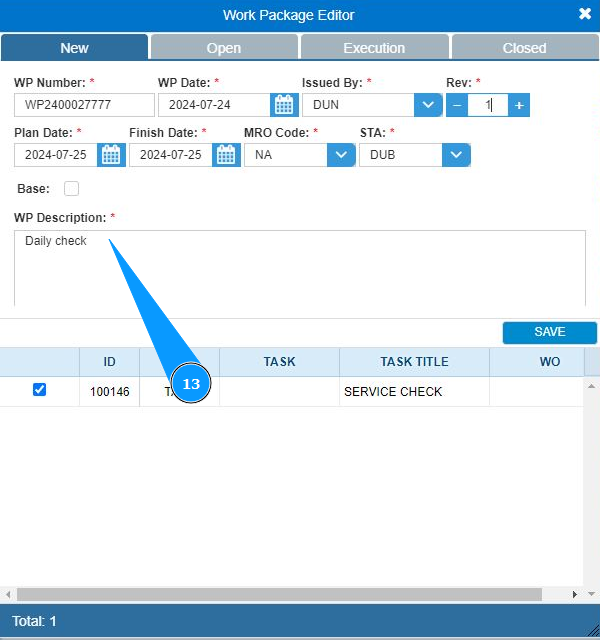
13. Enter the description of the work package in the field "WP Description".
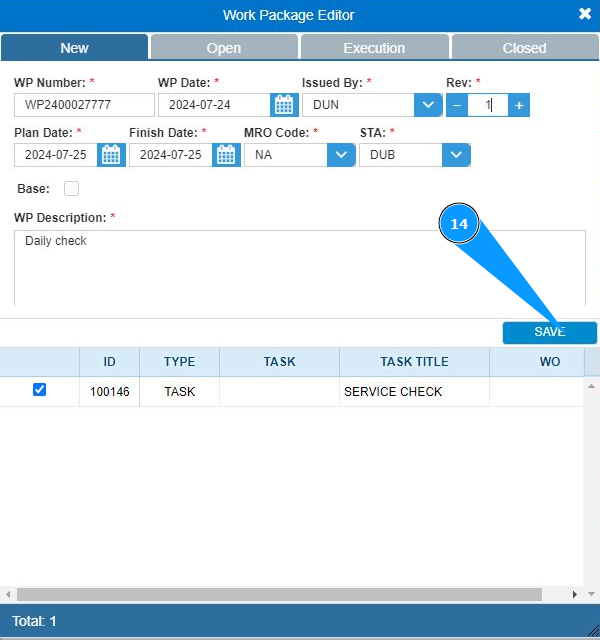
14. Click on the button "Save" to save the data to the program.
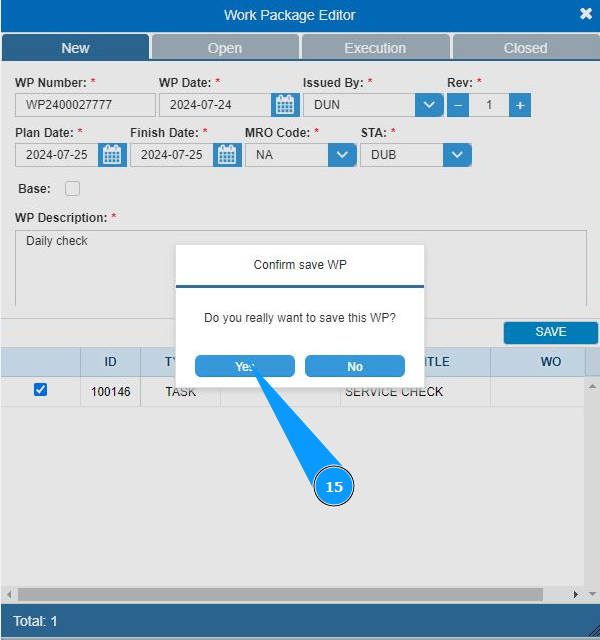
15. Click on the button "Yes" to confirm entering the data into the program.
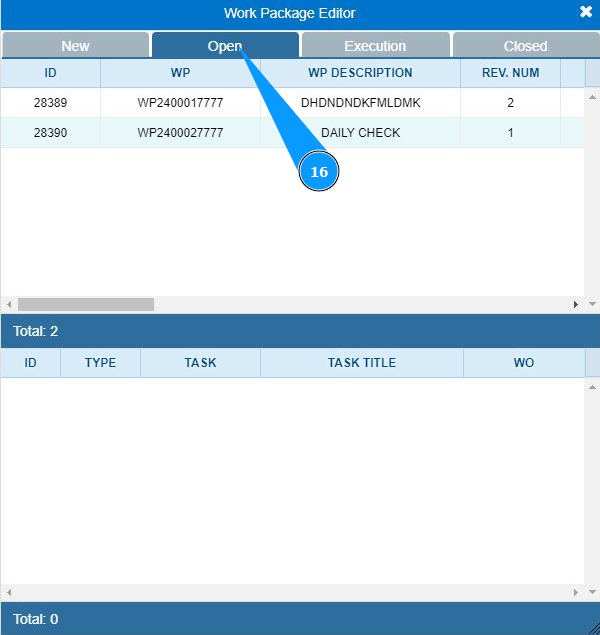
16. Make sure that the Work Package is generated and displayed in the tab "Open".