How to create a Customer Work Order
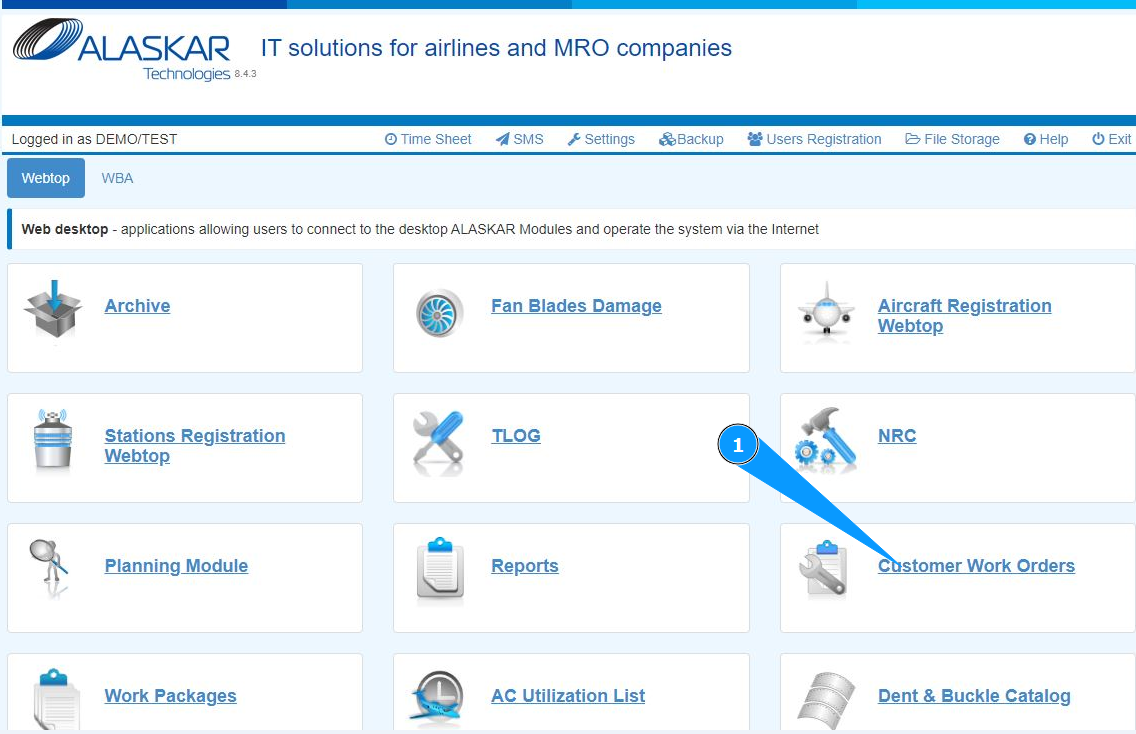
1. In order to create a customer Work Order, go to the submodule "Customer Work Orders".
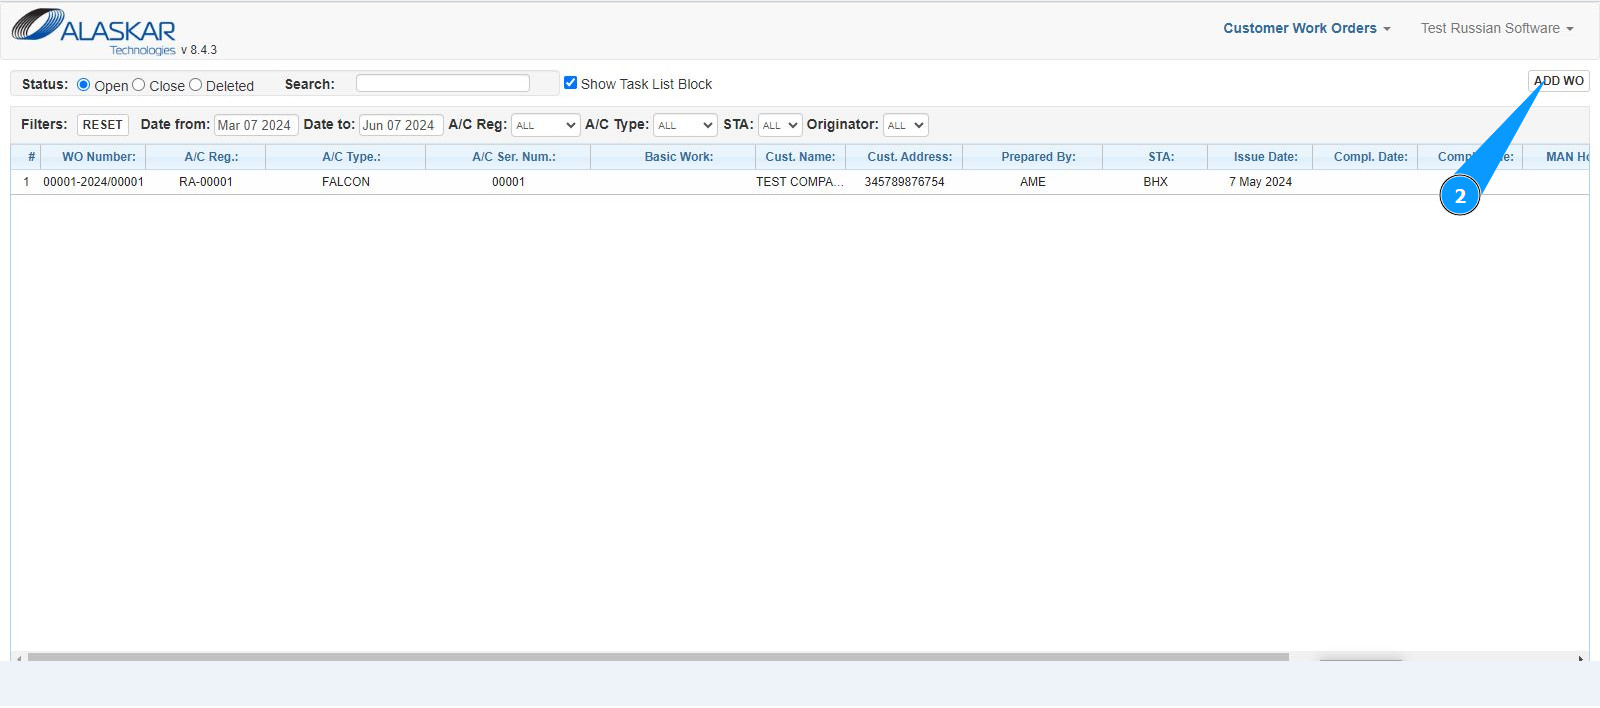
2. Click on the button "Add WO" to create WO.
3. Select the aircraft registration number from the dropdown list in the field "A/C Reg.". Note: The customer Work Order number is automatically generated by the program in the field "WO Number".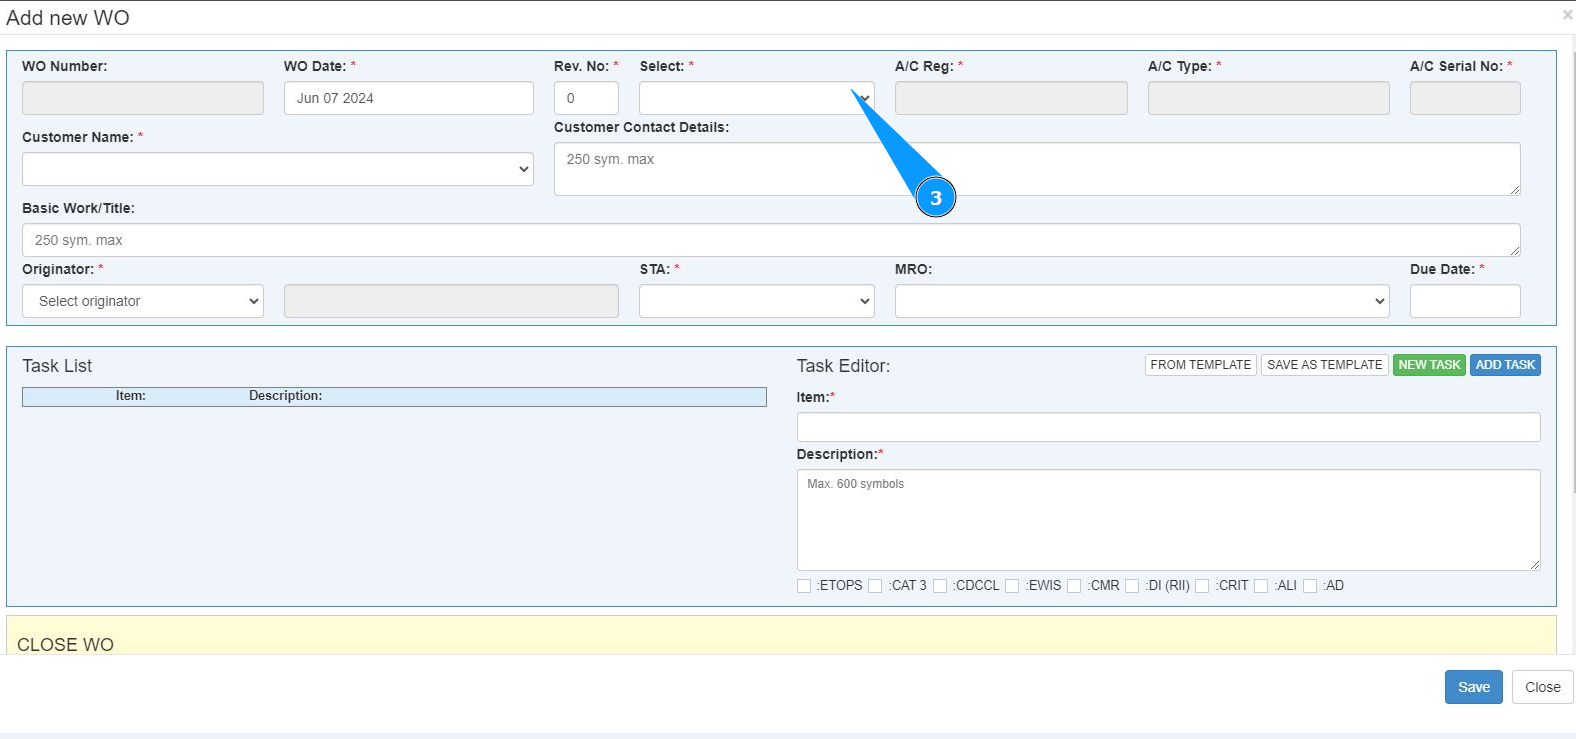
4. Enter the customer Work Order revision number in the field "Rev.№". Note: The aircraft type and serial number are automatically generated by the program.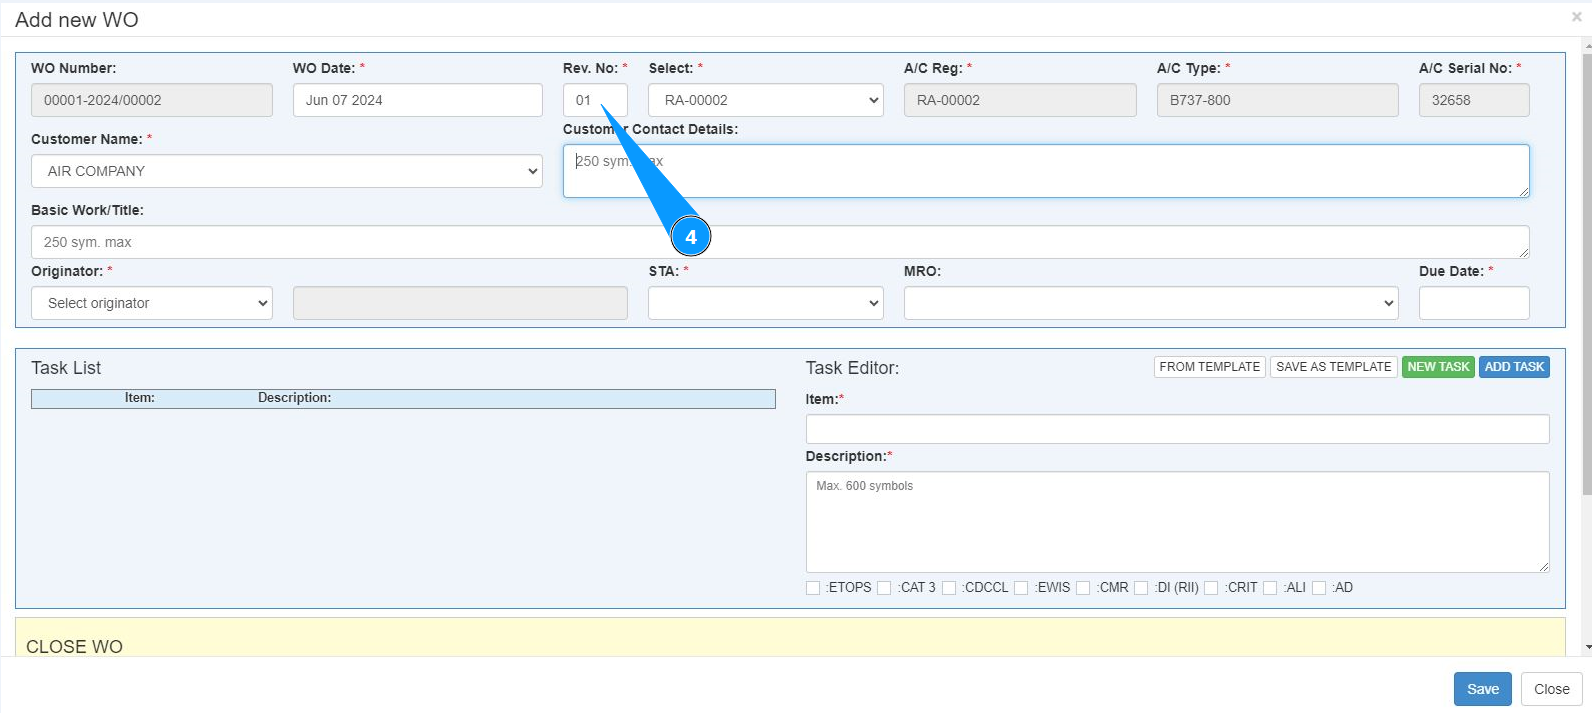
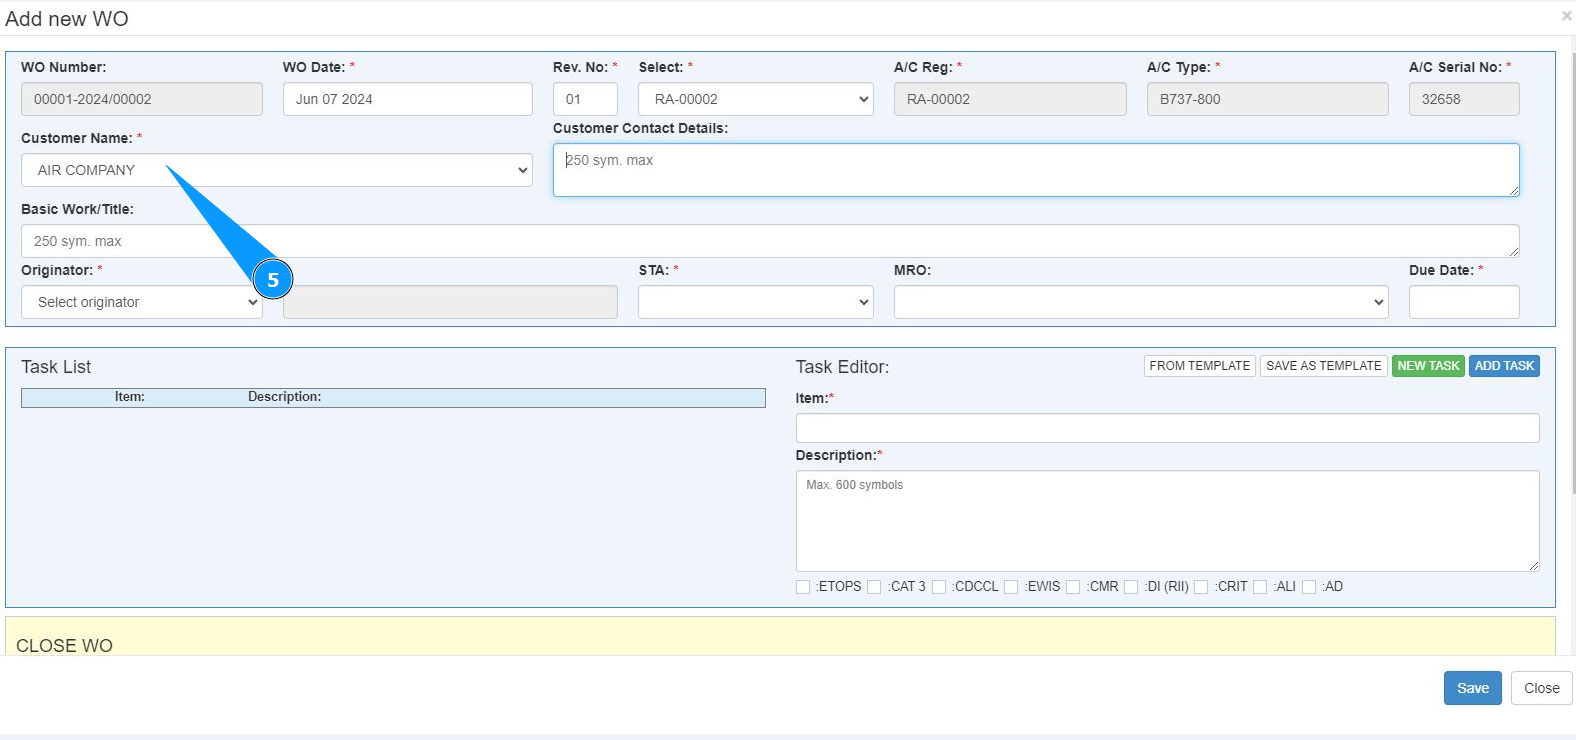
5. Select the customer name from the dropdown list in the field "Customer Name".
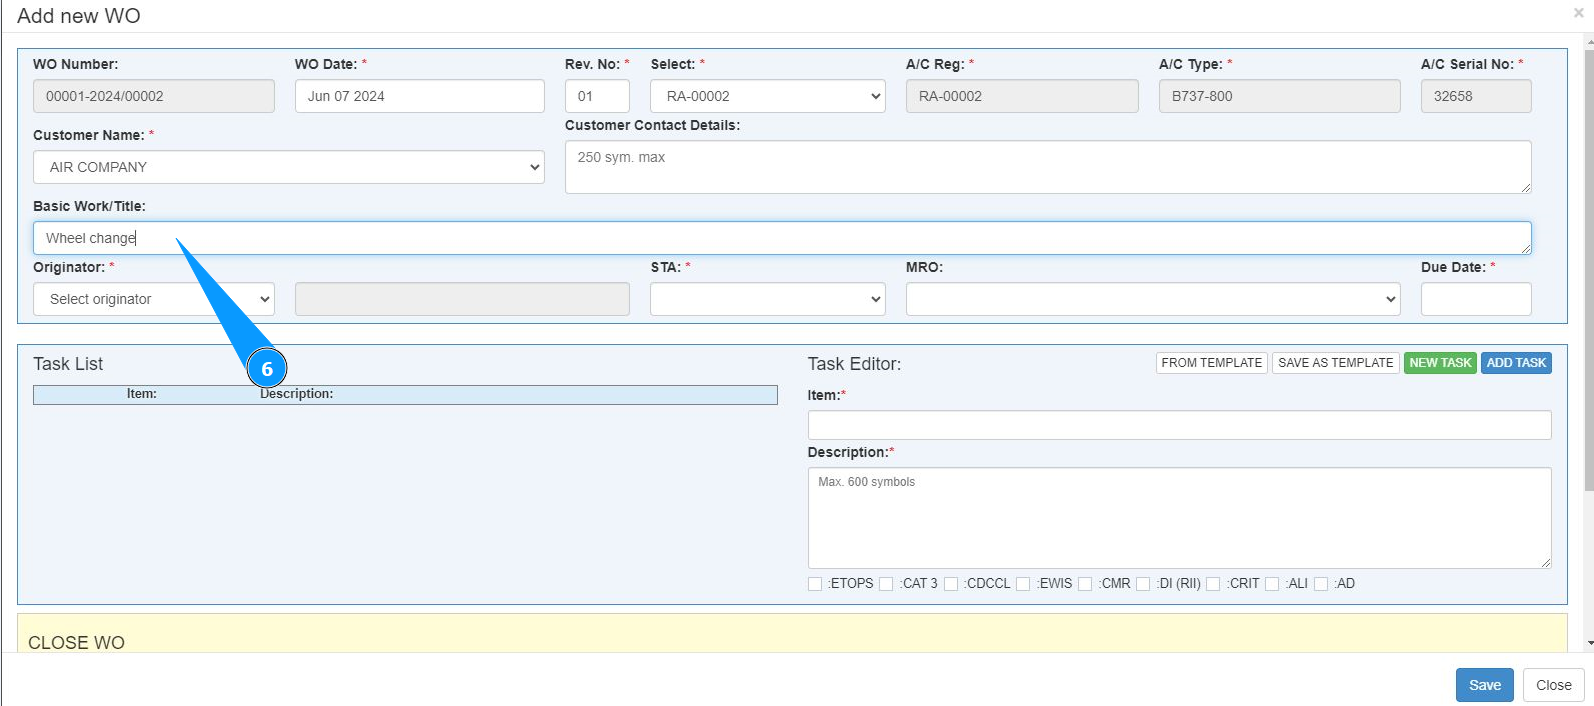
6. Enter the customer's card titli in the field "Basic Work/Title".
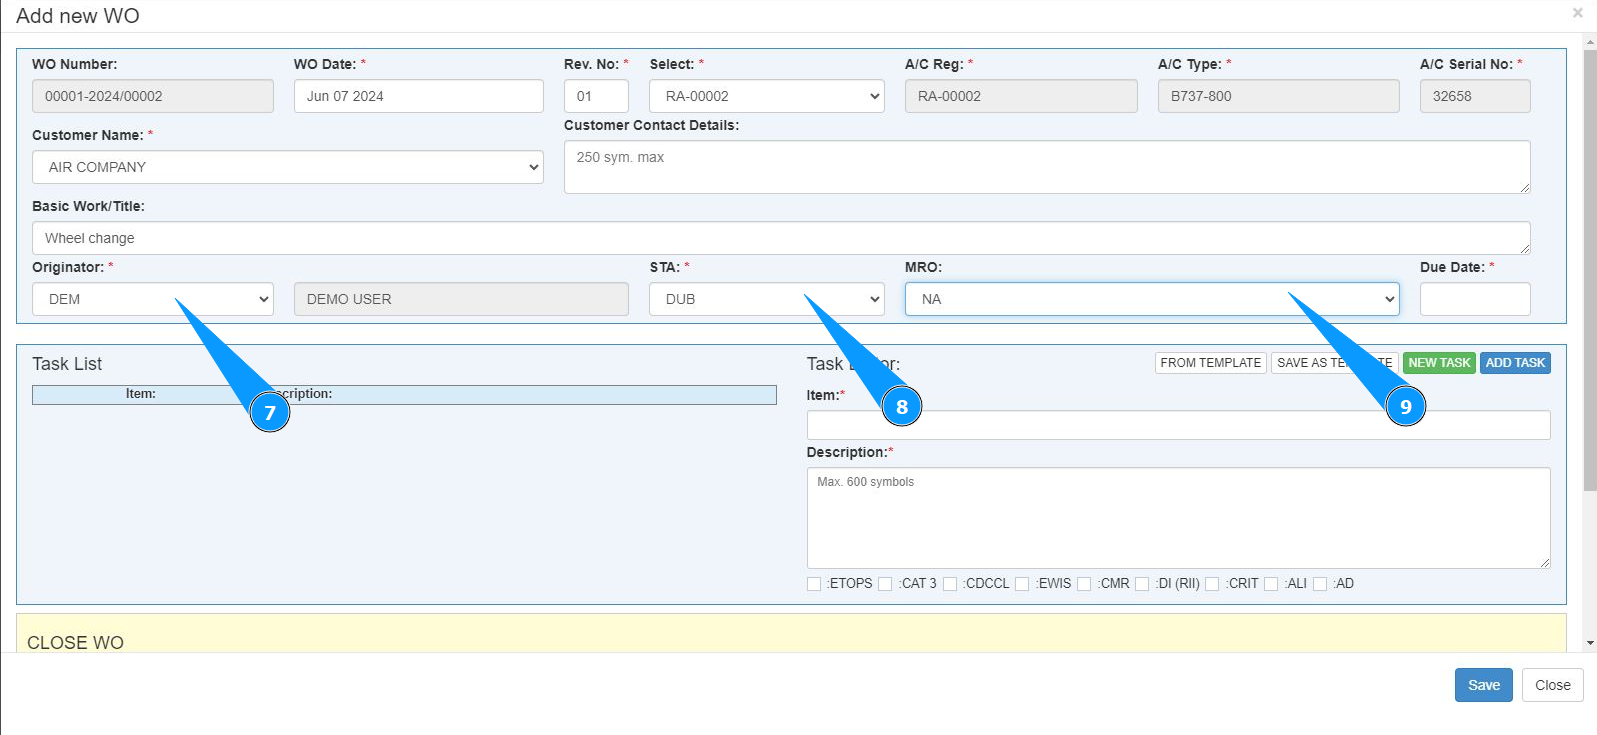
7. Select the login of the executor or creator of the customer Work Order (in accordance with your company's policy) from the dropdown list in the field "Originator".
8. Select the name of the work station from the dropdown list in the field "STA".
9. Select the name of the organization performing the work order from the dropdown list in the field "MRO".
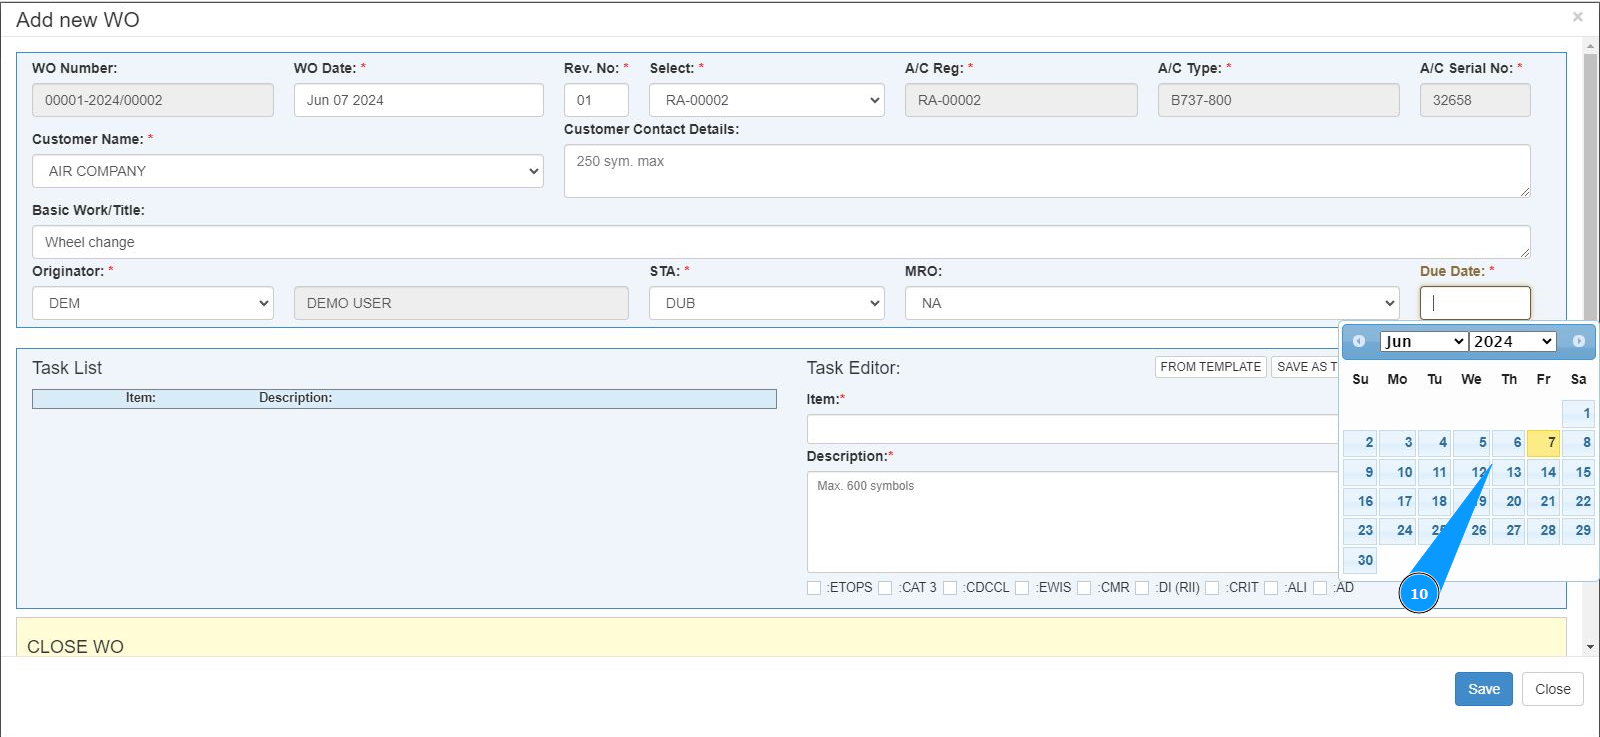
10. Enter the due date for this work order in the field "Due Date". Click on the specified field and select a date in the calendar.
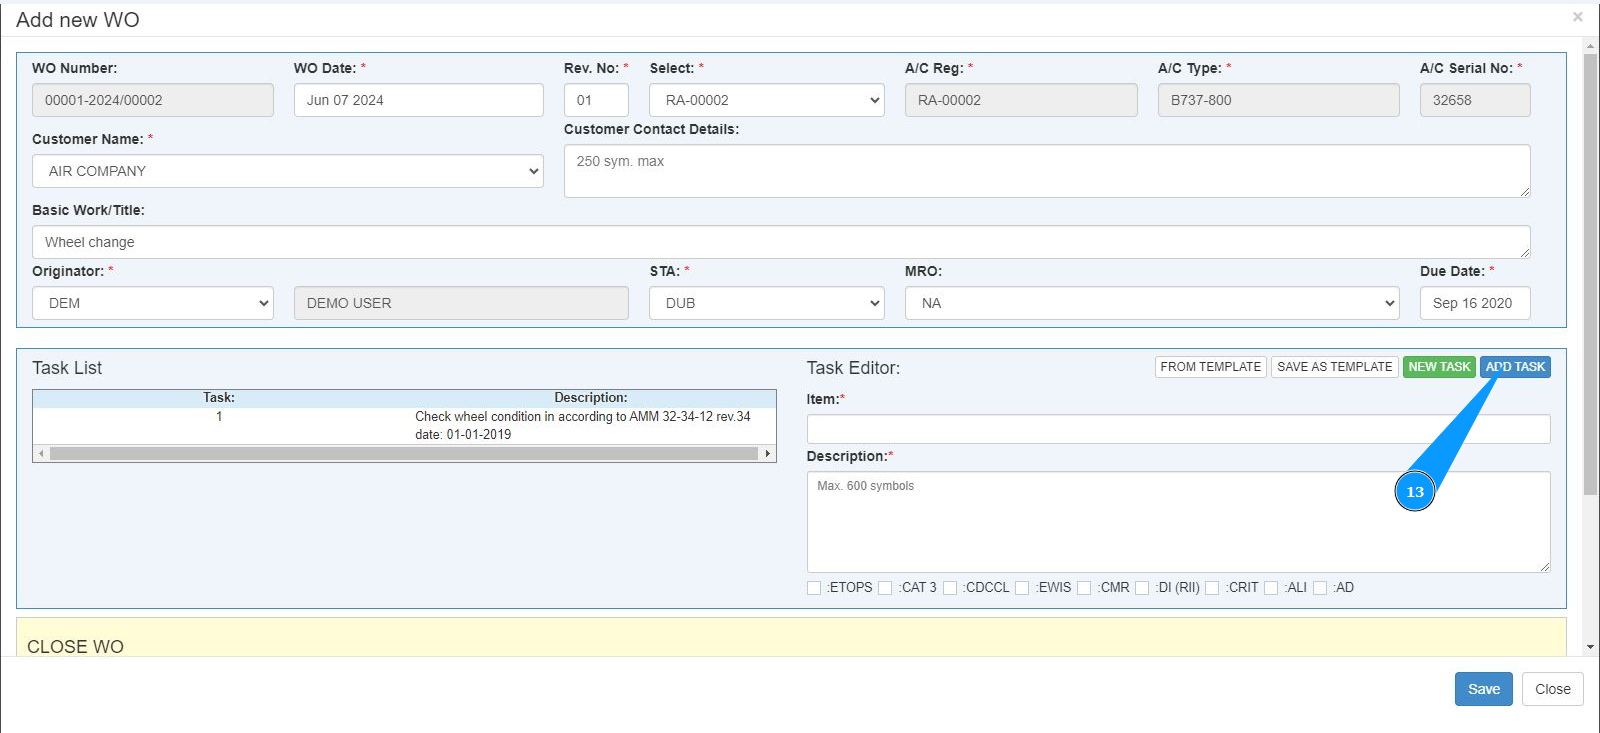
11. Enter the number of the task to be perfomed in the field "Item".
12. Enter a description of the task to be performed in the field "Description".

13. Click on the button "Add Task" to add the task to the program.
14. Check thst the newly created task is displayed in the window "Task List". Note: If necessary, add more tasks, in this case please repeat the steps from 11 to 13.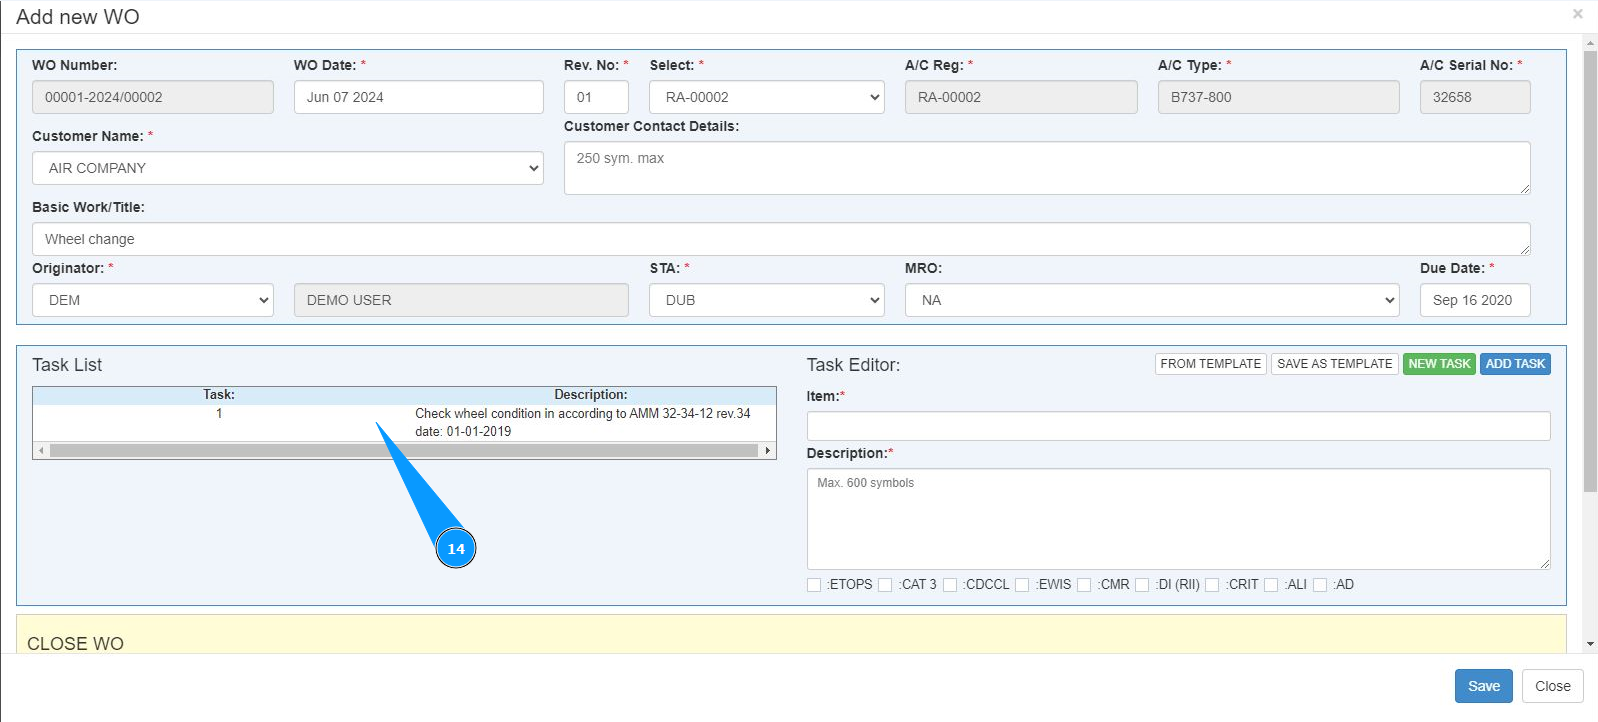
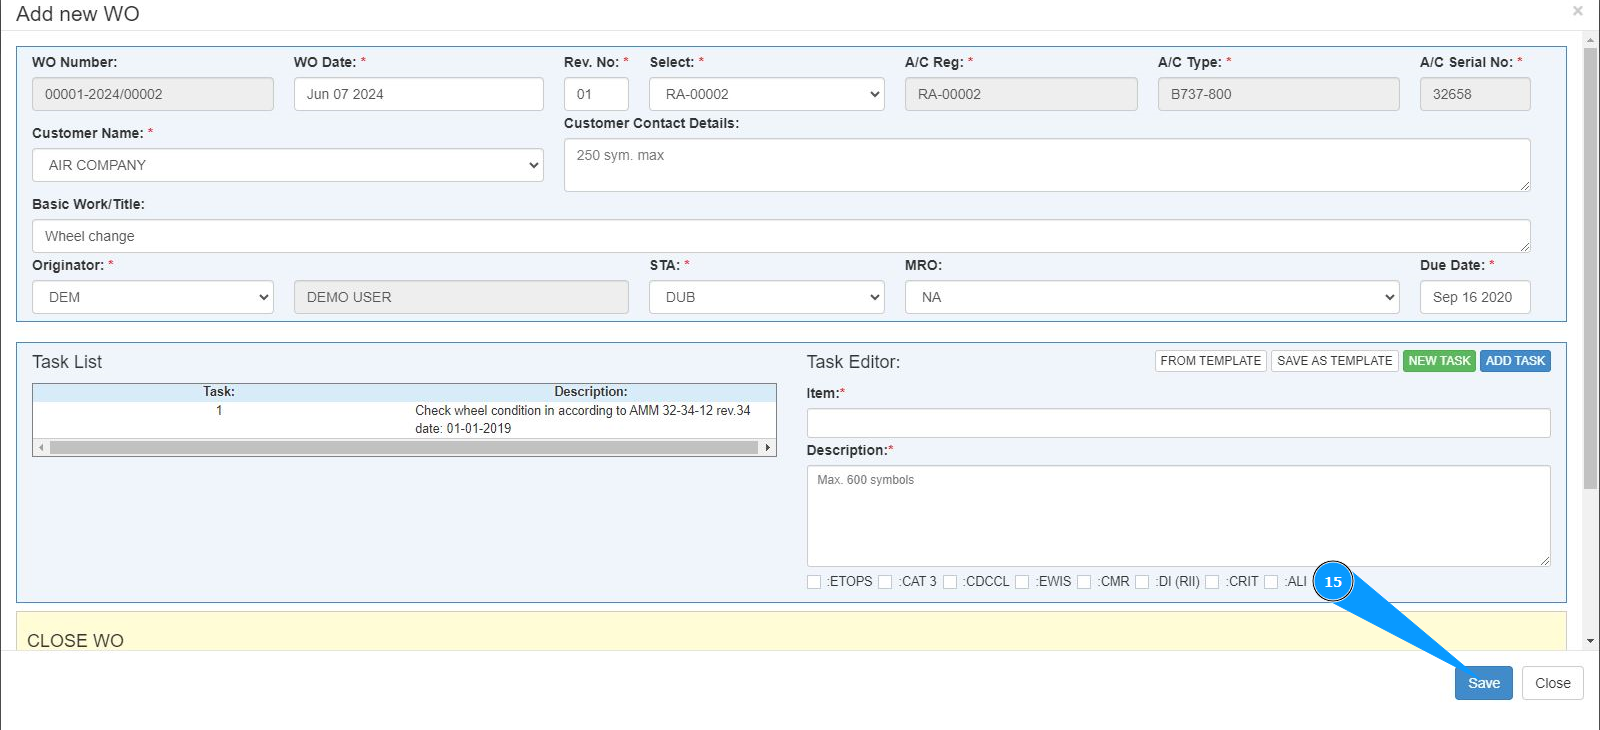
15. Click on the button "Save" to save the entered data into the program.
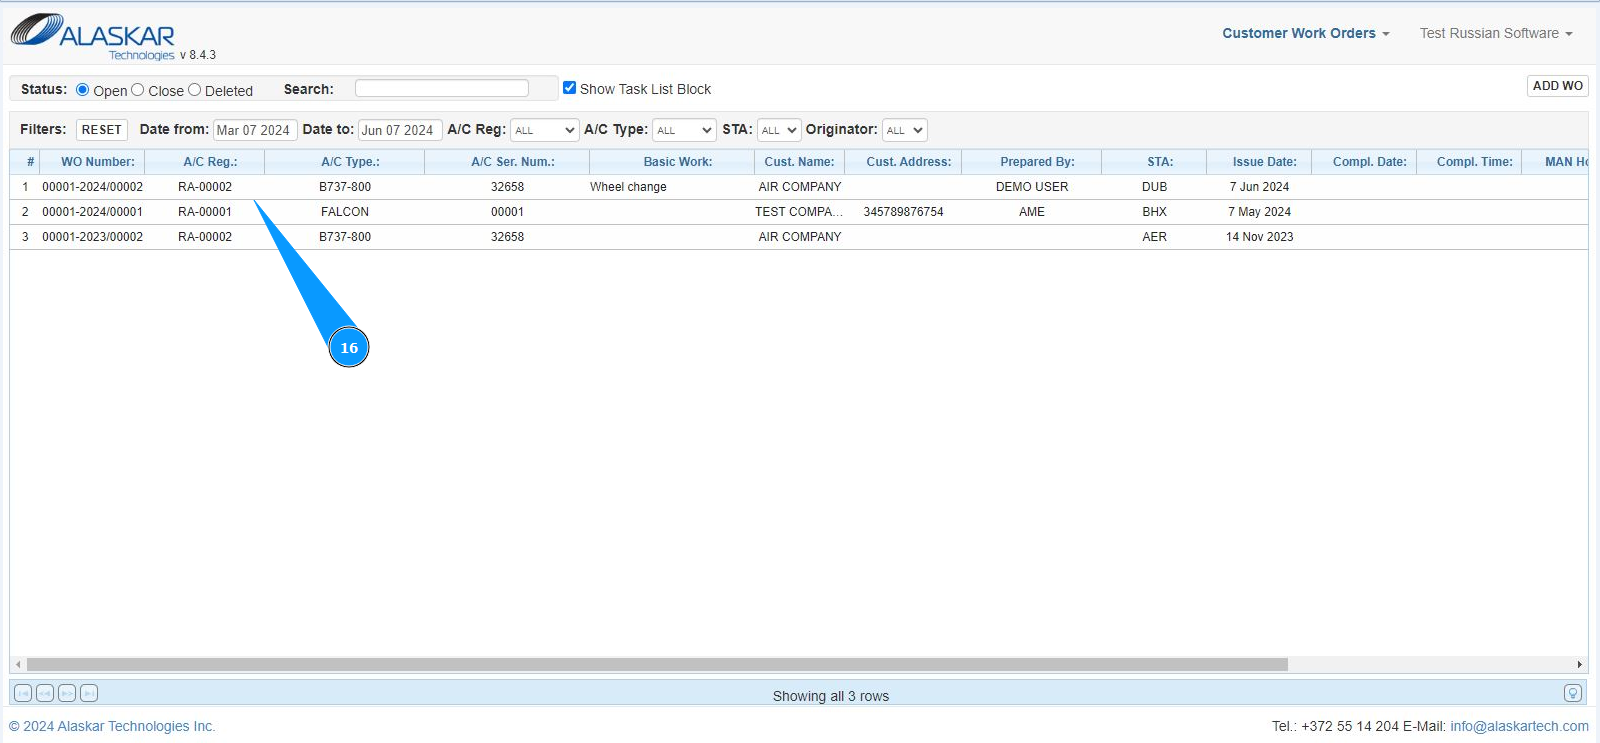
16. Make sure that the the newly created customer WO is displayed in the window "Customer Work Orders".