How to add necessary actions to the troubleshooting card
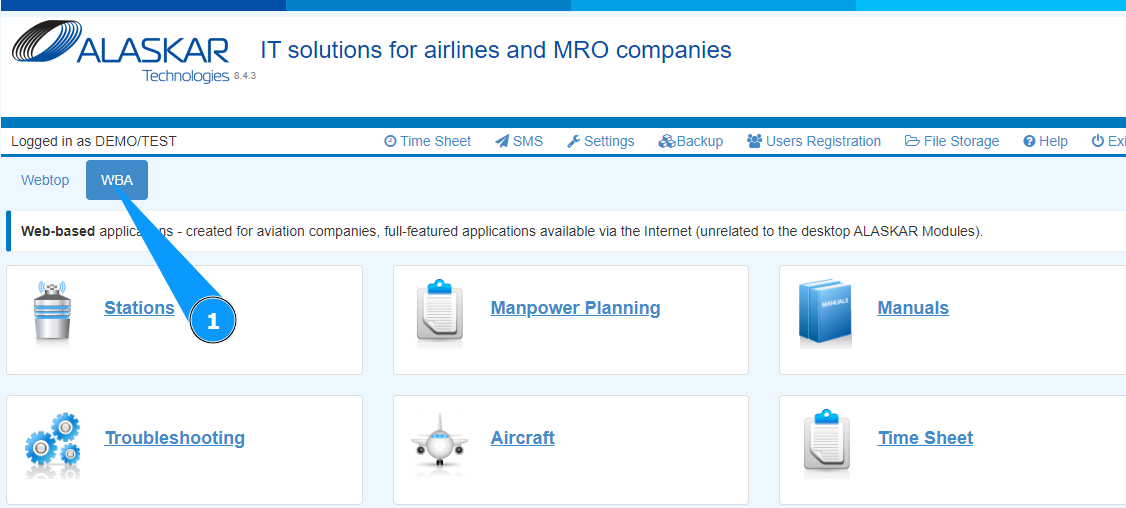
1. In order to add necessary actions to the troubleshooting card, go to the tab "WBA".
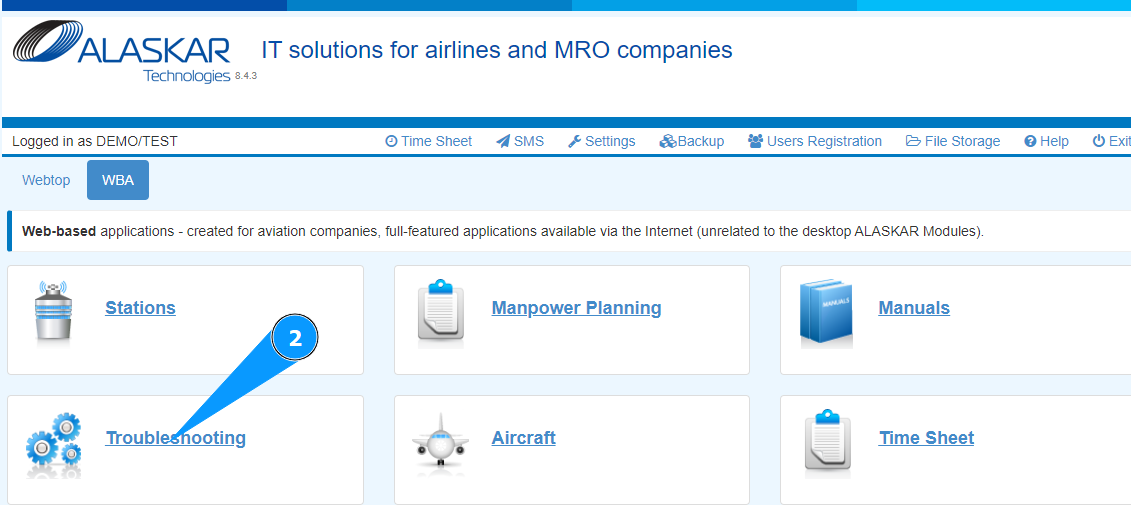
2. Go to the submodule "Troubleshooting".
3. Check that the troubleshooting card window has opened and is available in the window "Troubleshooting".
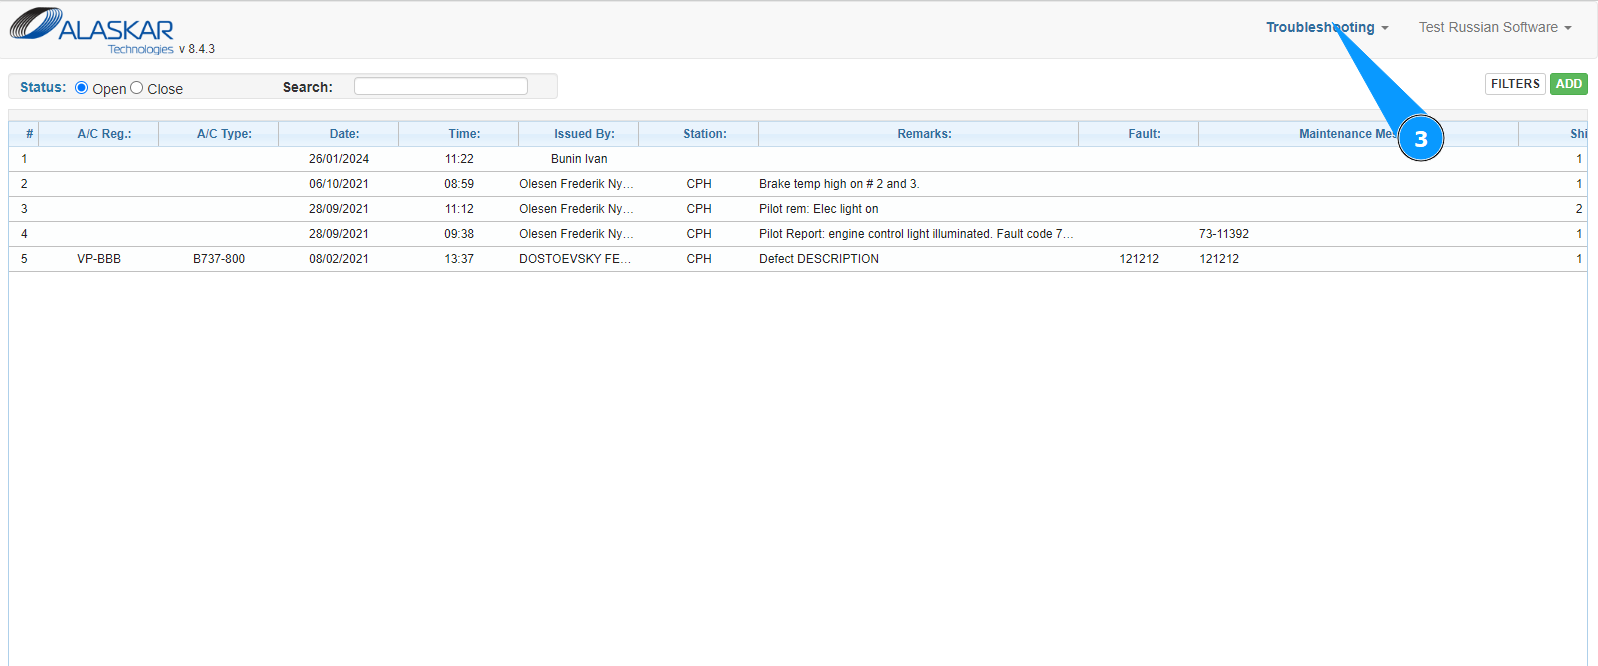
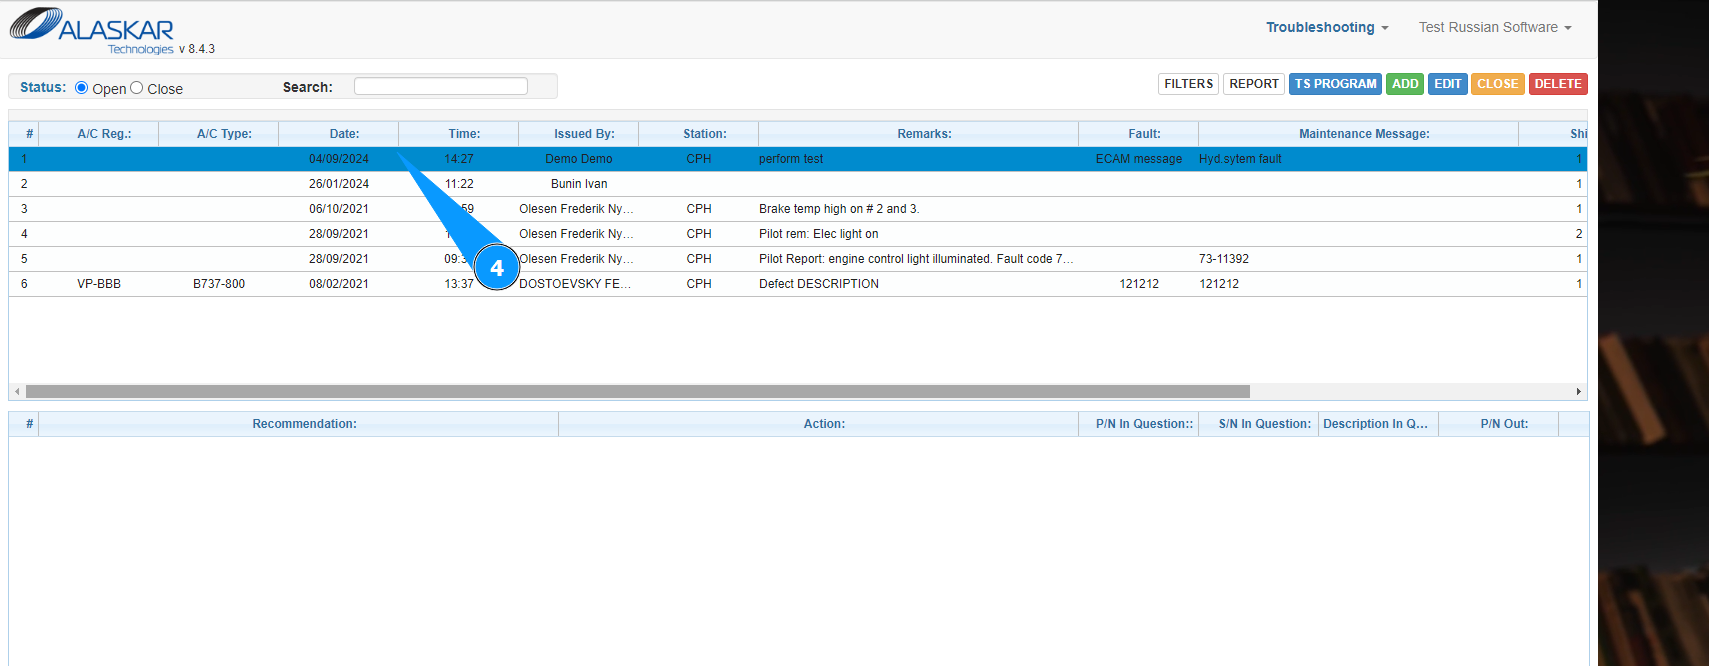
4. Select the required troubleshooting card from the list in the window "Troubleshooting" and click on the corresponding line.
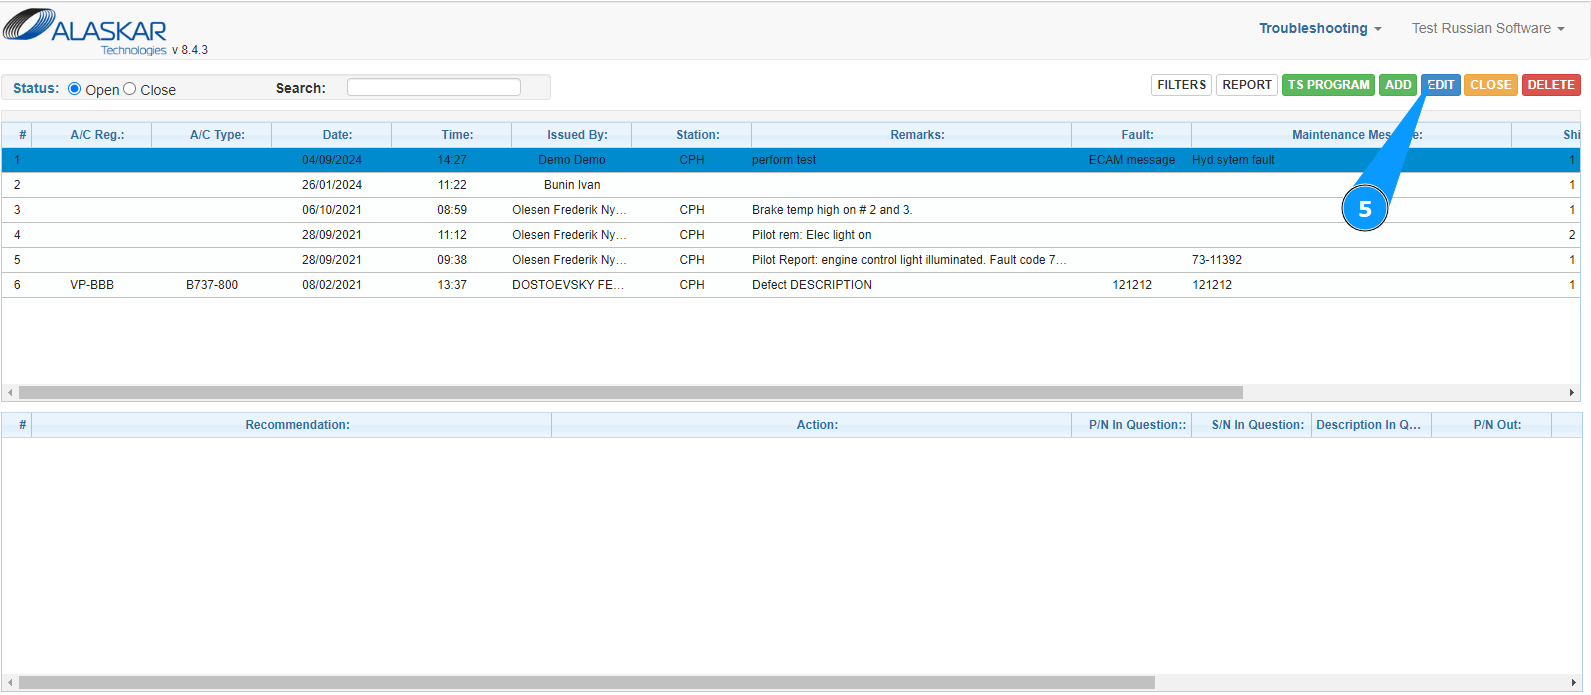
5. Click on the button "Edit" to enter the troubleshooting card action adding mode.
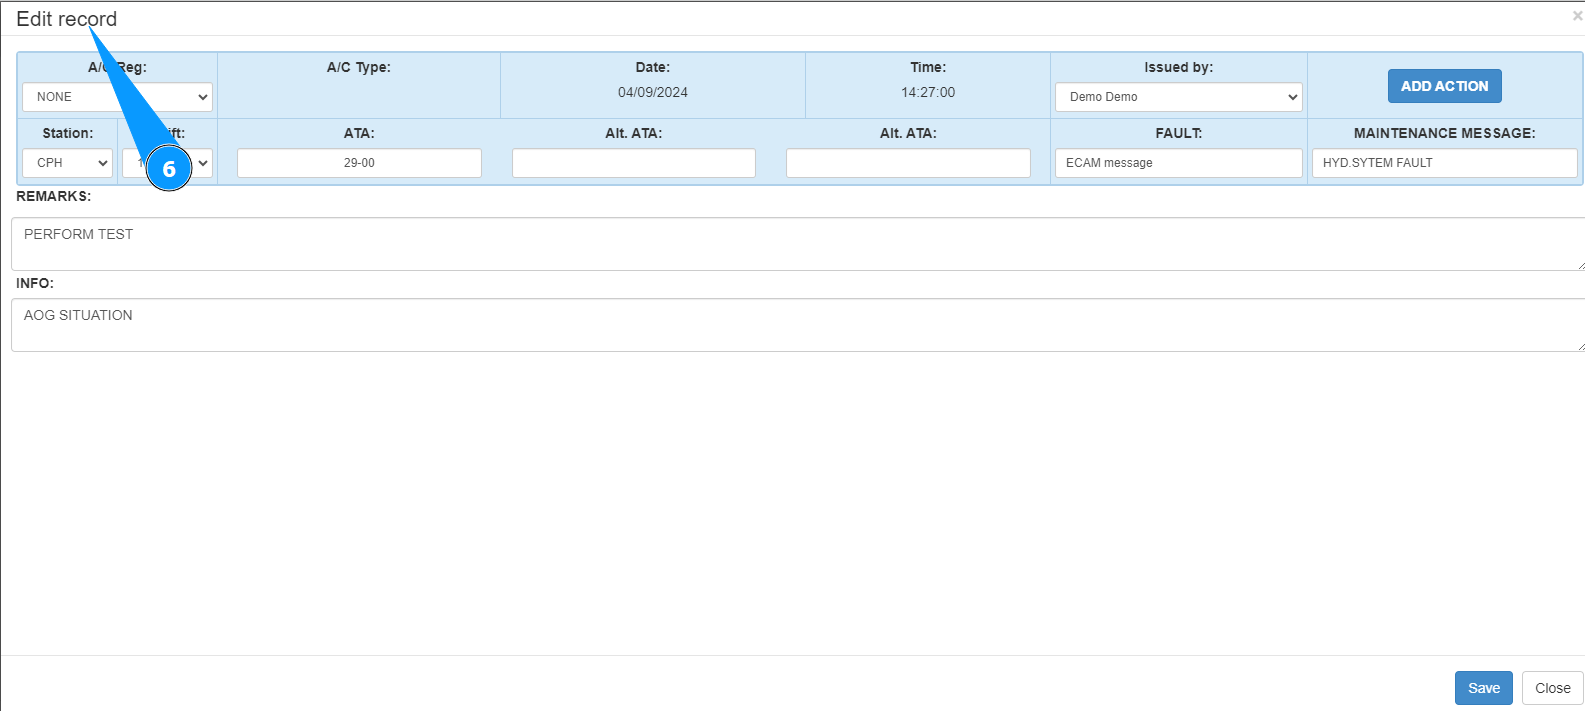
6. Check that the troubleshooting card editor has opened and is available in the window "Edit Record".
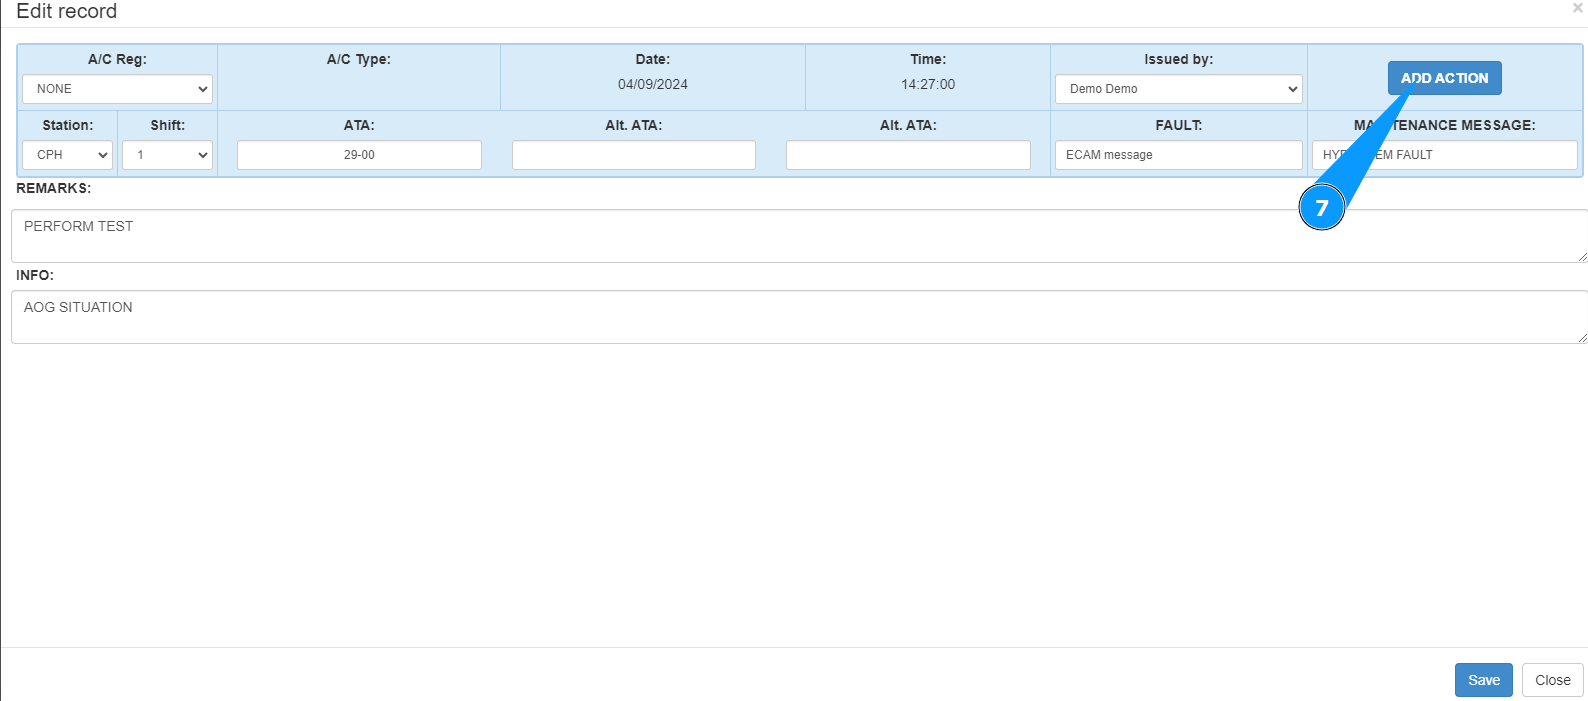
7. Click on the button "Add Action" to start adding actions to the troubleshooting card.
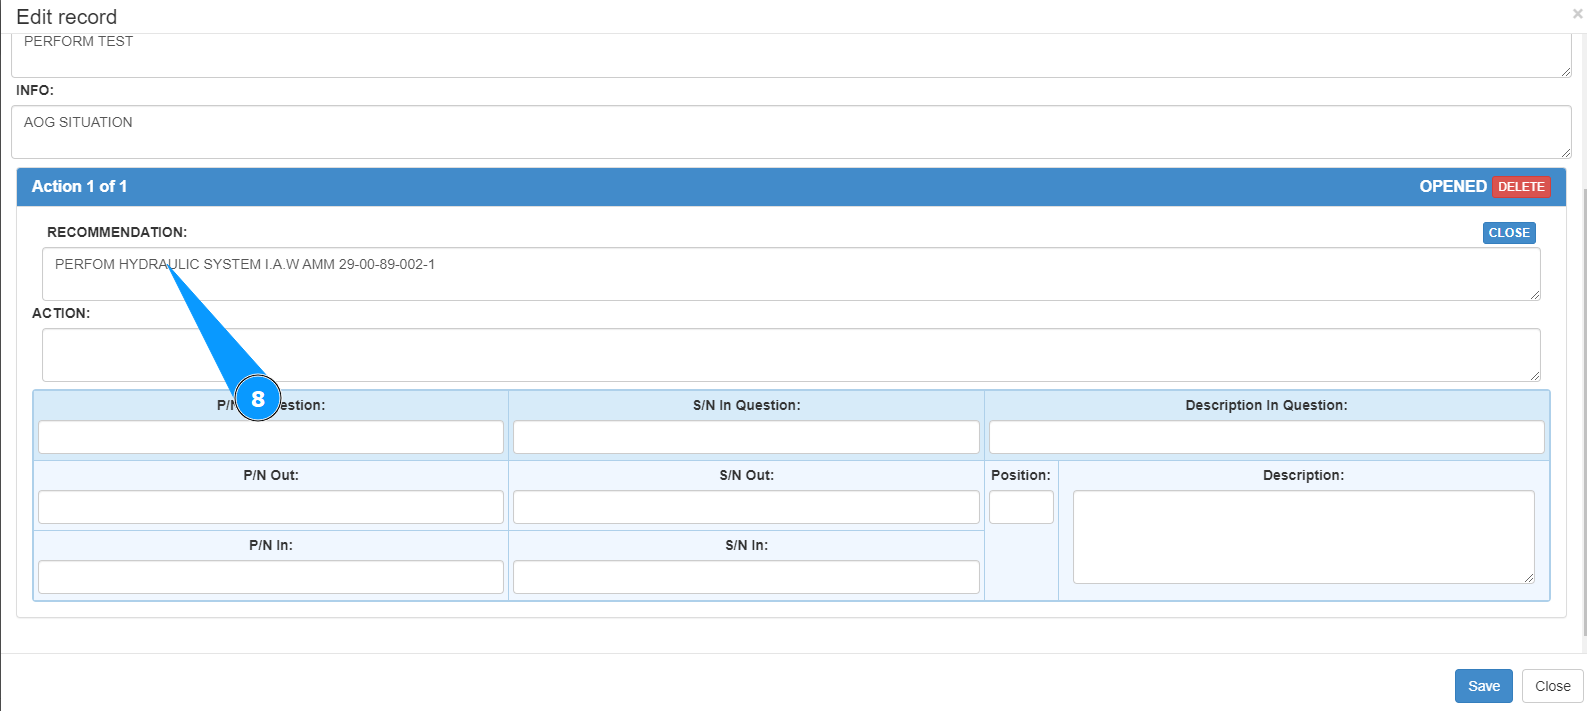
8. Enter the required troubleshooting recommendations in the field "Recommendation".
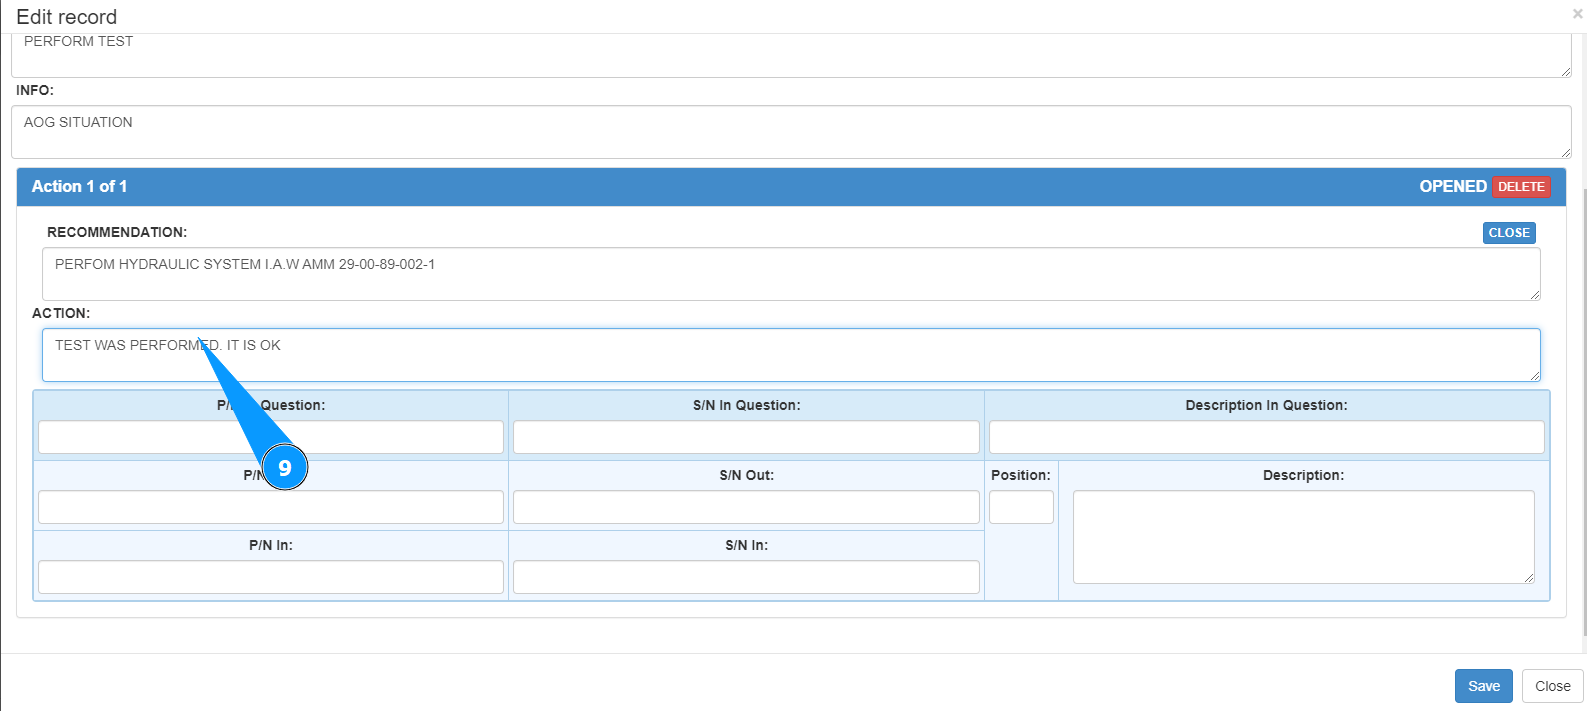
9. Enter the troubleshooting actions performed in the field "Action".
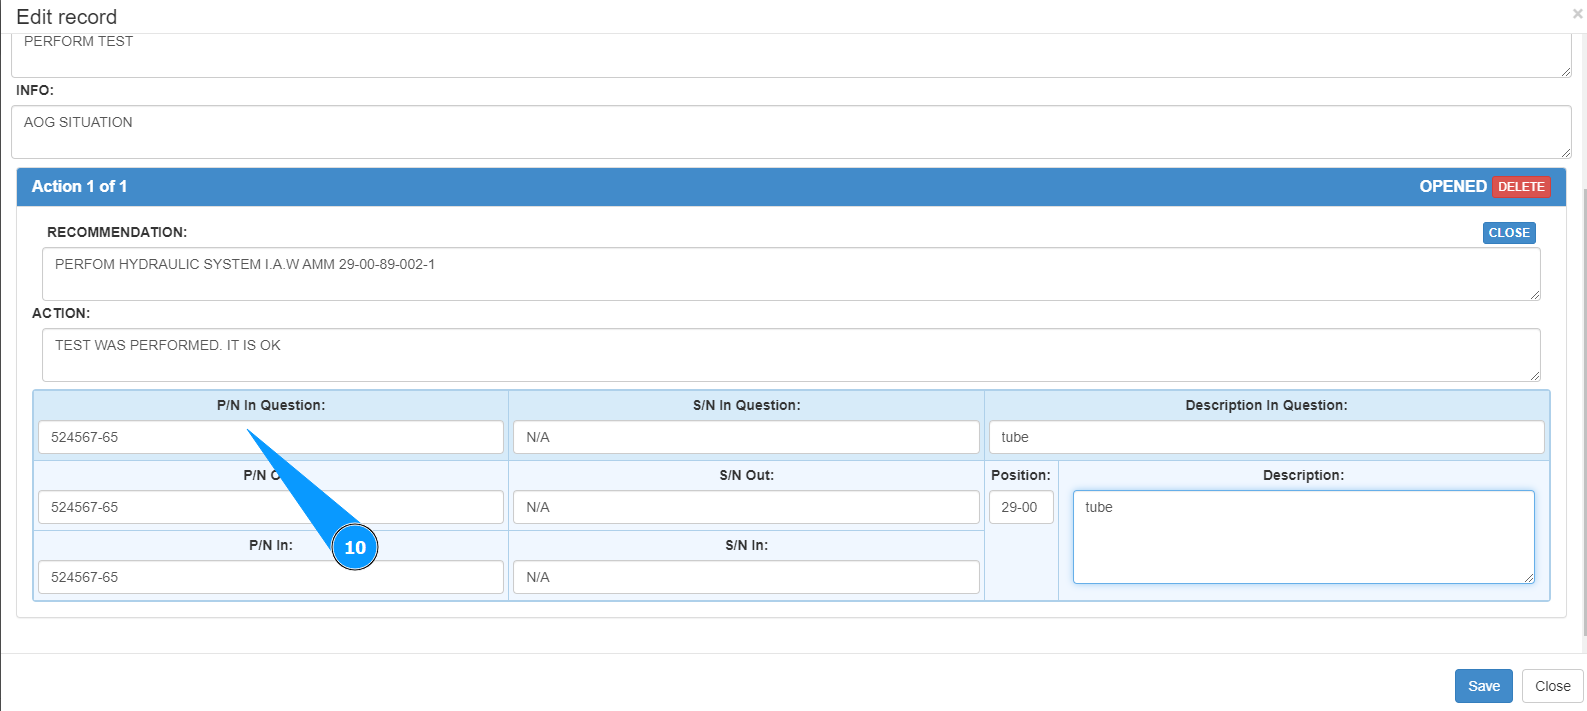
10. If necessary, enter the part number of the component to be replaced in the field "P/N in Question".
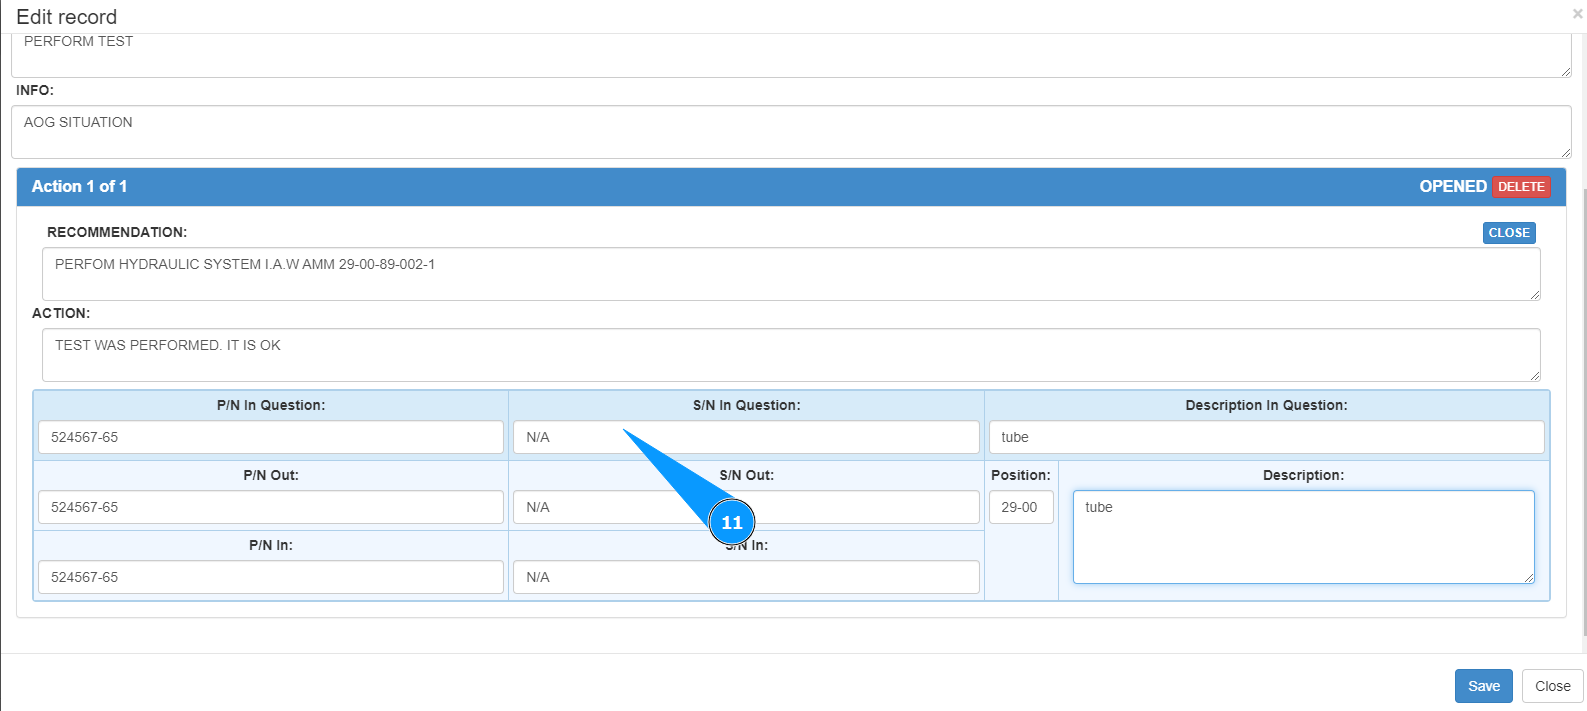
11. If necessary, enter the serial number to be replaced in the field "S/N in Question".
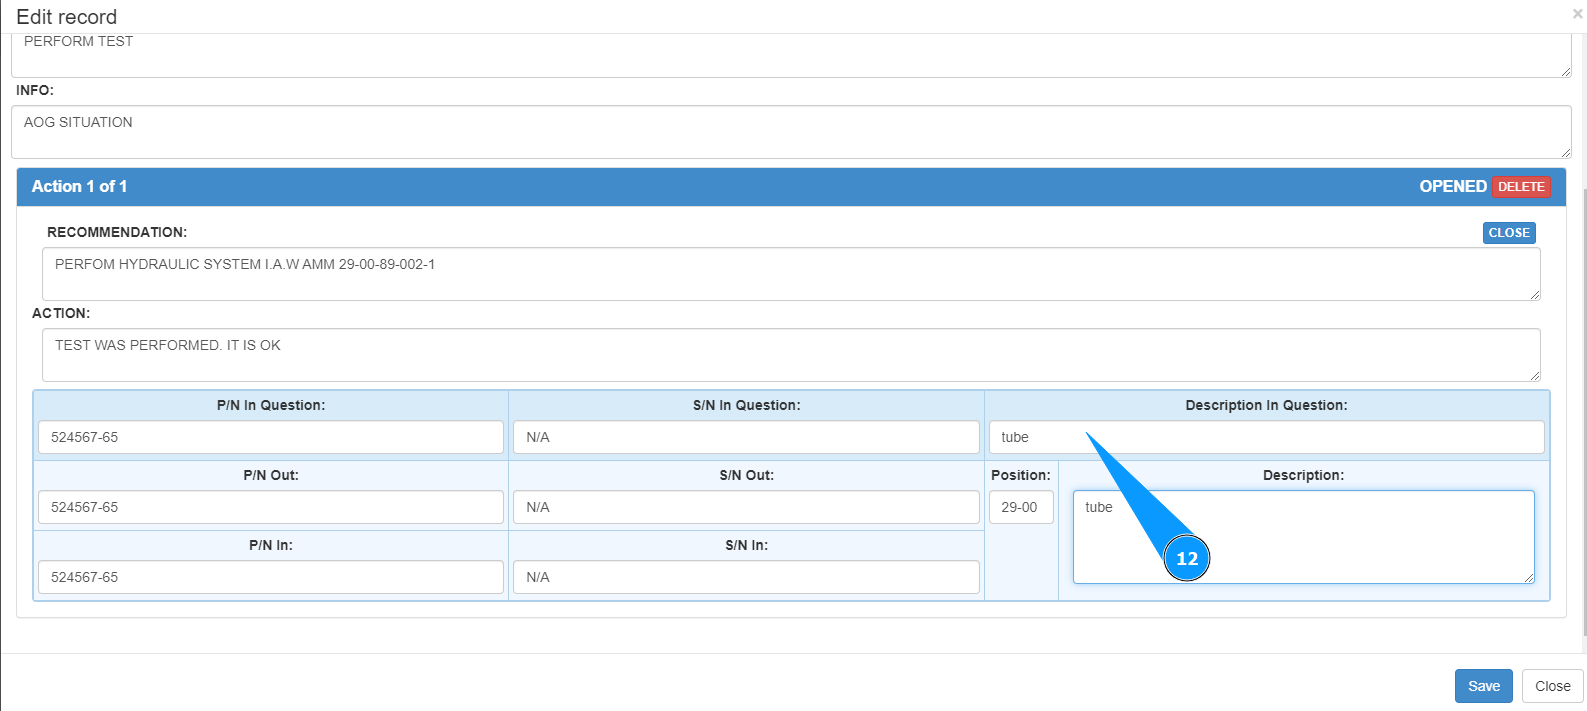
12. If necessary, enter the description of the component to be replaced in the field "Description in Question".
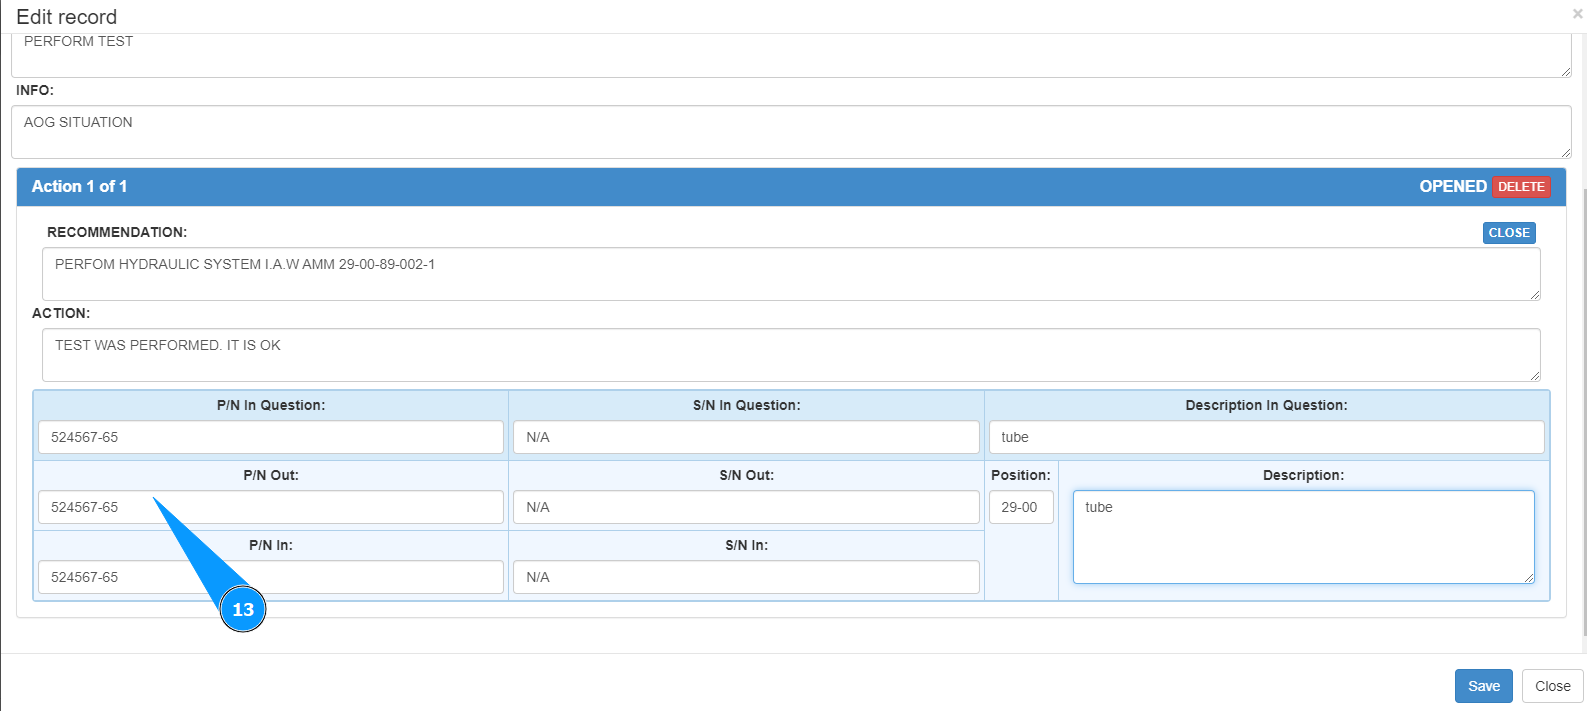
13. If necessary, enter the part number of the removed component in the field "P/N Out".
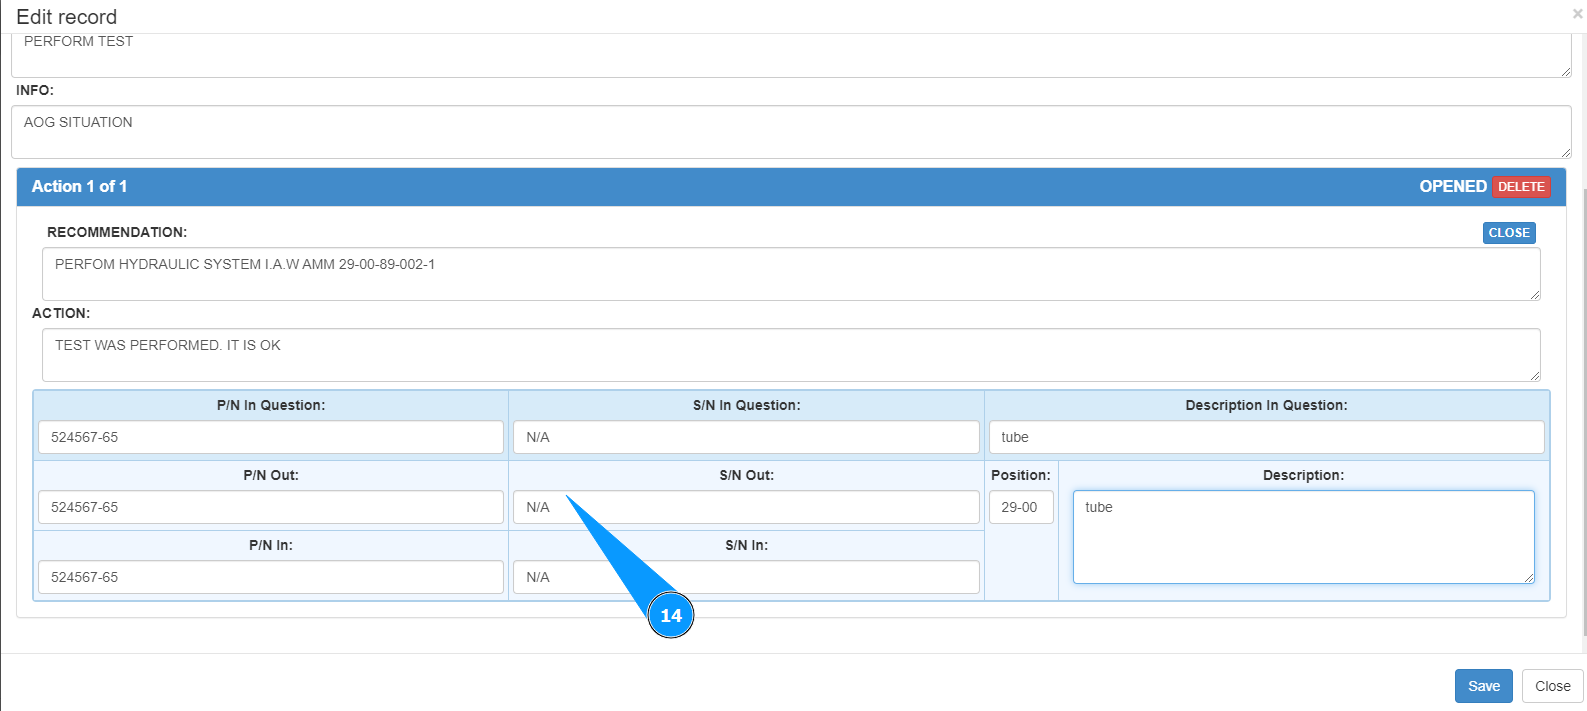
14. If necessary, enter the serial number of the removed component in the field "S/N Out".
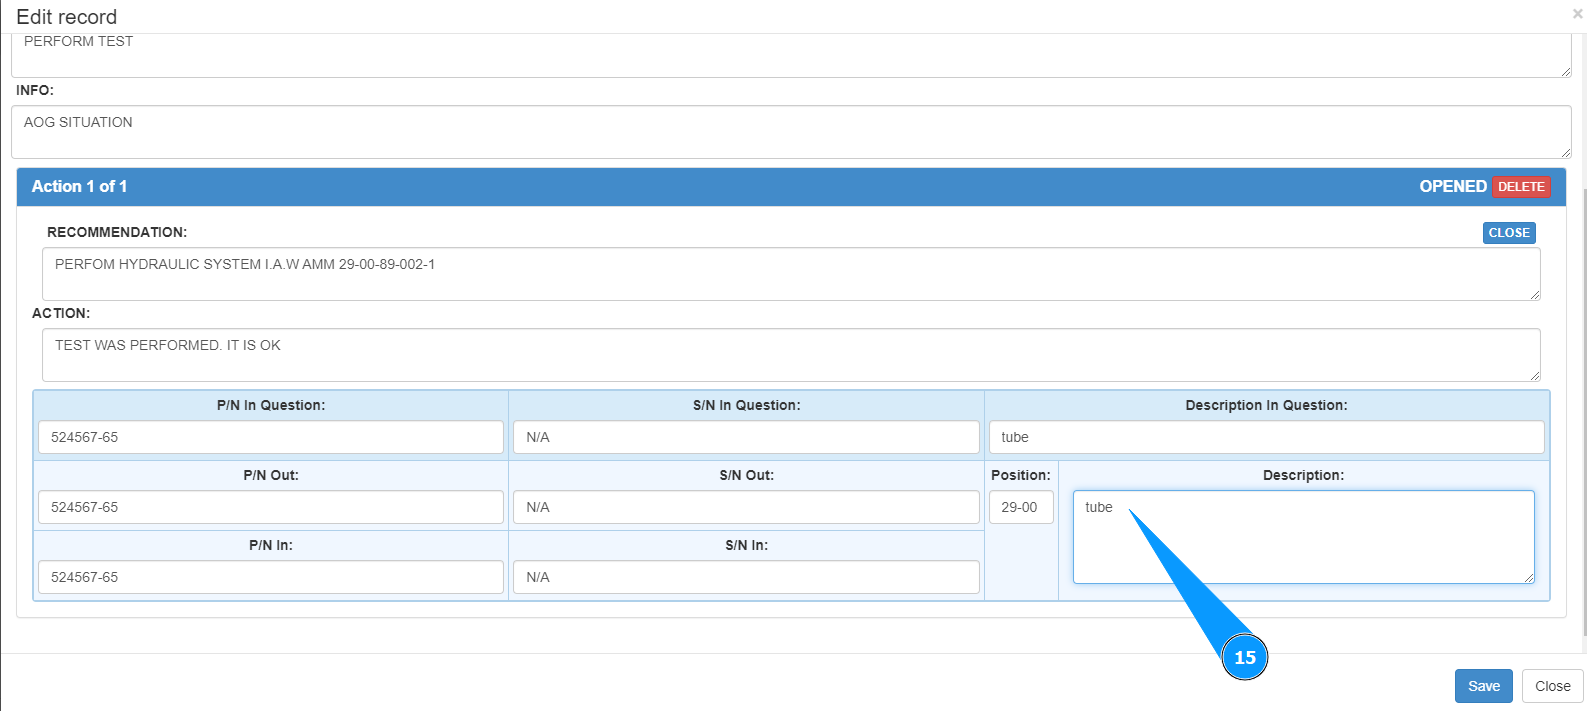
15. If necessary, enter a description of the removed component in the field "Description".
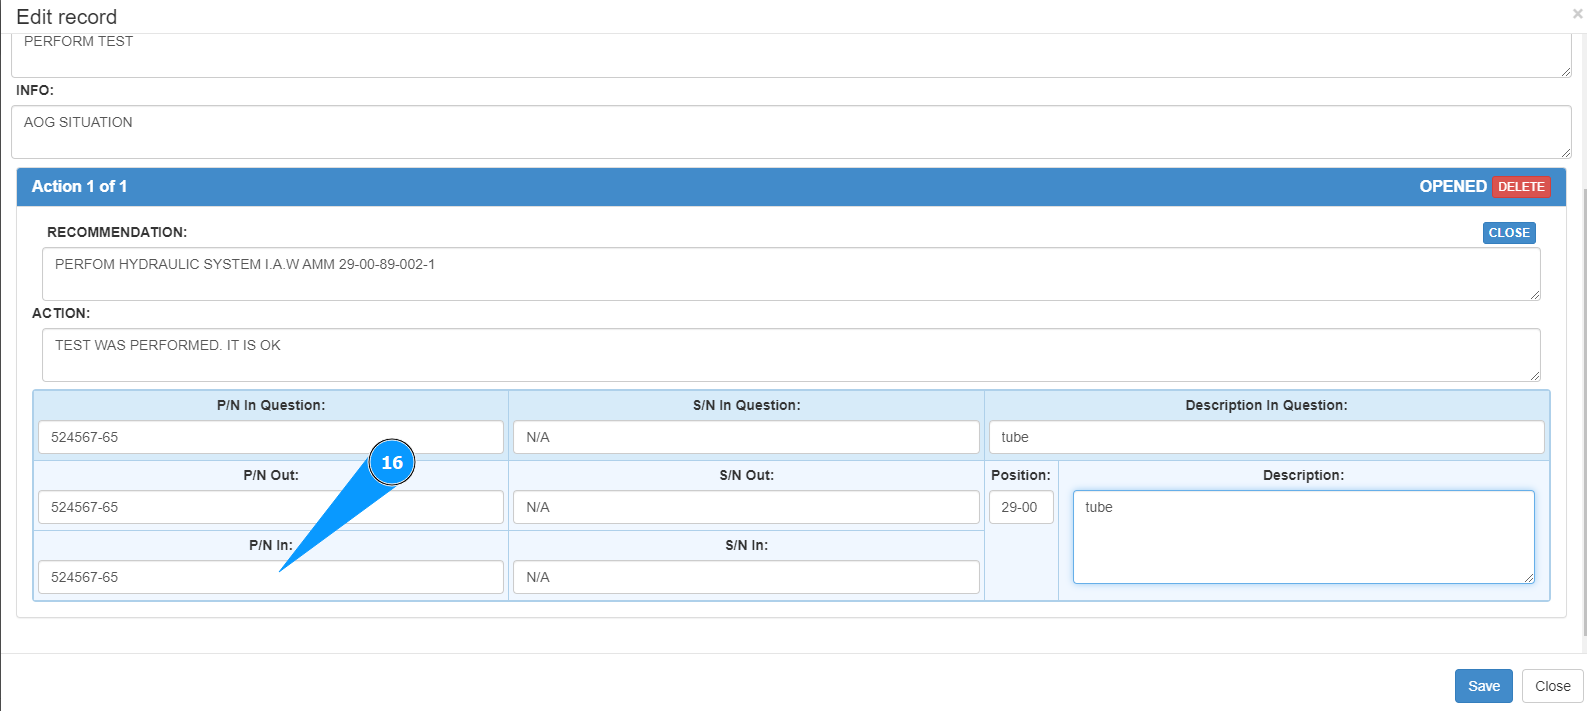
16. If necessary, enter the part number of the installed component in the field "P/N In".
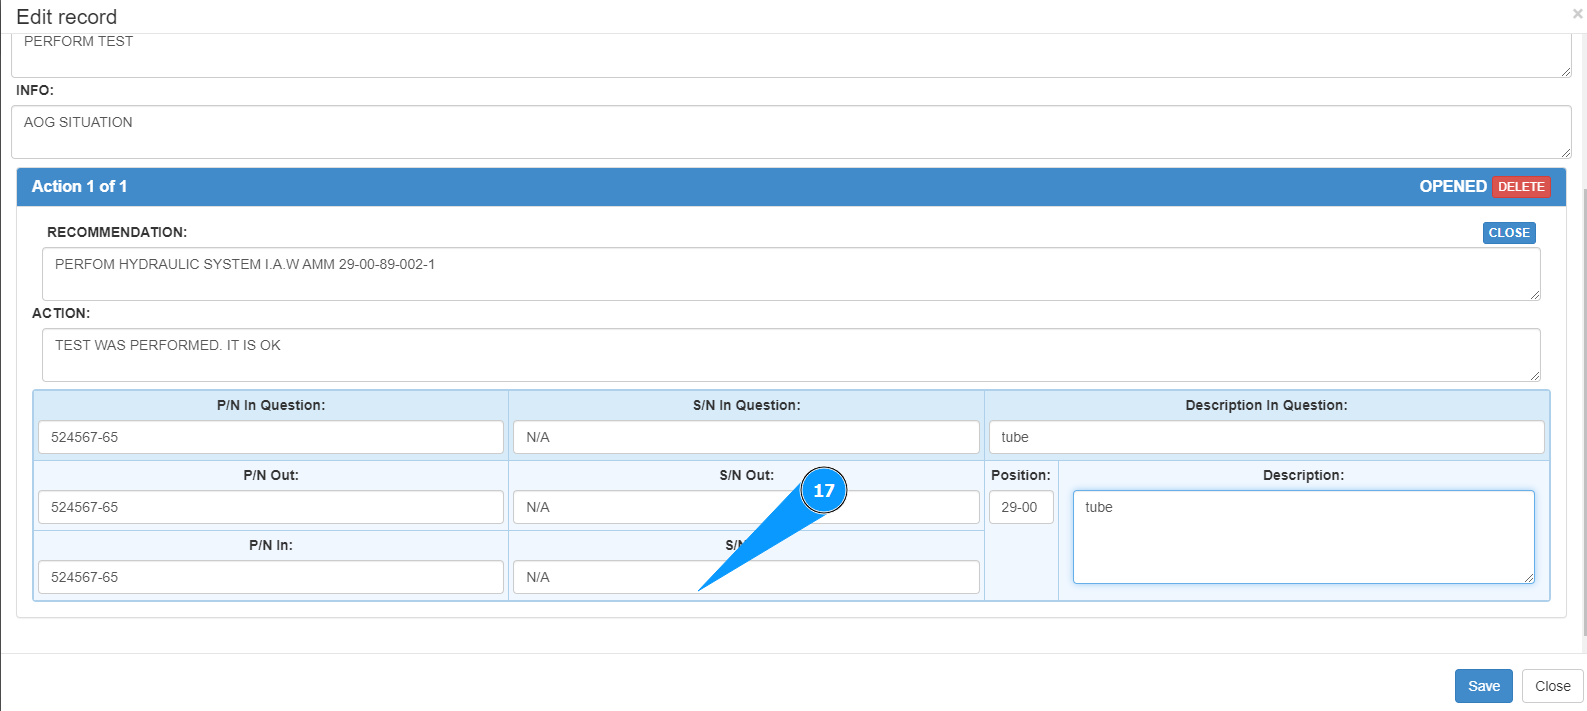
17. If necessary, enter the serial number of the installed component in the field "S/N In".
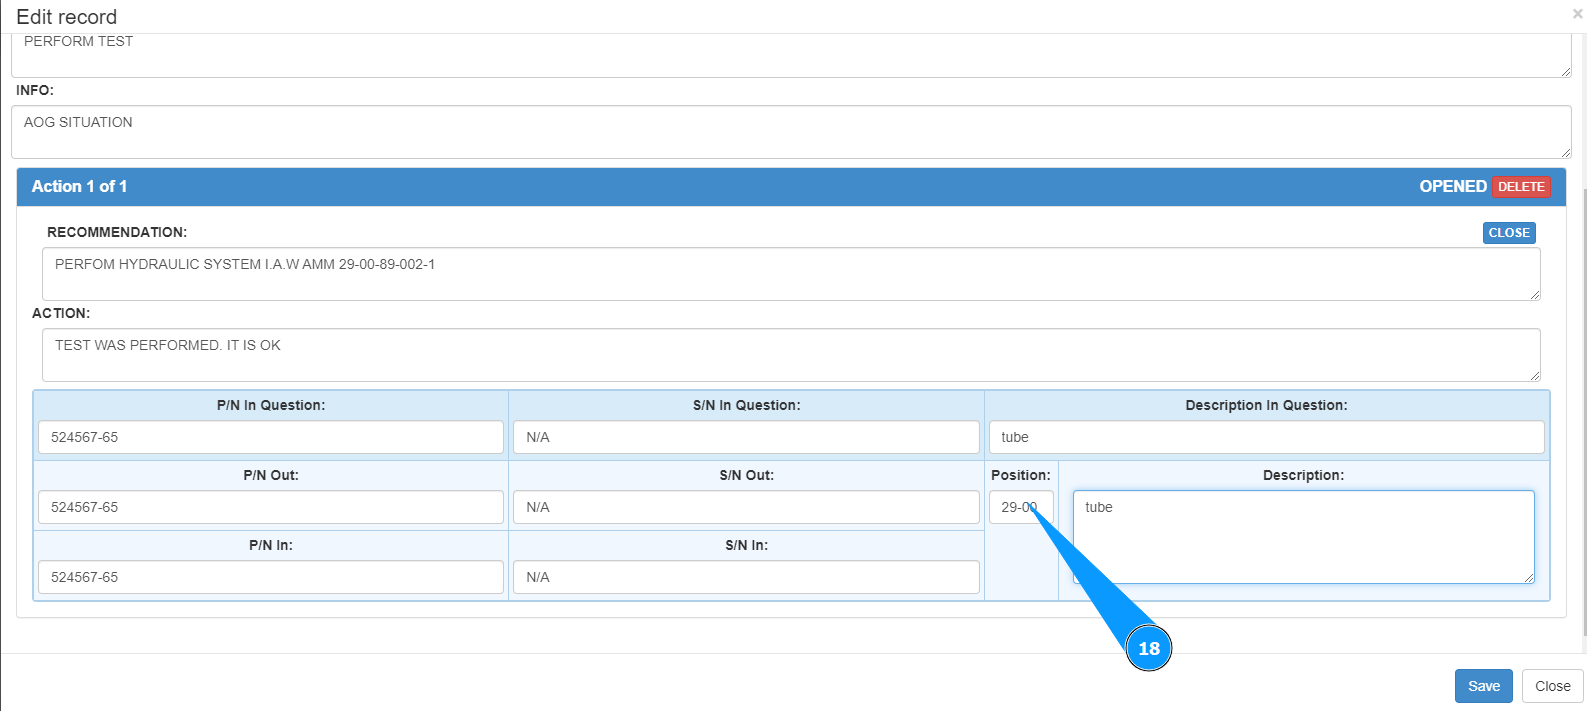
18. If necessary, enter the position of the component to be replaced in the field "Position".
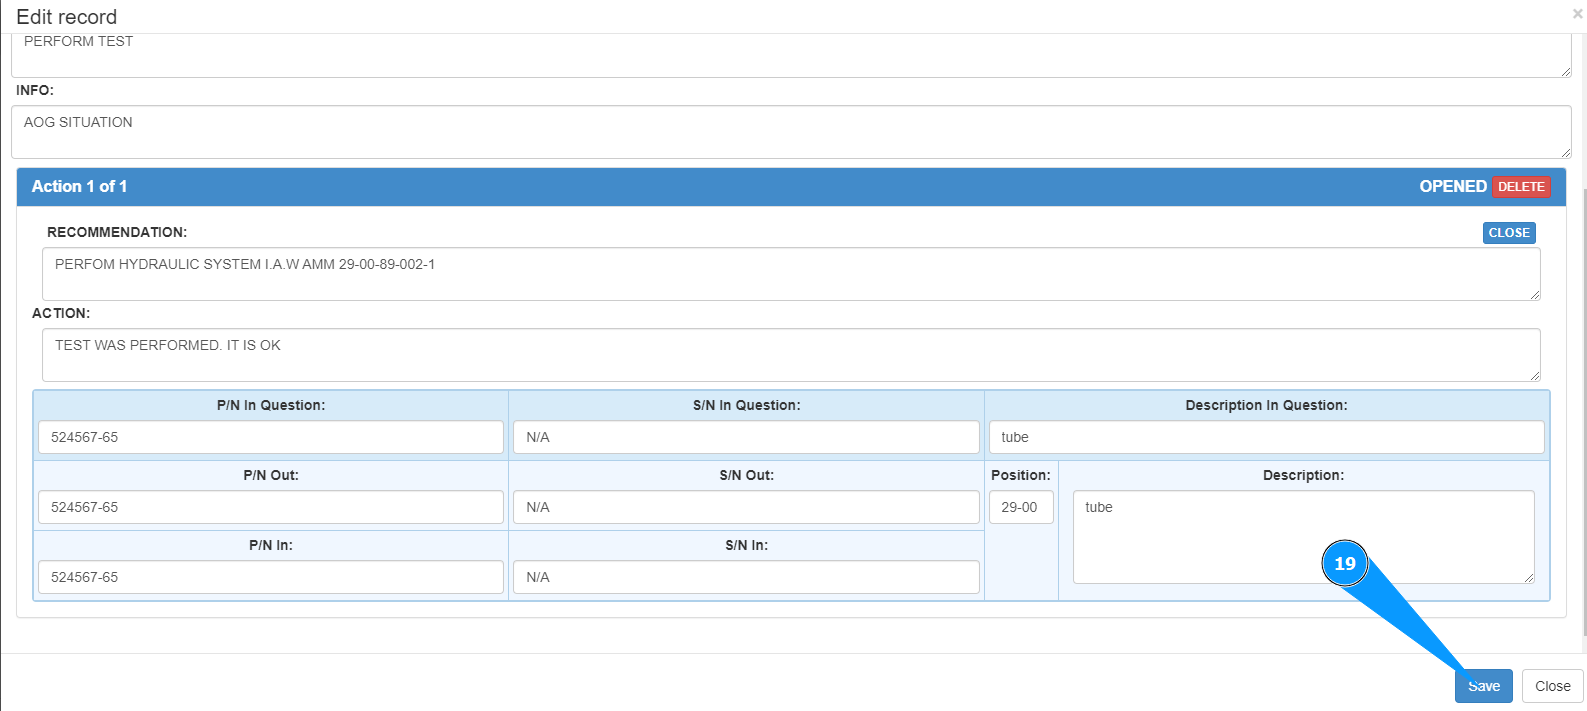
19. If the work has not actually been completed, click on the button "Save" to save the entered action data to the troubleshooting card.
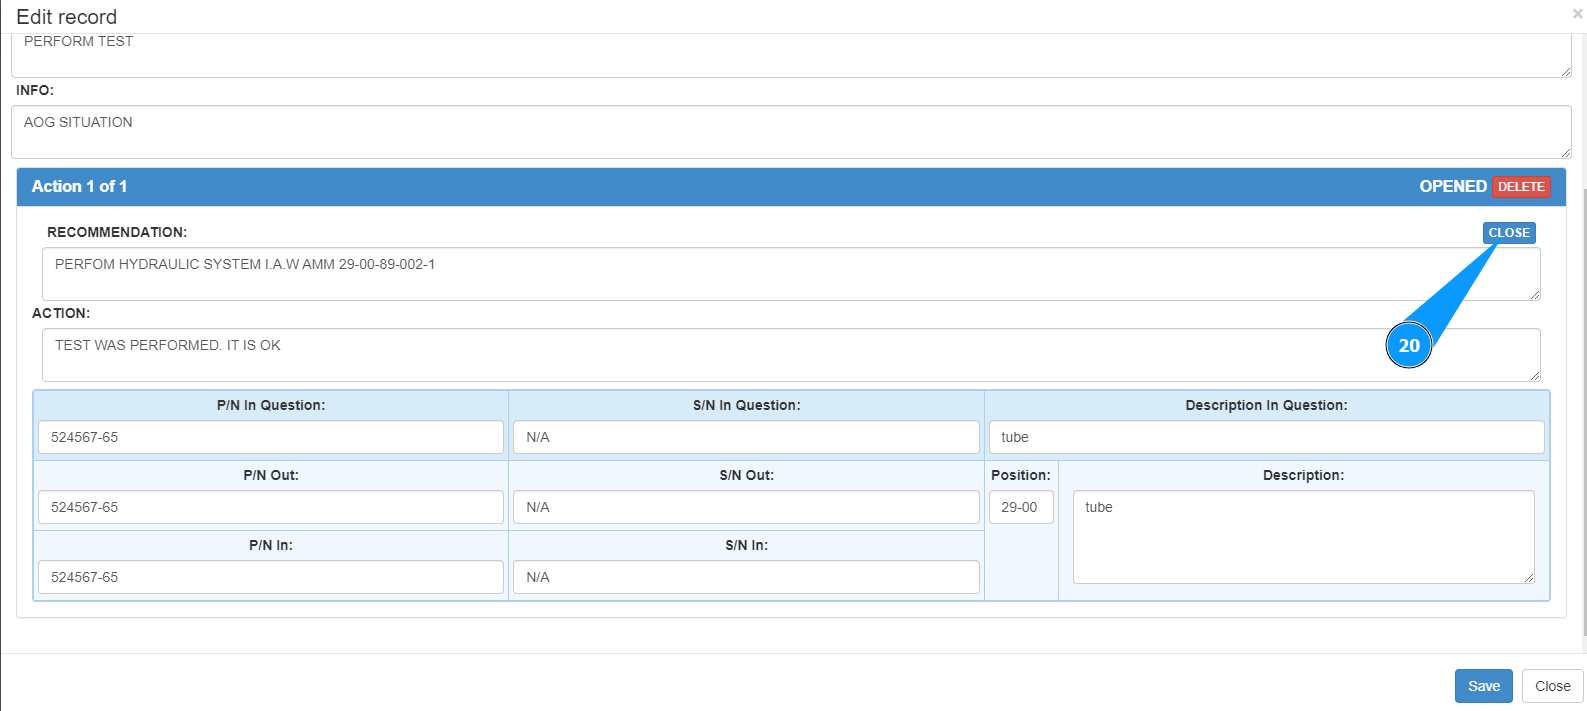
20. If the work has actually been fully completed for this action step, click on the button "Close" to close this step in the troubleshooting card.
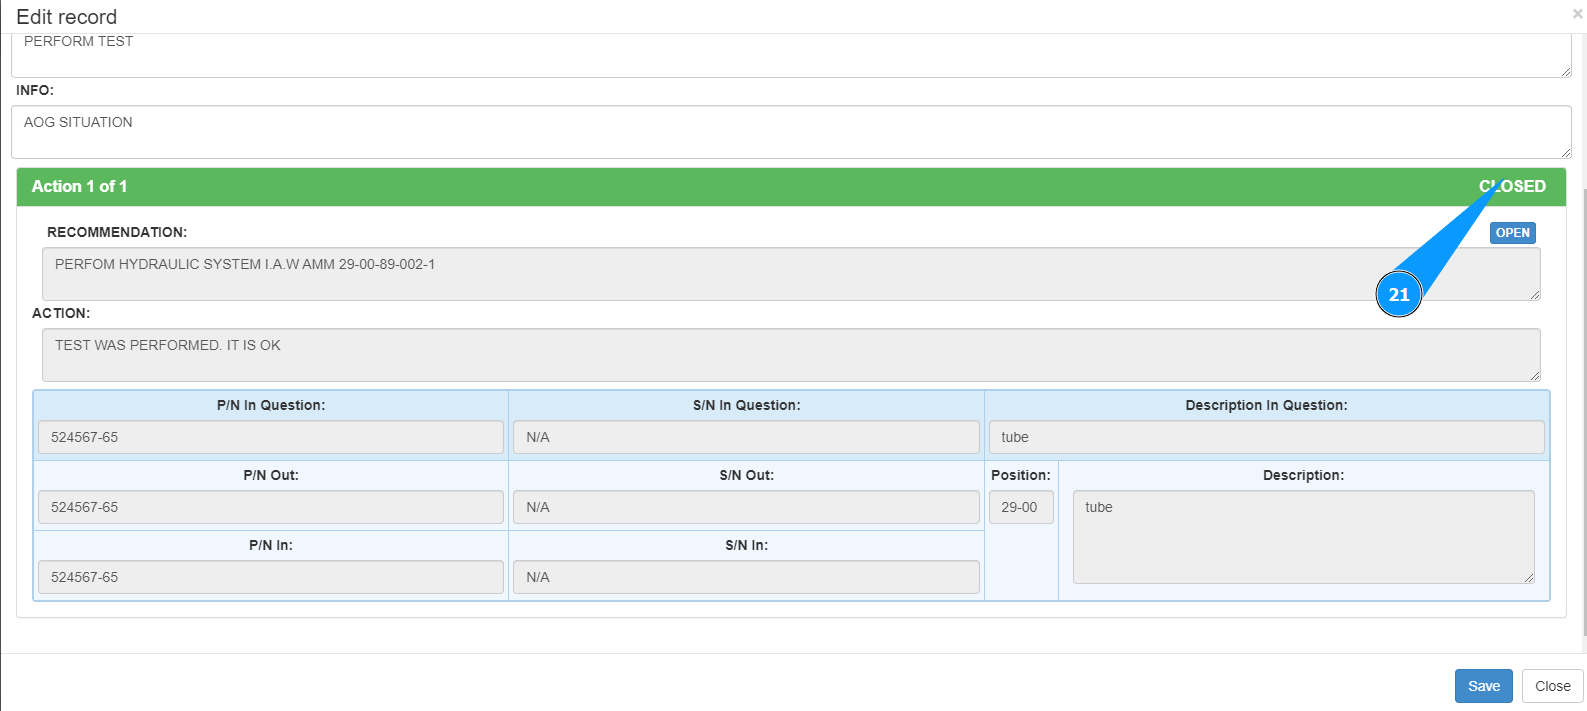
21. Check the color change to green and the status change to "Closed".